My Kitchen Window
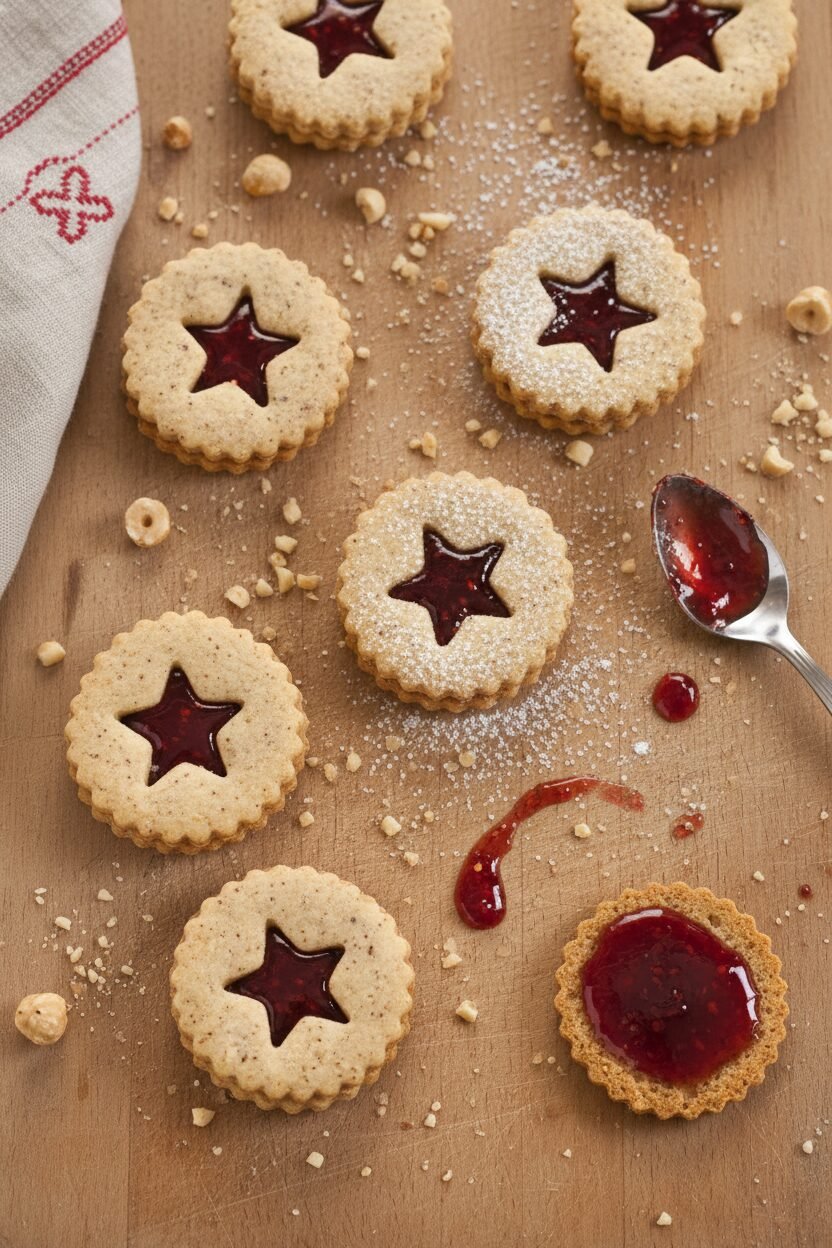
I love making these cookies in December. The light comes through my kitchen window just so. It shines right through the little cookie holes. They look like tiny stained glass.
I call them my windowpane cookies. They let the light in. They let the jam shine out. Doesn’t that sound lovely? What’s your favorite cookie to make when the days get short?
A Little Cookie Story
I first had a cookie like this at my friend Marta’s house. She was from Austria. Her kitchen smelled of toasted nuts and sweet jam. I took one bite and knew I needed the recipe.
She showed me how to cut the little centers out. I was so nervous I’d break them! I still laugh at that. Now, it’s my favorite part. This matters because food connects us to people. Even friends who are far away.
The Heart of the Cookie
Let’s talk about the jam. You cook it down first. This is very important. It makes the jam thick and sticky. Runny jam will leak out the sides.
Stir it slowly and watch it bubble. It will get darker and smell amazing. Let it cool completely. Patience here makes a prettier cookie. Do you prefer raspberry jam or another kind for cookies?
Secrets in the Dough
The dough is simple. But it has two special things. Toasted hazelnuts and a tiny bit of almond extract. They work together. They make the flavor warm and cozy.
Fun fact: The hazelnuts are called “filberts” in some old recipes. Chill the dough well. This matters because cold dough is easier to cut. It keeps its shape in the oven.
Making the Windows
Roll the dough nice and thin. Use a glass if you don’t have a cutter. For the windows, use a smaller cutter or a bottle cap. Save the little centers you cut out! Bake them too. They are the cook’s treat.
Watch them closely in the oven. They bake fast. The edges should be just golden. Let them cool before you add the jam. It feels like putting together a puzzle. A very tasty one.
Your Turn to Share
When you make these, put them on a plate. Share them with someone. See their smile when they hold one up to the light. That’s the best part.
Food made with care is a gift. It says, “I thought of you.” Will you make these for a holiday, or just a rainy Tuesday? Tell me who you’d share your batch with.
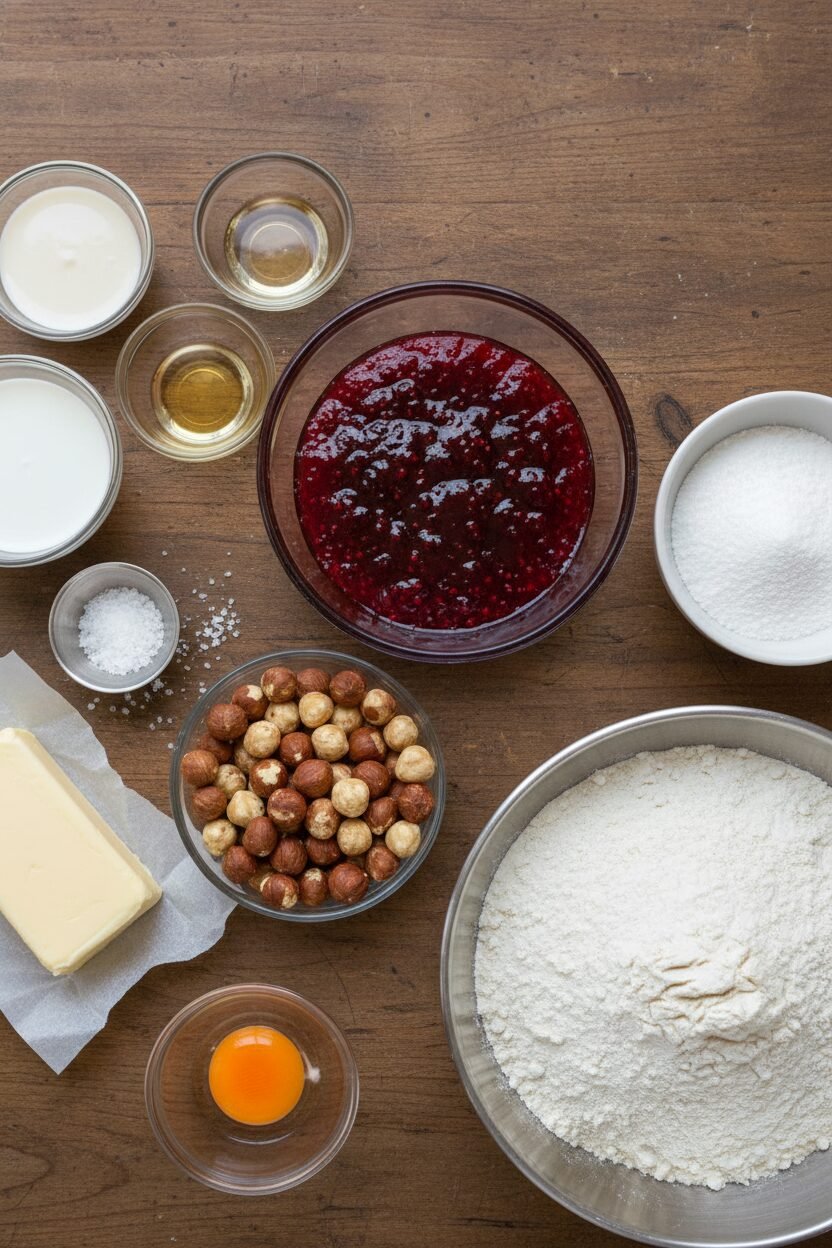
Ingredients:
| Ingredient | Amount | Notes |
|---|---|---|
| Seedless raspberry jam | ⅔ cup | Simmered until reduced to ½ cup |
| Confectioners’ sugar | ⅔ cup (2⅔ ounces/75 grams) | |
| Hazelnuts | ½ cup | Toasted and skinned |
| All-purpose flour | 1 cup (5 ounces/142 grams) | |
| Salt | ¼ teaspoon | |
| Unsalted butter | 6 tablespoons | Cut into ½-inch pieces and chilled |
| Large egg yolk | 1 | |
| Heavy cream | 1 tablespoon | |
| Vanilla extract | ½ teaspoon | |
| Almond extract | ¼ teaspoon |
Instructions
Step 1: First, let’s make the jam shine. Simmer your raspberry jam in a small pan. Stir it often until it thickens, about 10 minutes. Let it cool completely. This takes about an hour. I like to set it on the windowsill. Now, for the dough. Pulse the sugar and hazelnuts in your food processor. They should look like fine sand. Add the flour, salt, and cold butter pieces. Pulse until it looks like crumbs. Then add the egg yolk, cream, and both extracts. Process until a soft ball forms. Wrap this dough in plastic and chill it. (Chilling the dough makes it much easier to roll later!)
Step 2: Get your oven ready for our cookies. Move your oven racks to the upper and lower middle spots. Heat the oven to 375 degrees. Line two baking sheets with parchment paper. This little paper saves so much scrubbing later. I still laugh at the time I forgot it. My baking sheets were a sticky mess for a week! Do you prefer parchment paper or a silicone mat? Share below!
Step 3: Time to roll and cut. Roll the dough on your counter until it’s very thin. Use your round cutter to make circles. Place them on your sheets. Now, take a smaller cutter. Cut little windows from the center of half the circles. Bake them for 8 to 10 minutes. Switch the pans halfway through. The edges should be just golden. Let them cool completely on a rack. Doesn’t that smell amazing?
Step 4: Finally, we assemble our treasures. Spread a teaspoon of your cool jam on each solid cookie. Gently press a window cookie on top. Let them sit for about 30 minutes. This lets the jam set so they don’t slide. Then, they are ready to share. I always sneak one before the guests arrive. It’s a grandma’s secret treat.
Creative Twists
These cookies love to play dress-up. Try a different jam, like apricot or blackberry. It’s like giving them a new sweater. Use different shaped cutters for your windows. A little heart or star is so cheerful. You can also dust the tops with powdered sugar. It looks like a light snowfall on your cookies. Which one would you try first? Comment below!
Serving & Pairing Ideas
These cookies are perfect on a fancy plate. I serve them with a bowl of clementines. The bright citrus looks so festive. For a drink, a cup of hot spiced apple cider is wonderful. The spices dance with the hazelnuts. For the grown-ups, a small glass of ruby port is lovely. It sips like a sweet, warm hug. Which would you choose tonight?
Keeping Your Windowpane Cookies Perfect
These cookies keep beautifully. Store them in a single layer in a tin. They will stay crisp for about five days. You can also freeze the baked, unfilled cookies for a month.
Just thaw them on the counter before adding jam. I once filled cookies before freezing. The jam made them soggy. Now I always fill them fresh. Batch cooking is a wonderful time-saver.
Make and roll the dough ahead. You can freeze the dough disk for later. This matters because it spreads out the holiday fun. You get to bake without the big mess. Have you ever tried storing it this way? Share below!
Cookie Troubles and Simple Fixes
First, dough that is too soft is common. Just chill it a bit longer. I remember when my dough stuck to everything. A little extra flour on the rolling pin helps.
Second, jam can leak out the sides. Your jam must be thick and cool. Simmering it first is the key step. This matters for a neat, pretty cookie. Third, cookies might spread too much.
Make sure your butter is properly chilled. This ensures your windows stay clear and lovely. Getting these right builds your baking confidence. Which of these problems have you run into before?
Your Quick Questions, Answered
Q: Can I make these gluten-free? A: Yes. Use a good gluten-free flour blend. The texture will be slightly more delicate.
Q: How far ahead can I make them? A: Make dough up to two days ahead. Keep it wrapped tightly in the fridge.
Q: What if I don’t have hazelnuts? A: Almonds work just as well. The flavor will be slightly different but delicious.
Q: Can I double the recipe? A: Absolutely. Just mix it in two separate batches. This prevents overworking the dough.
Q: Any optional tips? A: A light dusting of powdered sugar looks like snow. Fun fact: These cookies are named after the city of Linz in Austria! Which tip will you try first?
From My Kitchen to Yours
I hope you love making these little window cookies. They always remind me of snowy days. Baking is about sharing joy and stories.
I would love to hear about your baking adventures. Tell me all about it in the comments. Have you tried this recipe? Your stories are my favorite thing to read.
Happy cooking!
—Elowen Thorn.

Festive Linzer Windowpane Cookies
Description
Classic buttery, nutty cookies with a festive jam-filled window.
Ingredients
Instructions
- Simmer jam in small saucepan over medium heat, stirring frequently, until thickened and reduced to ½ cup, about 10 minutes; let cool completely, about 1 hour. Meanwhile, process sugar and hazelnuts in food processor until hazelnuts are finely ground, about 20 seconds. Add flour, salt, and butter and pulse until mixture resembles coarse meal, 15 to 20 pulses. Add egg yolk, cream, vanilla, and almond extract and process until dough forms ball, about 20 seconds. Transfer dough to counter. Form dough into disk, wrap disk tightly in plastic wrap, and refrigerate for 30 minutes.
- Adjust oven racks to upper-middle and lower-middle positions and heat oven to 375 degrees. Line 2 baking sheets with parchment paper.
- Roll dough ⅛ inch thick on counter. Using 2-inch fluted round cookie cutter, cut out rounds; space rounds ¾ inch apart on prepared sheets. Using smaller cutter, cut out centers of half of dough rounds. Gather and reroll scraps once. Bake until edges are lightly browned, 8 to 10 minutes, switching and rotating sheets halfway through baking. Let cookies cool on sheets for 5 minutes, then transfer to wire rack. Let cookies cool completely.
- Spread bottom of each solid cookie with 1 teaspoon jam, then top with cutout cookie, pressing lightly to adhere. Let cookies set before serving, about 30 minutes.
Notes
- Ensure jam is completely cool before assembling cookies to prevent sogginess. Cookies can be stored in an airtight container at room temperature for up to 3 days.