The Heart of the Feast
Hello, my dear. Come sit. Let’s talk about our big, beautiful turkey feast. This recipe is my secret for a happy table. It makes sure everyone gets their favorite piece. The dark meat is braised until it’s falling-off-the-bone tender. The white meat stays juicy and perfect. Doesn’t that sound like a good plan?
We cook them separately. This way, each part gets the love it needs. The legs become so soft in a cozy bath of broth and wine. The breasts get a crispy, golden skin. I still laugh at the year I served a dry breast. Never again! This method matters because it respects the bird. It makes every bite special.
A Little Story & A Big Pot
My grandson once asked why the gravy tastes so deep and rich. I showed him the pot. It starts with a mountain of chopped onions, celery, and carrots. We let them get sweet and brown on the stove. The smell fills the whole house. It smells like love and coming home.
Then we add the broth and wine. It bubbles up, grabbing all those tasty brown bits from the pan. That’s where the flavor lives! Those bits are pure gold. *Fun fact: covering the pan with parchment and then foil keeps the wine from making holes in the foil!* This first step matters. It builds a foundation of flavor for everything to come.
The Two-Day Tango
Now, here is the trick. We do not rush. Good food asks for a little time. The legs cook low and slow on day one. Then they rest in their juices. The breasts get a good rub of salt a full day before roasting. That salt works its way deep into the meat.
This makes the breast so moist. It seasons it from the inside out. Do you have a family trick for keeping meat juicy? I would love to hear it. Taking this time matters. It turns a simple meal into a celebration. It shows you care.
The Big Finish
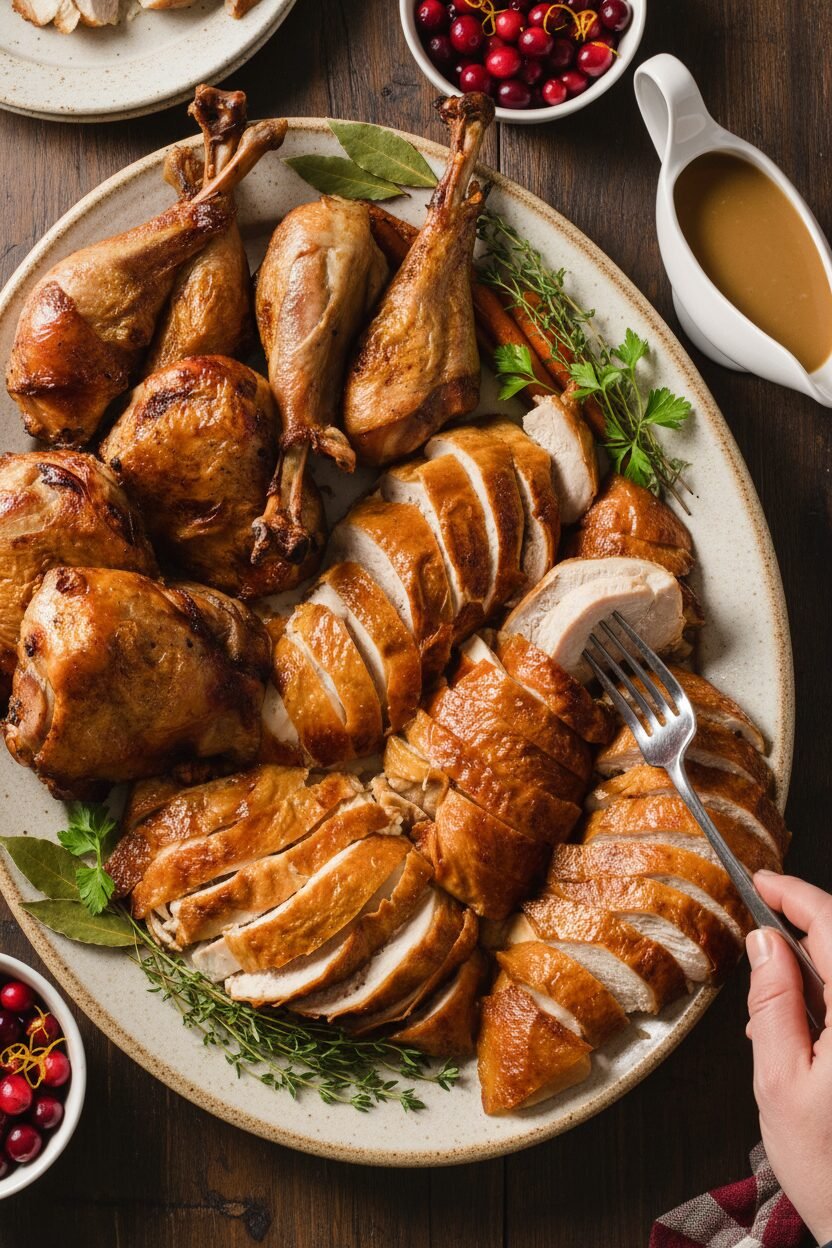
On the big day, the magic happens. The breasts roast until their skin is like crispy paper. Then we give the legs a quick trip back to the oven. This makes their skin snap and shine. The gravy warms on the stove, waiting for the precious juices from the resting breast.
Doesn’t that smell amazing? All the parts come together at the end. You get a platter full of different textures and flavors. Which part is your favorite on the plate? The tender dark meat or the slice of juicy breast?
Your Turn at the Table
This might seem like a lot of steps. But think of it like a story. Each chapter builds to the happy ending. You can do parts ahead of time. That makes the day itself much calmer. The gravy is already made! What a gift to your future self.
The real secret is sharing it. Seeing everyone’s face as you bring the platter out. Hearing them ask for more gravy. That is the best part. Tell me, what is the one dish that makes your family’s feast feel complete?
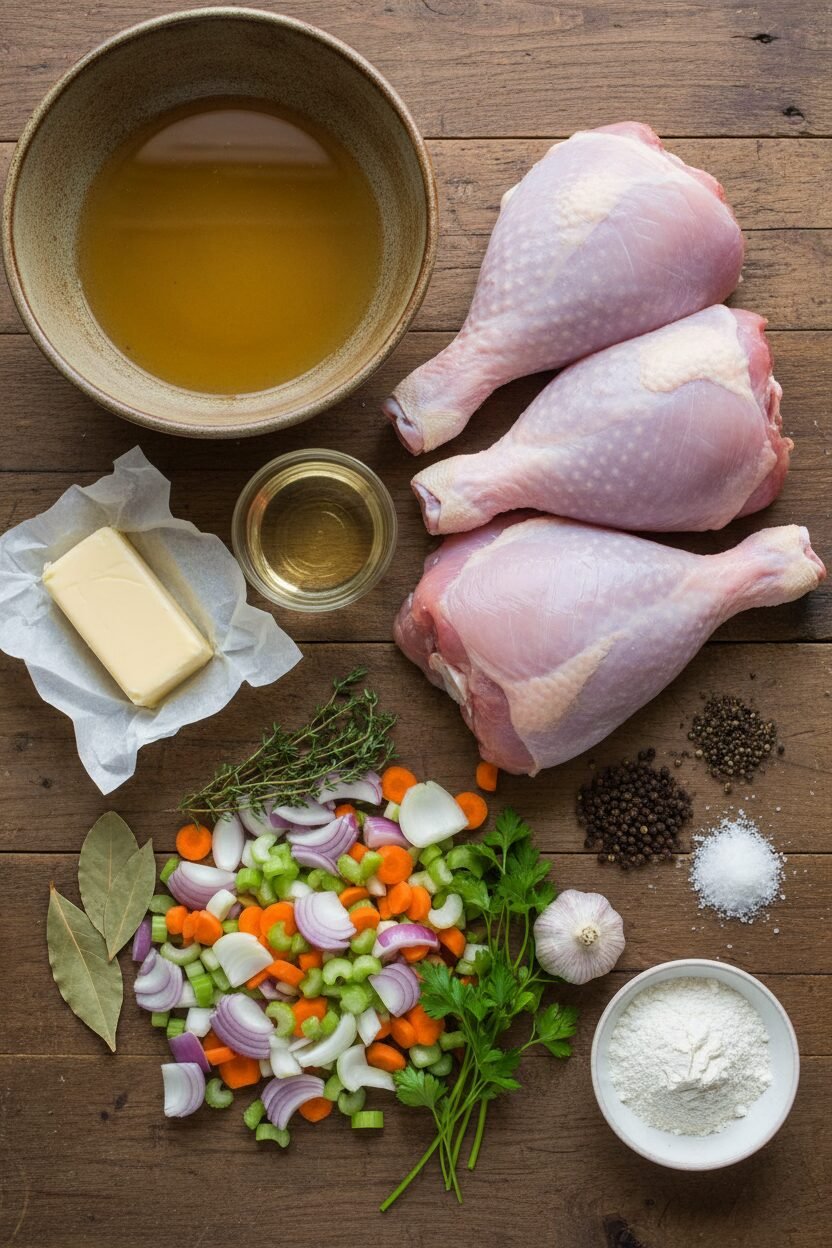
Ingredients:
| Ingredient | Amount | Notes |
|---|---|---|
| Onions, chopped | 3 | |
| Celery ribs, chopped | 4 | |
| Carrots, peeled and chopped | 4 | |
| Garlic cloves, crushed and peeled | 10 | |
| Unsalted butter, melted | 3 tablespoons + extra | For braising; extra as needed for gravy fat |
| Bay leaves | 3 | |
| Fresh thyme sprigs | 10 | |
| Fresh parsley sprigs | 10 | |
| Black peppercorns | 1 tablespoon | |
| Chicken broth | 4 cups | |
| Water | 1 cup | |
| Dry white wine | 1 cup | |
| Turkey leg quarters (1½- to 2-pound) | 4 | Trimmed |
| Kosher salt | 3 tablespoons | For legs |
| All-purpose flour | ½ cup | For gravy |
| Bone-in turkey breasts (5- to 6-pound) | 2 | Trimmed |
| Kosher salt, divided | 2 tablespoons + 2 teaspoons | For breasts |
| Unsalted butter, melted, divided | 7 tablespoons | For roasting breasts & reheating legs |
A Feast for the Whole Flock
Hello, my dear. Pull up a chair. Let’s talk about our big holiday bird. Cooking a whole turkey can feel so big, can’t it? I found a smarter way. We cook the dark and white meat separately. This way, everything turns out just right. The legs become so tender they nearly fall apart. The breast stays wonderfully juicy. I still laugh at that year I served a dry turkey. We all just smiled and ate extra gravy!
Instructions
Step 1: Heat your oven to 325 degrees. Toss all those chopped veggies and herbs in a big pan with butter. Cook them on the stove until they smell amazing and get soft. Now pour in your broth, water, and wine. Let it all simmer together for a minute. (A good fond, those browned bits in the pan, means great flavor!)
Step 2: Cut your turkey legs at the joint. Sprinkle them well with salt. Nestle them into that lovely broth in the pan. Cover everything tightly with parchment and foil. Let it cook in the oven for a few hours. The meat should be very tender. What does “braising” mean? Share below!
Step 3: Carefully take the turkey legs out to cool. Now, strain all the liquid from the pan into a big bowl. Press on the veggies to get every last drop of flavor. You can toss the cooked veggies away. Their job is done. This liquid will be your gravy magic.
Step 4: Let the liquid sit so the fat rises to the top. You’ll need some of that fat. If you don’t have enough, add a little butter. Heat the fat in a pot and whisk in flour. Cook it until it’s a pretty golden color. Then slowly whisk in your reserved liquid.
Step 5: Let your gravy simmer until it thickens nicely. Give it a little taste. Does it need more salt or pepper? Let the gravy cool, then pop it in the fridge. Now, for the breasts. Separate the bone from the meat. (Leaving the skin attached makes a cozy blanket for the meat.) Rub salt under the skin. Refrigerate them overnight. This makes the meat so flavorful.
Step 6: On the big day, heat your oven again. Make a foil ball for your baking sheet. This keeps things from smoking. Place the breasts on a rack, brush with butter, and roast. They cook low and slow first. This keeps all the juices inside. Doesn’t that smell wonderful?
Step 7: Take the breasts out and turn the oven up high. This makes the skin crispy and golden. While they get crispy, warm your turkey legs in the oven too. Gently reheat your gravy on the stove. Let the big breasts rest before you carve. This is the most important step for juicy meat!
Creative Twists
Add a handful of dried mushrooms to the braising veggies. They give the gravy a deep, earthy flavor.
Use apple cider instead of white wine. It adds a gentle, sweet note everyone loves.
Rub the breasts with maple syrup and thyme. It makes the skin sweet, sticky, and crisp.
Which one would you try first? Comment below!
Serving & Pairing Ideas
Serve this feast on a big platter with all your favorite sides. Buttery mashed potatoes are a must for that gravy. Some roasted Brussels sprouts add a nice crunch. For a drink, a glass of chilled apple cider is perfect. For the grown-ups, a Pinot Noir wine pairs beautifully. It’s fruity and light. Which would you choose tonight?
Storing Your Feast for Later
Let’s talk about storing your beautiful turkey. First, let everything cool completely. I leave it on the counter for an hour. Then, pack the meat and gravy in separate containers. They will keep in the fridge for four days.
For the freezer, use airtight bags or containers. The dark meat and gravy freeze wonderfully for two months. The white meat can dry out, so I freeze it with extra gravy. Thaw everything in the fridge overnight.
Reheating is simple. Warm the gravy in a pot. Reheat the meat in a 325-degree oven until hot. I once reheated turkey in a microwave. It got rubbery! The oven keeps it tender and juicy.
This matters because good planning means less stress. You can enjoy the party, not just cook for it. Have you ever tried storing it this way? Share below!
Three Little Hiccups and How to Fix Them
First, the gravy is too thin. Do not worry. Mix a tablespoon of flour with cold water. Whisk it into the simmering gravy. It will thicken right up.
Second, the turkey skin is not crispy. Pat the skin very dry before roasting. I remember when my skin stayed soggy. I forgot this simple step! Dry skin makes all the difference.
Third, you are worried about timing. Do the legs and gravy up to three days early. This spreads out the work. You will feel calm on the big day.
Fixing small problems builds your cooking confidence. It also makes the food taste its very best. Which of these problems have you run into before?
Your Quick Questions, Answered
Q: Can I make this gluten-free?
A: Yes! Use cornstarch instead of flour to thicken your gravy.
Q: How far ahead can I prepare it?
A: The dark meat and gravy are best made up to three days ahead.
Q: What if I do not have white wine?
A: Use more chicken broth. It will still be delicious and rich.
Q: Can I make a smaller amount?
A: Of course. Just cut all the ingredients in half. Use a smaller pan.
Q: Any optional tips?
A: Add a spoon of apple cider to the gravy. It gives a lovely, gentle tang. *Fun fact: My grandson calls this my “secret ingredient.”* Which tip will you try first?
From My Kitchen to Yours
I hope this recipe brings joy to your table. Cooking for loved ones is a special gift. The work is an act of love. I would love to hear about your own feast.
Tell me about your family’s traditions. Did your gravy turn out silky and rich? Have you tried this recipe? Please share your story in the comments below. I read every single one.
Happy cooking!
—Elowen Thorn.
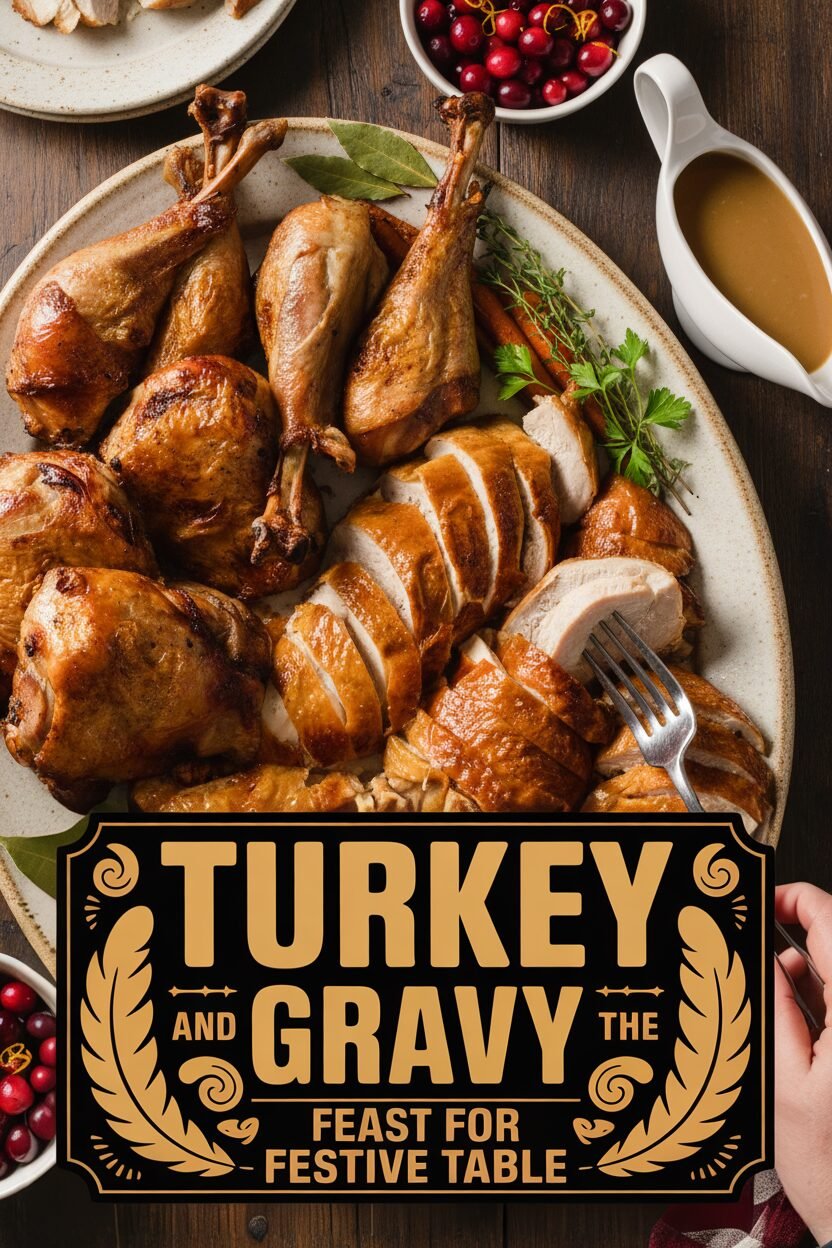

Turkey and Gravy Feast for the Festive Table
Description
A complete holiday feast featuring succulent roasted turkey breasts and tender, braised dark meat, all served with a rich, homemade gravy.
Ingredients
Turkey Legs and Gravy:
Turkey Breasts:
Instructions
- UP TO 3 DAYS IN ADVANCE: Braise Leg Quarters, Make Gravy (TIME: 4 TO 4½ HOURS, PLUS 1 HOUR COOLING) For the Turkey Legs and Gravy: Adjust oven rack to lower-middle position and heat oven to 325 degrees. Toss onions, celery, carrots, garlic, melted butter, bay leaves, thyme sprigs, parsley sprigs, and peppercorns together in large roasting pan; spread into even layer. Place pan over medium heat and cook, stirring occasionally, until vegetables are softened and lightly browned and fond forms on bottom of pan, about 15 minutes. Add broth, water, and wine and bring to simmer, scraping up any browned bits. Remove pan from heat.
- Cut leg quarters at joints into thighs and drumsticks, sprinkle with salt, and season with pepper to taste. Place pieces skin side up in pan (braising liquid should come about three-quarters of way up legs and thighs). Place 12 by 16-inch piece of parchment paper over turkey pieces. Cover pan tightly with aluminum foil. Place pan in oven and cook until thighs register 170 degrees, 2½ to 3 hours. Remove pan from oven. Transfer turkey pieces to large, shallow container and let cool completely, about 1 hour. Once cool, cover and refrigerate.
- Using spatula, scrape up any browned bits from bottom and sides of pan. Strain contents of pan through fine-mesh strainer set over large bowl, pressing on solids with spatula to extract as much liquid as possible; discard solids.
- Transfer liquid to fat separator and let settle for 5 minutes. Reserve ½ cup plus 1 tablespoon fat (if there is not enough fat, add extra melted butter to make up difference) and 8 cups liquid; discard remaining liquid.
- Heat reserved fat in large saucepan over medium-high heat. Add flour and cook, stirring constantly, until flour is medium golden brown and fragrant, about 5 minutes. Slowly whisk in reserved liquid and bring to boil. Reduce heat to medium-low and simmer, stirring occasionally, until gravy is thickened and reduced to 6 cups, 15 to 20 minutes. Off heat, season gravy with salt and pepper to taste. Transfer to large container and let cool completely, about 1 hour. Once cool, cover and refrigerate.
- DAY BEFORE: Butcher and Salt Breasts (TIME: 30 MINUTES, PLUS 24 HOURS SALTING) For the Turkey Breasts: Place breasts on cutting board skin side down. Using kitchen shears, cut through ribs, following vertical lines of fat where breasts meet backs, from tapered ends of breasts to wing joints. Using your hands, bend backs away from breasts to pop shoulder joints out of sockets. Using paring knife, cut through joints between bones to separate backs from breasts.
- Flip breasts skin side up. Using your fingers, carefully loosen and separate skin from each side of 1 breast. Peel back skin, leaving it attached at top and center of each breast. Rub 1 teaspoon salt onto each side of breast, then place skin back over meat. Rub 1 teaspoon salt onto underside of breast cavity. Repeat with remaining breast. Place breasts on rimmed baking sheet and refrigerate, uncovered, for 24 hours.
- SERVING DAY: Roast Breasts, Reheat Dark Meat and Gravy, and Carve (TIME: 2¾ HOURS) Adjust oven rack to middle position and heat oven to 325 degrees. Measure out 20-inch piece of foil and roll into loose ball. Unroll foil, place on second rimmed baking sheet, and top with wire rack (crinkled foil will insulate bottom of sheet to keep it from smoking during roasting). Place breasts, skin side up, on prepared wire rack; brush with 4 tablespoons melted butter and sprinkle each whole breast with 1 teaspoon remaining salt. Roast until thickest part of breast registers 130 degrees, about 1½ hours.
- Remove breasts from oven and increase oven temperature to 500 degrees. When oven reaches temperature, return breasts to oven and roast until skin is deeply browned and thickest part of breast registers 160 degrees, 20 to 30 minutes. Transfer to carving board and let rest, uncovered, for 30 minutes. Pour any juices from sheet into bowl and set aside.
- Adjust oven rack to upper-middle position. Place thighs and drumsticks skin side up on now-empty wire rack set in sheet and brush with remaining 3 tablespoons melted butter. Place in oven and reheat until skin is well browned and thighs register 110 degrees, 18 to 22 minutes. Transfer thighs and drumsticks to large platter.
- While thighs reheat, bring gravy to simmer in large saucepan over medium-low heat, whisking occasionally. Add any reserved juices from breasts and season with salt and pepper to taste. Cover and keep warm.
- Carve breasts and transfer to platter with thighs and drumsticks. Serve, passing gravy separately.
Notes
- Before You Begin: This recipe requires refrigerating the salted turkey breasts for 24 hours. If using self-basting or kosher turkey breasts, do not salt in step 9, but season with salt in step 11. We used Diamond Crystal Kosher Salt; if you use Morton Kosher Salt, reduce the salt in step 9 to 2½ teaspoons per breast, rubbing 1 teaspoon onto each side and ½ teaspoon into the cavity. Covering the turkey with parchment and then foil will prevent the wine in the braising liquid from “pitting” the foil.