My Kitchen Smells Like Christmas
I pull out my old yellow bowl. The one with the tiny chip on the rim. I start creaming the butter and sugar. The smell is sweet and rich. It already feels like a holiday.
These cookies are special to me. My friend Hilda shared the recipe years ago. She was from a small German town. We baked these every December. I still laugh at that. We always had flour on our noses.
Why We Use Dates and Walnuts
Dates are nature’s sticky, sweet candy. They make these cookies so chewy. Walnuts add a nice little crunch. Together, they are the heart of the cookie.
This matters. Food is about texture. A soft chew and a gentle crunch feel wonderful in your mouth. It makes eating more fun. Don’t you love that feeling?
A Little Cookie Secret
You see that step with baking soda and hot water? It’s a tiny magic trick. It helps the cookies rise just a bit. It makes them tender.
Fun fact: This trick is very old. Bakers used it before baking powder was common. I like keeping old tricks alive. It connects us to cooks from long ago. What’s a family cooking trick you know?
The Joy of Shaping Them
You just drop the dough with a spoon. No rolling or cutting needed. The dough is chunky with dates and nuts. Each cookie will look a little different. That’s perfect.
This matters too. Food does not need to be perfect. Homemade things have character. Their uneven shape is part of their charm. It shows they were made with hands, not a machine.
Time for a Story
One year, my grandson Sam helped me. He was very small. He tried to chop the walnuts. They went everywhere! On the floor, in the dog’s bowl. We found walnuts for weeks.
We still got the cookies baked. And they were delicious. The mess just became part of the memory. Doesn’t that smell amazing when they are in the oven? What’s your funniest kitchen memory?
Your Turn to Bake
Now you have the recipe. It is simple and sturdy. It forgives little mistakes. That is the best kind of recipe.
Gather your ingredients. Put on some music. Let your kitchen get warm and sweet. Will you try making these this year? I would love to hear how it goes.
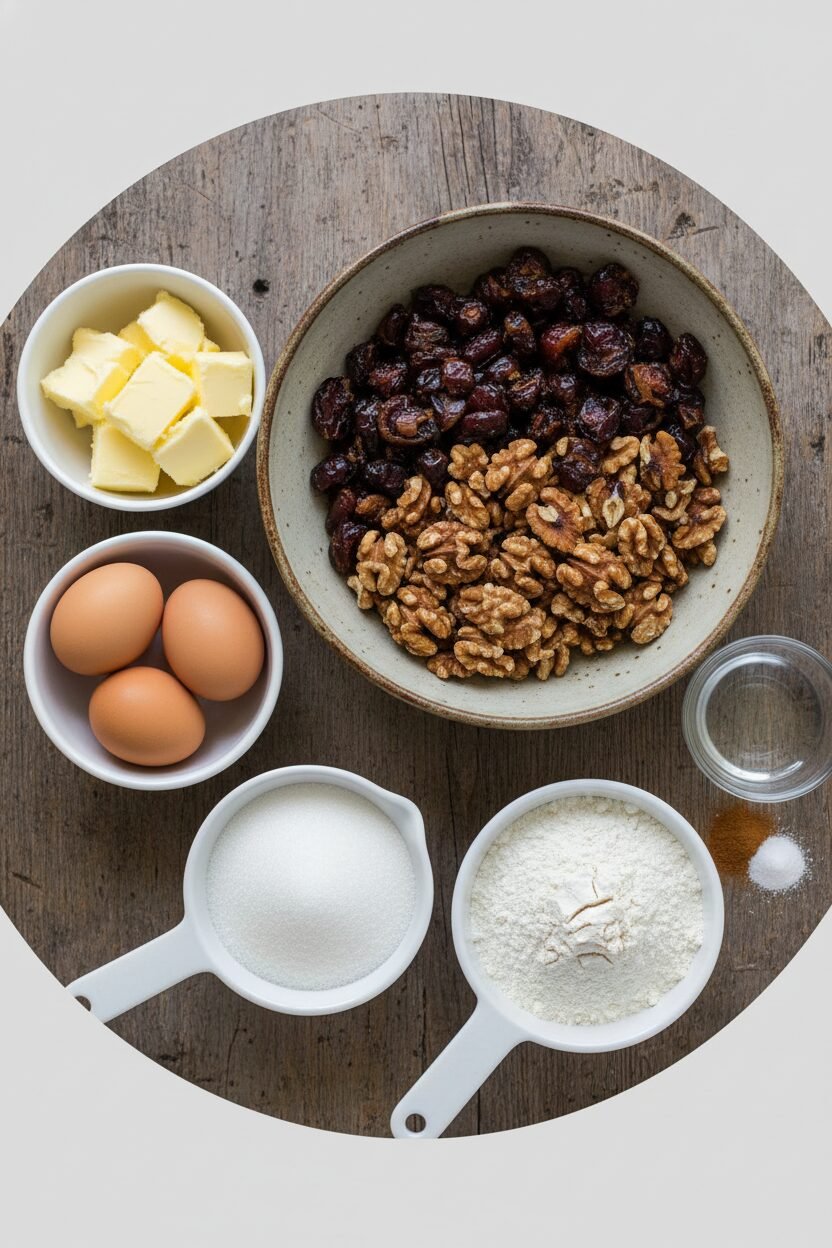
Ingredients:
| Ingredient | Amount | Notes |
|---|---|---|
| White sugar | 1 ½ cups | |
| Unsalted butter | ½ cup | softened |
| Eggs | 3 large | |
| All-purpose flour | 2 ½ cups | sifted |
| Ground cinnamon | 1 teaspoon | |
| Baking soda | 1 teaspoon | |
| Hot water | 1 teaspoon | for dissolving baking soda |
| Dates | 2 cups | pitted and finely chopped |
| Walnuts | 3 cups | chopped |
Instructions
Step 1: First, warm your oven to 350°F. This gets it ready for our cookies. I like to do this first thing. It feels like the kitchen is waking up. A warm oven makes everything cozier, doesn’t it?
Step 2: Now, cream the butter and sugar together. Use a medium bowl. Mix until it’s light and fluffy. I use my trusty wooden spoon. It takes a little arm work, but it’s worth it. (Soft butter mixes best straight from the counter.)
Step 3: Crack in the eggs, one by one. Stir well after each one. This makes the batter nice and smooth. My grandson once tried to add them all at once. We had quite a mess! What’s your favorite cookie to bake? Share below!
Step 4: In a tiny dish, mix the baking soda with hot water. Stir until it disappears. Then pour it into your bowl. This little step makes the cookies just puff up a bit. It’s a kitchen magic trick.
Step 5: Add your sifted flour and cinnamon. Stir it in gently. The dough will get thick. That’s perfect. I always take a deep breath here. Doesn’t that cinnamon smell amazing? It reminds me of my own grandma.
Step 6: Time for the good stuff! Fold in the dates and walnuts. Make sure they’re spread all through the dough. Every bite should have a little treasure. I still laugh at how we’d fight for the cookie with the most walnuts.
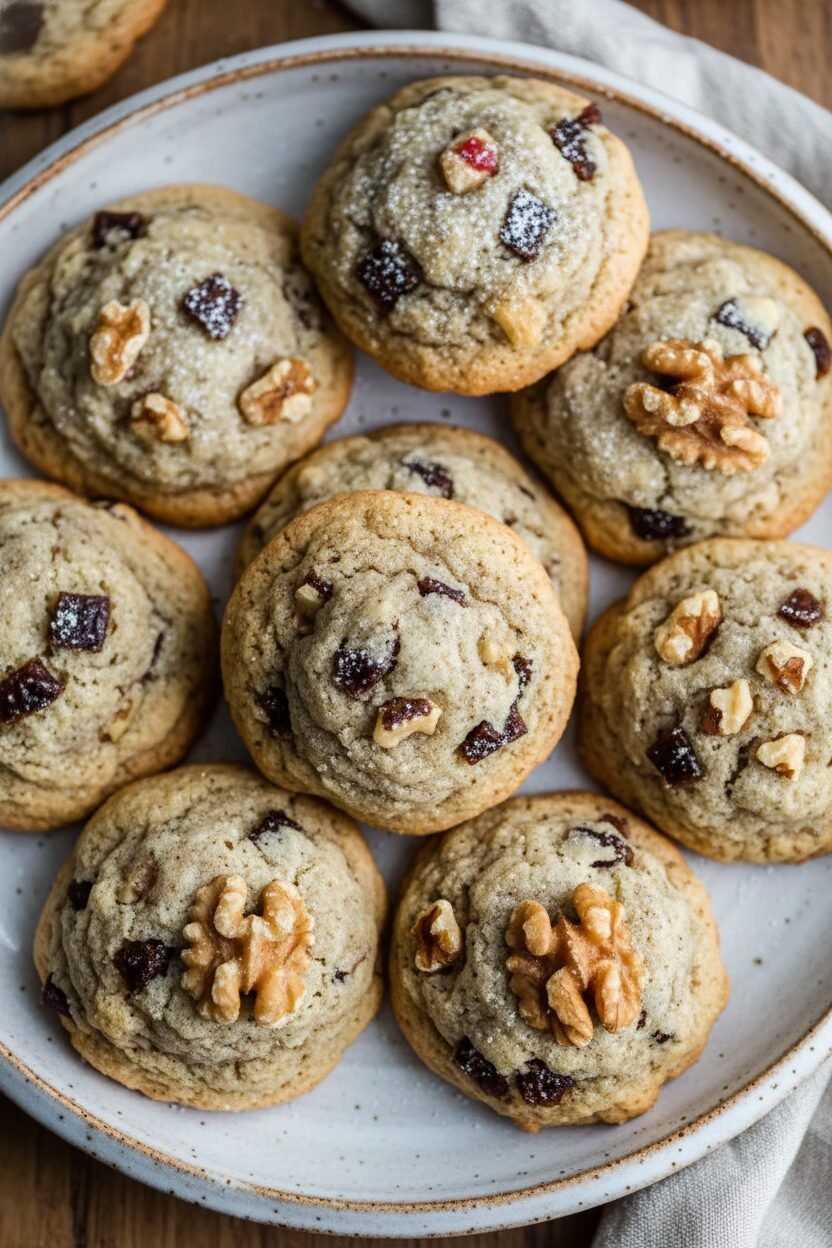
Step 7: Drop big spoonfuls onto a baking sheet. They don’t need much room. These cookies don’t spread too much. They stay nice and plump. I like to make them all a similar size. That way they bake evenly.
Step 8: Bake for 10 to 15 minutes. Watch for light golden edges. Let them cool on a rack. The waiting is the hardest part. But a warm cookie is a happy thing. Just let them set for a minute first.
Creative Twists
Swap walnuts for pecans. They have a lovely, buttery flavor. It’s a nice change.
Add a handful of chocolate chips. Because chocolate makes everything more fun.
Roll the dough balls in sugar. It gives them a pretty, sparkly crust.
Which one would you try first? Comment below!
Serving & Pairing Ideas
These cookies are wonderful on a plate with a tangerine. The citrus is so bright. You could also crumble one over vanilla ice cream. That’s a real treat. For a drink, a glass of cold milk is classic. For the grown-ups, a sweet sherry pairs beautifully. It’s like a warm hug. Which would you choose tonight?
Keeping Your Cookies Cozy
These cookies stay fresh in a tin for a week. I like to layer them with parchment paper. For longer storage, freeze them in a single layer first.
Once frozen, pack them tightly in a freezer bag. They will keep for three months. You can bake a big batch and freeze half. This saves so much time during the busy holidays.
I once forgot a bag in the back of the freezer. Finding them in January was a lovely surprise! Let thaw at room temperature for an hour. They taste just-baked.
Having cookies ready matters. It means you are always ready for a friend’s visit. It turns a busy day into a sweet moment. Have you ever tried storing cookies this way? Share below!
Cookie Troubles and Simple Fixes
First, if your cookies spread too much, your butter was too soft. Your dough should be thick and hold its shape. Chilling the dough for 30 minutes helps a lot.
Second, dry cookies mean you over-measured the flour. Always spoon flour into your cup. Then level it off with a knife. I remember when my first batch turned out like little rocks!
Third, if the bottoms burn, your oven is too hot. An oven thermometer is a baker’s best friend. Getting this right matters for perfect texture. Fixing small problems builds your cooking confidence. Which of these problems have you run into before?
Your Quick Questions, Answered
Q: Can I make these gluten-free? A: Yes. Use a good gluten-free flour blend. Make sure it has xanthan gum in it.
Q: Can I make the dough ahead? A: Absolutely. Wrap it tightly and refrigerate for up to two days. Let it soften a bit before scooping.
Q: What if I don’t have walnuts? A: Pecans work wonderfully. You could also use chopped almonds. The cookie will still be delicious.
Q: Can I halve the recipe? A: You can. Just divide all the ingredients in half. It bakes for the same amount of time.
Q: Any optional tips? A: A pinch of nutmeg adds warmth. *Fun fact: These are sometimes called “rock cookies” because of their shape!* Which tip will you try first?
From My Kitchen to Yours
I hope you love making these cookies. They fill the house with the best smell. It is the smell of memory and warmth.
I would love to hear about your baking adventure. Tell me about the stories made in your kitchen. Sharing recipes connects us all. Have you tried this recipe? Let me know in the comments below.
Happy cooking!
—Elowen Thorn.


Rocking German Christmas Cookie Date
Description
German Rock Date Cookies
Ingredients
Instructions
- Preheat the oven to 350°F (175°C) to ensure it reaches the correct temperature before baking.
- In a medium-sized mixing bowl, cream together the softened butter and sugar until the mixture becomes light and uniform.
- Add the eggs one at a time, mixing thoroughly after each addition to create a smooth, cohesive batter.
- In a small dish, dissolve the baking soda in the teaspoon of hot water. Stir until fully blended, then incorporate it into the butter and egg mixture.
- Combine the sifted all-purpose flour and ground cinnamon. Gradually add this mixture to the wet ingredients, stirring until a thick, well-blended dough forms.
- Fold in the chopped dates and walnuts, ensuring they are evenly distributed throughout the dough.
- Drop heaping spoonfuls of dough onto an ungreased baking sheet, spacing them slightly apart. The cookies will retain much of their shape.
- Bake for 10 to 15 minutes, or until the cookies develop a light golden-brown color. Remove from the oven and allow them to cool on a wire rack.
Notes
- Store cookies in an airtight container at room temperature for up to a week.