

A Little Kick in Your Cookie
These cookies have a secret. It is a tiny bit of cayenne pepper. I know, it sounds strange. But trust your grandma Elowen. It is not about heat. It is about a warm, happy feeling in your chest. It makes the chocolate taste deeper and richer.
Toasting the almonds with the spices is my favorite part. The smell fills my whole kitchen. It smells like a cozy holiday and a little adventure all at once. Doesn’t that smell amazing? That smell is the heart of the cookie. It matters because food should wake up all your senses, not just your taste.
The Story of the Dough Log
You will make a big roll of dough. We call it a log. Then you chill it. This is the hard part. You must wait. I still laugh at that. I always want to bake them right away. But waiting makes the cookies hold their shape.
While you wait, you can roll the log in sparkly sugar. This gives the edges a sweet crunch. It is a small step that makes a big difference. It matters because the little details are what make homemade food special. What is your favorite part of baking? Is it mixing, or is it the eating?
Why We Call It Mexican Chocolate
This recipe is inspired by a old way of drinking chocolate. Long ago, in Mexico, people mixed chocolate with cinnamon and spices. They even added chili. They knew something wonderful. Spices and chocolate are best friends.
*Fun fact*: The ancient Aztecs prized the cacao bean so much, they used it as money. Can you imagine buying bread with chocolate coins? I think that is a lovely idea. This history matters. It connects us to people from long ago who also loved a good, spiced treat.
Baking With Your Nose
Your nose will tell you when these are done. Do not wait for them to look dark. The recipe says they should “show slight resistance to touch.” That is a fancy way of saying: press one gently. If it springs back a little, it is ready.
If you smell them getting too toasty, they are probably done. Ovens can be tricky. Mine runs hot. I always set my timer for less time, just in case. Do you have an oven that likes to surprise you, too?
The Shiny Finish
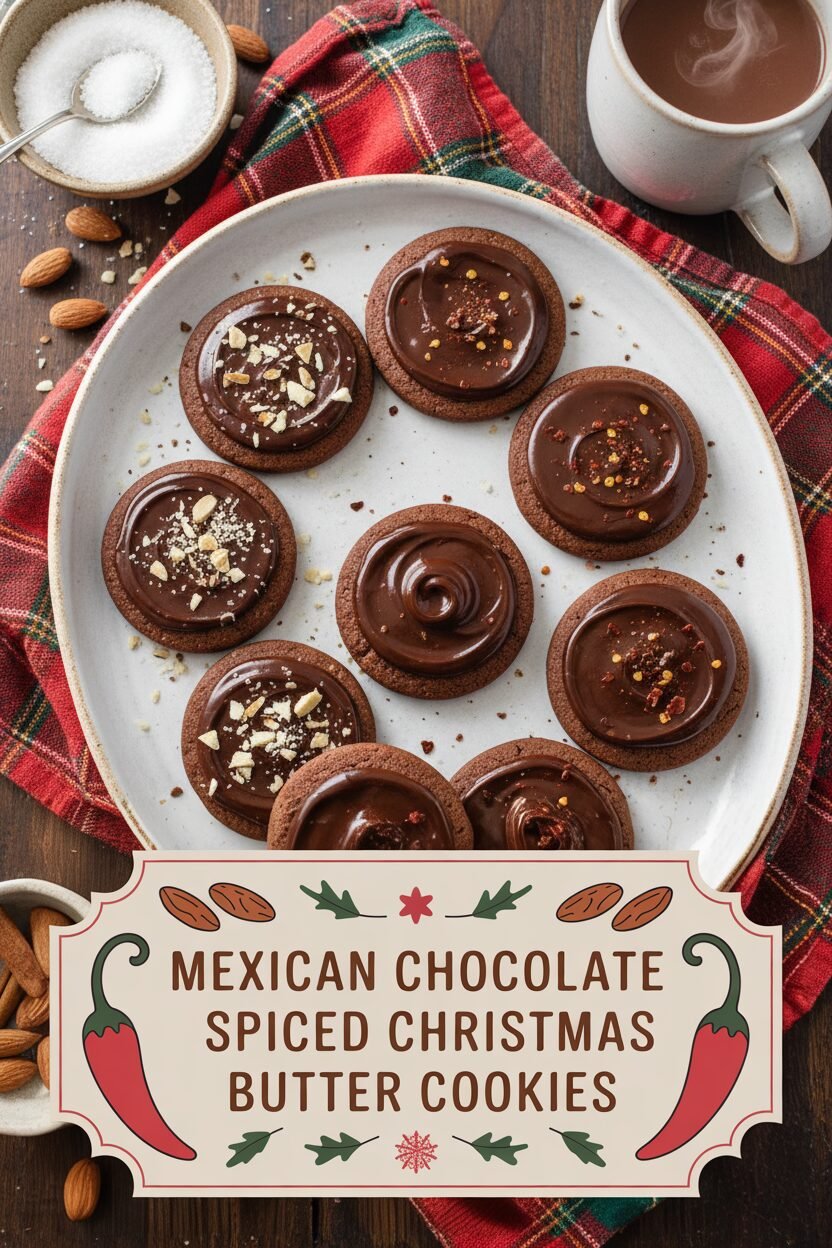
The glaze is like putting on a beautiful coat. It is optional, but I always do it. Melting chocolate with butter and a touch of corn syrup makes it so shiny. It dries smooth and firm. It looks like a professional made them.
Let the glaze dry completely. This is another test of patience. But it is worth it. A perfect cookie is a gift. Who will you share your first batch with? I love hearing about your kitchen adventures.
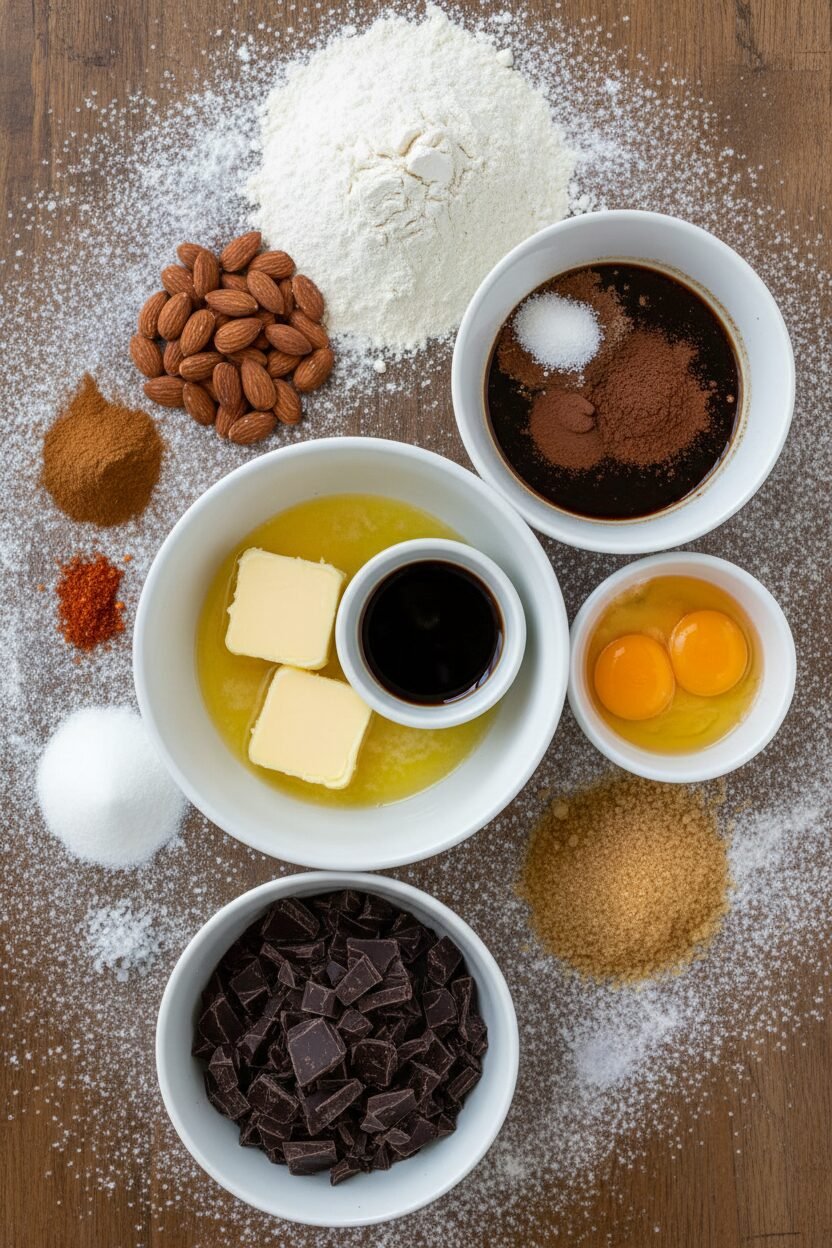
Ingredients:
| Ingredient | Amount | Notes |
|---|---|---|
| Sliced almonds | 1/2 cup | Toasted and finely ground with spices |
| Ground cinnamon | 1 teaspoon | |
| Cayenne pepper | 1/8 teaspoon | |
| Unsalted butter (for cookies) | 20 tablespoons (2 1/2 sticks) | Softened to cool room temperature |
| Cocoa powder | 1/2 cup (about 2 oz / 57g) | |
| Espresso powder | 1 teaspoon | |
| Sugar | 1 cup (7 oz / 198g) | |
| Table salt | 1/4 teaspoon | |
| Large egg yolks | 2 | |
| Vanilla extract (for cookies) | 1 tablespoon | |
| Unbleached all-purpose flour | 2 1/4 cups (11 1/4 oz / 319g) | |
| Turbinado sugar | 1/2 cup | For rolling the cookie log |
| For Optional Glaze | ||
| Bittersweet chocolate | 4 ounces (113 grams) | |
| Unsalted butter (for glaze) | 4 tablespoons | |
| Corn syrup | 2 tablespoons | |
| Vanilla extract (for glaze) | 1 teaspoon |
Instructions
Step 1: First, let’s wake up those spices. Toast your almonds, cinnamon, and cayenne in a dry pan. Just until you smell their warmth. Let it all cool completely. Then buzz it in a food processor until it’s like fine sand. This step makes the cookies sing. (Watch the cayenne! A little pinch is plenty for a gentle kick.)
Step 2: Now, move your oven rack to the middle. Heat the oven to 375 degrees. Melt 4 tablespoons of butter in a saucepan. Stir in the cocoa and espresso powder. You’ll get a lovely, dark paste. Let this cool for a good 15 minutes. I like to set it by the window.
Step 3: In a big bowl, beat the rest of the butter with the sugar and salt. Add your cooled chocolate paste. Mix until it’s fluffy and happy. Beat in the egg yolks and vanilla. Now, stir your nut-spice mix into the flour. Gently mix the flour into the butter bowl in three parts. The dough will come together beautifully. Roll it into a log on some parchment paper. Chill it for at least an hour. (Chilling is key for neat slices!)
Step 4: Time to dress them up! Roll your firm log in the turbinado sugar. It gives a lovely crunch. Slice cookies about 1/4 inch thick. Place them on a parchment-lined tray. Don’t crowd them. They need a little space to breathe.
Step 5: Bake for 10 to 12 minutes. Rotate the tray halfway. They’re done when they just resist a soft touch. Let them cool on the tray for 5 minutes. Then move them to a rack. What’s your favorite cookie texture: soft or crisp? Share below!
Step 6: For the glaze, gently melt chocolate and butter together. Whisk in corn syrup and vanilla. It gets so shiny! Spread a little on each cooled cookie. Let them dry for 20 minutes. The waiting is the hardest part, isn’t it?
Creative Twists
These cookies love to play dress-up. You can make them your own. Here are a few of my favorite little twists.
Swap the almonds for pecans. They toast up so nice and buttery.
Add a tiny orange zest to the dough. Chocolate and orange are best friends.
Skip the glaze and press a chocolate kiss on top. Do it right when they come out of the oven.
Which one would you try first? Comment below!
Serving & Pairing Ideas
These cookies are a celebration all by themselves. I love to stack them on my grandmother’s old plate. A dusting of powdered sugar looks like snow. For a real treat, serve them with a scoop of vanilla ice cream. The cold and spicy is magic.
For drinks, a cup of spicy Mexican hot chocolate is perfect. The flavors dance together. For the grown-ups, a small glass of tawny port is wonderful. It sips like a warm hug. Which would you choose tonight?

Keeping Your Christmas Cookies Cozy
These cookies keep beautifully. Store them in a tin at room temperature for a week. They love a little parchment paper between layers.
You can freeze the dough log for up to three months. Just wrap it tightly in plastic wrap. Slice and bake straight from the freezer when you need a treat.
I once forgot a batch in the freezer until February. What a lovely surprise on a grey day! Batch cooking means joy is always ready.
This matters because life gets busy. Having dough ready lets you share homemade warmth anytime. Have you ever tried storing it this way? Share below!
Cookie Troubles? Let’s Fix Them Together
Is your dough too crumbly? The butter was likely too cold. Let it soften on the counter for an hour. Your dough should feel like clay.
Do the cookies spread too much? Your dough log was not chilled enough. It must be very firm before slicing. I remember when my first batch turned into one giant cookie!
Are they tasting bland? You may have under-toasted the almonds. Toast them until you can really smell them. This wakes up all the flavors.
Fixing small issues builds your cooking confidence. It also makes the flavors sing. Which of these problems have you run into before?
Your Quick Questions, Answered
Q: Can I make these gluten-free?
A: Yes! Use a good gluten-free flour blend. I like the ones with xanthan gum already in them.
Q: How far ahead can I make them?
A: The dough log chills for a day easily. Baked cookies are perfect for up to a week.
Q: I don’t have espresso powder.
A: Use a teaspoon of very strong brewed coffee instead. It just deepens the chocolate flavor.
Q: Can I halve the recipe?
A: You can. Just use one egg yolk. It will make a shorter, smaller log of dough.
Q: Is the glaze necessary?
A: Not at all! The cookies are wonderful plain. The glaze just makes them extra festive and shiny.
*Fun fact: The cayenne pepper is a traditional Mexican chocolate touch. It gives a tiny, warm hug at the end of each bite!* Which tip will you try first?
From My Kitchen to Yours
I hope you love making these special cookies. The kitchen smells like a spicy, chocolatey hug.
It is my favorite part of the season. Sharing recipes is how we share our stories.
I would love to hear about your baking adventure. Have you tried this recipe? Tell me all about it in the comments below.
Happy cooking!
—Elowen Thorn.

Mexican Chocolate Spiced Christmas Butter Cookies
Description
Rich, buttery cookies infused with the warm flavors of Mexican chocolate, cinnamon, cayenne, and toasted almonds, finished with a shiny bittersweet chocolate glaze.
Ingredients
Optional Bittersweet Chocolate Glaze:
Instructions
- In medium skillet set over medium heat, toast almonds, cinnamon, and cayenne until fragrant, about 3 minutes; set aside to cool. In food processor fitted with metal blade, process cooled mixture until very fine, about 15 seconds. Set aside.
- Adjust oven rack to middle position; heat oven to 375 degrees. Melt 4 tablespoons butter in medium saucepan over medium heat. Add cocoa powder and espresso powder; stir until mixture forms smooth paste. Set aside to cool, 15 to 20 minutes.
- In standing mixer fitted with paddle attachment, mix remaining 16 tablespoons butter, sugar, salt, and cooled cocoa mixture on high speed until well combined and fluffy, about 1 minute, scraping sides of mixing bowl once or twice with rubber spatula. Add yolks and vanilla and mix on medium speed until thoroughly combined, about 30 seconds. Scrape sides of bowl. Whisk nut/spice mixture into flour. With mixer running on low, add flour in three additions, waiting until each addition is incorporated before adding next and scraping bowl after each addition. Continue to mix until dough forms cohesive ball, about 5 seconds. Shape into dough log, 2 inches in diameter and about 12 inches long; use parchment paper or plastic wrap to roll into neat cylinder. Chill until very firm and cold, at least 1 hour.
- Roll chilled log in turbinado sugar. Slice cookies 1/4 inch thick and place on parchment-lined baking sheets.
- Bake until cookies show slight resistance to touch, 10 to 12 minutes, rotating baking sheet halfway through baking time; if cookies begin to darken on edges, they have overbaked. Cool for 5 minutes, then, using spatula, transfer cookies to wire rack; cool completely. Decorate as desired.
- For Glaze: Melt bittersweet chocolate with butter and whisk until smooth. Add corn syrup and vanilla extract and mix until smooth and shiny. Use back of spoon to spread scant 1 teaspoon glaze almost to edge of each cookie. (If necessary, reheat to prolong fluidity of glaze.) Allow glazed cookies to dry at least 20 minutes.
Notes
- For a spicier kick, increase the cayenne pepper to 1/4 teaspoon. The dough log can be wrapped tightly and frozen for up to 1 month; slice and bake directly from the freezer, adding a minute or two to the baking time.