A Cozy Pot and a Simple Plan
Hello, my dear. Come sit. Let’s talk about a cozy kitchen day. We are making turkey in a pot. It is simple and smells like a hug. You just need one big pot and a little patience.
This is my kind of cooking. Everything happens in one pot. The turkey browns first. Then the vegetables get sweet and brown. Finally, it all cooks together slowly. The oven does the gentle work. I love that.
Why We Brown First
Let me tell you a secret. The best flavor starts in the pot, not the oven. We brown the turkey skin until it is golden. This makes it taste rich and wonderful. The vegetables get browned too. This is where the magic gravy begins.
This matters because flavor is built in layers. Each step adds something special. My grandson once skipped the browning. He learned his lesson. The gravy was pale and sad. We still laugh at that. Do you have a kitchen mistake that taught you something?
The Slow, Gentle Cook
Now, we let the oven take over. A low heat, 250 degrees, is just right. The turkey cooks slow and steady. It stays so juicy this way. You just seal the pot with foil and the lid. Then you walk away.
This slow cook matters. It keeps the turkey tender. High heat can make it tough and dry. Gentle heat coaxes out the goodness. *Fun fact: This method is called “en cocotte.” It’s just a fancy way to say “in a pot.”* Doesn’t that smell amazing already?
The Golden Finish & The Gravy
After the slow cook, we give the skin a crisp. A quick broil makes it golden and perfect. Then the turkey rests. This lets the juices settle. Now, for the best part: the gravy.
All those browned bits in the pot are flavor gold. We make the gravy right in there. You stir in flour, then whisk in broth. It bubbles and thickens into a rich, oniony gravy. It is the heart of the meal. What is your favorite thing to pour gravy over?
Gathering Around the Table
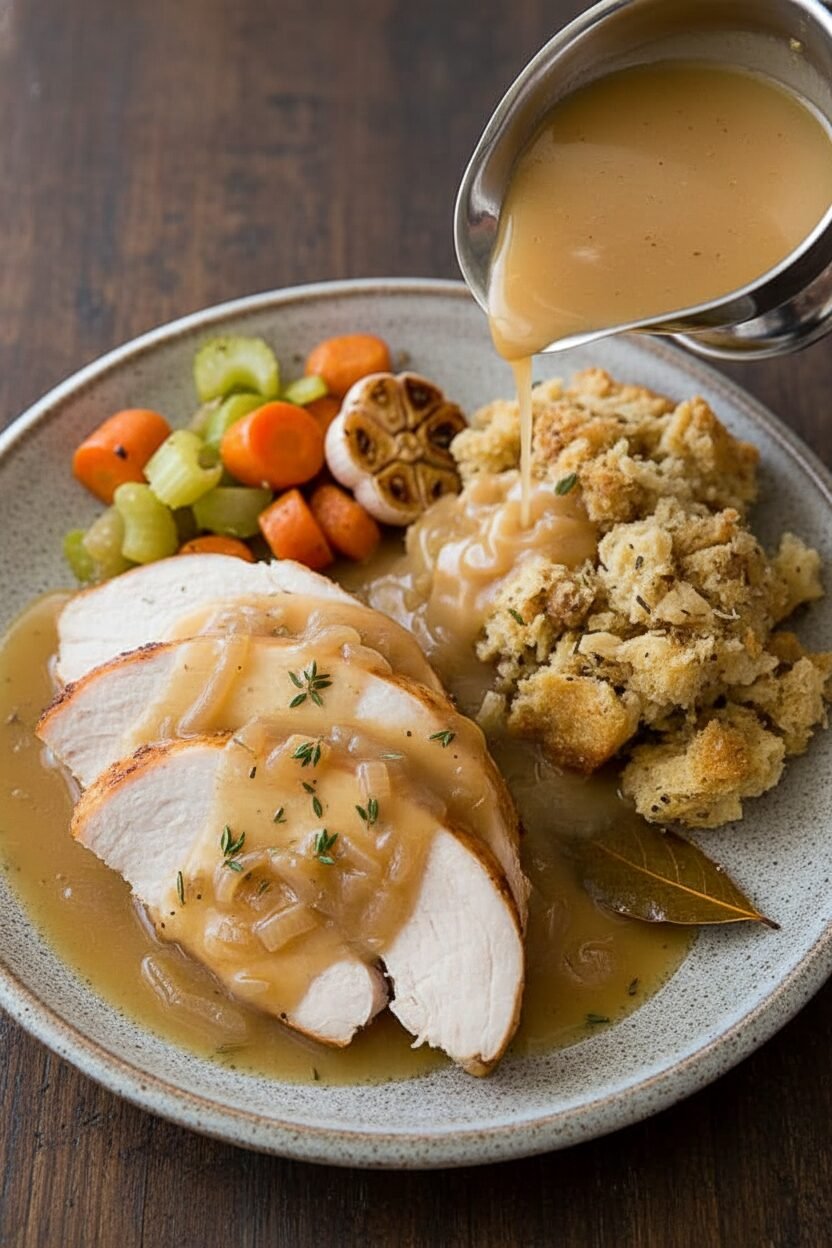
Carve the turkey. Warm the gravy. Call everyone to the table. This meal feels like a Sunday, even on a Wednesday. It is simple, hearty food. It fills your belly and your heart.
Food like this is about sharing. It is a whole turkey breast, so there is plenty. It asks you to sit down together. To talk and pass the gravy boat. That is the real recipe. Tell me, what meals make you feel most at home?
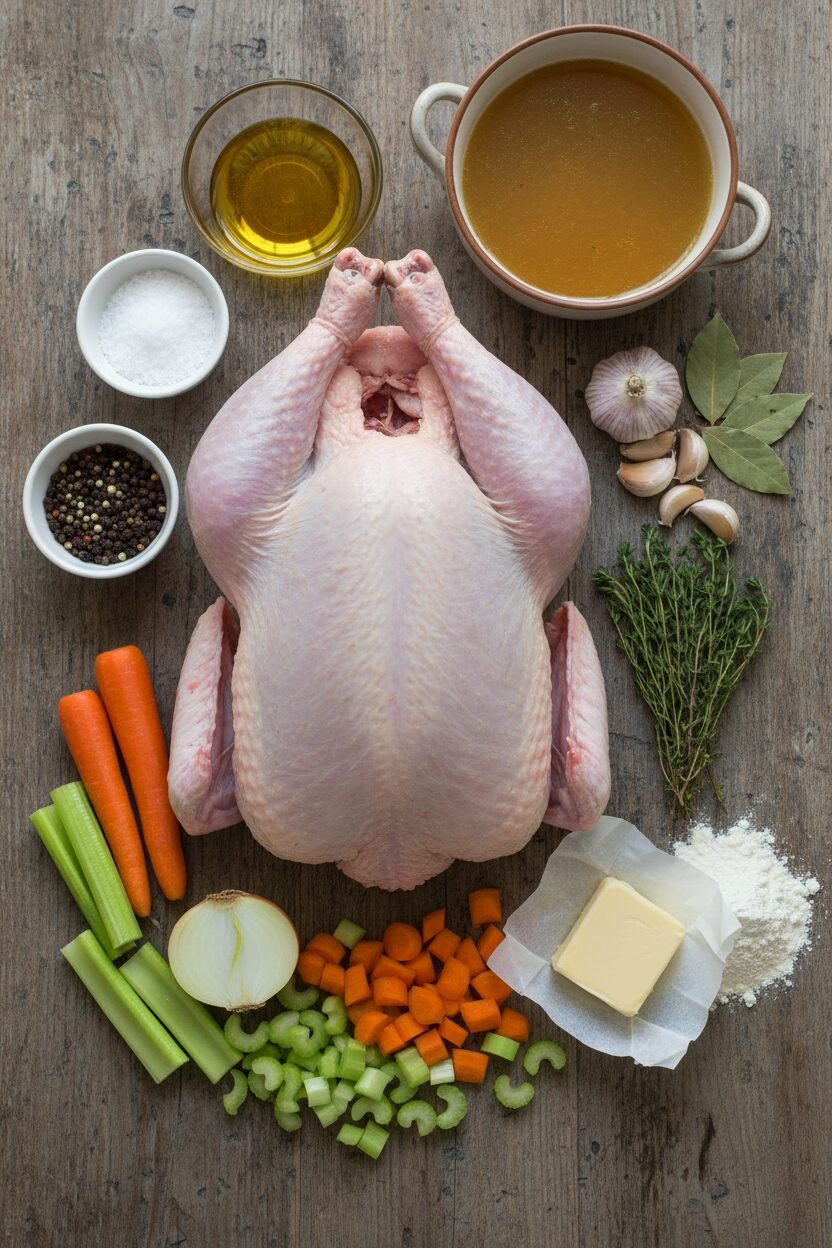
Ingredients:
| Ingredient | Amount | Notes |
|---|---|---|
| Bone-in whole turkey breast | 1 (7-pound) | Wings discarded, trimmed |
| Salt and pepper | To taste | For seasoning |
| Olive oil | 2 tablespoons | |
| Onion | 1, chopped | |
| Carrot | 1, chopped | |
| Celery rib | 1, chopped | |
| Garlic cloves | 6 | Crushed and peeled |
| Fresh thyme | 1 teaspoon | Minced |
| Bay leaf | 1 | |
| Unsalted butter | 1 tablespoon | Melted |
| All-purpose flour | ¼ cup | |
| Chicken broth | 4 cups |
Instructions
Step 1: Heat your oven to 250 degrees. Get your big pot ready. Pat the turkey breast nice and dry with paper towels. Sprinkle it well with salt and pepper. This helps the skin get so crispy later. My mouth waters just thinking about it!
Step 2: Heat the oil in your pot until it shimmers. Carefully lay the turkey in, skin-side down. Let it get a beautiful, deep brown. This takes patience, about 12 to 16 minutes. (Don’t rush the browning—that’s where the flavor lives!) Then take the turkey out and add your chopped veggies and herbs.
Step 3: Let those vegetables cook until they smell sweet and look browned. Doesn’t that smell amazing? Now, put the turkey back in, skin-side up. Seal the pot tightly with foil and the lid. Let it cook slowly in the oven for about 1 1/2 hours. The low heat makes the meat incredibly tender.
Step 4: Time for the magic finish! Take the pot out and turn on your broiler. Brush the turkey with melted butter. Broil it until the skin is golden and perfect. Let the turkey rest on a board. Why do we let meat rest? Share below! This keeps all the lovely juices inside when you carve it.
Step 5: Now for the gravy. Put your pot back on the stove. Cook the juices down, then stir in the flour. Whisk in your broth slowly. Let it bubble and thicken into a rich, oniony gravy. Strain it for silky smoothness. I still laugh at the time I forgot to strain it—we had “rustic” gravy with bits!
Creative Twists
This recipe is a wonderful friend. It loves little changes. Try adding a big spoonful of apple butter to the gravy. It adds a sweet, cozy note. Use parsnips instead of carrots for a different kind of sweetness. Rub the turkey skin with smoked paprika before browning. It gives a warm, smoky flavor. Which one would you try first? Comment below!
Serving & Pairing Ideas
This turkey asks for simple, happy sides. Buttery mashed potatoes are a must for that gravy. A bright, crunchy salad balances the rich meal. For a drink, a cold glass of apple cider is just right. Grown-ups might enjoy a glass of Chardonnay. It sips nicely with the herbs. Which would you choose tonight?
Keeping Your Cozy Turkey Dinner
Let’s talk about keeping your turkey cozy for later. First, let it cool completely. Then, shred or slice the meat. Store it in a sealed container in the fridge for up to four days. The gravy goes in its own little jar. For the freezer, pack the meat and gravy separately. They will be good for two months. This makes a wonderful future meal on a busy night.
I remember my first time freezing this. I was so proud of my future self! A week later, I had a ready-made feast. It felt like a gift from my past kitchen. Batch cooking this recipe is a smart idea. It saves you time and energy later. That matters because it gives you a night off from cooking. You deserve a break, my dear.
To reheat, warm the gravy in a pan. Add the turkey slices to the gravy. Heat it gently until everything is warm. This keeps the meat from drying out. Have you ever tried storing it this way? Share below!
Simple Fixes for Common Hiccups
Even grandmas have kitchen troubles sometimes. Here are three common ones. First, the skin isn’t browning. Make sure you pat the turkey very dry first. Wet skin will not get crispy. I once forgot this step. My turkey was pale, but still tasty!
Second, your gravy is too thin. Let it simmer a bit longer. It will thicken as it cooks. Third, the vegetables burn while browning. Just stir them more often. Keep the heat at medium-high, not too hot. Getting a good brown color matters. It builds deep, wonderful flavor in your gravy.
Fixing small problems builds your cooking confidence. You learn that a mistake is not the end. It is just a little bump in the road. Which of these problems have you run into before?
Your Quick Questions, Answered
Q: Can I make this gluten-free?
A: Yes! Just use a gluten-free flour blend for the gravy. It works just the same.
Q: Can I make it ahead?
A: Absolutely. Follow the storage tips above. The flavors get even better after a day.
Q: I don’t have fresh thyme.
A: Use half a teaspoon of dried thyme instead. It will still be lovely.
Q: Can I use a smaller turkey breast?
A: You can. Just reduce the cooking time. Use your thermometer to check for doneness.
Q: Any optional tips?
A: A fun fact: letting the turkey rest is key. It lets the juices settle back into the meat. This makes every slice moist and tender. Which tip will you try first?
From My Kitchen to Yours
I hope you enjoy making this comforting dish. It fills your home with the best smells. Cooking is about sharing warmth and stories. I would love to hear about your kitchen adventure. Tell me all about it in the comments below.
Have you tried this recipe? Let me know how it turned out for you. Your stories are my favorite thing to read. Happy cooking!
—Elowen Thorn.

Turkey in a Pot with Gravy
Description
A succulent, oven-braised turkey breast with a rich, homemade gravy, all cooked in one pot for maximum flavor and ease.
Ingredients
Instructions
- Adjust oven rack to middle position and heat oven to 250 degrees. Using kitchen shears, trim any rib bones that extend beyond underside of turkey breast. (If any backbone pieces are still attached to underside of turkey, remove them.) Pat turkey dry with paper towels and season with salt and pepper.
- Heat oil in large Dutch oven over medium-high heat until just smoking. Add turkey, skin side down, and cook until well browned, 12 to 16 minutes, rolling it from side to side as needed for even browning. Transfer turkey to plate and set aside. Pour off all but 2 tablespoons fat from pot. Add onion, carrot, celery, garlic, thyme, and bay leaf to pot and cook until vegetables are well browned, 7 to 10 minutes.
- Return turkey and accumulated juices to pot, skin side up. Off heat, place large sheet of aluminum foil over pot and press edges to seal, then cover tightly with lid. Transfer pot to oven and cook until thickest part of breast registers 155 degrees, 1 1/2 to 1 3/4 hours.
- Remove pot from oven and heat broiler. Uncover pot (handles will be very hot) and brush turkey with melted butter. When broiler is heated, return pot to oven and broil until skin is golden brown, 8 to 15 minutes, rotating pot as needed for even browning. Remove pot from oven. Transfer turkey to carving board, tent loosely with foil, and let rest while making gravy.
- Place pot over medium-high heat, bring to boil, and cook until almost all liquid has evaporated, 8 to 15 minutes. Stir in flour and cook until lightly browned, about 2 minutes. Slowly whisk in broth and bring to boil. Reduce heat to medium and cook at strong simmer, stirring often, until gravy is thickened and measures about 2 cups, 15 to 18 minutes. Strain gravy through fine-mesh strainer set over medium saucepan; discard solids. Season gravy with salt and pepper to taste. Carve turkey. Rewarm gravy and serve with turkey.
Notes
- For a richer gravy, you can substitute 1 cup of the chicken broth with dry white wine. Let the turkey rest for the full 15 minutes before carving to ensure juicy meat.