

A Pie Without the Oven
Hello, my dear. Come sit. Let’s talk about pumpkin pie. I love the classic one. But my oven was broken one Thanksgiving. I had to think fast.
I made this no-bake version instead. Everyone loved it. They said it was lighter and creamier. I still laugh at that kitchen disaster. It gave me a new favorite. Have you ever had a kitchen mistake turn out great?
The Magic of Gelatin
This pie sets without baking. How? The secret is gelatin. You sprinkle it on cold orange juice. It looks like glassy little beads. Then you add the warm custard. It melts right in.
This matters because it’s gentle. The filling never gets too hot. The flavor stays bright and fresh. Fun fact: gelatin comes from animal collagen. It’s what gives this pie its lovely, smooth slice.
Building the Flavor
First, the crust. Graham crackers, sugar, and warm butter. Press it in the pan. Bake it until it smells like toasty honey. Doesn’t that smell amazing? Let it cool completely.
Now, the spiced custard. You cook cream, sugar, and spices. Then you whisk it with egg yolks. This step matters. It makes the filling rich and silky. It’s the heart of the pie.
Bringing It All Together
Pour the warm custard over the gelatin. Stir until it’s smooth. Then mix in the pumpkin and more cream. It becomes a beautiful orange color. Pour it into your cool crust.
The hard part is waiting. Chill it for three hours. Then cover it and wait longer. Overnight is best. The wait makes the slice perfect. Do you find it hard to wait for desserts?
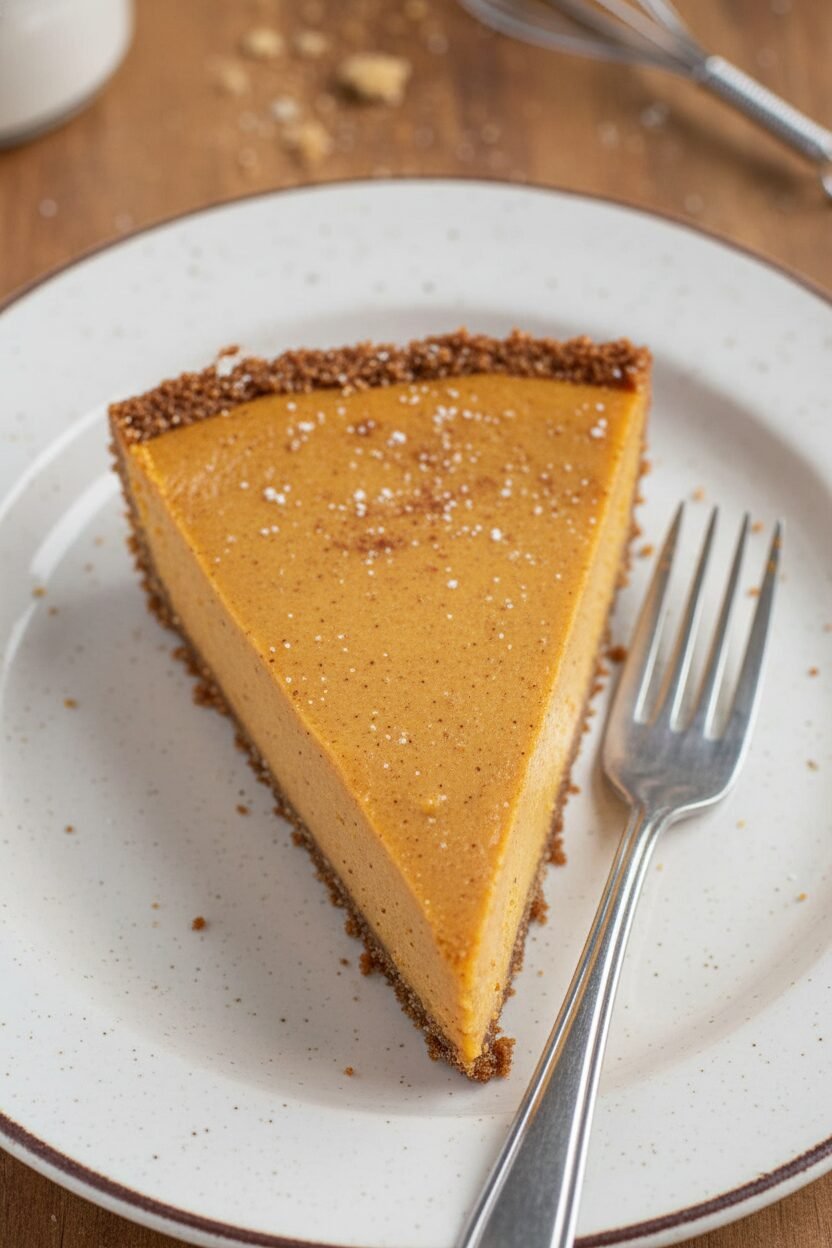
Your Slice of Comfort
When you cut a slice, it stands tall. It’s frosty and spiced. The crust is sweet and crumbly. It feels like a hug in pie form. Perfect for when you want pie without the heat.
This recipe is a little project. But each step is simple. I think that’s the joy of cooking. Small steps make something wonderful. What’s your favorite cozy dessert to make?
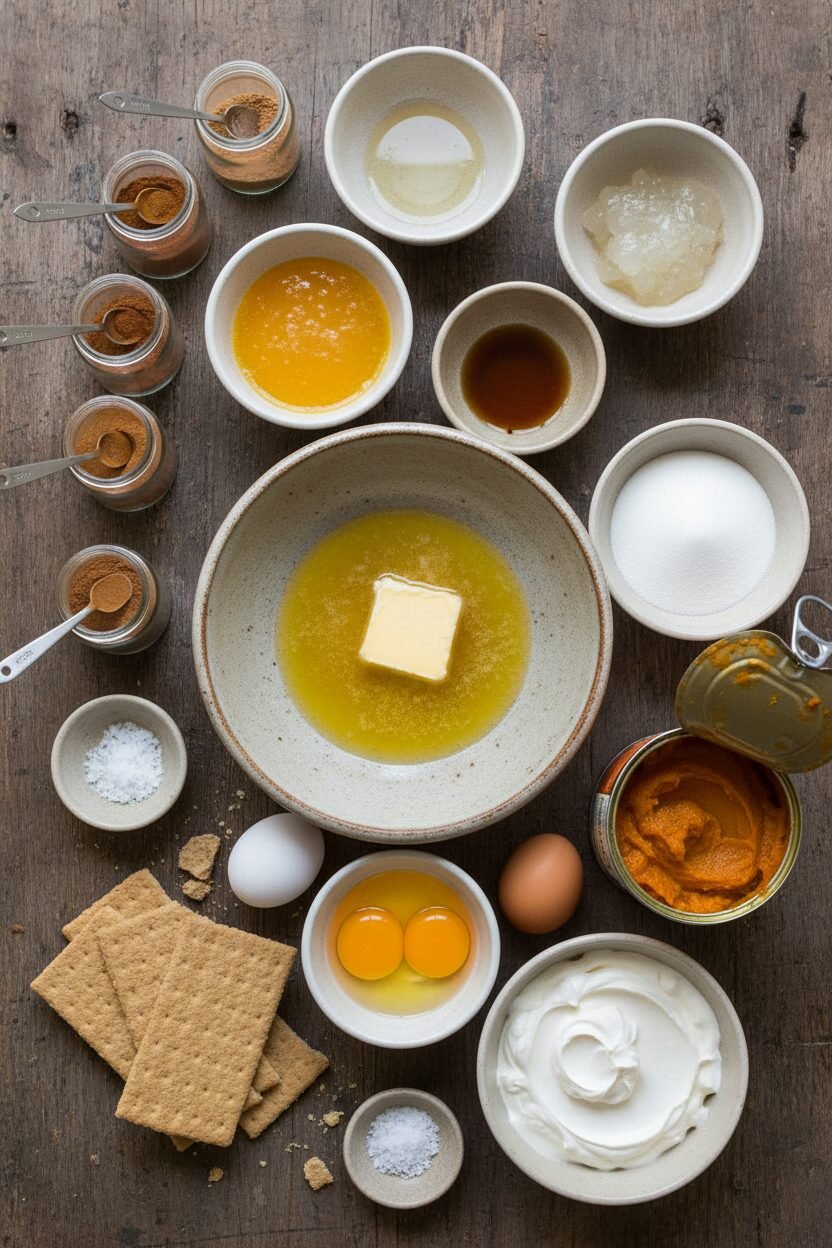
Ingredients:
| Ingredient | Amount | Notes |
|---|---|---|
| Graham cracker crumbs | 5 oz (142 g / ~9 whole crackers) | For the crust |
| Sugar | 2 tablespoons | For the crust |
| Unsalted butter | 5 tablespoons | Melted and warm, for the crust |
| Orange juice | 3 tablespoons | Cold, for the filling |
| Vanilla extract | 2 teaspoons | For the filling |
| Gelatin | 2 teaspoons | From 1 package, for the filling |
| Heavy cream | 1 cup | Cold, for the filling |
| Sugar | 2/3 cup (4 3/4 oz / 135 g) | For the filling |
| Table salt | 3/4 teaspoon | For the filling |
| Ground cinnamon | 1 teaspoon | For the filling |
| Ground ginger | 1/2 teaspoon | For the filling |
| Ground nutmeg | 1/4 teaspoon | For the filling |
| Ground cloves | 1/8 teaspoon | For the filling |
| Egg yolks | 3 large | For the filling |
| Pumpkin puree | 1 (15 oz) can (1 3/4 cups) | Plain, not pumpkin pie mix |
Instructions
Step 1: First, make your crust. Pulse the crackers and sugar in a food processor. It should look like fine sand. Pour in the warm, melted butter while pulsing. Press the crumbs firmly into your pie plate with a cup. Bake it until the edges smell toasty. (Press really hard so your crust isn’t crumbly!) Let it cool completely. I always set it on the windowsill.
Step 2: Now, let the gelatin bloom. Mix the cold orange juice and vanilla in a bowl. Sprinkle the gelatin over the top. Just walk away for five minutes. It will get all wrinkly and thick. Isn’t that funny? It’s like magic in a bowl.
Step 3: Time for the spiced custard. Heat half the cream, some sugar, salt, and spices in a pan. Whisk the rest of the sugar with the egg yolks until pale. Slowly pour the hot cream into the yolks, whisking fast! Pour it all back into the pan. Cook gently until it coats your spatula. What kitchen tool is your best helper for this? Share below!
Step 4: Combine everything. Pour the hot custard over the gelatin mixture. Stir until it’s all smooth. Puree the pumpkin in your clean food processor. With it running, stream in the last of the cold cream. Now, stir the pumpkin into the custard. It becomes such a lovely, smooth orange. I still smile at that color.
Step 5: Pour your filling into the cool crust. Chill it, uncovered, for about three hours. Then cover it and let it sleep in the fridge. It needs at least six hours total to set perfectly. Waiting is the hardest part! (Chilling it overnight is always best.) Slice it cold and serve. Doesn’t that look wonderful?
Creative Twists
This pie is a wonderful canvas. You can play with it! Try a gingersnap crust instead of graham crackers. The spicy snap is so good. Or, fold a handful of mini chocolate chips into the filling. They add little melty surprises. For a fancy top, sprinkle chopped toasted pecans on just before serving. Which one would you try first? Comment below!
Serving & Pairing Ideas
This slice is dreamy all on its own. But a dollop of whipped cream never hurts. A sprinkle of cinnamon on top makes it extra special. For a party, serve tiny slivers on little plates. It feels so elegant. To drink, a hot cup of spiced apple cider is perfect. For the grown-ups, a small glass of creamy bourbon liqueur is a cozy match. Which would you choose tonight?
Keeping Your Slice Perfectly Frosty
This pie loves the cold. Store any leftovers right in the fridge. Just cover the pie plate tightly with plastic wrap. It will stay happy for up to four days. I do not recommend freezing this one. The filling can get a bit weepy when it thaws.
You can make the whole pie a day ahead. That is the best batch-cooking tip. The flavors get even friendlier overnight. I remember my first time making it for Thanksgiving. I was so nervous it wouldn’t set! Chilling it overnight gave me peace and perfect slices.
Getting ahead matters. It takes the pressure off on a big day. You get to enjoy your own party. Have you ever tried storing it this way? Share below!
Three Little Hiccups and How to Fix Them
First, a soggy crust. Always cool your baked crust completely before adding filling. I once got impatient. A warm crust made the bottom soft. A cool crust stays nice and crisp.
Second, lumpy filling. Make sure your gelatin fully dissolves. Stir it well into the warm custard. If you see bits, strain the mix through a sieve. This ensures your pie is silky smooth.
Third, the pie won’t slice neatly. It needs its full chill time. Wait the full six hours, please. A properly set pie makes you feel like a pro. Fixing small issues builds big cooking confidence. Which of these problems have you run into before?
Your Quick Questions, Answered
Q: Can I make this gluten-free?
A: Yes! Use gluten-free graham crackers for the crust. The filling is naturally gluten-free.
Q: How far ahead can I make it?
A: You can make it up to 24 hours before serving. This is a make-ahead dream.
Q: I don’t have orange juice.
A: Use cold apple juice or even water. The juice just helps the gelatin bloom. *Fun fact: “Bloom” is just a fancy cook’s word for letting gelatin soften!*
Q: Can I double the recipe?
A: For two pies, yes. Mix the filling in two batches. Your food processor will be too full otherwise.
Q: Any optional tips?
A: A dollop of whipped cream on each slice is lovely. A little sprinkle of cinnamon on top is pretty. Which tip will you try first?
From My Kitchen to Yours
I hope this recipe finds its way to your table. It is a hug in pie form. Share it with people you love, or keep a slice just for you. I would love to hear all about your baking adventure.
Tell me your story in the comments below. Have you tried this recipe? Did your family ask for seconds? Happy cooking!
—Elowen Thorn.

Frosty Spiced Pumpkin Slice
Description
A creamy, no-bake pumpkin pie with a spiced graham cracker crust, set with gelatin for a perfectly sliceable texture.
Ingredients
Graham Cracker Crust:
Pumpkin Filling:
Instructions
- For the crust: Adjust oven rack to lower-middle position and heat oven to 325 degrees. Pulse crackers and sugar in food processor until evenly and finely ground, about fifteen 2-second pulses (you should have 1 cup crumbs). Add warm butter in steady stream through feed tube while pulsing until crumbs are evenly moistened and resemble damp sand. Transfer crumbs to 9-inch pie plate and spread evenly over bottom and sides; wipe out food processor bowl and reserve. Using flat-bottomed ramekin or dry measuring cup, press and smooth crumbs into pie plate. Bake until fragrant and browned around edges, 15 to 18 minutes. Cool completely on wire rack.
- For the filling: Stir orange juice and vanilla together in medium bowl. Sprinkle gelatin over orange juice mixture and set aside to thicken, about 5 minutes.
- Combine 1/2 cup heavy cream, 1/3 cup sugar, salt, and spices in small saucepan. Cook over medium-low heat until bubbles form at edges; remove from heat. Whisk remaining 1/3 cup sugar and yolks together in medium bowl until pale and slightly thickened. Slowly pour hot cream into yolk mixture, whisking constantly. Return mixture to pan and cook over medium-low heat, stirring constantly and scraping bottom of pot with heatproof spatula, until custard is thickened and registers 175 to 180 degrees on instant-read thermometer, about 2 minutes. (When properly cooked, custard should form slight ridge on tip of spatula when bottom of pan is scraped and spatula is lifted.) Immediately pour custard over gelatin mixture and stir until smooth and gelatin has completely dissolved.
- Puree pumpkin in food processor until smooth, 10 to 15 seconds. With machine running, add remaining 1/2 cup heavy cream through feed tube in steady stream. Scrape sides of bowl and process for additional 10 to 15 seconds. Add pumpkin mixture to custard mixture and stir until completely smooth. Transfer filling to cooled crust.
- Chill pie, uncovered, until filling is just set, about 3 hours. Cover pie with plastic wrap and continue to chill until fully set, at least 6 and up to 24 hours. Cut pie into wedges and serve.
Notes
- Nutritional information is an estimate based on 8 servings. Ensure the pumpkin puree is plain, not pumpkin pie mix, for the correct flavor and consistency.