

A Kitchen Full of Sweet Snow
My kitchen smells like sugar and vanilla today. I am making little forest pines from meringue. They look like tiny trees dusted with snow. Doesn’t that sound magical?
I first made these for my grandson Leo. His eyes got so wide. He said they looked like a fairy forest. I still laugh at that. Now, we make them every year. What is your favorite sweet smell in the kitchen?
The Magic of Egg Whites
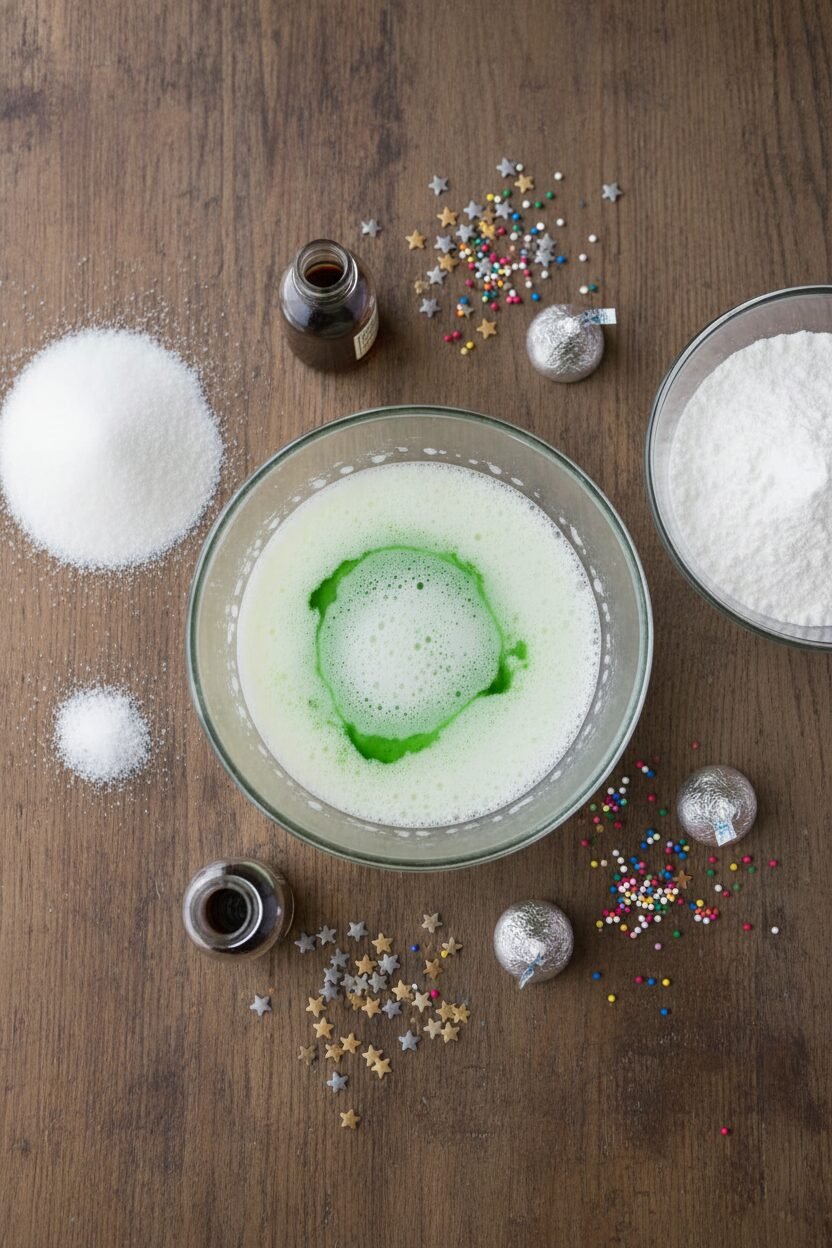
Let me tell you a secret. The magic is in the eggs. You use only the whites. You whip them with sugar until they are fluffy. They turn into a glossy, bright cloud.
This matters because patience is key. You must whip them just right. Too fast and they get grainy. Too slow and they stay runny. Fun fact: The stiff peaks mean the air is trapped inside. That air is what makes your trees light and crisp.
Piping Your Little Forest
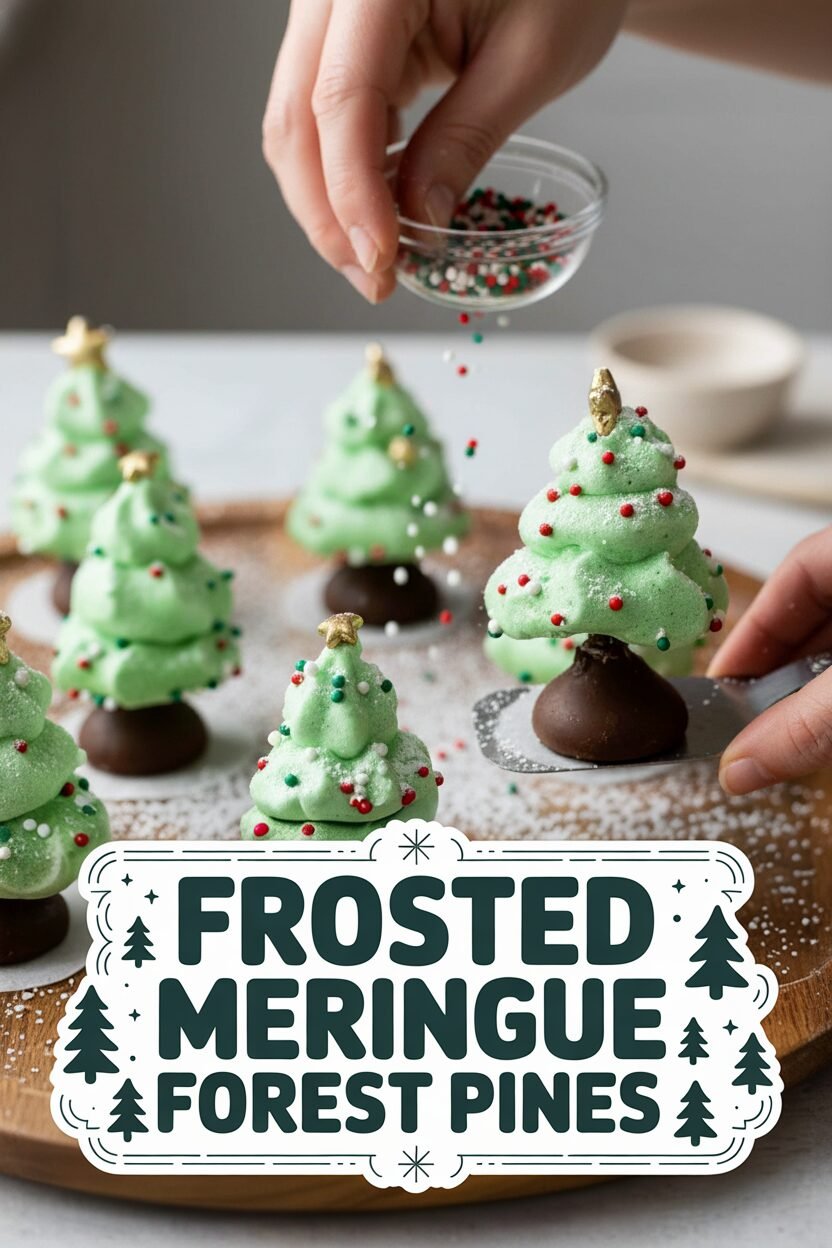
Now for the fun part. You pipe the meringue into trees. Use a star-shaped tip. Pipe one star, then a smaller one on top. Add one more tiny star for the top. It is like building a snowman, but a tree!
Do not worry if they are not perfect. My first tree looked like a green blob. Each one has its own character. This matters. Food made by hand should look friendly, not factory-made. Do you like to add sprinkles or sugar stars first?
A Slow, Warm Nap in the Oven
Here is the trick. You bake them very slowly. The oven is only 225 degrees. They need to dry out, not brown. It takes a whole hour.
Then, you turn the oven off. Let the trees cool inside. They finish drying there. This keeps them from cracking. It feels like the trees are taking a long, warm nap. Have you ever tried a recipe that needs a long, slow bake like this?
The Chocolate Surprise
The final touch is my favorite. You melt a few chocolate kisses. Then you stick a whole kiss on the bottom of each tree. This is the tree trunk.
It also makes them stand up straight. And you get a sweet chocolate bite at the end. It is a happy little surprise. I think the best treats have a surprise inside. What is your favorite chocolate treat to use in baking?
Sharing Your Forest
Finally, dust them with powdered sugar. It looks like a soft snowfall landed on your forest. Place them on a plate. They are almost too pretty to eat. Almost.
Making these is about more than a recipe. It is about making magic from simple things. Egg whites, sugar, and a little color. It is about creating a moment of wonder. That is a wonderful thing to share.
Ingredients:
| Ingredient | Amount | Notes |
|---|---|---|
| granulated sugar | ¾ cup (5 ¼ ounces/149 grams) | |
| cornstarch | 2 teaspoons | |
| large egg whites | 4 | |
| vanilla extract | ¾ teaspoon | |
| green food coloring | 8-10 drops | |
| salt | ⅛ teaspoon | |
| sugar stars | For decoration | |
| Multicolored nonpareils | For decoration | |
| Hershey’s Chocolate Kisses | 62, unwrapped | For base and adhesive |
| Confectioners’ sugar | For dusting before serving |
Instructions
Step 1: First, get your oven ready. Move the racks to the middle spots. Heat it to 225 degrees. Line two baking sheets with parchment paper. Mix your sugar and cornstarch in a little bowl. Now, whip the egg whites with vanilla, green color, and salt. Start slow until it’s foamy. Then whip faster until it gets fluffy. (A clean, dry bowl is the secret for happy egg whites!)
Step 2: Time to make the trees! Fill a pastry bag with the green meringue. Pipe a big star on the sheet. Add a smaller star on top. Finish with a tiny star for the tip. You’ll have a little pine tree. Quickly add a sugar star topper and sprinkle with nonpareils. What do you call those tiny round sprinkles? Share below!
Step 3: Bake your forest for one hour. Swap the trays halfway through. Then, turn the oven off. Let the trees cool inside for an hour. This keeps them from cracking. I always peek through the window. They look like a magical winter village. Finally, let them cool completely on the rack.
Step 4: Melt a dozen chocolate kisses at half power. Carefully cut a tiny hole in each tree’s bottom. Dip other kisses in the melted chocolate. Press them into the holes as trunks. The chocolate acts like glue. Lastly, dust everything with powdered sugar for a snowy look. Doesn’t that smell amazing?
Creative Twists
You can make this forest your own. Try these fun ideas. Peppermint Pines: Use a drop of peppermint extract instead of vanilla. Chocolate Trunks: Use mini peanut butter cups for a different base. Berry Snow: Dust with pink powdered drink mix for a berry blush. Which one would you try first? Comment below!
Serving & Pairing Ideas
These trees love company. Arrange them on a plate with fresh rosemary sprigs. It looks like a real snowy thicket. They are perfect with a cup of rich hot chocolate. For a grown-up treat, try them with a small glass of cream sherry. Its sweetness is just right. For a party, serve them on a cake stand as a centerpiece. Which would you choose tonight?

Keeping Your Frosted Forest Fresh
These little trees are best enjoyed the day you make them. Their crunch is perfect then. You can store them in a single layer in a tin for two days. Do not put them in the fridge. The fridge will make them soft and sticky.
I do not recommend freezing them either. The meringue can become chewy. It loses its lovely light crunch. I learned this the hard way with a batch of plain meringues years ago. I was so sad to find them soggy!
You can bake the trees ahead of time. Just add the chocolate trunk right before you serve. This keeps the chocolate nice and firm. Batch cooking saves your holiday energy. It lets you enjoy your own party more. Have you ever tried storing it this way? Share below!
Meringue Mishaps and Simple Fixes
First, if your meringue is flat, check your bowl. Any tiny bit of grease or egg yolk will stop the foam. I always wipe my bowl with lemon juice or vinegar first. This gives the egg whites a clean start.
Second, if the trees spread or weep, your oven may be too hot. An oven thermometer helps a lot. I remember when my first batch melted into puddles. My old oven ran much hotter than it said!
Third, if the color is dull, add a drop more food coloring. Gel color gives a brighter green than liquid. Getting the texture right builds your kitchen confidence. A pretty color makes the treat feel extra special. Which of these problems have you run into before?
Your Quick Questions, Answered
Q: Is this recipe gluten-free?
A: Yes, meringues are naturally gluten-free. Just check your food coloring and candy labels.
Q: Can I make these ahead?
A: Absolutely. Bake and cool the trees fully. Store them in a tin for two days. Add the chocolate just before serving.
Q: What can I use instead of Kisses?
A: Small chocolate chips or a broken chocolate bar piece work fine. You just need a bit for the trunk.
Q: Can I double the recipe?
A: I do not recommend it. The meringue can deflate while you wait to pipe. Make separate batches for the best results.
Q: Any optional tips?
A: Try a tiny drop of peppermint extract instead of vanilla. It tastes like a winter forest! *Fun fact: Meringues were invented in a Swiss village named Meiringen.* Which tip will you try first?
From My Kitchen to Yours
I hope you have fun making this frosted forest. It always makes my kitchen feel merry. The best part is sharing them with people you love.
I would love to hear about your baking adventure. Tell me all about it in the comments below. Did your trees turn out tall and bright? Have you tried this recipe? Your stories are my favorite thing to read.
Happy cooking!
—Elowen Thorn.

Frosted Meringue Forest Pines
Description
Meringue Christmas Trees
Ingredients
Instructions
- Adjust oven racks to upper-middle and lower-middle positions and heat oven to 225 degrees. Line 2 baking sheets with parchment paper. Combine granulated sugar and cornstarch in small bowl. Using stand mixer fitted with whisk attachment, whip egg whites, vanilla, food coloring, and salt on medium-low speed until foamy, about 1 minute. Increase speed to medium-high and whip whites to soft, billowy mounds, about 1 minute. Gradually add sugar mixture and whip until glossy, stiff peaks form, 2 to 3 minutes.
- Working quickly, fill pastry bag fitted with ¼- to ⅝-inch star tip with meringue. Pipe 1-inch-wide stars, spaced 1 inch apart, on prepared sheets. Top each star with another smaller star; then pipe even smaller star on top (trees should be 1½ inches tall). Place sugar star on top of each tree and sprinkle nonpareils around sides.
- Bake meringues for 1 hour, switching and rotating sheets halfway through baking. Turn off oven and let meringues cool in oven for at least 1 hour. Transfer sheets to wire rack and let meringues cool completely.
- Microwave 12 candies at 50 percent power until melted, 1 to 2 minutes. Using paring knife, gently cut small hole in bottom of each tree. Press tips of remaining candies into melted chocolate and then snugly into each hole. Dust trees with confectioners’ sugar before serving.
Notes
- Store in an airtight container at room temperature for up to a week.