

My Cast Iron Secret
I love my cast iron pan. It makes everything taste like home. For pizza, it gives the crust a magic crunch. I learned this from my own grandma, you know.
She would make her weekend pizza in one. The smell filled the whole house. I still laugh at how we’d all crowd in the kitchen. That pan holds more than food. It holds memories.
Why This Pizza is Different
We put the cheese down first. Then the sauce goes on top. It sounds backwards, doesn’t it? But trust this old grandma.
This little trick keeps the dough from getting soggy. The cheese melts right into the crust. It makes it golden and crispy. This matters because texture is half the fun of eating. A good crunch makes you smile.
Building Your Masterpiece
First, oil your pan well. Gently stretch your dough to fit. Don’t fight it, let it relax. Then, cover it with a blanket of cheese.
Now for the fun part. Spoon your sauce over the cheese. Add your favorite toppings. Do you like classic pepperoni or lots of veggies? I love a simple spinach and mushroom mix myself.
The Oven’s Hot Dance
Here is the key. You must use two oven racks. Start your pizza on the bottom rack. This gets that crust cooking fast.
Lift a corner with a spatula to check. Is it a beautiful brown? If the top needs help, move it up. Two minutes on the top rack works wonders. This careful heat matters. It gives you a perfect crispy finish everywhere.
Gather and Share
*Fun fact*: The first pizzas were just flatbreads with toppings. People have loved simple, tasty food for centuries. Isn’t that nice to know?
Making food is about sharing. What toppings will you try first? Tell me about your pizza night. Did your family go for a hearty meat feast or something lighter? I love hearing your stories almost as much as I love sharing mine.
Instructions
Step 1: First, get your oven ready. Move one rack to the very bottom. Put another rack at the very top. Now, preheat your oven to 450 degrees. This high heat makes the crust wonderfully crispy. I always do this first thing.
Step 2: Pour a little oil into your pan. Use your fingers to spread it all over. This stops the dough from sticking. It also gives the crust a lovely, golden color. (A well-oiled pan is the secret to a perfect crust every time!).
Step 3: Gently stretch your dough to fit the pan. Don’t let it go up the sides. Now, sprinkle cheese over the dough first. This is my grandma’s trick. The cheese melts and protects the dough from getting soggy. Doesn’t that sound clever?
Step 4: Spoon your tomato sauce right on top of the cheese. Add your favorite toppings next. I love mushrooms and olives. What’s your favorite topping? Share below! Then, bake your pizza on the bottom rack. This cooks the crust first.
Step 5: Check the bottom crust with a spatula. Is it golden and crisp? Good! If the top needs more color, move it to the top rack. Bake for just 2-3 more minutes. Your kitchen will smell amazing. Let it cool for a minute before slicing.
Creative Twists
Breakfast Pizza: Use white sauce, scrambled eggs, and crispy bacon.
Garden Party Pizza: Try a swirl of spinach pesto instead of tomato sauce.
Sweet & Savory: Top with figs, prosciutto, and a drizzle of honey after baking.
Which one would you try first? Comment below!
Serving & Pairing Ideas
Serve your pizza with a simple, crunchy salad. It’s a perfect match. For a real feast, add some herb-crusted roasted vegetables on the side. A cold glass of lemonade finishes it all off nicely. Which would you choose tonight?
Making Your Pizza Last
Let’s talk about keeping your pizza tasty. Cool leftovers completely before storing. Wrap slices tightly or use an airtight container. They will keep in the fridge for three days. You can also freeze slices for a month. Separate slices with parchment paper first. This stops them from sticking together.
I remember my first cast iron pizza. I put the whole hot pan in the fridge. The steam made the crust very sad and soft. Now I know to let it cool on the rack. Batch cooking is a wonderful trick. Make two pizzas and save one for later. It turns a busy night into a simple one.
Reheat slices in your hot oven or a skillet. This brings back the crispy crust. The microwave makes crusts rubbery. Storing food well saves money and time. It means a good meal is always close by. Have you ever tried storing it this way? Share below!
Simple Fixes for Common Hiccups
We all face little problems in the kitchen. Here are three easy fixes. First, a soggy crust. Always preheat your skillet with the oven. A hot pan starts the cooking fast. This gives you that perfect crispy bottom.
Second, cheese that burns before the crust browns. I once had a pizza with a pale bottom and black cheese. The fix is simple. Start your pizza on the oven’s bottom rack. Move it up only at the very end.
Third, dough that is hard to stretch. If it snaps back, walk away for five minutes. Let the dough relax. This patience makes everything easier. Fixing these issues builds your cooking confidence. It also makes your food taste so much better. Which of these problems have you run into before?
Your Quick Questions, Answered
How do I prevent my cast iron pizza crust from getting soggy?
Preheat your skillet in the hot oven first. A hot pan sears the dough immediately. This creates a barrier against moisture. Also, put the cheese down before the sauce. The cheese layer protects the dough from wet sauce. This trick works for many dishes, like a quiche without crust. Always cool your pizza on a wire rack, not in the pan.
What is the best flour for cast iron pizza dough?
Bread flour is the best choice for a chewy, strong crust. Its high protein content creates more gluten. This gives your dough great structure and a lovely chew. All-purpose flour will work in a pinch. For a special treat, try a recipe with a herb crusted idea mixed into the dough. The key is to knead your dough well until it’s smooth.
Should I preheat the cast iron skillet for pizza?
Yes, always preheat the cast iron skillet. This is the secret to a crispy bottom. Place the empty pan in the oven as it heats. The pan must be very hot before you add the dough. Carefully add oil and dough to the hot pan. This method is similar to starting a flaky galette on a hot surface. It makes all the difference.
How do I get a crispy bottom crust on cast iron pizza?
Use enough oil in the bottom of the hot pan. The oil fries the dough as it bakes. Start baking on the lowest oven rack. This puts the crust close to the heat source. Check it halfway through cooking. If it needs more color, leave it on the bottom rack longer. A fun fact: this technique is like making a Parmesan crusted fish bake for maximum crispiness.
Can I use store-bought dough for cast iron pizza?
Absolutely! Store-bought dough works perfectly. Let it sit at room temperature for an hour first. This makes it much easier to stretch. Do not worry about making dough from scratch. The hot cast iron will do the magic for you. You can focus on fun toppings instead. It is a great way to get a homemade pizza perfection result with less work.
How long should I cook pizza in a cast iron skillet?
Bake your pizza for 12 to 15 minutes at 450°F. Start on the bottom rack. Check at 12 minutes by lifting the edge with a spatula. Look for a deep golden-brown color. If the top needs more color, move it to the top rack for 2-3 minutes. Timing is key, just like with a crispy herbed crust on fish. Which tip will you try first?
From My Kitchen to Yours
I hope you love this pizza as much as I do. The cast iron makes it so special. It feels like a treat from a cozy restaurant. Cooking should be fun, not stressful. Remember, every meal is a chance to make a happy memory.
I would love to hear about your cooking adventure. Tell me what toppings you chose. Did your family enjoy it? Your stories are my favorite thing to read. Have you tried this recipe? Please share your thoughts in the comments below.
Happy cooking!
—Elowen Thorn

My Cast Iron Pan Pizza Recipe for Perfect Crust
Description
A simple guide to making a delicious, crispy-crusted pizza in a cast iron skillet.
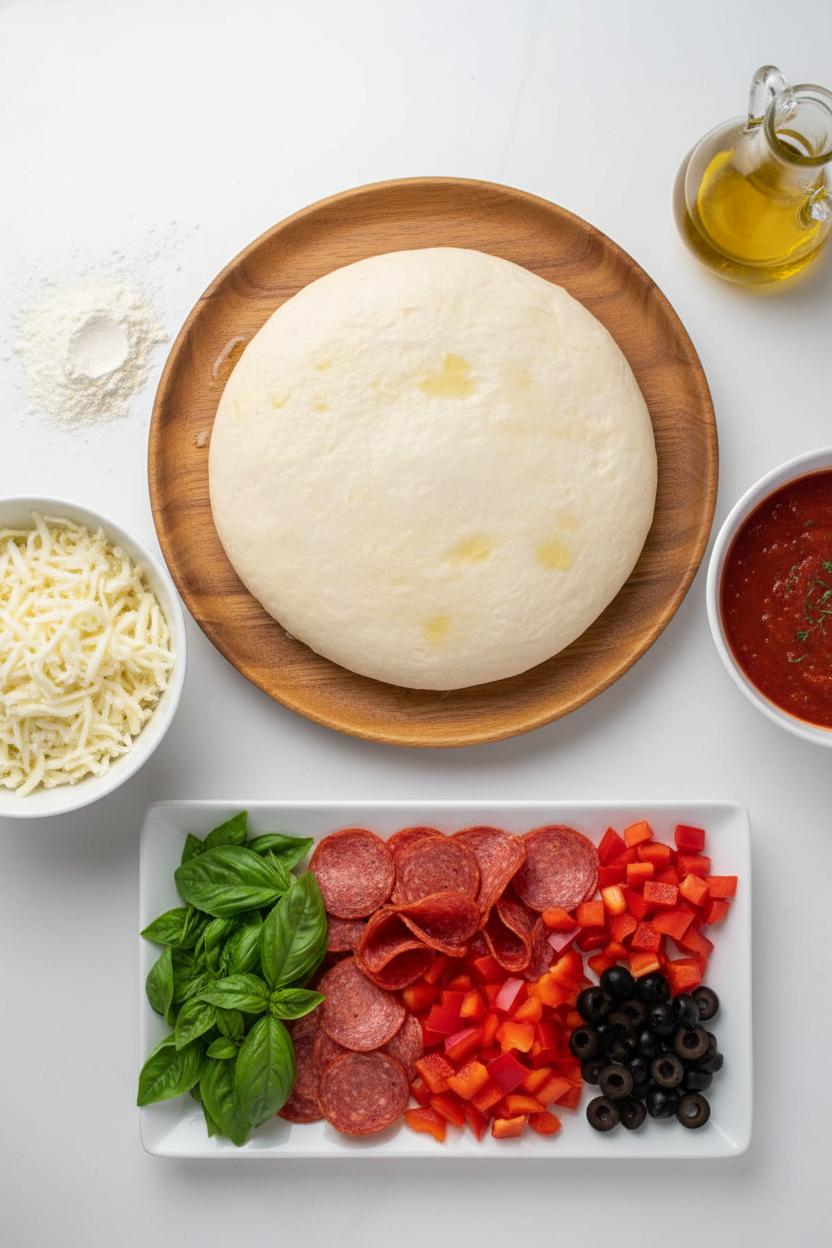
Ingredients
Instructions
- Before you start, move one oven rack to the very bottom and another to the top of your oven. Then preheat the oven to 450 F/230 C.
- Oil the bottom of the cast iron pan. Pour the oil into your cast iron pan and spread it evenly around the bottom and sides of the pan.
- Add the pizza dough. Gently stretch 12 ounces of dough to evenly fill the bottom of the pan. The dough should not go up the sides of the skillet.
- Layer the cheese. Sprinkle the shredded mozzarella cheese evenly on top of the dough. Make sure the cheese goes all the way to the edges of the dough.
- Add the sauce. Spoon your tomato sauce on top of the cheese.
- Add your favorite pizza toppings.
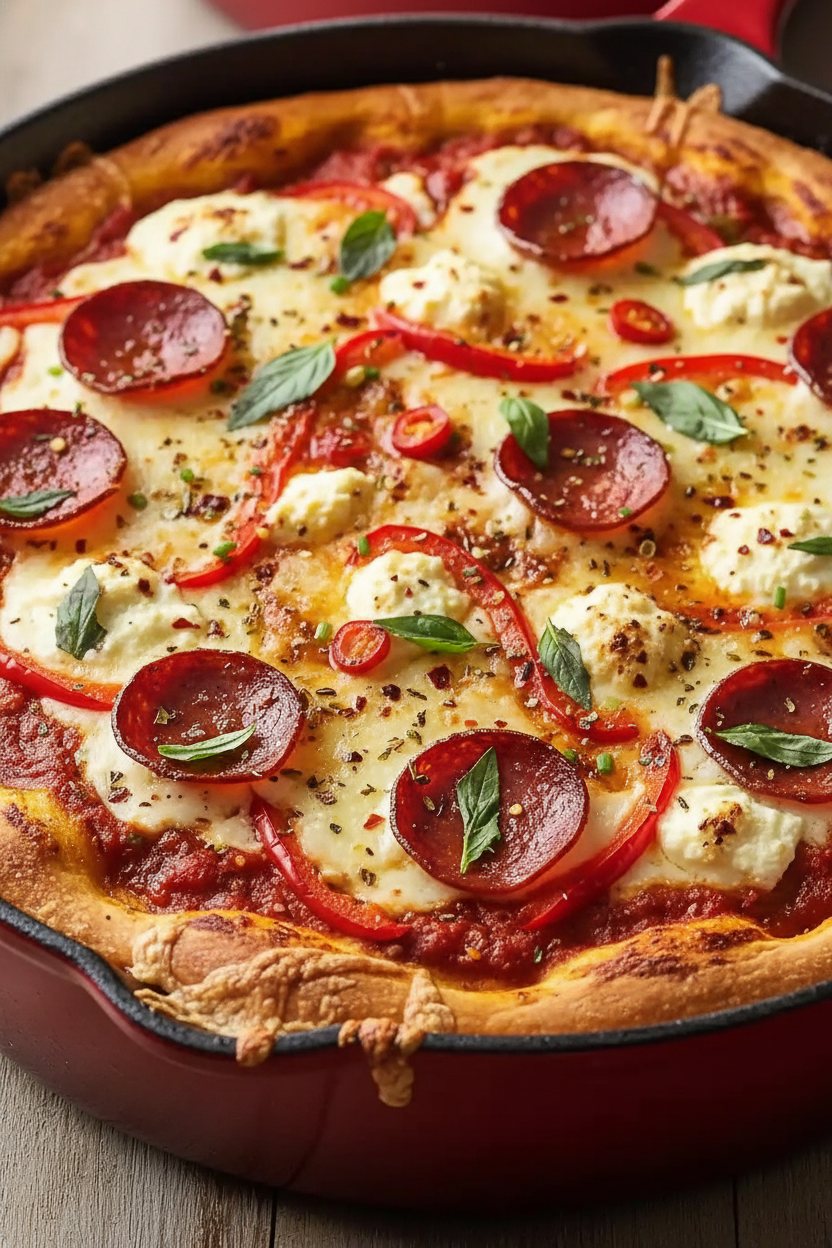
- Bake the pizza. Check if the crust is golden brown by lifting it up with a spatula. If needed, continue baking on the bottom rack until browned. If the top isn’t browning enough, place it on the top rack and bake for 2-3 minutes until the desired color.
Notes
- For a crispier crust, let the stretched dough rest in the oiled pan for 10-15 minutes before adding toppings. You can use store-bought or homemade dough.