

My Messy Easter Tradition
I first made this for my grandkids years ago. They called it “dirt cake.” I still laugh at that. It looked like a garden in a dish. But it tasted like sweet, creamy magic.
We made it together every spring. Little hands are best for crushing cookies. The mess was half the fun. What was your favorite messy kitchen memory as a kid?
Why The Layers Matter
This dessert is all about layers. The crunchy cookie dirt. The smooth, fluffy filling. The bright candy flowers on top. Each bite has a little of everything.
That mix of textures is important. It makes eating more fun. Food should be a joy for your mouth. *Fun fact: The first “dirt cake” recipes used gummy worms!* We use spring candies instead.
A Little Secret for the Filling
Let me tell you a secret. The filling must be light. Beat the cream cheese until it’s very smooth. No lumps allowed! Then fold in the whipped topping gently.
Folding keeps the air in. This makes the filling cloud-soft. It matters because a heavy filling would sink. We want it to sit fluffy on that cookie crust. Doesn’t that sound better?
The Magic of Waiting
This is the hardest step. You must wait. Cover the dish and walk away. Let it chill for two whole hours. I know, it’s tough!
But this wait matters. It lets the flavors get to know each other. The crust softens just a bit. The filling sets up perfectly. Do you think you can be patient, or will you peek?
Your Turn to Create
Now it’s your kitchen adventure. Crush those cookies with feeling. Sprinkle the candies like you’re planting a garden. Make it your own.
You could use different candies. Maybe try a chocolate pudding mix. What pastel candy would make you smile most on top? Share your idea with me. I love to hear them.
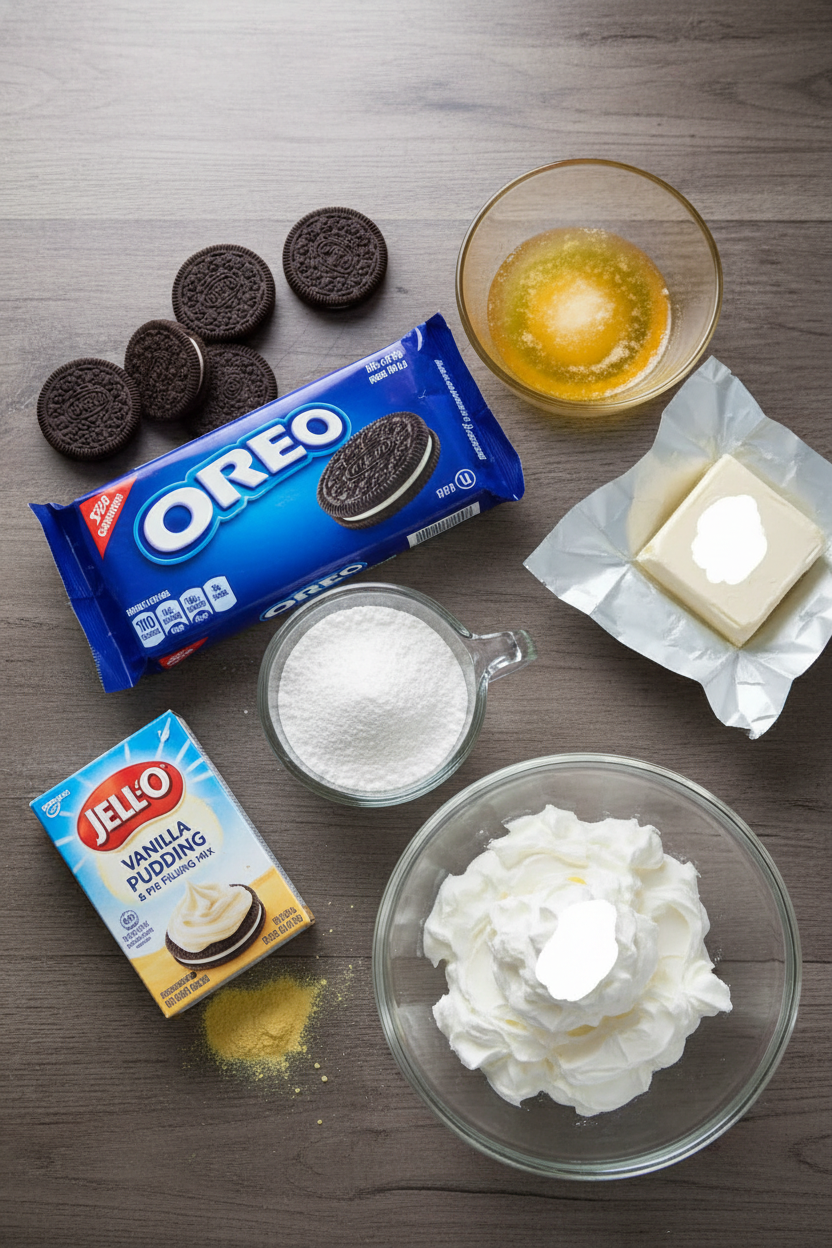
Ingredients:
| Ingredient | Amount | Notes |
|---|---|---|
| Oreo cookies | 14 oz (crushed) | Set aside 1/2 cup for topping |
| Cream cheese | 8 oz | Softened |
| Unsalted butter | 0.25 cup | Softened |
| Powdered sugar | 1 cup | |
| Instant vanilla pudding mix | 3.4 oz | |
| Cold milk | 2 cups | |
| Whipped topping (e.g., Cool Whip) | 8 oz | Thawed |
| Pastel candy coated chocolates (e.g., M&M’s) | 1 cup | For topping |
| Mini Oreo cookies | 0.5 cup | For topping |
Instructions
Step 1: First, crush those Oreos. I use a bag and a rolling pin. It’s fun! Press the crumbs into your dish. This is your garden dirt. Save a little pile for later. (A zip-top bag keeps the mess away.)
Step 2: Now, mix the cream cheese, butter, and sugar. Beat it until it’s super smooth. Then, gently fold in the whipped topping. Doesn’t that look like a fluffy cloud? Be gentle so it stays light.
Step 3: Whisk the pudding mix with cold milk. It will thicken right up! Let it sit for five minutes. Then, stir it into your creamy cheese mixture. This is the magic step. Why use cold milk? Share below!
Step 4: Spread your creamy filling over the dirt crust. Isn’t that pretty? Now, sprinkle your saved crumbs, mini Oreos, and candies. Make it look like a spring garden. I love the pop of pastel colors.
Step 5: Finally, cover it and let it rest in the fridge. Wait at least two hours. This is the hardest part! The wait makes it perfect. (Chilling it overnight is even better, trust me.)
Creative Twists
Bunny Burrows: Use a spoon to make little dips. Tuck a candy bunny inside each one.
Flower Garden: Use green coconut for grass. Add flower-shaped cookies on top.
Bird’s Nest: Make a nest with chow mein noodles. Place a few candy eggs in the center.
Which one would you try first? Comment below!
Serving & Pairing Ideas
Serve this on a bright plate. A little extra whipped cream on the side is lovely. For a real treat, pair it with a cold glass of milk. It’s also wonderful with fresh strawberries. The sweet and tart berries are perfect. Which would you choose tonight?
Keeping Your Spring Treat Fresh
Let’s talk about storing this lovely dessert. It must stay in the fridge, covered tight. Use plastic wrap or a lid. It will stay good for three to four days this way. You can also freeze it for a month. Just wrap the whole dish well in foil first.
I remember my first dirt cake. I left it out too long. The whipped topping wept! I was so sad. Now I never skip the chill time. Batch cooking is a lifesaver for busy springs. Making two means one is ready for surprise guests. It saves you time and stress.
Have you ever tried storing it this way? Share below!
Simple Fixes for Common Hiccups
First, a soggy crust. Press those cookie crumbs firmly. Use the bottom of a cup. This creates a solid barrier for the creamy filling. I once didn’t press enough. The filling mixed right into the crust! A firm press keeps layers distinct and tasty.
Second, lumpy filling. Your cream cheese and butter must be soft. Let them sit on the counter first. Beat them until completely smooth. This makes the dessert luxuriously creamy. Smooth filling feels special and is easier to spread. It builds your kitchen confidence.
Third, runny pudding. Always use cold milk. Whisk it well and let it sit. This waiting time lets the pudding thicken properly. A thick pudding holds the layers together. This matters for perfect, neat slices every single time.
Which of these problems have you run into before?
Your Quick Questions, Answered
What is the best way to make Oreo pastel dessert?
Follow the recipe steps closely. First, make a firm crust with crushed Oreos. Next, blend the creamy cheese layer until smooth. Then, prepare the pudding separately with cold milk. Finally, fold it all together and chill. The key is letting it set in the fridge for two hours. This allows all the wonderful layers to firm up perfectly for slicing.
Can I use different cookies for a pastel dessert?
Yes, you certainly can try other cookies. Golden Oreos or chocolate sandwich cookies work well. The fun fact is that the original “dirt cake” used chocolate pudding and Oreos to look like garden soil. For a spring look, vanilla pudding and pastel candies are perfect. Just make sure your cookies crush nicely. They need to form that all-important base layer for your treat.
How do you keep a creamy Oreo dessert from getting soggy?
Two simple steps prevent sogginess. First, press the cookie crust down very firmly. Second, serve the dessert with the toppings added just before eating. If you store it with candies on top, they might bleed color. Keep the creamy filling covered until you are ready to serve. This keeps the texture delightful and the colors bright for your guests.
What are some variations of the no-bake Oreo dessert?
You can create many fun versions. Use chocolate pudding instead of vanilla. Try a layer of sliced strawberries or bananas. Swap the candies for crushed peppermints at Christmas. You could even make individual cups instead of one big dish. Let your imagination guide you with flavors and colors. The no-bake method makes it easy to experiment with different tasty ideas.
Can Oreo pastel dessert be made ahead of time?
It is an excellent make-ahead dessert. You must make it at least two hours early to set. I often make mine the night before a gathering. Cover it well and keep it chilled. Add the final candy toppings right before you bring it to the table. This plan makes your day easier and your dessert perfectly set.
How many layers does a traditional Oreo pastel dessert have?
A traditional version has three main layers. First, the crushed Oreo cookie crust. Second, the creamy filling of cheese and pudding. Third, the crumb and candy topping. Some recipes add extra layers inside the cream. But the classic structure is simple and satisfying. Each bite gives you crunch, cream, and a sweet candy surprise.
Which tip will you try first?
From My Kitchen to Yours
I hope you love making this spring treat. It always brings smiles to my table. Cooking is about sharing joy and sweet moments. I would love to hear about your baking adventures.
Have you tried this recipe? Tell me all about it in the comments below. Did your family enjoy it? What fun variations did you create? Your stories are my favorite thing to read.
Happy cooking!
—Marina Caldwell

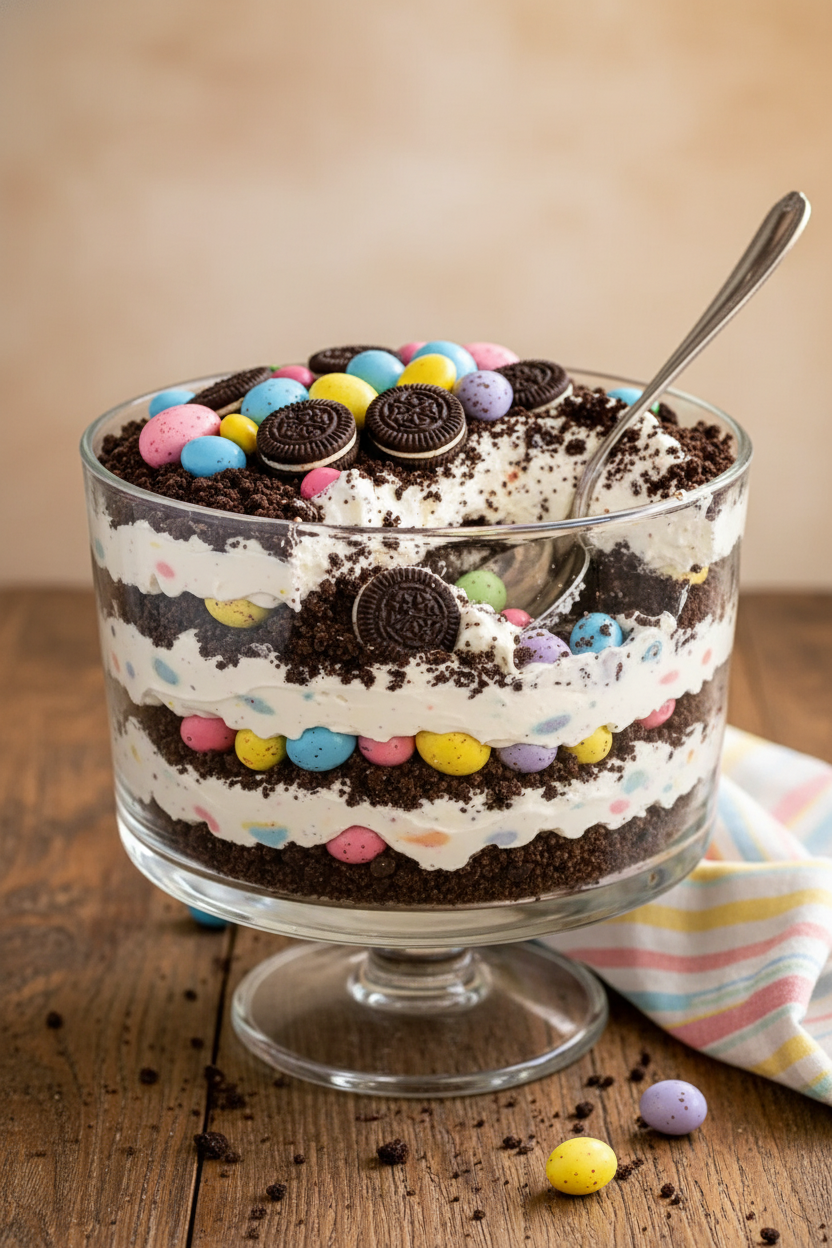
My Favorite Creamy Oreo Pastel Dessert
Description
A delightful no-bake dessert with an Oreo crust, creamy cheesecake and pudding filling, topped with mini Oreos and pastel candies.
Ingredients
Instructions
- Crush all Oreo cookies and set aside 1/2 cup of crumbs for topping. Press the remaining crumbs into a 9×13 inch dish to form the crust.
- Beat softened cream cheese, butter, and powdered sugar until smooth. Fold in the whipped topping until light and fluffy.
- Whisk the pudding mix with cold milk until thickened. Let rest five minutes, then fold into the cream cheese mixture.
- Spread the filling over the crust. Sprinkle with reserved crumbs, mini Oreos, and pastel candies.
- Cover and refrigerate at least two hours to set.
Notes
- For a firmer crust, you can mix the Oreo crumbs with a tablespoon of melted butter before pressing into the dish.