

The First Crunch
Let’s start with the crust. It is the foundation of our treat. Mix those graham cracker crumbs with melted butter and sugar. It will feel like wet sand. I love that feeling. Press it into your dish firmly. This matters because a strong crust holds everything up. No one wants a dessert that falls apart!
Now, pop it in the fridge. Chilling it for ten minutes makes it set. This small wait is worth it. It makes the next layer so much easier to spread. Do you like a thick crust or a thin one? I always go for thick.
The Heart of the Matter
The peanut butter layer is the heart. Beat the cream cheese until it’s smooth. Then add the peanut butter and sugar. The smell is so good. Doesn’t that smell amazing? Gently fold in the whipped topping. This keeps it light and fluffy.
My grandson calls this “cloud cream.” He once tried to eat it straight from the bowl. I still laugh at that. Spread this creamy heart over your cold crust. Why does this matter? This creamy layer makes the dessert rich but not too heavy. It’s the perfect middle.
A Silky Chocolate Blanket
Next is the chocolate ganache. It sounds fancy, but it’s simple. Heat the cream until it’s steaming. Pour it over the chocolate chips. Let it sit for two minutes. Then stir. It will become a silky, glossy blanket.
*Fun fact: This method is called “ganache.” French chefs made it long ago.* Let the chocolate cool just a little. Then pour it over the peanut butter cloud. Tilt your dish to help it spread. This shiny top makes the dessert look so special.
The Hardest Part
Now comes the hardest part. Waiting. You must refrigerate it for four hours. Overnight is even better. This wait matters most of all. It lets all the layers become friends. They firm up and the flavors blend.
I know it’s tempting to peek. But trust me, good things come to those who wait. What’s your favorite topping? Chopped peanuts add a nice crunch. Mini Reese’s pieces are fun too. Tell me what you would sprinkle on top.
Sharing the Joy
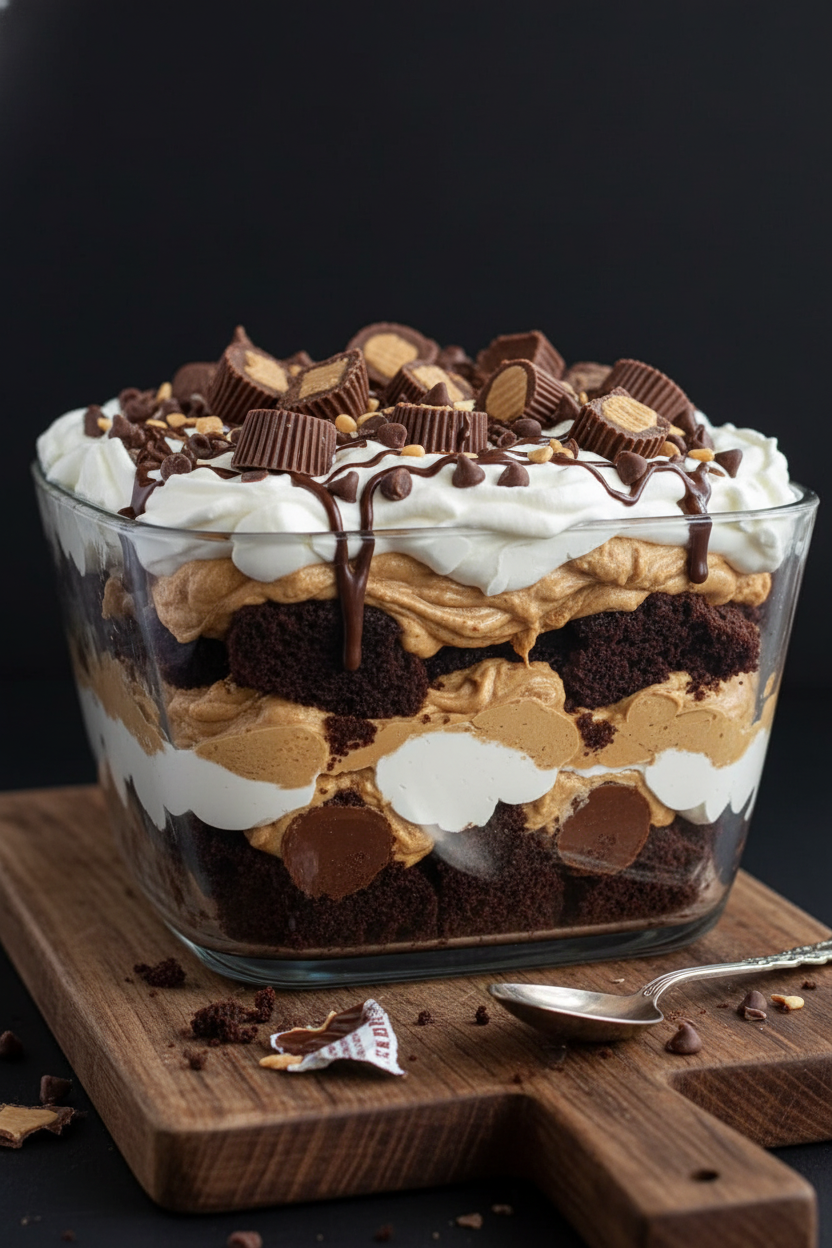
Finally, it’s time to cut and serve. Use a sharp knife. Wipe it clean between cuts for neat squares. Each piece has the crunch, the cream, and the chocolate. It’s a perfect bite.
Food is meant to be shared. This dessert always brings smiles. It’s a simple way to show someone you care. Did you make this for a special person or a special day? I’d love to hear your story. Now, go enjoy your heaven in a bowl.
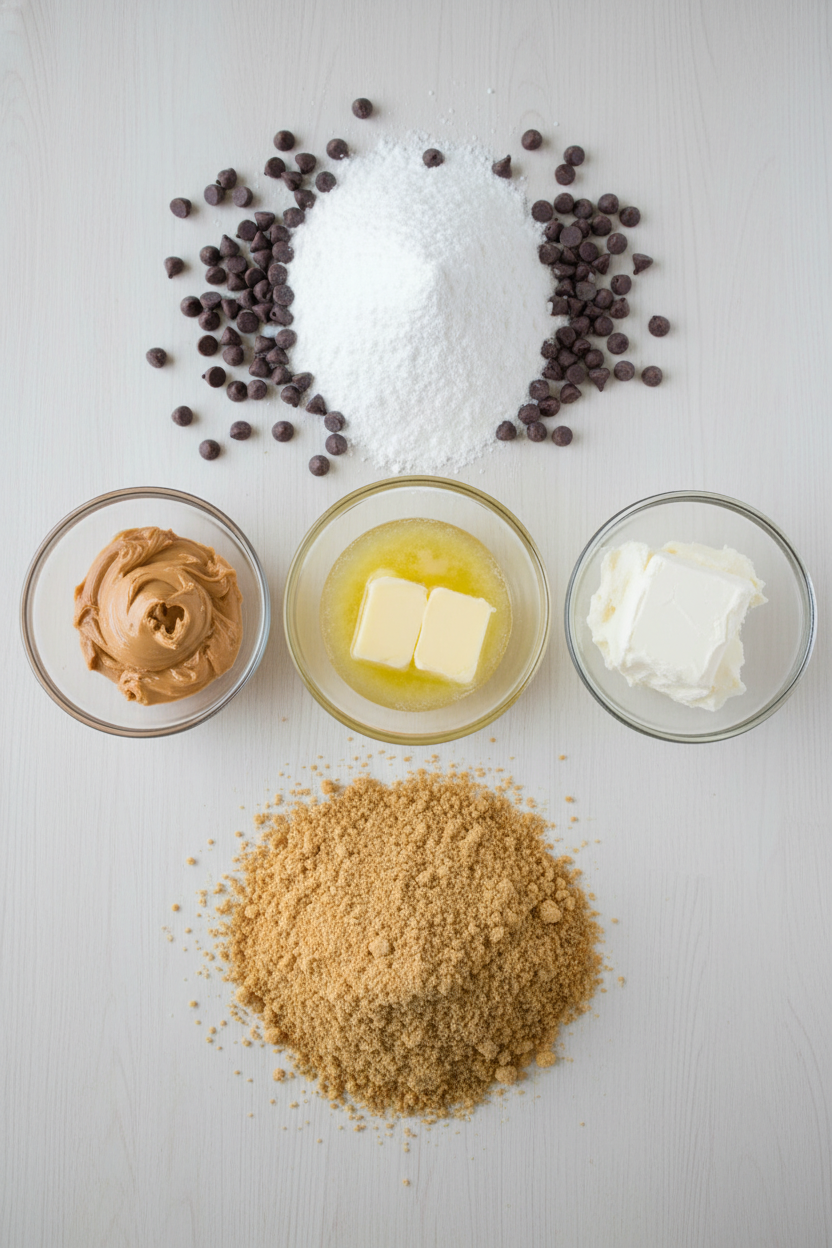
Ingredients:
| Ingredient | Amount | Notes |
|---|---|---|
| Graham cracker crumbs | 2 cups | For the crust |
| Melted butter | ½ cup | For the crust |
| Granulated sugar | ¼ cup | For the crust |
| Creamy peanut butter | 1 cup | For the peanut butter layer |
| Cream cheese | 8 oz | Softened; for the peanut butter layer |
| Powdered sugar | 1 cup | For the peanut butter layer |
| Vanilla extract | 1 tsp | For the peanut butter layer |
| Whipped topping (e.g., Cool Whip) | 1½ cups | For the peanut butter layer |
| Semi-sweet chocolate chips | 1 cup | For the ganache |
| Heavy cream | ½ cup | For the ganache |
| Chopped peanuts | As desired | Optional topping |
| Mini Reese’s pieces or cups | As desired | Optional topping |
| Chocolate curls or drizzle | As desired | Optional topping |
Instructions
Step 1: First, make your crunchy crust. Mix the crumbs, melted butter, and sugar in a bowl. Press it firmly into your dish. I always use my fingers for this. Chill it for ten minutes. This little wait makes the crust strong. (A good tip: use the bottom of a cup to press it flat.)
Step 2: Now for the creamy dream! Beat the peanut butter and soft cream cheese together. Add the powdered sugar and vanilla. Doesn’t that smell amazing? Gently fold in the whipped topping. Spread this fluffy cloud over your crust. Try not to eat it all with a spoon!
Step 3: Time for magic chocolate. Heat the cream until it’s steaming hot. Pour it right over the chocolate chips. Let it sit for two whole minutes. Then, stir slowly until it’s glossy and smooth. Let it cool a tiny bit. What’s this silky mix called? Share below!
Step 4: Pour your slightly cooled ganache over the peanut butter. Spread it gently to the edges. I still laugh at that time I was too eager. I poured it hot and made a mess! Now, the hard part begins. You must be patient.
Step 5: Pop the whole dish into the fridge. Let it chill for at least four hours. Overnight is even better for perfect slices. Before serving, add your favorite crunchy toppings. Then, just cut and enjoy your heaven in a bowl!
Creative Twists
Cookie Crust: Swap graham crackers for crushed Oreos or vanilla wafers. Fruity Swirl: Add a layer of strawberry jam under the peanut butter. Salted Caramel Drizzle: Top the ganache with a ribbon of salty-sweet caramel. Which one would you try first? Comment below!Serving & Pairing Ideas
Serve each square with a dollop of fresh whipped cream. A few raspberries on the side add a lovely, tart bite. For a real treat, pair it with a cold glass of milk. It’s the perfect partner for that rich chocolate. Which would you choose tonight?
Keeping Your Treats Tasty
Let’s talk about keeping your bars perfect. They need the fridge, always. Cover the dish tightly with plastic wrap. This keeps other food smells out. I learned this the hard way. My first batch tasted like onions! Not a good mix with peanut butter.
You can freeze them for a sweet surprise later. Cut them into squares first. Wrap each piece in plastic, then put them in a bag. They will keep for two months. Thaw them in the fridge overnight. This batch-cooking trick saves time for busy days.
Having a ready-made dessert matters. It brings a little joy on a tough day. It means you can share sweetness anytime. Have you ever tried storing it this way? Share below!
Simple Fixes for Common Hiccups
First, a soggy crust. Make sure your butter is fully melted. Press the crumbs in firmly. I remember a crumbly mess from not pressing enough. A firm press gives you a solid base.
Second, a lumpy peanut butter layer. Your cream cheese must be soft. Leave it on the counter for an hour. Beat it well before adding other things. This makes everything smooth and dreamy.
Third, a ganache that seizes. Your cream should be hot but not boiling. Just steam it gently. Pour it over the chips and wait. Patience makes it glossy. Fixing small issues builds your kitchen confidence. It also makes every bite taste just right. Which of these problems have you run into before?
Your Quick Questions, Answered
How to make no-bake peanut butter bars?
You mix a crust from crumbs, butter, and sugar. Press it in a dish. Then make a creamy peanut butter layer with cream cheese and whipped topping. Finally, make a simple chocolate ganache with hot cream and chips. Pour it on top. Chill everything for hours until set. No oven needed for this easy, delicious dessert.
What is the best chocolate for ganache?
Use good quality semi-sweet chocolate chips. They melt smoothly. You can also chop a chocolate bar. Avoid chocolate with wax in it. The better the chocolate, the richer your ganache will taste. It makes the whole dessert feel special and luxurious without much extra work at all.
Can I use natural peanut butter for no-bake bars?
I do not recommend natural peanut butter here. The oil separates and can make the layer greasy. It might not set properly. Use a regular creamy peanut butter. It is stabilized and gives you the perfect, firm texture you want for these delicious no-bake bars every single time.
How do you set ganache without baking?
Ganache sets in the refrigerator. The cold makes the cocoa butter in the chocolate firm up. Pour the warm ganache over your bars. Then let the whole dish chill for at least four hours. Overnight is even better. The cold does all the work for you, no heat needed.
How long do no-bake peanut butter bars last?
They last up to five days in the fridge. Keep them covered tightly. The crust may get a little softer after day three. For the best taste and texture, enjoy them within the first few days. That is when the layers are perfectly distinct and delicious.
Can you freeze peanut butter chocolate ganache bars?
Yes, you can freeze them very well. Cut them into squares first. Wrap each piece tightly in plastic wrap. Place them in a freezer bag. They will keep for about two months. Thaw in the refrigerator overnight before serving. This is a great way to plan ahead for parties.
*Fun fact: Graham crackers were originally created to be a healthy, bland food!* Which tip will you try first?
From My Kitchen to Yours
I hope you love making these bars. They are a favorite in my house. My grandkids always ask for them. Sharing food is sharing love.
I would love to hear about your kitchen adventures. Tell me how it went for you. Your stories make my day. Have you tried this recipe? Let me know in the comments below.
Happy cooking!
—Elena Rutherford
