

My First Key Lime Pie
I made my first key lime pie at age ten. I used regular limes. My grandma smiled anyway. She said the love was the secret ingredient. I still laugh at that.
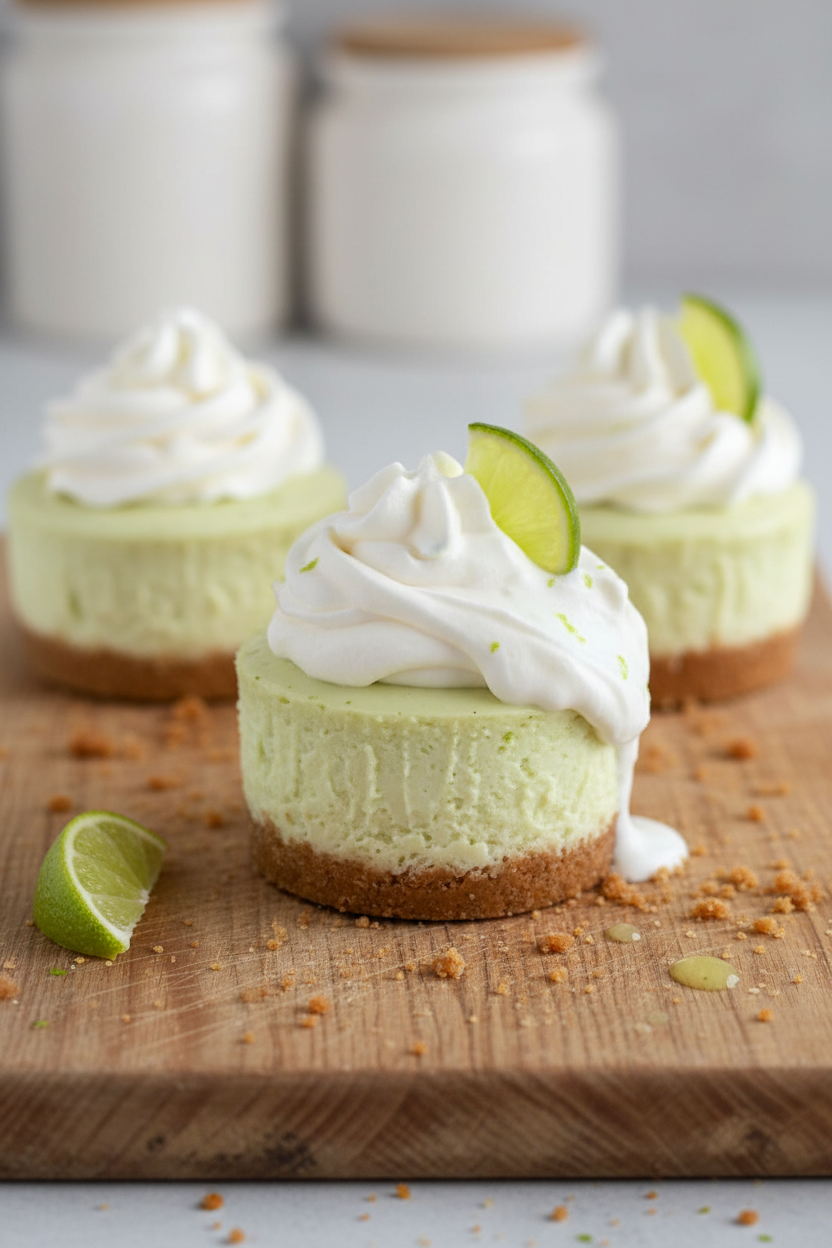
Now, I make mini cheesecakes instead. They are perfect for small hands. Everyone gets their own little sunshiny dessert. That matters. Food made with joy tastes better.
The Magic of the Crust
Let’s talk about the crunchy bottom. Graham crackers are the best for this. Crush them up fine. Mix them with melted butter and a bit of sugar.
Press the crumbs down hard in the pan. This makes a strong base. It holds our creamy filling up. Do you like a thick or a thin crust best? Tell me your favorite part.
Sunshine in a Bowl
Now for the good part. Beat the cream cheese until it’s smooth. Add sour cream and sugar. Then comes the sunshine! That’s the key lime juice and zest.
*Fun fact: Key limes are smaller and yellower than regular limes. They grow in Florida. They have a special, tangy taste.
Add one drop of green food dye. It makes them look like a spring day. Doesn’t that smell amazing? Mix in the egg last, just until combined.
A Lesson in Patience
Baking teaches us to wait. These little cakes bake fast. But then they must cool. Then they must chill in the fridge for hours.
This waiting matters. It lets the flavors become friends. It makes the texture just right. It is hard to wait, I know. What do you do while you wait for treats to cool?
Your Turn to Share
I love sharing food with friends. These mini cheesecakes are perfect for that. They are little bites of happiness. Making them together is even more fun.
Will you try this recipe? If you do, will you use key limes or regular ones? Share a picture of your baking adventure with me. I would love to see it.
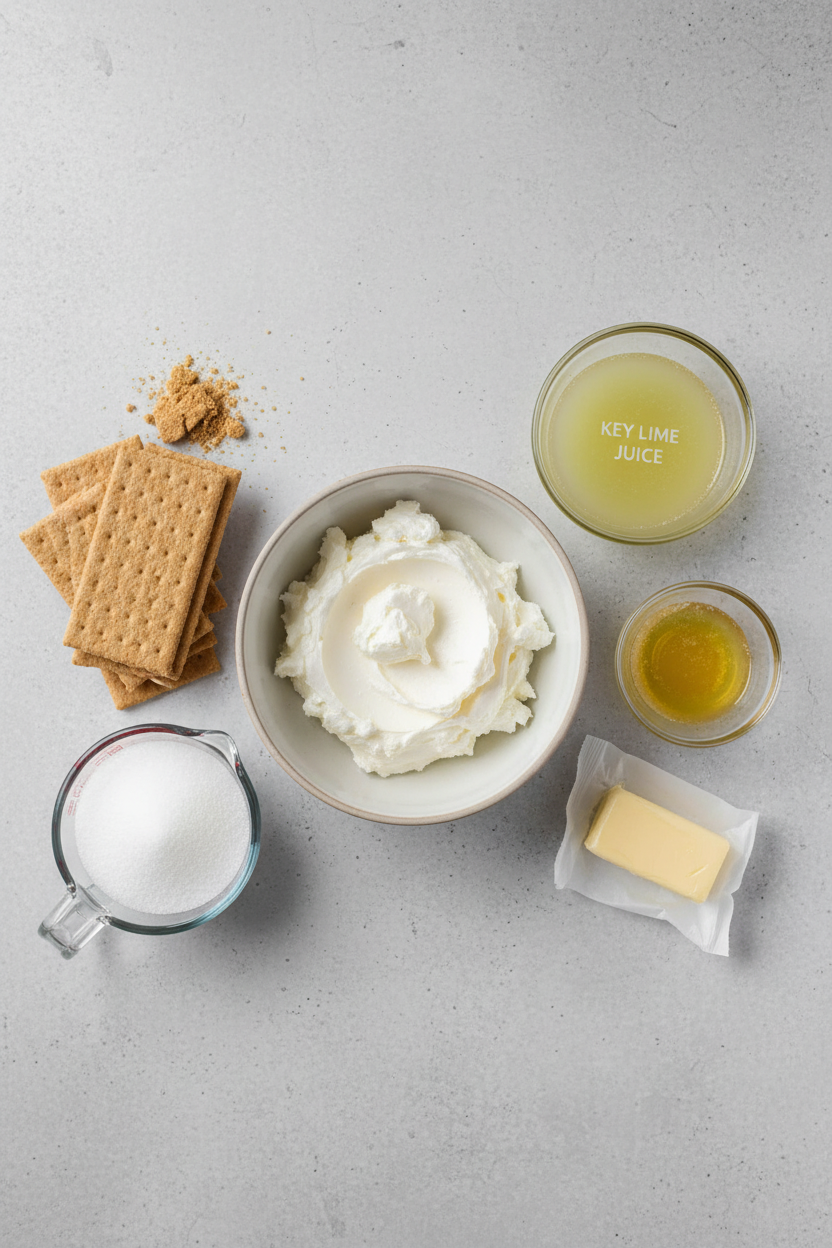
Ingredients:
| Ingredient | Amount | Notes |
|---|---|---|
| Graham crackers (full-sheets) | 6 sheets (90g) | Or ¾ cup graham cracker crumbs |
| Butter, melted | 3 tbsp (45g) | For the crust |
| Granulated sugar (for crust) | 2 tbsp (25g) | For the crust |
| Cream cheese, brick-style | 12 oz | Softened to room temperature |
| Sour cream | ¼ cup (60g) | |
| Granulated sugar (for filling) | ½ cup (100g) | For the cheesecake filling |
| Key lime juice | 3 tbsp (45ml) | |
| Key lime zest | 1 tsp | Regular lime zest can be substituted |
| Vanilla extract | 1 tsp | |
| Green food dye | 1 drop | Optional, for color |
| Large egg | 1 | Room temperature |
Instructions
Step 1: First, let’s make our crust. Crush the graham crackers into fine crumbs. Mix them with the melted butter and sugar. Press this sandy mix firmly into your pan cups. (A small glass helps press it flat!) Bake them for just 5 minutes. Doesn’t that smell amazing already?
Step 2: Now for the creamy filling. Beat the soft cream cheese until it’s super smooth. Add the sour cream, sugar, and key lime juice. A little green food dye makes it look like spring! Finally, mix in the egg on low. Why do we add the egg last? Share below!
Step 3: Spoon the filling onto your cooled crusts. Bake them for about 15 minutes. The tops should look set, not wobbly. I always watch them like a hawk. (Overbaking makes them crack, so be gentle!) Let them cool on the counter for an hour.
Step 4: Patience is the hardest part! Cover the pan and chill it in the fridge. Wait at least 3 hours, or overnight. This makes them perfectly firm and cool. My grandson tries to peek every time. Finally, pop them out and enjoy your little bites of sunshine.
Creative Twists
Swap the crust for crushed vanilla wafers or ginger snaps.Skip the food dye and add a tiny mint leaf on top.
Make them frozen by popping them in the freezer for a cool treat.
Which one would you try first? Comment below!
Serving & Pairing Ideas
Serve these on a pretty plate with extra lime zest sprinkled on top. A dollop of whipped cream makes them extra special. For a fun party, let everyone top their own with berries or a drizzle of honey. They’re perfect with a glass of cold lemonade on a warm day. Which would you choose tonight?
Keeping Your Little Cheesecakes Happy
These mini cheesecakes love the cold. Store them in an airtight container in the fridge. They will stay perfect for three to four days. You can also freeze them for a sweet surprise later. Just wrap each one tightly in plastic wrap first. Then, place them all in a freezer bag.
To reheat, let a frozen cheesecake thaw in the fridge overnight. I remember my first batch. I left them on the counter too long. They got a little too soft. The fridge is truly their best friend. Batch cooking these is a wonderful idea. Making a double batch takes little extra time. It means you always have a treat ready for guests.
This matters because good food should bring joy, not stress. Having a dessert ready in your freezer is a small gift to your future self. Have you ever tried storing it this way? Share below!
Three Tiny Troubles, Fixed
First, a soggy crust. Press your crumbs down very firmly. Use the bottom of a small glass to help you. A solid pack is the secret. I once rushed this step. The crust crumbled everywhere when we ate it.
Second, cracked tops. Do not over-mix the filling once you add the egg. Mix on low speed until it is just combined. Over-mixing puts too much air in the batter. This matters because a smooth top makes your dessert look lovely and professional.
Third, cheesecakes that stick. Always spray your pan well with nonstick spray. Lining with cupcake liners makes removal foolproof. This simple step builds your confidence. You know your treats will come out perfectly. Which of these problems have you run into before?
Your Quick Questions, Answered
Can I use regular limes instead of key limes?
Yes, you absolutely can. The flavor will be slightly different but still delicious. Key limes are a bit more tart and aromatic. Regular Persian limes are more common and easier to find. Use the same amount of juice and zest from your regular limes. Your cheesecakes will be wonderfully tangy and bright. It is a perfect substitute when you are in a pinch.
What is the secret to a graham cracker crust that doesn’t fall apart?
The secret is in the packing. After you divide the crumbs, press them down very hard. Use a small glass or measuring cup to compact them. You want a firm, even layer. The melted butter acts like glue to hold it together. A well-packed crust bakes into a solid base. This keeps your cheesecake stable and easy to eat with your fingers.
Can I make these mini cheesecakes ahead of time?
They are an excellent make-ahead dessert. In fact, they need time to chill and set. You can bake them one or two days before you need them. Just keep them covered tightly in the refrigerator. The flavor even gets better as it sits. This makes them perfect for parties. You can do all the work early and enjoy the day.
How do I prevent my cheesecakes from cracking on top?
The main trick is to not over-mix the batter. Once you add the egg, mix on low speed. Mix only until the egg disappears into the batter. Too much air causes cracks as it bakes. Also, do not over-bake them. They are done when the tops look set. A little jiggle in the center is just fine. They firm up as they cool.
Can I make this recipe without a mixer?
You can, but it takes some arm power. Make sure your cream cheese is very soft. Use a sturdy whisk or a large fork. Mash and stir until it is completely smooth. Then whisk in the other ingredients. It is a great workout. The goal is a lump-free filling. A *fun fact*: people made cheesecakes for centuries before electric mixers were invented.
How long do mini cheesecakes need to chill before serving?
They need at least three to four hours in the fridge. Overnight is even better. This chilling time is not just to make them cold. It allows the structure to set properly. This gives you that classic creamy, firm cheesecake texture. If you serve them too soon, they will be too soft. Patience makes them perfect. Which tip will you try first?
From My Kitchen to Yours
I hope you love making these little bites of sunshine. They always remind me of summer afternoons. Sharing food is one of life’s simplest joys. I would love to hear about your baking adventure.
Tell me all about it in the comments. Have you tried this recipe? Did your family enjoy them? Your stories are my favorite thing to read. Thank you for spending this time with me in my kitchen.
Happy cooking!
—Grace Hollander.
