

My Fancy Chocolate Surprise
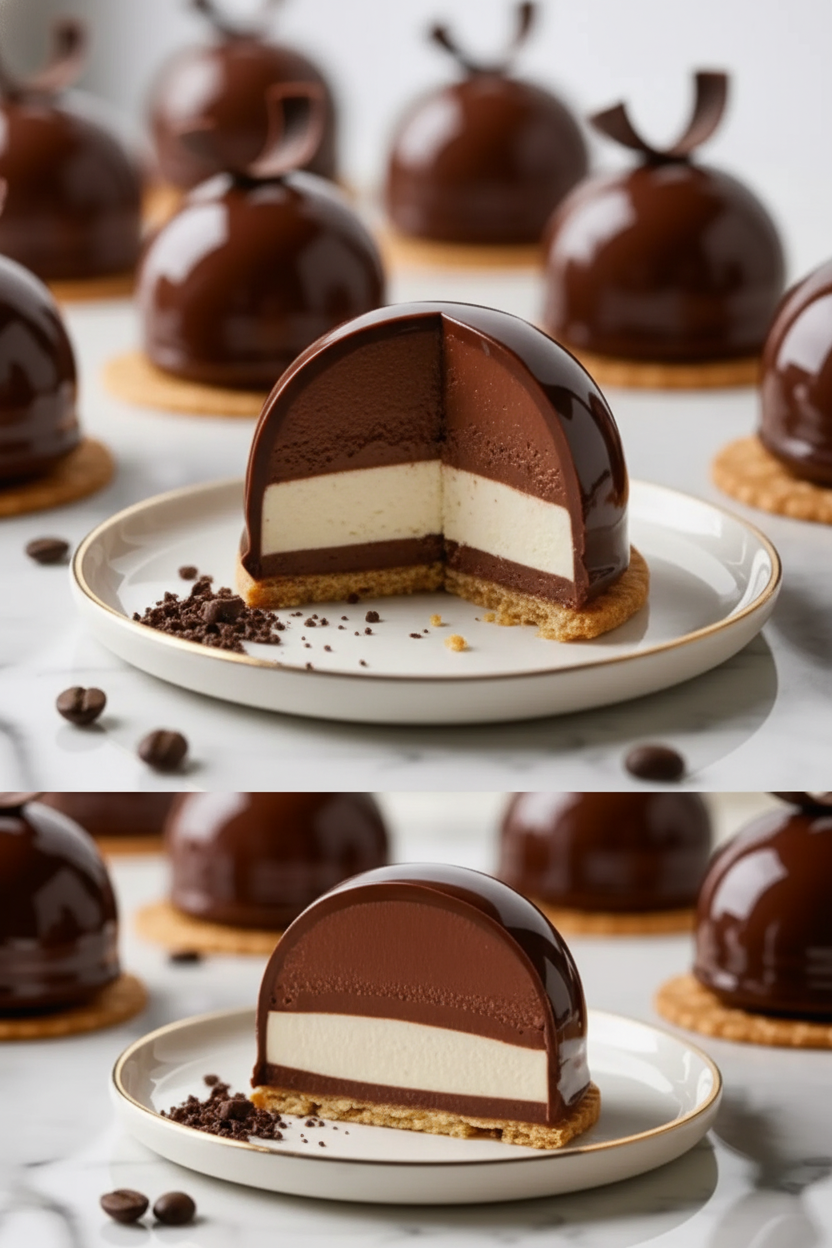
This dessert looks like a jewel. It is a smooth chocolate dome with a shiny coat. Inside, a creamy mascarpone heart waits. It is a special treat, perfect for making someone feel loved. I first had one at my niece’s wedding. I knew I had to learn to make it myself.
Why does this matter? Because food is more than eating. It is about creating a moment of joy. A beautiful dessert can turn a regular Tuesday into a celebration. Do you have a dessert that makes you feel celebrated? I would love for you to share your favorite treat with me.
The Secret is in the Layers
We start with two mousses. One is deep, dark chocolate. The other is sweet, soft mascarpone cheese. You layer them in a little round mold. The key is to freeze it solid. This makes the magic possible later. I still laugh at my first try. My layers were all wobbly!
*Fun fact*: Mascarpone is an Italian cream cheese. It is much softer and sweeter than the kind you put on a bagel. It makes the filling so silky. When you bite in, the mix of strong chocolate and gentle cream is wonderful. It reminds me of another rich chocolate dessert I adore.
The Cookie Crunch
Every fancy dome needs a base. We use simple digestive biscuits. You crush them and mix with melted butter. It makes a perfect little crunchy plate. This is so important. It gives your spoon something to push against. Without it, the creamy dome might just slide away!
Why does this matter? Texture is everything in a good bite. You want smooth, cold, creamy, and crunchy all at once. It makes your mouth happy. A good base is key for many desserts, like a flaky apple kringle or even a savory glazed chicken. What is your favorite crunchy-and-creamy food combo?
The Magic Mirror Glaze
Now for the real fun. The mirror glaze is like a shiny, chocolate raincoat. You pour it over the frozen dome. It flows down and sets like glass. The secret is getting the temperature just right. Not too hot, not too cold. Doesn’t that sound like a science experiment?
It is easier than it looks, I promise. The glaze uses gelatin to set. This gives it that perfect glossy finish. It is the same idea used in other glazes, like on strawberry angel cakes. When you see that shiny shell, you will feel so proud.
Putting It All Together
Take your glazed dome. Place it gently on the cookie base. And there you have it. Your own little masterpiece. Let it thaw in the fridge before serving. The mousse will become soft and dreamy inside its shiny shell.
The best part is sharing it. Watch someone’s eyes light up when they see it. Then watch them smile when they taste it. That is the real reward. Do you think you’ll try the shiny glaze on other desserts, like apple fritters or a simple apple cinnamon cake? Tell me what you create!

Instructions
Step 1: First, let’s make the chocolate mousse. Melt the dark chocolate gently until it’s smooth. Let it cool a bit. Whip the cream until it’s fluffy like a cloud. (Tip: fold, don’t stir, to keep it airy!) Gently mix the chocolate and cream together. Doesn’t that smell amazing? Put it in the fridge to wait.
Step 2: Now for the mascarpone mousse. Mix the mascarpone cheese with powdered sugar and vanilla. In another bowl, whip more cream. Fold them together gently. I still laugh at the time I used a whisk and made a mess! This mixture is so creamy and dreamy. Transfer it to a piping bag.
Step 3: Time to build our domes! Use half-sphere molds. Pipe some chocolate mousse in first. Tap the mold to settle it. Add a dollop of mascarpone mousse right in the center. Cover it with more chocolate mousse. Smooth the top and freeze them solid. This step needs patience, my dears.
Step 4: Make the cookie base while they freeze. Crush biscuits into fine crumbs. Mix the crumbs with melted butter until it’s like wet sand. Press it flat on a tray and chill. Then, cut out circles to fit your domes. It’s like making edible plates! Keep them cold. A good base makes any dessert special.
Step 5: The magic mirror glaze is next. Sprinkle gelatin over cold water to bloom it. Heat sugar, syrup, water, and cream until warm. Pour it over chopped chocolate and stir. Finally, mix in the gelatin until clear. Let it cool to body temperature. Why do we let the glaze cool? Share below! This gives it that shiny, perfect coat.
Step 6: The grand finale! Unmold your frozen domes. Place them on a wire rack. Pour the warm glaze over each one. Watch it flow down like a shiny blanket. Let the extra drip off. Carefully place each glazed dome on a cookie base. A glossy finish always feels fancy. Refrigerate until you’re ready for pure joy.
Creative Twists
Orange Dream: Add a little orange zest to the mascarpone mousse. It’s a sunny, bright surprise.
Berry Heart: Hide a single frozen raspberry in the center of each dome.
Cookie Crunch: Mix mini chocolate chips into the cookie base for extra texture.
Which one would you try first? Comment below!
Serving & Pairing Ideas
Serve each dome on a pretty plate. A few fresh berries on the side look lovely. A little mint leaf adds a pop of green. For a real treat, a drizzle of caramel sauce pairs beautifully with the chocolate. You could also offer a cup of milky coffee or herbal tea. It cuts the richness just right. Which would you choose tonight?
Keeping Your Domes Dreamy
Let’s talk about storing these lovely domes. They need to stay cold. Once glazed, keep them in the fridge for up to three days. Cover them loosely so the shiny glaze can breathe. For longer storage, freeze them unglazed. Wrap each frozen dome tightly in plastic wrap. They will keep for a month this way.
I remember my first batch. I left them uncovered. The beautiful shine turned dull and sticky. It was a sad kitchen day. Now I always use a cake dome or loose foil. This little step protects your hard work. It keeps your dessert looking elegant and ready for guests.
Batch cooking the mousse fills is a great idea. Make a double batch and freeze the extras. Future you will be so thankful on a busy day. This matters because good food should make life easier, not harder. Have you ever tried storing it this way? Share below! You can find more make-ahead tips for chocolate desserts online.
Simple Fixes for Common Hiccups
First, a runny mousse. If your mix won’t hold shape, it’s likely under-whipped. Your cream needs soft, billowy peaks. I once added cream too early to warm chocolate. It made a soupy mess. Let your melted chocolate cool a bit first. This ensures your mousse is fluffy and pipeable.
Second, bubbles in your dome. After piping, always tap the mold firmly. Do this on your countertop. It settles the mousse and pushes air out. This matters for a smooth, professional look. No one wants holes in their beautiful dessert.
Third, a glaze that won’t drip. If it’s too thick, it clumps. The temperature is key. Let it cool to body warmth, like a baby’s bottle. This gives you that perfect, glossy coat. Getting this right builds your confidence. Which of these problems have you run into before? A perfect glaze is just like the one on these teriyaki chicken thighs.
Your Quick Questions, Answered
How to make a chocolate mirror glaze?
Bloom gelatin in cold water. Heat sugar, glucose, water, and cream until hot. Pour this over chopped chocolate and stir smooth. Mix in the bloomed gelatin until it melts. Cool the glaze to body temperature before using. This gentle heat helps it flow like silk over your frozen domes for that famous shine.
What is the best recipe for mascarpone dome filling?
Whisk room-temperature mascarpone with powdered sugar and vanilla. In another bowl, whip heavy cream to soft peaks. Gently fold the whipped cream into the mascarpone mix. Be gentle to keep it light and airy. This creates a creamy, not-too-sweet center that pairs perfectly with rich chocolate.
How to achieve a perfect mirror glaze shine?
The secret is temperature. Your domes must be completely frozen. Your glaze must be cooled to about 95°F. When warm glaze hits a cold surface, it sets quickly and smoothly. This creates that flawless, mirror-like finish. It’s a magic little science trick in your kitchen.
What are common problems with mirror glaze and how to fix them?
A thick, clumpy glaze means it’s too cold. Warm it gently over a double boiler. A thin, runny glaze means it’s too hot. Let it cool more. Blotchy color means you didn’t stir enough before pouring. Always stir your glaze gently but fully for an even, gorgeous color.
Can you make mirror glaze domes without gelatin?
Yes, you can use agar-agar, a plant-based substitute. Use about one teaspoon of agar powder. Whisk it into your cold liquid and heat it to a simmer. It sets firmer than gelatin, so work quickly. Your glaze will still be shiny and beautiful, perfect for special diets.
What are some variations for mirror glaze flavors and colors?
Try white chocolate instead of dark for a vanilla glaze. Add fruit purees like raspberry for flavor and pink color. A bit of matcha powder makes a lovely green glaze. For a fun fact, the glaze on an apple fritter uses a similar sugar technique. Which tip will you try first?
From My Kitchen to Yours
I hope you feel ready to make these beautiful domes. Remember, every great cook has a few messy tries first. My first glaze was a lumpy puddle. But the taste was still wonderful. That’s what matters most. Food is about sharing joy.
I would love to hear about your baking adventures. Tell me about your kitchen triumphs. Or even the funny little flops. We learn best by doing and sharing. Have you tried this recipe? Let me know how it went in the comments below. You can find more sweet inspiration, like this glazed apple cinnamon cake, on my blog.
Happy cooking!
—Elowen Thorn

Chocolate and Mascarpone Mirror Glaze Domes
Description
Elegant and decadent dessert domes with a rich chocolate mousse, creamy mascarpone center, and a glossy mirror glaze on a crunchy cookie base.
Ingredients
FOR THE CHOCOLATE MOUSSE:
FOR THE MASCARPONE MOUSSE:
FOR THE BASE:
FOR THE MIRROR GLAZE:
Instructions
- MAKE THE CHOCOLATE MOUSSE: Melt the dark chocolate using a double boiler or in the microwave in 30-second intervals, stirring between each until smooth. Let it cool slightly. In a separate bowl, whip the heavy cream to soft peaks, then fold in vanilla extract and sugar if using. Add one-third of the whipped cream to the melted chocolate and fold gently to lighten the mixture. Fold in the remaining cream until fully combined and smooth. Transfer the mousse to a piping bag and refrigerate while preparing the other components.
- PREPARE THE MASCARPONE MOUSSE: In a medium bowl, whisk mascarpone cheese with powdered sugar and vanilla extract until smooth and creamy. In a separate bowl, whip the heavy cream to soft peaks. Gently fold the whipped cream into the mascarpone mixture until fully combined. Transfer to a piping bag.
- ASSEMBLE THE LAYERS IN DOME MOLDS: Using silicone half-sphere molds, pipe chocolate mousse into each mold to fill halfway. Tap the molds gently on the counter to eliminate air bubbles and level the surface. Pipe a smaller amount of mascarpone mousse into the center of each dome. Fill the rest of the mold with more chocolate mousse and smooth the tops with an offset spatula. Freeze the domes for at least 6 hours or overnight until completely firm.
- MAKE THE COOKIE BASE: Crush digestive biscuits or graham crackers into fine crumbs using a food processor or by hand. Combine the crumbs with melted butter and mix until evenly moistened. Press the mixture into a flat, even layer about ½ inch thick on a lined baking sheet. Chill in the refrigerator until firm, then cut out 6 rounds using a cookie cutter sized to match the diameter of the dome molds. Keep refrigerated until assembly.
- PREPARE THE MIRROR GLAZE: Bloom the powdered gelatin by sprinkling it over cold water and letting it sit for 5 to 10 minutes. In a small saucepan, combine sugar, glucose syrup, water, and heavy cream. Heat the mixture over medium heat until it just begins to boil. Remove from heat and add chopped dark chocolate, stirring until melted and smooth. Add the bloomed gelatin and stir until fully dissolved. Let the glaze cool to 32–35°C (body temperature) before using to ensure proper consistency for glazing.
- GLAZE THE DOMES: Once fully frozen, unmold the domes and place them on a wire rack set over a tray to catch excess glaze. Pour the mirror glaze evenly over each dome, making sure it covers the surface completely. Let the glaze drip off and set for a few minutes. Using a spatula, carefully lift each dome and place it onto a cookie base. Keep refrigerated until ready to serve.
Notes
- Ensure the domes are completely frozen before glazing for a smooth, even coating. The mirror glaze should be at body temperature (32–35°C) for the best shine and flow. Leftover glaze can be strained and reused.