

My Kitchen Table Secret
I call this recipe Heaven In A Bowl. It is my grandson’s favorite. He asks for it every visit. The secret is in the layers. Each one is simple on its own.
Together, they make magic. A crisp crust, a fluffy peanut butter cloud, and shiny chocolate on top. It matters because it’s made to share. Food tastes better with loved ones around the table. Do you have a dessert that makes everyone smile? I would love to hear about it.
The Story of the Crust
That graham cracker crust has a history. I learned it from my own grandma. She used a rolling pin to crush the crackers. I still laugh at that. Now I buy the crumbs. It’s much easier!
Pressing it into the pan is the fun part. Use your fingers. Make it nice and even. Chilling it sets the stage. It’s the strong foundation for all the creamy goodness to come. You can find more about building the perfect no-bake dessert base here.
The Fluffy Peanut Butter Heart
Next is the peanut butter layer. Let the cream cheese get soft first. This is important. It mixes into a dreamy, smooth filling. Doesn’t that smell amazing? Folding in the whipped topping makes it light.
Spreading it over the cold crust is so satisfying. This layer is the heart of the dessert. It matters because it’s creamy but not too heavy. It feels like a hug. For another treat with a similar creamy heart, look at this peanut butter and Oreo creation.
Magic Chocolate Topping
Now for the magic. You make the ganache. Just heat cream and pour it over chocolate chips. Let it sit. Then stir. It turns into a glossy, perfect blanket. *Fun fact: This method is called a “pour-over ganache.” It’s a fancy term for a simple trick.
Let it cool a little before pouring. This stops it from melting the fluffy layer below. You want distinct stripes of flavor. The waiting is the hardest part! If you love this chocolate step, you might enjoy the process in this chocolate peanut butter roll cake.
The Final Wait & Your Turn
You must let it chill. Four hours is good. Overnight is even better. This wait lets the flavors become friends. The layers firm up just right. Then you can add your toppings.
Chopped peanuts add a nice crunch. Mini Reese’s are always a hit. What would you sprinkle on top? Tell me your favorite topping idea. I think the final touch makes it your own. For a different layered dessert idea, this raspberry chocolate lasagna is a fun twist. Now, slice, serve, and watch the happy faces. What is the first dessert you ever learned to make?
Instructions
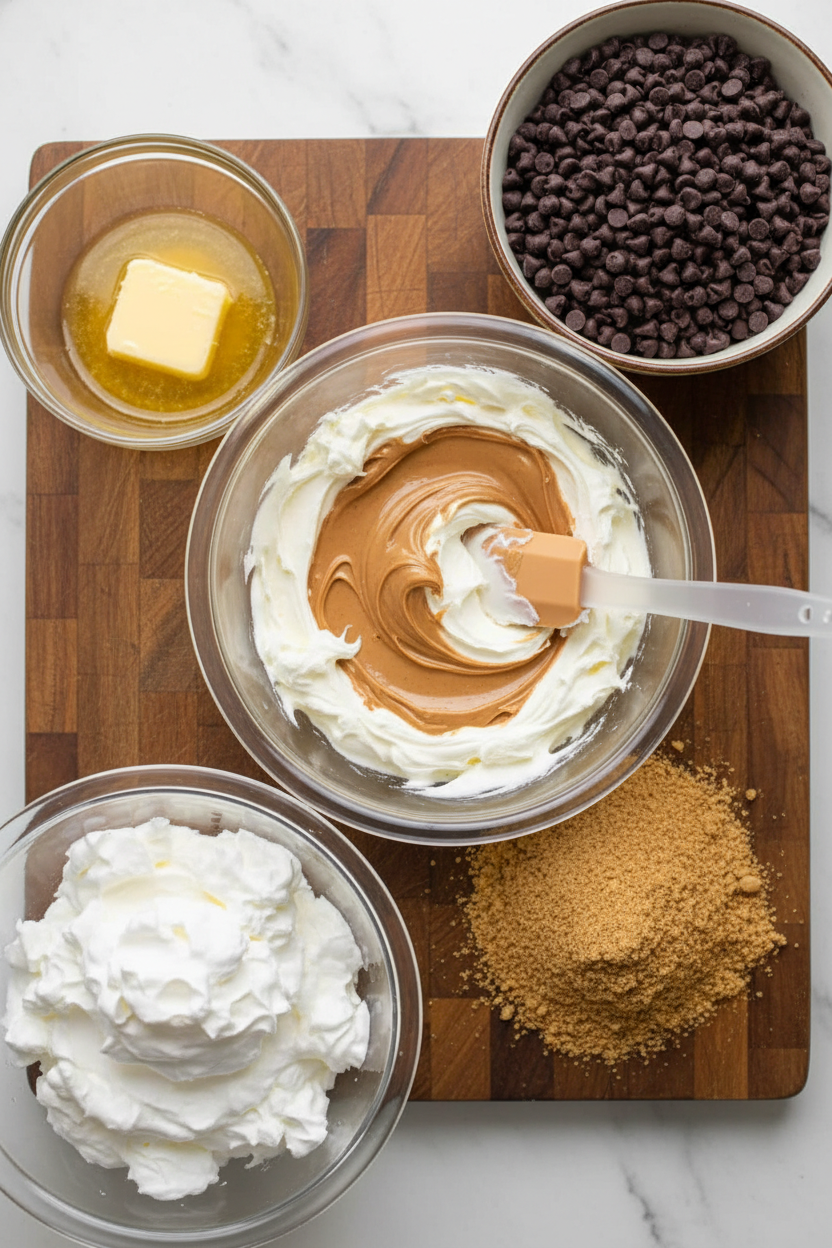
Step 1: First, make your crunchy base. Mix the crumbs, melted butter, and sugar in a bowl. Press it firmly into your greased dish. I use the bottom of a cup to press it flat. Chill it for ten minutes to set. (A hot tip: really pack it down so it doesn’t crumble later!)
Step 2: Now for the creamy peanut butter layer. Beat the peanut butter and soft cream cheese together. Add the powdered sugar and vanilla. Fold in the whipped topping gently. Doesn’t that smell amazing? Spread this dreamy mix over your chilled crust. What’s your favorite peanut butter brand? Share below!
Step 3: Time for the chocolate magic! Heat the cream until it’s just steaming. Pour it over the chocolate chips and let it sit. After two minutes, stir it into a smooth, glossy ganache. Let it cool a little before the next step. I still laugh at how easy this is.
Step 4: Pour your slightly cooled ganache over the peanut butter layer. Spread it gently to cover every bit. Try not to dip your finger in yet! Now, the hard part is waiting. Pop it in the fridge for at least four hours. Overnight is even better for the perfect texture.
Creative Twists
Cookie Crunch: Use crushed chocolate sandwich cookies instead of graham crackers for the crust.
Fruity Swirl: Swirl a few spoonfuls of raspberry jam into the peanut butter layer before adding chocolate.
Salted Caramel Drizzle: Drizzle salted caramel sauce over the set ganache for a sweet-and-salty kick.
Which one would you try first? Comment below!
Serving & Pairing Ideas
Top each square with chopped peanuts for a nice crunch. A little sprinkle of sea salt makes the chocolate sing. Serve it with a cold glass of milk or a scoop of vanilla ice cream. It’s like a party on a plate! For a fancy touch, add a few chocolate curls. Which would you choose tonight? This treat reminds me of my favorite roll cake, but so much easier to make.
Keeping Your Heaven In A Bowl Fresh
These bars are best kept in the fridge. Cover the dish tightly with plastic wrap. They will stay perfect for about four days. You can also freeze them for a sweet treat later. Cut them into squares first. Place the squares in a single layer on a tray. Freeze them solid, then store in a freezer bag.
When you want one, just let it thaw in the fridge. I remember my first batch. I was so proud, I hid it in the freezer. I forgot about it for a month! Finding it was a wonderful surprise. Batch cooking like this saves you time on busy days. It means a homemade dessert is always ready for you. Have you ever tried storing it this way? Share below!
Easy Fixes for Common Kitchen Hiccups
Is your crust too crumbly? You might need a bit more butter. Press it firmly into the dish with a measuring cup. Is your peanut butter layer lumpy? Make sure your cream cheese is very soft. I once used cold cream cheese. My arm got so tired from mixing! Let it sit on the counter for an hour first.
Did your ganache turn grainy? Your cream was likely too hot. It should steam, not boil. Pouring hot cream over the chips is the key. Fixing these small issues builds your confidence. You learn what “right” feels and looks like. It also makes your food taste so much better. Which of these problems have you run into before?
Your Quick Questions, Answered
What are some easy no-bake dessert recipes?
No-bake recipes are perfect for hot days. Try a simple chocolate peanut butter pie or a fruity raspberry chocolate lasagna. You can also make peanut butter balls rolled in sugar. They all come together with simple mixing. No oven is needed. These desserts are cool, creamy, and always a hit with family and friends.
Can I use natural peanut butter for no-bake bars?
You can, but be careful. Natural peanut butter often separates. The oil can make your filling too soft. For the best results, use a regular creamy peanut butter. It is more stable. This helps your bars set up firm and slice neatly. Stir your natural peanut butter very well first if you decide to use it.
How do you make a simple chocolate ganache?
Ganache sounds fancy but is easy. Heat heavy cream until it steams. Pour it over chocolate chips in a bowl. Let it sit for two minutes. Then stir slowly until it is smooth and shiny. Let it cool a little before pouring. This method works for glazes, frostings, and even filling cakes.
What can I use instead of graham crackers for the crust?
You have many tasty choices! Crushed vanilla wafers or digestive biscuits work well. For a chocolate crust, use crushed Oreo cookies. Just remove the filling first. You could even use pretzels for a sweet and salty twist. The fun fact is, the butter and sugar mix binds it all together. Use the same amounts as the recipe states.
How long do no-bake peanut butter bars need to set?
They need at least four hours in the fridge. Overnight is even better. This patience gives all the layers time to firm up. A firm bar will cut cleanly. You will get beautiful squares. If you try to cut it too soon, the layers will smoosh together. Waiting is the hardest part of this simple dessert!
Can these bars be frozen for later?
Yes, they freeze beautifully. Cut them into squares first. Place them on a tray until frozen solid. Then store them in a freezer bag. They will keep for about two months. Thaw them in the refrigerator before serving. This makes them a wonderful make-ahead treat for parties or a quick sweet craving. Which tip will you try first?
From My Kitchen to Yours
I hope you love making this dessert as much as I do. It truly is a little bit of heaven. The mix of crunchy crust, creamy filling, and rich chocolate ganache is magic. Sharing food is one of life’s greatest joys. I would love to hear about your baking adventures in the comments below. Have you tried this recipe?
Happy cooking!
—Elowen Thorn

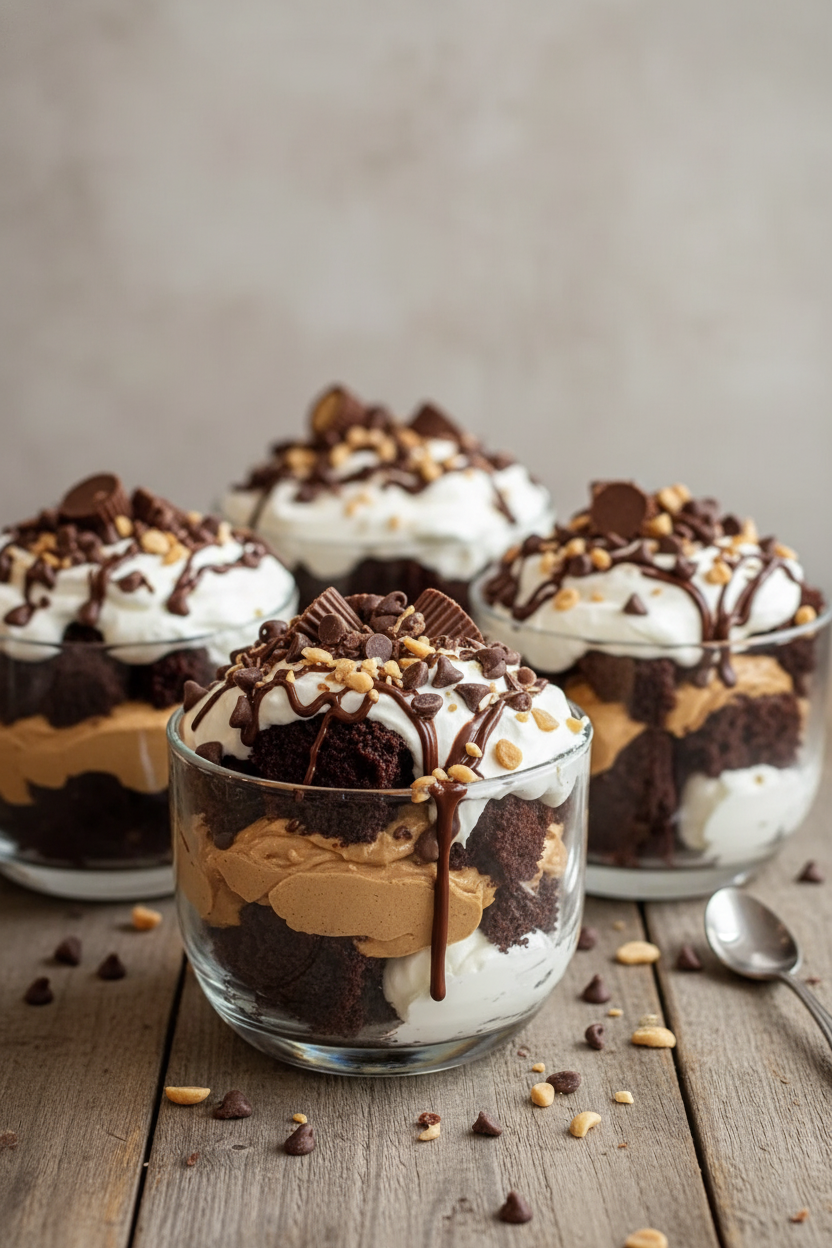
No-Bake Peanut Butter Chocolate Ganache Bars
Description
Indulge in these decadent No-Bake Peanut Butter Chocolate Ganache Bars, featuring a graham cracker crust, creamy peanut butter filling, and a rich chocolate ganache topping.
Ingredients
Instructions
- In a mixing bowl, stir together graham cracker crumbs, melted butter, and sugar until combined. Press into the bottom of a greased 9×13″ dish. Chill for 10 minutes to set.
- Beat peanut butter, softened cream cheese, powdered sugar, and vanilla extract until smooth and creamy. Gently fold in whipped topping. Spread evenly over the chilled crust.
- Heat the heavy cream until steaming (not boiling). Pour over the chocolate chips in a bowl. Let sit for 2 minutes, then stir until smooth and glossy. Allow to cool slightly.
- Pour ganache over the peanut butter layer and spread evenly.
- Refrigerate at least 4 hours or overnight for best texture. Top with optional toppings before serving.
Notes
- For clean cuts, dip your knife in hot water and wipe it dry before slicing the chilled bars.