

The Joy of No-Bake Treats
I love a good no-bake dessert. They feel like a little kitchen magic. You just mix, chill, and enjoy. No hot oven to watch. Perfect for warm days or busy weeks.
These cups are my kind of magic. They remind me of a mini cheesecakes in jars I make. The filling is cool and creamy. It sets up firm in the fridge. That’s why chilling matters. It gives the treat its perfect, sliceable texture.
A Story in Every Layer
Layering is like telling a story. Each part adds something new. First, the crunchy chocolate base. It’s the solid start. Then, the smooth peanut butter filling. It hugs the sweet, chewy Snickers bits.
My grandson calls them “treasure hunts.” He loves finding the candy pieces. I still laugh at that. The final drizzle is the happy ending. Doesn’t that look amazing? What’s your favorite part of a layered dessert?
Why the Peanut Butter Matters
You only use a little peanut butter. But it does a big job. It adds a deep, nutty flavor. It makes the caramel taste richer. It ties all the parts together.
Think of it like the glue in a swirled layer cake. Each bite feels complete. *Fun fact:* Peanuts aren’t nuts! They are legumes, like beans. That always surprises people.
The Secret to the Filling
Getting the filling thick is key. You beat the cream cheese and sugar first. Get it very smooth. No lumps. Then you add the heavy cream.
Keep mixing until it holds soft peaks. This is what lets you pipe it neatly. It’s the same trick I use for cheesecake bites. Patience here makes a prettier cup. Do you prefer piping or spooning your desserts?
Make It Your Own
The best recipes are guides. You can play with them. Try different cookie crumbs. Use chopped peanuts instead of extra Snickers. A sprinkle of sea salt on top is lovely.
It’s like my blackberry cheesecake. The fruit can change with the season. Making a treat your own is half the fun. What candy bar would you try in these cups? Share your idea with me!
Instructions
Step 1: First, crush your chocolate cookies. I use a bag and a rolling pin. It’s fun! Press the crumbs into your little cups. Pop them in the fridge to get cold. A cold base makes everything better, you’ll see.
Step 2: Now, beat the cream cheese and sugar together. Make it super smooth. Add the peanut butter, caramel, and vanilla. Doesn’t that smell amazing? (A little pinch of salt makes the sweet flavors pop.) Give it a good mix until it’s all one happy family.
Step 3: Here’s the magic part. Pour in the heavy cream. Keep mixing until it gets thick and dreamy. It should look like fluffy clouds. This is the filling for your mini cheesecakes. What other flavor of mini cheesecake would you try? Share below!
Step 4: Time to build your cups! Spoon half the filling over the crumbs. Add a layer of diced Snickers. Drop little blobs of caramel on top. I still laugh at how messy my fingers get. Cover it all with the rest of the filling.
Step 5: Let them chill for 15 minutes. Then, drizzle melted chocolate and more caramel over the top. Sprinkle on extra Snickers pieces. Refrigerate until you’re ready to share. Waiting is the hardest part, I think!
Creative Twists
Cookie Swap: Use crushed pretzels instead of cookies for a salty crunch.
Berry Blast: Add a layer of strawberry jam, like in these strawberry almond bites.
Chocolate Dream: Mix cocoa powder into the filling for a double chocolate treat, perfect for red velvet lovers. Which one would you try first? Comment below!
Serving & Pairing Ideas
Serve these cups with a cold glass of milk. It’s the classic pairing! For a party, line them up on a pretty plate. A little whipped cream on the side never hurts. For a fruity contrast, try a blackberry cheesecake next time. Or maybe a cream cheese swirled cake for a bigger celebration. Which would you choose tonight?
Keeping Your Snickers Cups Happy
These little cups are best friends with your fridge. Keep them in a sealed container. They will stay perfect for two days. You can also freeze them for a month. Just thaw them in the fridge overnight.
I remember my first batch. I left them out by mistake. They became a sad, soft puddle. Now I always chill them right away. This matters because a cold treat is a happy treat. It keeps all the layers neat and tasty.
Making a double batch is a smart idea. It saves you time for a busy week. You can have a sweet treat ready anytime. It makes sharing with friends so easy. Have you ever tried storing it this way? Share below! For more make-ahead ideas, check out these easy mini cheesecakes in jars.
Three Little Hiccups and How to Fix Them
First, a runny filling. Make sure your cream cheese is very cold. Whip the heavy cream until it is quite thick. I once used warm cream cheese. My filling would not set at all.
Second, crumbs that won’t stick. Press them firmly into the cup bottom. A small spoon works well for this. This gives your dessert a solid, tasty foundation.
Third, chocolate that seizes up. Melt it slowly and gently. A microwave in short bursts is best. Fixing these small issues builds your kitchen confidence. It also makes your food taste just right. Which of these problems have you run into before? If you love chocolate layers, you might enjoy these triple layer cheesecake brownies.
Your Quick Questions, Answered
How to make cheesecake cups without baking?
You use a simple no-bake filling. Beat cold cream cheese with sugar until smooth. Then mix in peanut butter and caramel. Finally, fold in whipped heavy cream. The heavy cream sets firm in the fridge. This creates a creamy, sliceable texture without any oven time. It is wonderfully simple.
Can I use a different candy bar instead of Snickers?
Absolutely. Any chocolate and caramel candy will work well. Try chopped-up Twix or Milky Way bars. You could even use peanut butter cups. The goal is a fun, chewy surprise inside your cup. Just keep the pieces small so they are easy to eat.
What are some easy no-bake dessert recipes?
No-bake desserts are my favorite for summer. You can make strawberry almond cheesecake bites. Or try a simple chocolate pie with a cookie crust. Fruit and cream parfaits are always a hit. They keep your kitchen cool and your family happy.
How long do cheesecake cups need to set in the fridge?
They need at least four hours to set properly. Overnight is even better. This gives the cream time to firm up. It makes the layers hold their shape when you eat them. Patience here makes a perfect treat. A fun fact: chilling also makes the flavors blend together beautifully.
Can I make Snickers cheesecake cups ahead of time?
Yes, they are perfect for making ahead. Assemble them completely. Then store them in the fridge for up to two days. You can also freeze them for a whole month. This makes party planning so much easier. You are ready for guests anytime.
What is a good substitute for cream cheese in cheesecake?
For a similar tang, try full-fat Greek yogurt. You must drain it well first. Blended cottage cheese is another good option. For a dairy-free version, use soaked cashews blended smooth. The texture will be a little different but still delicious. Which tip will you try first? For a different cream cheese treat, see this cream cheese swirled cake.
From My Kitchen to Yours
I hope you love making these sweet cups. Cooking is about sharing joy and creating memories. My kitchen is always a little messy, and that is okay. The best part is seeing people enjoy what you made.
I would love to hear about your baking adventures. Tell me all about it in the comments. Have you tried this recipe? Let me know how it turned out for you. For another fruity no-bake idea, these mini peach cheesecakes are delightful.
Happy cooking!
—Elowen Thorn

Easy Snickers Cheesecake Cups Recipe
Description
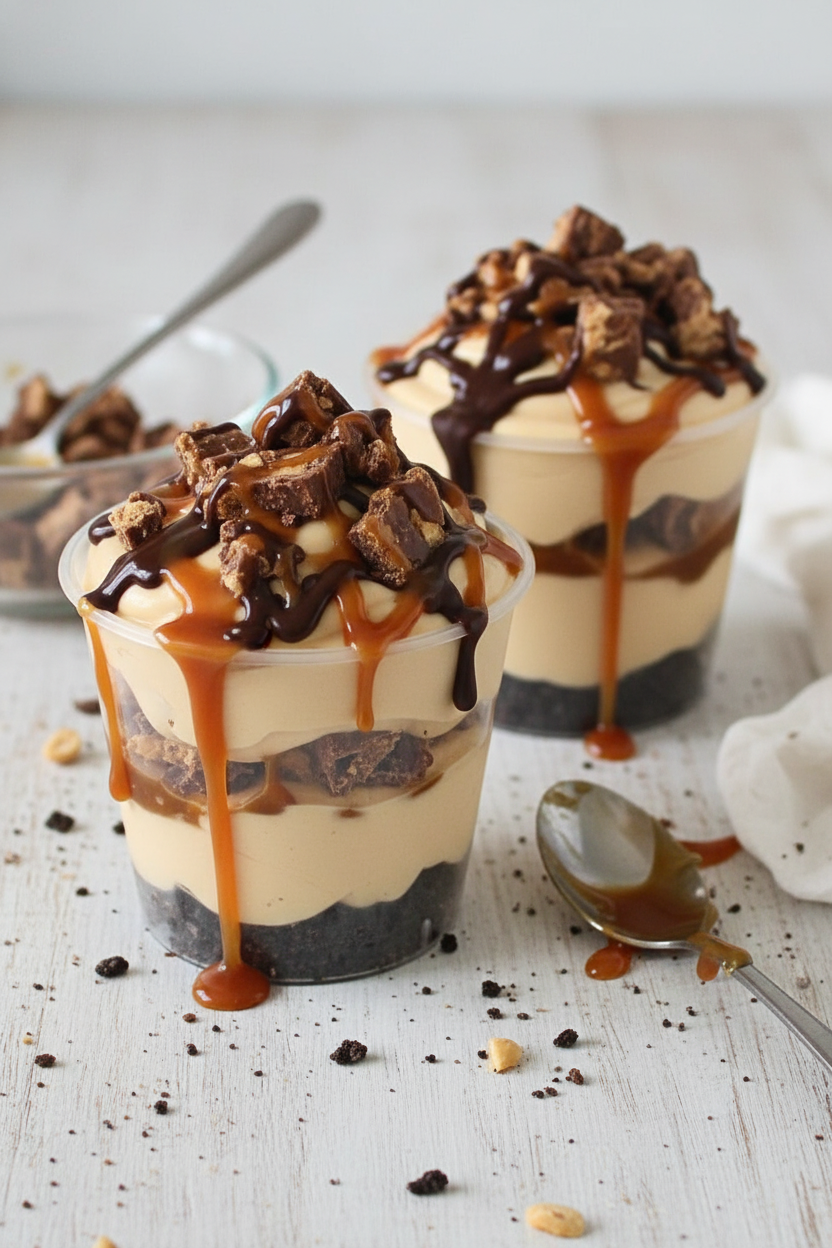
Indulge in these decadent and easy-to-make Snickers Cheesecake Cups, featuring a chocolate cookie base, creamy peanut butter cheesecake filling, and layers of caramel, Snickers, and chocolate.
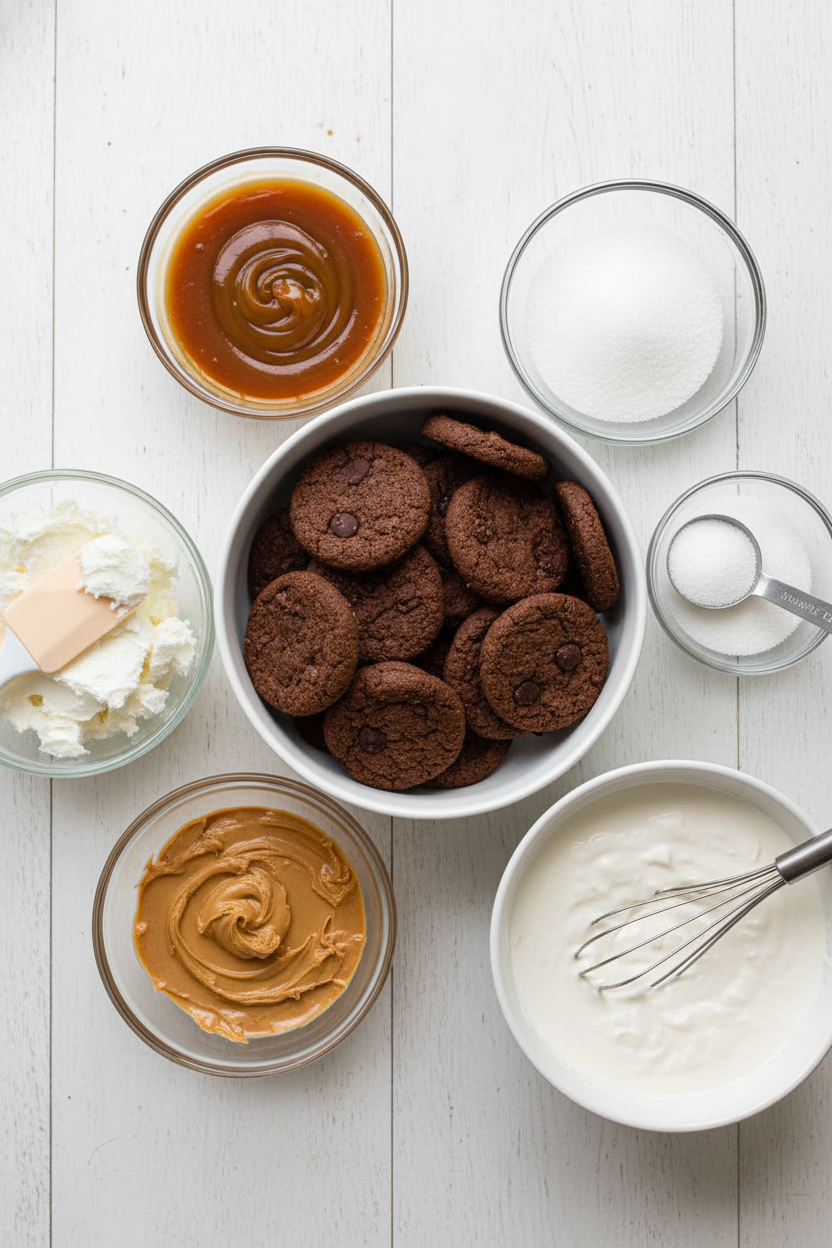
Ingredients
Instructions
- Prepare the Base: Divide crushed chocolate cookie crumbs evenly among 15 mini dessert cups (80ml/3oz each). Refrigerate while preparing the filling.
- Make the Cheesecake Filling: Beat cream cheese and sugar in a bowl with a hand mixer until smooth. No lumps should remain. Add peanut butter, ½ cup caramel, vanilla extract, and a pinch of salt. Mix until fully combined.
- Thicken the Mixture: Scrape the sides of the bowl, then add heavy cream. Mix until the filling begins to thicken and holds its shape.
- Assemble the Cups: Spoon or pipe half the filling into the dessert cups, over the cookie base. Add a layer of diced Snickers pieces, followed by a few blobs of caramel. Spoon the remaining filling on top. Refrigerate for 15 minutes.
- Add the Toppings: Drizzle melted chocolate over the top of each cup. Add another drizzle of caramel and garnish with extra diced Snickers.
- Chill and Serve: Refrigerate the cups until ready to serve. These can be made up to 2 days in advance and stored in an airtight container.
Notes
- For best results, ensure your cream cheese is at room temperature before mixing to avoid lumps. You can use a piping bag for a neater filling layer.