

My Springtime Secret
I love making treats that feel like a hug. These truffles are just that. They mix the cozy taste of banana pudding with the joy of spring. Doesn’t that sound lovely?
My grandkids call them “Easter eggs you can eat.” I still laugh at that. Making them is simple fun. You get to use your hands. This matters because cooking should be joyful, not hard. What is your favorite spring flavor to eat?
A Little Story from My Kitchen
I first made these on a rainy April day. I wanted sunshine in a bowl. I had vanilla wafers and a ripe banana. But I used pudding mix instead. It was perfect!
The cream cheese makes them rich. The pudding mix adds that sweet, familiar flavor. Mixing it all feels like making play dough, but you can eat it. Your family will gather to see what you’re doing. I promise.
Why The Chill Time Matters
After you roll the balls, they must rest in the cold. This is the secret step. It firms them up so they don’t fall apart. Patience makes a better treat.
This matters in baking and in life. Good things need a little time. While you wait, you can clean up. Or dream about the white chocolate coating coming next. Do you like to listen to music while you wait for recipes?
The Magic of Color
Now for the pretty part. Melting the chocolate is like magic. *Fun fact: white chocolate isn’t really chocolate!* It’s made from cocoa butter. Isn’t that interesting?
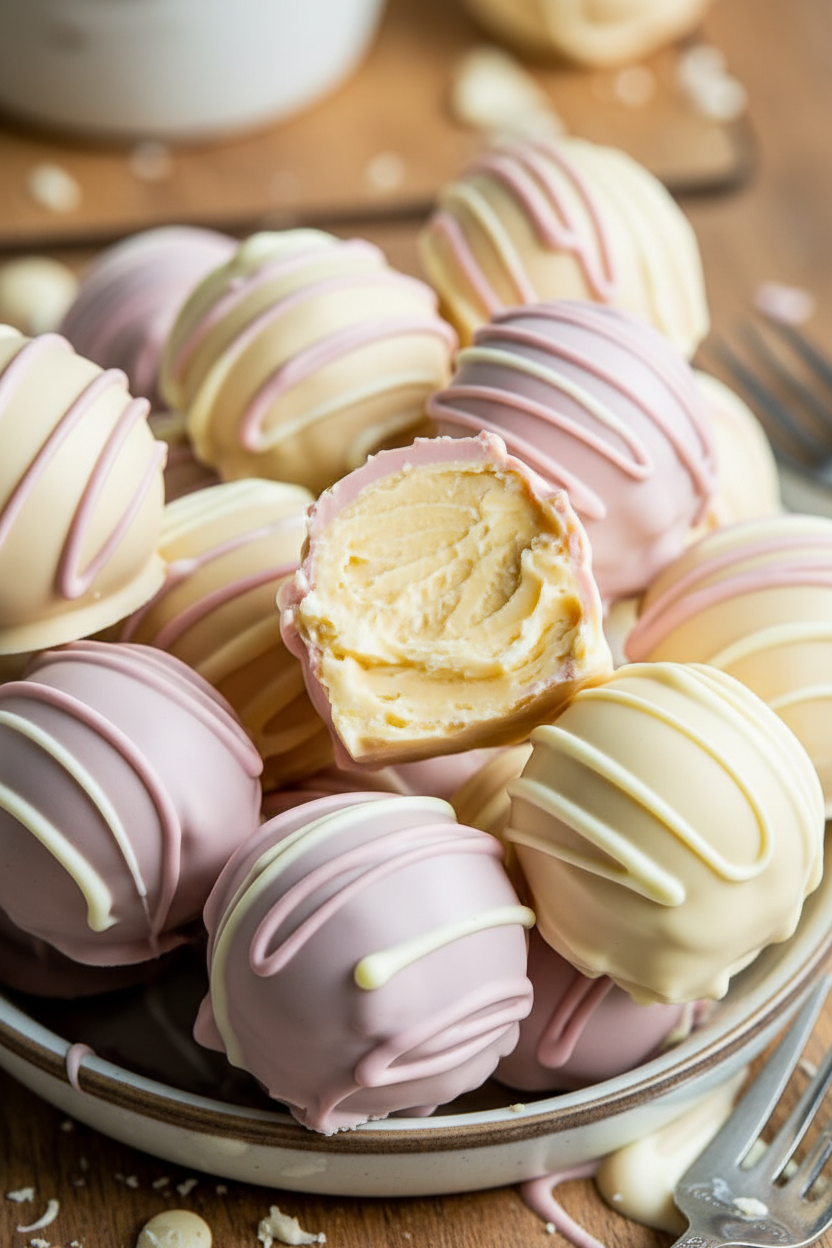
You can make it pink, yellow, or light blue. Dipping the truffles is my favorite. It’s okay if they’re not perfect. Each one has its own character. It reminds me of making cake truffles with my sister. We always made a happy mess.
Your Turn to Create
Finally, you get to decorate. Use sprinkles or more crushed cookies. This is where you can be an artist. What colors make you think of spring?
Sharing these is the best part. They are a small gift of sweetness. This matters because sharing food is sharing love. Place them in a nice bowl. Or try colorful liners for a festive touch. Will you make these for a special someone this season?
Instructions
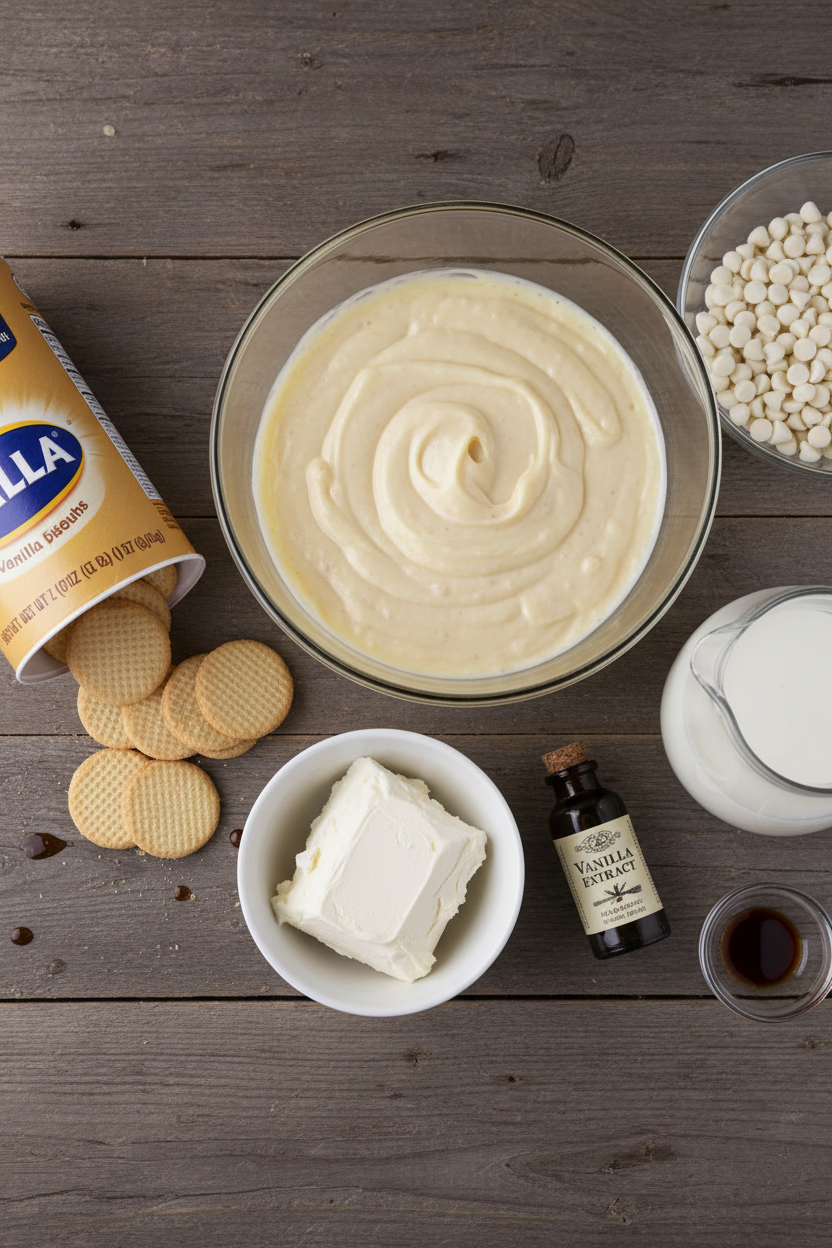
Step 1: Let’s make our dough. Mix the crushed wafers, cream cheese, and dry banana pudding mix in a big bowl. Add the milk and vanilla. Stir until it feels like soft playdough. Doesn’t that smell amazing already? (A hard-learned tip: make sure your cream cheese is soft!)
Step 2: Roll the dough into little balls. Use a tablespoon to keep them even. Place them on a parchment-lined tray. Pop them in the fridge to chill. I still laugh at how my grandson sneaks one at this stage. Do you prefer rolling or scooping? Share below!
Step 3: Time for the fun part: coating! Melt the white chocolate chips carefully. Stir between short bursts in the microwave. You can divide it and color it with pastel food coloring. It’s like edible spring paint.
Step 4: Dip each chilled ball into the chocolate. Use a fork to let the extra drip off. Place them back on the parchment. Now, decorate quickly before the chocolate sets! Add sprinkles or more crushed wafer crumbs. Let them set completely.
Creative Twists
Cookie Dough Bliss: Use crushed graham crackers instead of vanilla wafers.
Fruity Surprise: Hide a tiny piece of dried banana in the center of each truffle.
Nutty Crunch: Roll the finished truffles in finely chopped, toasted pecans.
Which one would you try first? Comment below!
Serving & Pairing Ideas
Serve these on a pretty plate lined with green shredded coconut for a “grass” effect. They’re wonderful with a cold glass of milk or a cup of herbal tea. For a party, arrange them in pastel cupcake liners on a tiered stand. Which would you choose tonight?
Keeping Your Truffles Happy and Fresh
Let’s talk about storing these sweet bites. They last a week in the fridge in a sealed container. The cold keeps the cream cheese safe and firm. You can also freeze them for a month. Just layer them between parchment paper in a freezer box.
I remember my first batch of a similar treat. I left them out too long. They became a soft, sad puddle! Now I chill them right away. Batch cooking these is a wonderful time-saver. Make a double batch and freeze half. You’ll thank yourself later when you need a quick, sweet gift.
This matters because good food should be enjoyed, not wasted. Proper storage means sweet treats are always ready for surprise guests or a little personal joy. Have you ever tried storing truffles this way? Share below!
Easy Fixes for Common Truffle Troubles
Is your mixture too sticky? Add a bit more crushed vanilla wafers. This will help it roll into neat balls. Is the chocolate coating too thick? Try adding a tiny spoon of coconut oil to thin it. This makes dipping so much smoother.
I once rushed and didn’t chill the balls. They fell apart in the chocolate! Chilling them first is the key to success. Fixing these small issues builds your cooking confidence. You learn that mistakes have simple solutions. It also makes the final flavor and texture just perfect. Which of these problems have you run into before?
Your Quick Questions, Answered
How do you make banana pudding truffles with cream cheese?
First, soften your cream cheese. Mix it with dry banana pudding mix, milk, and vanilla. Then, stir in crushed vanilla wafers until it looks like dough. Roll the mix into small balls and chill them well. Finally, dip the cold balls into melted white chocolate. Let them set on parchment paper. It’s a simple, no-bake process perfect for beginners.
What are the ingredients for no-bake banana pudding truffles?
You need vanilla wafers, soft cream cheese, and a box of dry banana pudding mix. Also grab some milk, vanilla extract, and white chocolate for coating. That’s the main list! Optional items are sprinkles or food coloring for the chocolate. These easy no-bake treats come together with just a bowl and a spoon. No oven is required at all.
Can you freeze banana pudding truffles?
Yes, you absolutely can freeze them! Place the finished truffles in a single layer on a tray. Freeze them solid first. Then transfer them to a sealed freezer container. They will keep for about one month. Thaw them in the fridge before serving. This is a great way to make treats ahead for a party or a busy week.
What is the best way to coat banana pudding truffles?
The best way is to use a fork or a dipping tool. Make sure your truffles are very cold first. Dip each ball into the melted chocolate. Gently tap the fork on the bowl’s edge. This removes extra chocolate for a thin, even coat. Slide the coated truffle onto parchment paper to harden. For more ideas, see this easy white chocolate guide.
How long do banana pudding truffles last in the fridge?
They will stay fresh and delicious for up to one week. Always keep them in a container with a tight lid. The fridge keeps the cream cheese filling firm and safe to eat. For the best taste and texture, let them sit out for 10 minutes before serving. This allows the flavors to soften and bloom nicely.
Are banana pudding truffles made with Nilla wafers?
Yes, traditional recipes use Nilla wafers. They are crushed up to form the base of the truffle. Their vanilla flavor pairs perfectly with the banana pudding. You can use any brand of vanilla wafer cookie though. The fun fact is that using wafers means no baking is needed. Which tip will you try first?
A Final Word from My Kitchen to Yours
I hope you love making these cheerful truffles. Cooking is about sharing joy and creating sweet memories. These little bites are perfect for that. I’d love to hear about your baking adventures in my kitchen.
Tell me all about it in the comments below. Have you tried this recipe yet? I am always here to chat about food and fun. Happy cooking!
—Grace Ellington.

Easy No-Bake Banana Pudding Truffles with Cream Cheese
Description
These delightful no-bake truffles combine the classic flavor of banana pudding with a creamy, cheesecake-like filling, all coated in colorful chocolate.
Ingredients
For the Filling:
For the Coating:
For Decoration (Optional):
Instructions
- In a large bowl, mix the crushed vanilla wafers, cream cheese, banana pudding mix, milk, and vanilla extract. Stir until the mixture forms a dough-like consistency. It should be firm yet pliable.
- Scoop out tablespoon-sized portions of the dough and roll them into balls. Place the truffles on a parchment-lined baking sheet. Refrigerate for 30-45 minutes to firm up.
- In a microwave-safe bowl, melt the white chocolate chips or candy melts in 30-second intervals, stirring after each until smooth. If using multiple colors, divide the chocolate into bowls and add food coloring. Stir until the colors are evenly distributed.
- Using a fork or dipping tool, dip each chilled truffle into the melted chocolate, tapping off any excess. Place the coated truffles back on the parchment paper.
- Before the chocolate sets, sprinkle with crushed vanilla wafers or Easter sprinkles. For a decorative drizzle, use a spoon or piping bag to drizzle contrasting colored chocolate over the truffles.
- Allow the truffles to set at room temperature or refrigerate them for 15-20 minutes.
- Serve the truffles in a decorative bowl or arrange them in Easter-themed cupcake liners.
Notes
- Store truffles in an airtight container in the refrigerator for up to 5 days. For best results, ensure the cream cheese is fully softened to avoid lumps in the filling.