

My Disneyland Snack Secret
I first tried these bars at Disneyland years ago. My grandson begged for one. I took a bite and my eyes got wide. I knew I had to make them at home.
It took me a few tries to get it right. But now, this recipe is a family treasure. It reminds me of that sunny day and his happy face. Do you have a favorite treat from a special trip?
Why Layers Matter
This treat is all about the layers. You start with a crunchy graham cracker. Then you add smooth chocolate. The peanut butter layer is the best part. It’s sweet and salty all at once.
Building it right makes every bite perfect. You get a little of everything. This matters because texture is just as important as taste. A good bar cookie should be fun to eat!
A Little Kitchen Magic
My favorite step is using your hands. You take fistfuls of the peanut butter mix. You flatten it and lay it over the chocolate. It feels like playing with edible clay.
Don’t worry if it’s not perfect. Just cover the chocolate as best you can. The next layer will hide any mess. I still laugh at my first try. It looked lumpy, but tasted amazing. Have you ever made a messy dessert that turned out great?
The Waiting Game
After you sprinkle the crumbs on top, you must wait. The fridge needs to cool it for an hour. This is the hardest part! The smell is so good.
But waiting matters. It lets all the layers set. This way, you get clean squares when you cut it. *Fun fact*: letting it cool makes the flavors come together better. Trust me, it’s worth it.
Make It Your Own
This recipe is a wonderful base. You can change it up. Some folks use milk chocolate chips. Others add a sprinkle of sea salt on top. What would you try?
Cooking is about sharing joy. These bars are pure happiness on a plate. Making them for someone is a sweet act of love. That’s the real secret ingredient. Will you make them for a family movie night or a friend?
Instructions
Step 1: First, spray your baking dish. Then, crush two graham sheets into crumbs in a bag. I use a rolling pin. It makes a lovely, sandy texture. Set those aside for later. This is the fun, crunchy topping.
Step 2: Now, mix the peanut butter, soft butter, vanilla, and salt. Doesn’t that smell amazing? Slowly add the powdered sugar. It will get thick and doughy. (A tip: Use your hands to mix at the end. It works best!)
Step 3: Melt the chocolate chips with shortening. Do 30-second bursts in the microwave. Stir well each time. Be careful not to overcook. Warm chocolate is so silky. What’s your favorite thing to melt chocolate for? Share below!
Step 4: Layer six whole graham sheets in the dish. Pour a third of the chocolate over them. Then, take fistfuls of peanut butter dough. Flatten and lay them over the chocolate. Cover as best you can. I still laugh at my patchwork layers.
Step 5: Add another chocolate layer, then more graham crackers. Top with the last chocolate. Sprinkle your saved crumbs on top. Chill for one hour. Finally, cut into squares. Find more layered bar ideas like these easy peanut butter and jelly swirl blondies or this easy Snickers cheesecake cups recipe.
Creative Twists
Crunchy Time: Mix chopped pretzels into the peanut butter layer.
Fruity Swirl: Add a thin layer of strawberry jam on the graham crackers.
Cookie Mash-Up: Use chocolate cookie crumbs instead of graham crackers.
Which one would you try first? Comment below!
Serving & Pairing Ideas
Serve these rich bars with a cold glass of milk. It’s the perfect match. For a party, place each square in a little paper liner. A sprinkle of sea salt on top looks fancy. You could also try them with a scoop of vanilla ice cream. It makes a wonderful dessert. For another peanut butter chocolate treat, see this easy peanut butter cup chocolate cake recipe or my go-to chocolate peanut butter roll cake. Which would you choose tonight?
Keeping Your Bars Fresh and Tasty
These bars keep well in the fridge. Just cover the dish tightly. They will stay good for about a week. You can also freeze them for a month. Wrap squares in parchment paper first. Then place them in a freezer bag.
I remember my first batch. I left it out by mistake. The chocolate got soft and messy. Now, I always chill them right away. Storing food properly saves money and time. It means you always have a sweet treat ready. Have you ever tried storing it this way? Share below!
Batch cooking is a wonderful trick. Making a double batch is just as easy. You get twice the joy with little extra work. It’s perfect for surprise guests or a quick dessert. For another great make-ahead bar, try these peanut butter and jam bars.
Simple Fixes for Common Hiccups
Is your peanut butter mixture too crumbly? Add a tiny bit more softened butter. This helps it stick together. Is the chocolate seizing or getting thick? A bit more shortening will smooth it right out.
I once rushed and used cold butter. The mixture was a lumpy mess! Letting ingredients warm up matters. It creates a smooth, easy-to-spread filling. Are the graham crackers breaking when you layer them? Handle them gently, like a precious letter.
Fixing small problems builds your cooking confidence. You learn how ingredients work together. This leads to better flavor and more fun in the kitchen. Which of these problems have you run into before? For more chocolate and peanut butter fun, these peanut butter swirl blondies are a delight.
Your Quick Questions, Answered
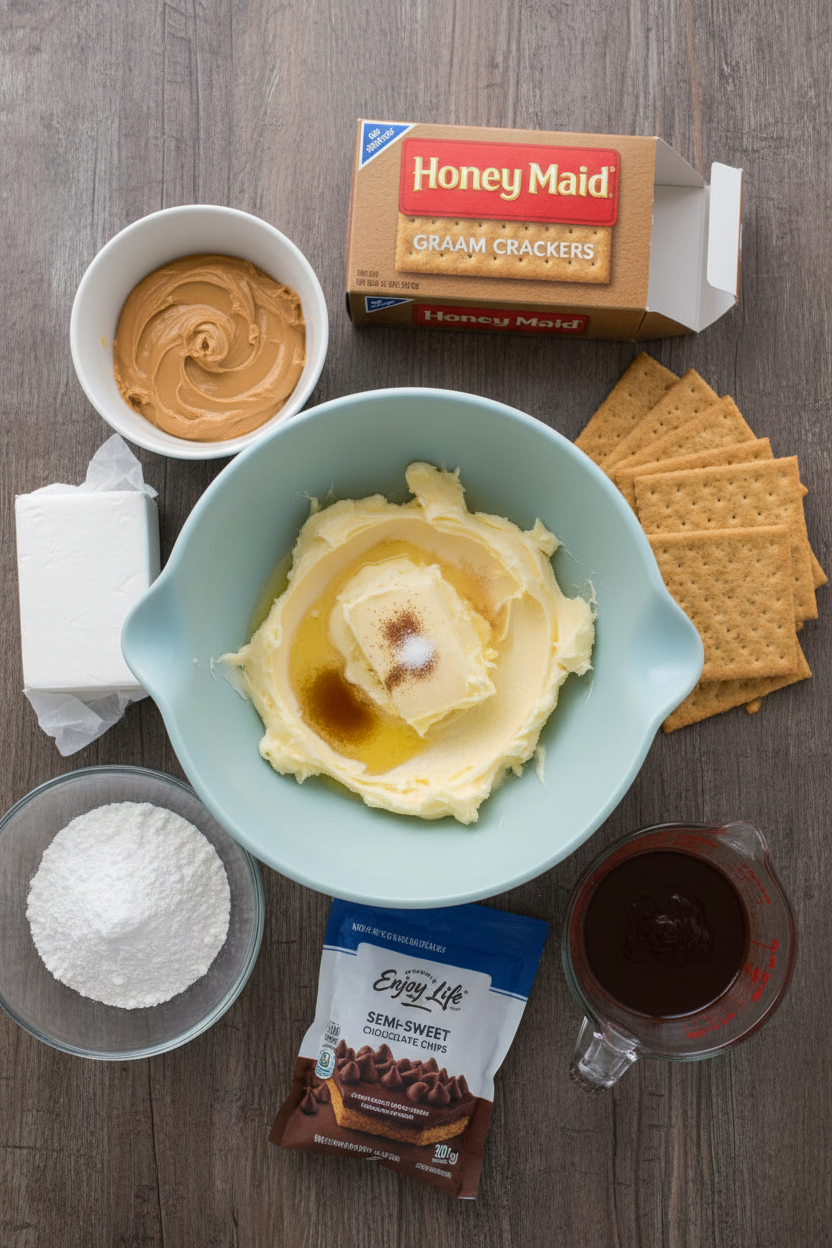
What are the ingredients for no-bake peanut butter bars?
You need graham crackers, creamy peanut butter, and softened butter. Also gather vanilla, salt, and powdered sugar. For the topping, use semi-sweet chocolate chips and shortening. That’s it! These simple items create magic. *Fun fact: Graham crackers were invented for a healthy diet!* Find another use for them in these Snickers cheesecake cups.
How do you make the chocolate topping for peanut butter bars?
Put chocolate chips and shortening in a bowl. Microwave it for 30 seconds. Then stir it well. Repeat until it is completely smooth. Be patient and do not overcook it. This gentle heat keeps the chocolate shiny and perfect for pouring over your layers.
Can I use honey instead of maple syrup in peanut butter bars?
This recipe does not use maple syrup. It uses powdered sugar for sweetness. So honey is not needed here. If you try a different bar recipe with syrup, honey can often work. But for these specific bars, stick with the powdered sugar. It gives the right texture.
How long do no-bake peanut butter bars need to set?
They need at least one hour in the refrigerator. This chills the chocolate and firms the layers. For the cleanest cuts, let them set a bit longer. I sometimes wait two hours. It makes slicing them into neat squares much easier. Then they are ready to enjoy!
Can I use almond butter instead of peanut butter?
Yes, you can use almond butter. The flavor will be different but still tasty. Make sure it is creamy, not crunchy. The texture might change slightly. If you love the combo, you must try this chocolate peanut butter roll cake.
How should I store no-bake peanut butter bars?
Always store them in the refrigerator. Keep them in a covered container. The cool temperature keeps the layers firm. They can last up to a week. You can also freeze them for a longer treat. Which tip will you try first?
From My Kitchen to Yours
I hope you love making these bars. They bring back happy memories for me. Cooking is about sharing joy and sweetness. I would love to hear about your baking adventure. Did your family enjoy them? Have you tried this recipe? Tell me all about it in the comments below. For one last idea, this peanut butter cup cake is a showstopper.
Happy cooking!
—Elowen Thorn.

Easy No-Bake Peanut Butter Chocolate Graham Cracker Bars
Description
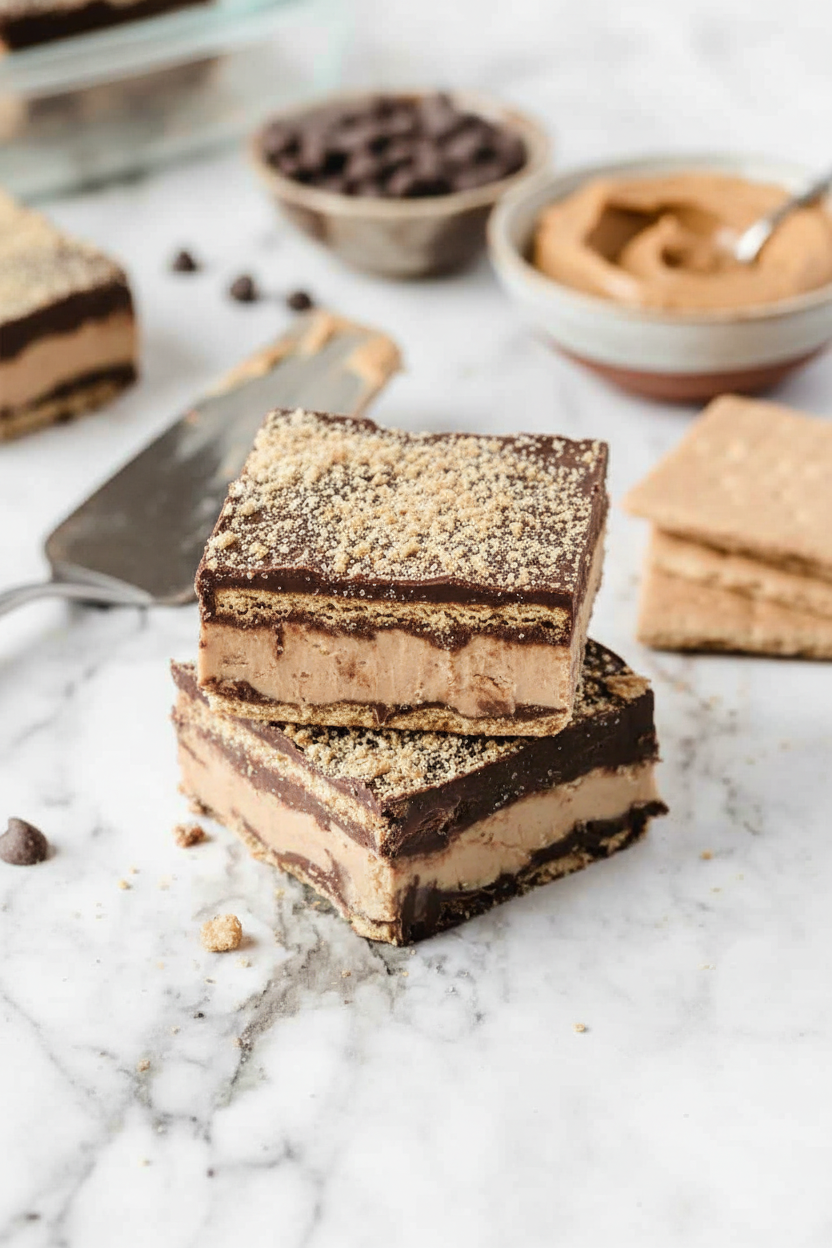
These irresistible no-bake bars feature layers of graham crackers, rich peanut butter filling, and smooth chocolate for a quick and easy treat.
Ingredients
Instructions
- Spray a 2 quart (8 ½ x 11) glass baking dish with non-stick spray.
- Place 2 whole sheets graham cracker in zip bag and crush into crumbs using a rolling pin, meat mallet or the bottom of a glass. Set aside.
- Mix peanut butter, butter, vanilla and salt. Slowly add in powdered sugar a little at a time.
- In microwave safe bowl heat chocolate chips with shortening. Heat for 30 seconds at a time, stirring between, until smooth. Be careful not to overcook.
- Lay first layer of graham crackers (6 whole sheets) in sprayed baking dish.
- Pour about 1/3 of the chocolate into a thin layer over the graham crackers.
- Using your hands, take fistfuls of the peanut butter mixture and flatten. Lay on top of the chocolate layer. Cover as best you can without breaking the graham crackers below. You will use all of the peanut butter mixture.
- Layer another 1/3 of chocolate on top of peanut butter and then layer again with graham crackers (6 whole sheets) and pour remaining chocolate on top.
- Sprinkle crushed graham cracker crumbs on top.
- Let cool in refrigerator for at least 1 hour. Cut into squares, big or small.
Notes
- For easier cutting, let the bars sit at room temperature for 5-10 minutes after chilling. Store in an airtight container in the refrigerator.