

My First Cheesecake Was a Mess
I still laugh at that first cheesecake I made. My grandmother handed me her old springform pan and said, “Don’t overmix, dear.” Well, I mixed that batter like I was angry at it. The cake cracked right down the middle. It looked like a little canyon. But we ate every single slice anyway, crumbs and all. Doesn’t that smell amazing just thinking about it?
This Blueberry Crumble Cheesecake is much friendlier than my first try. It forgives small mistakes. You don’t need to be a fancy baker to make this work. The blueberries and crumble hide any little cracks on top. That is what I call a smart dessert. Have you ever baked a cheesecake that cracked?
Why the Crust Matters Most
That cookie crust is the first bite everyone takes. It needs to be buttery and a little salty. I use digestive biscuits like my grandma did, but graham crackers work just fine. You crush them up with sugar and melted butter until it feels like wet sand. Then you press it firmly into the pan with a flat-bottomed glass. Press hard. A loose crust will fall apart when you cut the cake.
Here is an old trick I learned. Bake the crust for ten minutes before you add the filling. This keeps it from getting soggy later. The heat helps the butter set like a shield. *Fun fact: Digestive biscuits were first made in Scotland in 1839. They were thought to help with digestion. I am not sure about that, but they sure taste good in a crust.*
The Berry Secret That Changed Everything
My friend Julie once told me to toss blueberries in a little flour and sugar before baking. I thought she was crazy at first. But that tiny dusting of flour keeps the berries from sinking to the bottom of the cheesecake. They stay right where you put them, floating like little jewels in the batter. Why does this matter? Because a berry that sinks is a sad, squishy mess at the bottom of your pan. Nobody wants that.
The lemon juice in the berries is the real hero here. It brightens the whole cake up. It cuts through all that creamy, rich cheesecake filling. Without that tiny splash of lemon, the dessert tastes heavy. With it, every bite feels like summer on a plate. Have you ever added lemon to something sweet and been surprised by how good it is?
Room Temperature Is Not a Suggestion
This is the part where I sound like your grandmother, but listen to me. Take your cream cheese out of the fridge at least an hour before you start. Cold cream cheese makes lumpy batter. Lumpy batter makes a bumpy cheesecake. Nobody wants a bumpy cheesecake. The same goes for the sour cream and the eggs. Let them all sit on the counter and warm up together.
I once rushed this step because I was hungry. I ended up with tiny white lumps in my cheesecake. It still tasted fine, but it was not pretty. Why does this matter? Smooth batter bakes evenly. Even baking means no cracks, no sinking, no surprises. Your patience pays off in every silky bite. Do you have a kitchen shortcut that you always regret taking?
The Water Bath Trick That Saved My Cake
My grandmother swore by the water bath. She would wrap the springform pan in three layers of foil and place it in a bigger pan of hot water. The steam keeps the cheesecake moist and gentle while it bakes. It is like giving your cake a warm hug. Without the water bath, the edges cook too fast and the middle stays raw. That is how you get cracks.
This recipe uses two pans nested together to keep water out. That is a clever trick I wish I had learned earlier. You put the springform in a bigger cake pan, then set that whole thing in a roasting pan with water. The extra pan acts like a little shield. No soggy bottoms here. Have you ever tried a water bath for baking? Tell me how it went for you.
Patience Is the Hardest Ingredient
Once the cheesecake comes out of the oven, you cannot rush it. It needs to cool in the oven with the door cracked open for a full hour. Then it sits on the counter for another hour. Then it rests in the fridge overnight. I know that feels like forever. But a rushed cheesecake is a runny cheesecake. A patient cheesecake is a slice of heaven.
I remember the first time I waited the full time. I woke up the next morning, opened the fridge, and there it was. Perfect and creamy and golden on top. I cut a slice and the crumble held together. The blueberries stayed in place. I almost cried. That one bite was worth every single minute of waiting. What is the longest you have ever waited for a dessert to be ready?
A Slice Worth Sharing
This cake serves twelve people, but it feels like more. Every bite has a little bit of crunchy crust, soft berry, creamy filling, and buttery crumble. It is four textures in one forkful. That is why I love it so much. It is not just a dessert. It is a little moment of joy on a plate.
I hope you make this for someone you love. Or just for yourself on a quiet Sunday. Either way, take your time. Enjoy the process. And remember, even if it cracks a little, it will still taste wonderful. That is the real secret to baking. Have you ever baked something that turned out ugly but tasted amazing? I would love to hear your story.
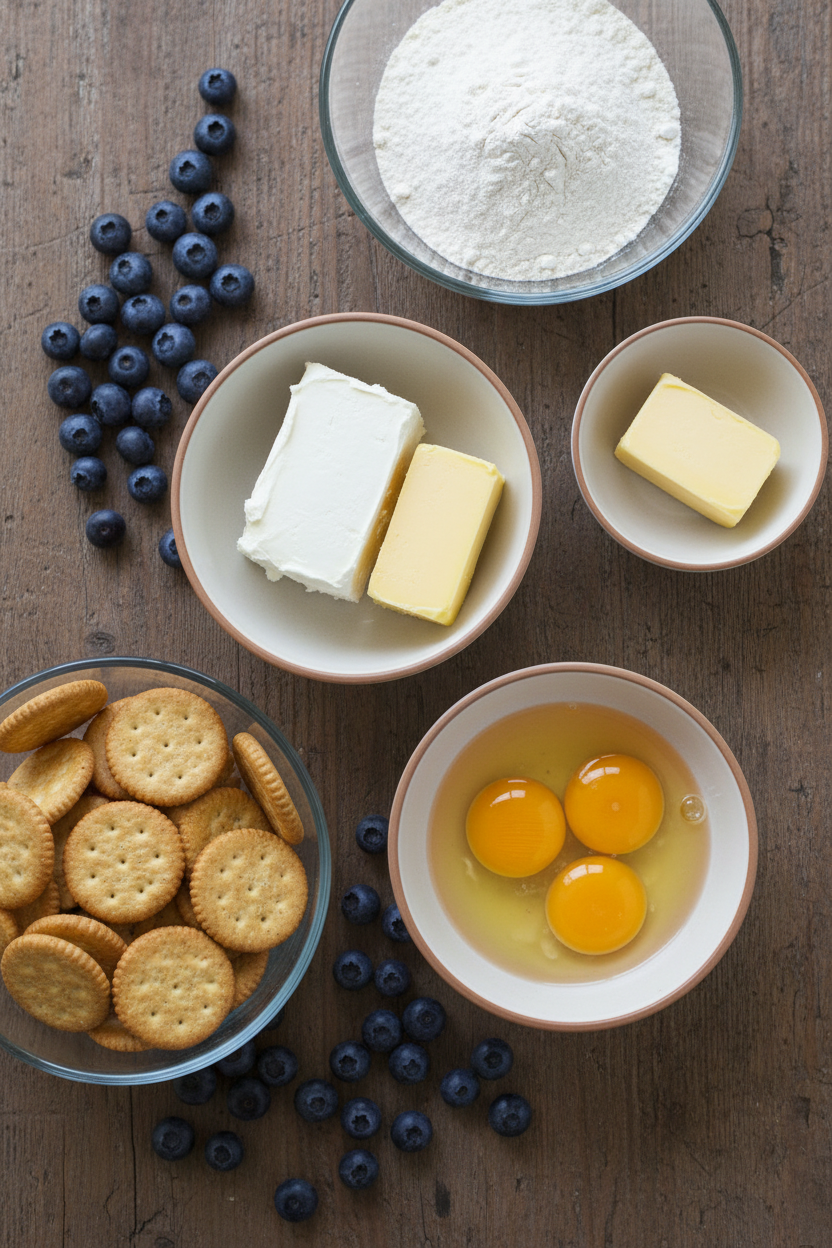
Ingredients:
| Ingredient | Amount | Notes |
|---|---|---|
| Digestive or graham crackers | 250 g | For the crust |
| Granulated sugar | 2 tablespoon | For the crust |
| Butter | 75 g | Melted, for the crust |
| Fresh blueberries | 300 g | |
| Granulated sugar | 1 tablespoon | For the blueberries |
| All-purpose flour | 1 tablespoon | For the blueberries |
| Lemon juice | 2 teaspoon | |
| All-purpose flour | 110 g | For the crumble |
| Dark brown sugar | 80 g | For the crumble |
| Butter | 70 g | Melted, for the crumble |
| Full fat cream cheese, room temperature | 800 g | |
| Granulated sugar | 260 g | For the cheesecake |
| Sour cream (18%), room temperature | 200 g | |
| Cornstarch | 1 ½ tablespoon | |
| Vanilla extract | 2 ½ teaspoon | |
| Large eggs | 4 |
Instructions
Step 1: Preheat your oven to 325°F. Line a 9-inch springform pan with parchment paper on the bottom. I still remember the first time I forgot this step. (Always line your pan or the crust will stick!)
Step 2: Crush your graham crackers into fine crumbs. I use a food processor, but a rolling pin and a sturdy bag work too. Mix in the sugar and melted butter until it feels like wet sand.
Step 3: Press the crust firmly into the pan and up the sides. I use the bottom of a glass to get it really even. Bake it for 10 minutes, then let it cool completely.
Step 4: Toss fresh blueberries with sugar, flour, and lemon juice. In another bowl, mix flour, brown sugar, and melted butter with a fork for the crumble. Doesn’t that smell amazing already?
Step 5: Beat room-temperature cream cheese and sugar until smooth. Add sour cream, cornstarch, and vanilla, then one egg at a time. What is your favorite part of baking a cheesecake? Share below!
Step 6: Pour the batter over the crust. Drop the blueberries and crumble on top. Bake in a water bath for 1 hour 20 minutes, then let it cool slowly in the oven.
Step 7: Chill the cheesecake in the fridge for at least 6 hours, but overnight is best. I always sneak a little taste of the crumble while waiting. Patience is hard, but so worth it!
Creative Twists
… Swap half the blueberries for raspberries or blackberries for a mixed berry surprise.
… Add a teaspoon of cinnamon to the crumble for a warm, cozy flavor.
… Drizzle white chocolate over the cooled cheesecake for a pretty, sweet finish.
Which one would you try first? Comment below!
Serving & Pairing Ideas
Serve this cheesecake chilled with a dollop of fresh whipped cream on top. A handful of extra fresh blueberries makes it look so pretty. For a cozy treat, pair it with a warm cup of vanilla tea or cold milk.
You can also drizzle a little warm blueberry sauce over each slice. It adds a bright, fruity pop next to the creamy cheesecake. This dessert is perfect for a summer picnic or a holiday dinner table.
Which would you choose tonight?
Your Blueberry Crumble Cheesecake, Ready When You Are
This cheesecake keeps well in the fridge for up to five days. Just cover it tight with plastic wrap or foil. The crumble will soften a little, but that is part of the charm. I remember my first cheesecake sat in the fridge for two days before we finally cut it. It tasted even better than the day I baked it.
You can freeze this cheesecake too. Slice it first, then wrap each slice in plastic and foil. Freeze for up to three months. When you want a piece, thaw it in the fridge overnight. Batch cooking like this saves time and gives you dessert ready for a rainy day. Have you ever tried storing it this way? Share below!
To reheat a slice, let it sit out for ten minutes. Then warm it in a low oven at 300 degrees for five minutes. This brings back the soft texture and the buttery crust. Storing food well means less waste and more happy moments around the table. That is why it matters.
Three Common Cheesecake Problems and Easy Fixes
The first problem is a cracked top. This happens when the cheesecake bakes too fast or cools too quickly. The fix is simple: use a water bath like the recipe says. I once forgot the water bath and got a canyon right through the center. We hid it with berries and no one knew the difference.
The second problem is a soggy crust. This happens when butter leaks through the pan. To fix it, press your crust firmly and pre-bake it for ten minutes. That seals the crust and keeps it crunchy. The third problem is a grainy filling. This means your cream cheese was too cold. Always let it sit out for an hour before mixing. Smooth filling makes a better dessert. Fixing these problems helps you cook with confidence. That is why it matters.
*Fun fact: real cheesecake is actually a type of cheese pie, not a cake at all.* Which of these problems have you run into before?
Your Quick Questions, Answered
What makes a good cheesecake crust?
A good cheesecake crust starts with crushed cookies like graham crackers or digestive biscuits. You mix them with a little sugar and melted butter. The butter binds the crumbs together and the sugar adds sweetness. Press the crust firmly into the pan with the bottom of a glass. Pre-baking it for ten minutes makes it golden and crunchy. That step keeps the crust from getting soggy later. A sturdy crust holds up against the creamy filling and gives every bite a nice crunch.
Can I use frozen blueberries for cheesecake topping?
You can use frozen blueberries, but you need to thaw and drain them first. Frozen berries release a lot of extra juice as they bake. Too much juice can make the cheesecake watery and the crumble mushy. After thawing, pat the berries dry with a paper towel. Then toss them with a little flour before adding them to the top. That small step keeps the filling firm and the crumble crisp. Fresh berries work best, but frozen ones can do the job with care.
How do I prevent my cheesecake from cracking?
The best way to prevent cracks is to bake your cheesecake low and slow. A water bath keeps the oven moist and the heat gentle. After baking, turn off the oven and leave the door cracked open for one hour. This slow cool-down stops the top from splitting. Do not rush the cooling process at all. Let the cheesecake sit on the counter for another hour before refrigerating. Patience is the secret to a smooth, beautiful top every time you bake.
What’s the difference between a crumble and a crisp topping?
A crumble topping uses flour, butter, and sugar mixed until it looks like small pebbles. It bakes into a soft, buttery layer that stays tender. A crisp topping also has oats or nuts added for extra crunch. The oats give it a firmer, toastier texture after baking. For this cheesecake, a crumble works better because it stays soft and blends nicely with the creamy filling. A crisp would be too crunchy on top of the smooth cheesecake layer. Both are good, but each fits a different dessert.
Can this cheesecake be made ahead of time?
Yes, this cheesecake is perfect for making ahead of time. You can bake it a full day before you plan to serve it. The cheesecake needs at least six hours in the fridge to set properly, but overnight is even better. Letting it rest overnight gives the flavors time to blend together. The texture becomes creamier and the crust stays firm. You can even freeze it for up to three months. Making it ahead takes the stress out of hosting and leaves you free to enjoy your guests.
How do I know when the cheesecake is done baking?
You know your cheesecake is done when the edges look set and firm, but the center still jiggles a little. Give the pan a gentle shake. The middle should wobble like jelly, not slosh like liquid. The cheesecake will keep cooking from its own heat after you turn off the oven. This is called carryover cooking and it finishes the center perfectly. Do not leave it in the oven too long or the top will crack. A slightly wobbly center is your best sign of a creamy result.
Which tip will you try first?
Final Thoughts from My Kitchen to Yours
I hope you love this Blueberry Crumble Cheesecake as much as I do. Every bite brings back memories of lazy Sunday afternoons and family gathered around the table. Have you tried this recipe? I would love to hear how it turned out for you. Please comment below and share your story.
Remember, cooking is about joy, not perfection. If your cheesecake cracks, put extra berries on top. If the crumble sinks, call it a surprise layer. There is no wrong way to make something with love. Keep baking, keep sharing, and keep making memories in the kitchen.
Happy cooking!
—Grace Ellington.

My Ultimate Blueberry Crumble Cheesecake Recipe
Description
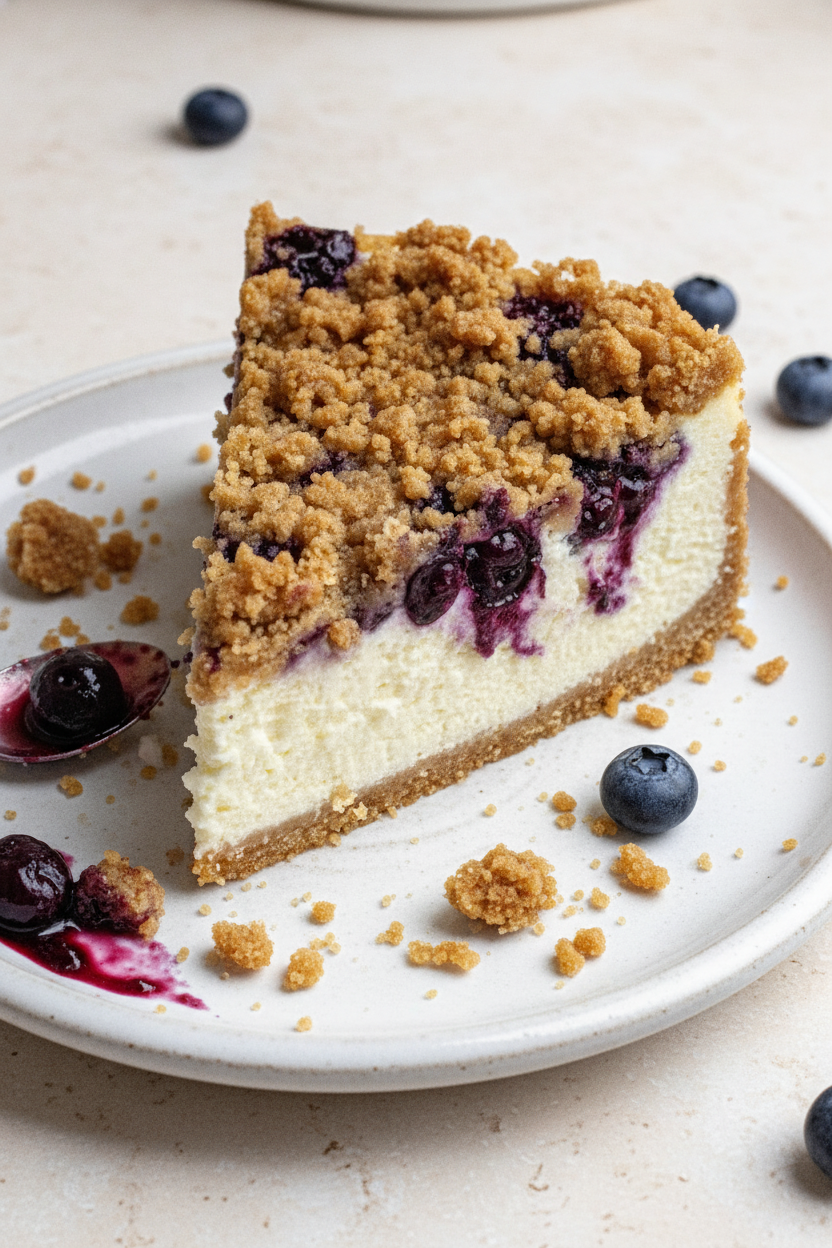
Experience the delightful contrast of textures and flavors with this ultimate blueberry crumble cheesecake, featuring a buttery cookie crust, fresh blueberry layer, crumbly topping, and creamy cheesecake filling.
Ingredients
Cookie Crust
Blueberries
Crumble
Cheesecake
Instructions
Before starting, preheat the oven to 160ºC/ 325ºF conventional oven. Prepare a 23 cm/9 inch springform tin lined with parchment paper in the bottom.In a food processor, add the cookies and granulated sugar and blend it all together until a fine sand-like texture. Melt the butter. Add the melted butter to the food processor and blend it together with the blended cookies.Add the cookie crumbs to the springform and press the cookie crumbs down with the bottom of a glass, and up against the side of the pan, so it’s well packed together and flattened out.Bake it for 10 minutes. Then let it cool down so that it’s cool to touch. Keep the oven turned on.
While the crust bakes, prepare the blueberries and the crumble.In a small bowl, mix together the blueberries, granulated sugar and all-purpose flour. Then add the lemon juice and mix it all together until there is no dry flour left. Set it aside.For the crumble, add all-purpose flour and brown sugar to another bowl and mix it together. Melt the butter and pour it over the flour mixture. With a fork mix it together until it forms a crumbled structure and there is no dry flour left. Set aside both toppings while making the cheesecake filling.
With a hand mixer or in a stand mix using the paddle attachment, cream the cream cheese for 1 minute on low speed. Then add the granulated sugar and let it mix for 1 minute on low speed. Scrape down the side of bowl mix it together for another 30 seconds.In a small bowl, mix together the sour cream and cornstarch until smooth. Add it to the cream cheese with the vanilla extract and let it mix on low speed until combined.Then add two eggs at a time and let it mix on low speed until combined. Once all the eggs have mixed in, scrape down the sides of the bowl and give it a final mix to make sure all the ingredients have incorporated.Pour the cheesecake batter into the spring pan. Gently divide the blueberries first on top of the cheesecake, followed by the crumble.Boil up water in a kettle. Place the springform pan in a 30 cm/12 inch cake pan. Place the cake pan in another baking pan or roasting pan and fill it with hot water. This method will prevent water from getting into the crust. Alternatively, add a triple layer of aluminium foil around the cake pan to safely seal it from the water before placing it in a water bath.Bake for 1 hour and 20-30 minutes.Once the time has passed, give the tray a very gentle shake. The cheesecake should still be a small wobbly in the middle. Turn off the oven and have the oven door slightly open and let the cheesecake cool down in the oven for 1 hour.Then take it out of the oven and remove it from the water bath and place the cheesecake on a cooling rack. Let it cool down fully for about 1 hour to room temperature.Finally, once at room temperature, place it in the fridge and let it set for at least 6 hours, preferable overnight before eating.
Notes
- For best results, use full-fat cream cheese and sour cream at room temperature. Let the cheesecake set overnight for the cleanest slices.