
The Bar That Broke My No-Sweets-Before-Noon Rule
I made these on a Sunday morning just to test the recipe.
By ten thirty I had eaten two bars standing over the kitchen counter in my pajamas.
I told myself it was research. The oats make it practically breakfast. The raspberries are fruit. This is basically a granola bar with ambition and I stand by that completely.
My husband walked in, saw me, saw the pan, and without saying a single word cut himself a piece.
We ate in comfortable silence and agreed never to speak of it again.
Why These Bars Are Different From Every Other Crumble
Most crumble desserts have a soft, almost soggy bottom layer.
Not these.
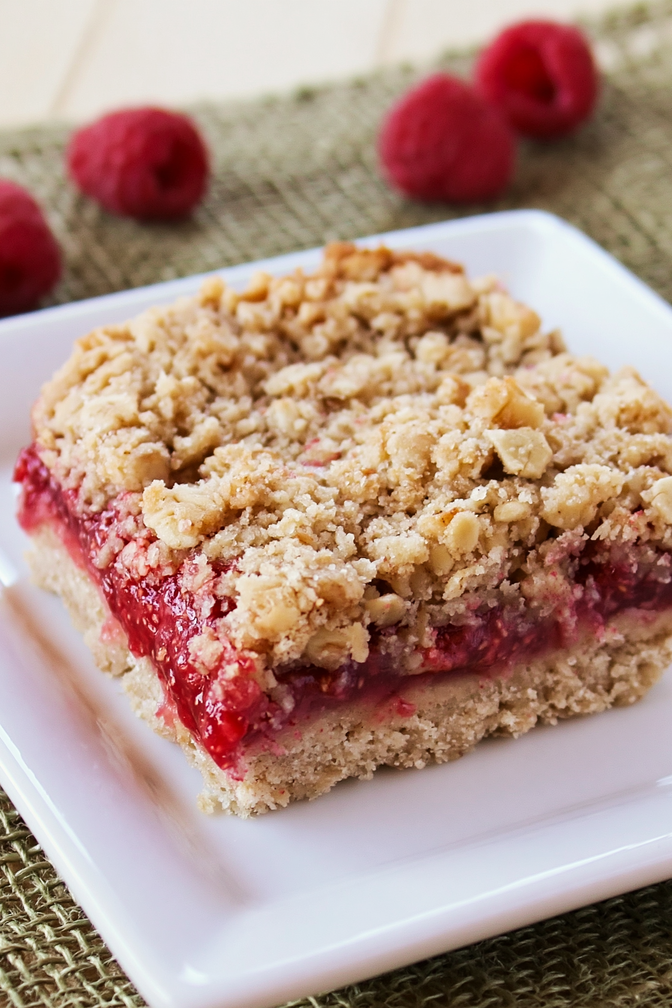
The oat base bakes up firm and golden and holds together when you pick it up. The raspberry layer in the middle is bright and jammy and a little tart. Then the crumble on top is loose and buttery and crisp.
Three textures. One bar. Zero regrets.
This matters because a bar that falls apart the second you lift it is a bar that ends up eaten with a spoon from a bowl. Which is fine. But this one holds together and that makes it a bring-to-the-party dessert instead of a stay-at-home dessert.
Fun fact: Oats have been used in baking since medieval Scotland, where they were pretty much in everything. Scottish bakers figured out centuries ago that oats make things hearty and crisp and wonderful. They were ahead of their time and I respect them deeply.
Making the Raspberry Jam Is the Fun Part
You are not opening a jar here.
You are throwing fresh or frozen raspberries into a small pot with a little sugar and lemon juice and watching something magical happen in about five minutes.
The berries break down. The juice thickens. The whole kitchen smells incredible.
The lemon juice is not optional. It is doing two things at once. It makes the raspberry flavor brighter and it helps the jam set up instead of staying runny. Do not skip it or your filling will seep into the base and make everything soft.
(Hard-learned tip: The jam should look thick and glossy when it comes off the heat. If it still looks thin and watery, give it another two minutes. Thin jam means a soggy bar and that is a sad outcome for everyone involved.)
The Oat Mixture Does Double Duty
Here is the clever part of this recipe and why I love it.
You make one bowl of oat mixture. That is it. Just one.
Two thirds of it goes into the bottom of the pan and becomes the base. The rest gets scattered over the raspberry jam and becomes the crumble top.
Same mixture. Two completely different jobs. One bowl to wash.
My kind of recipe.
The key is pressing that base layer firmly and evenly before anything else goes on top. Use your hands or the flat bottom of a glass. Really pack it down. A loose base crumbles when you slice and the whole bar falls apart.
This matters because a firm base means clean slices and clean slices mean a beautiful tray that gets photographed before it gets eaten.
(Pro tip: Set aside your top crumble portion before you press the base. I forgot once and pressed almost everything into the pan and had almost nothing left for the top. The bars looked bald. Learn from me.)
Cooling Is Not Suggestions. It Is Science.
Pull these out of the oven and they will smell so good you will want to slice immediately.
Do not slice immediately.
The raspberry layer needs time to set up as the bars cool. Cut too soon and that jammy middle runs everywhere. You end up with raspberry soup in a crumble situation. Still delicious. Completely unsliceable.
Cool them fully at room temperature first. Patience here pays off in clean, gorgeous bars that hold their shape and look like you put in much more effort than you actually did.
This matters because you waited the whole bake time already. You can wait another hour. The bars will still be there. I promise.
How to Make Raspberry Oat Crumble Bars
Ingredients
- 2 cups raspberries, fresh or frozen
- ¾ cup sugar, divided
- 1 tbsp lemon juice
- 1½ cups flour
- 1 cup rolled oats
- ½ cup brown sugar
- ½ tsp baking soda
- ¼ tsp salt
- ¾ cup butter, melted
Let’s Build These Bars
Step 1: Preheat your oven to 350 degrees.
Step 2: Simmer raspberries, ¼ cup sugar, and lemon juice in a small pot over medium heat for about 5 minutes until thick and jammy.
Step 3: Set the raspberry jam aside to cool slightly while you make the oat mixture.
Step 4: Mix flour, oats, brown sugar, remaining sugar, baking soda, and salt together in a large bowl.
Step 5: Stir in melted butter until the mixture clumps together and looks like wet crumble.
Step 6: Set aside about one third of the oat mixture in a separate bowl for the top. Do this before you press anything.
Step 7: Line a 9×13 pan with parchment paper. Press the remaining two thirds of the oat mixture firmly and evenly into the pan.
Step 8: Spread the raspberry jam evenly over the base all the way to the edges.
Step 9: Scatter the reserved oat mixture loosely over the raspberry layer. Do not press it down. Leave it crumbly and uneven.
Step 10: Bake for 25 to 30 minutes until the top is golden brown and the edges look set.
Step 11: Cool completely at room temperature before slicing. No shortcuts here.
Total time: 45 minutes plus cooling — Serves: 16
When Things Go Sideways
Base crumbling when you slice? It was not packed tightly enough. Really press that bottom layer firmly next time and give it the full cool time before cutting.
Raspberry layer running everywhere? The jam was too thin going in or you sliced too soon. Simmer it longer next time and wait for a full cool before the knife comes out.
Top not golden after 30 minutes? Every oven is a little different. Give it another five minutes and check again. You want that top fully golden, not pale.
Bars sticking to the pan? Line with parchment paper and leave some hanging over the edges. You can lift the whole thing out cleanly and slice it on a cutting board.
Quick Questions
Can I use frozen raspberries? Yes. No need to thaw first. Throw them straight into the pot. They break down faster than fresh and work just as well.
Can I use a different fruit? Absolutely. Blackberries, blueberries, and strawberries all work beautifully with this same base. Same amounts, same process.
Can I make these ahead? Yes, up to two days ahead. Store covered at room temperature for the first day or in the fridge after that. They actually slice cleaner on day two.
Can I freeze them? Yes. Wrap individual bars and freeze for up to two months. Thaw at room temperature for an hour and they come back perfectly.
From My Kitchen to Yours
These bars are the ones I make when I want to bring something to a gathering that looks impressive, travels well, and takes almost no effort to pull together.
They hit that perfect spot between a cookie and a pie and a crumble and something your grandma would have made on a Saturday afternoon.
Make them the day before if you can. Slice them cold. Watch them disappear faster than you expected and quietly feel very good about yourself.
Tag Savory Discovery on Pinterest with your crumble bars. I want to see that golden top.
Happy cooking!
—Elowen Thorn

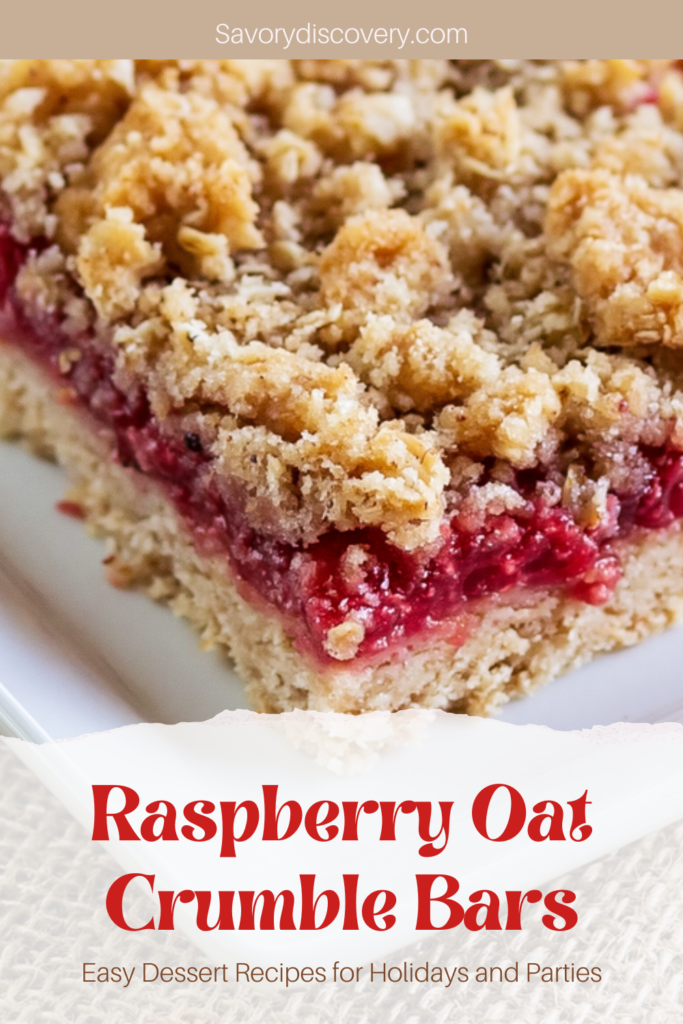
Raspberry Oat Crumble Bars
Ingredients
Instructions
- Preheat oven to 350°F. Simmer raspberries, 1/4 cup sugar and lemon juice 5 minutes into a jam. Set aside.
- Mix flour, oats, brown sugar, remaining sugar, baking soda and salt. Stir in melted butter.
- Press 2/3 of oat mixture into lined 9×13 pan.
- Spread raspberry jam over base.
- Crumble remaining oat mixture on top.
- Bake 25-30 minutes until golden.
- Cool completely before slicing.
Notes
- Reserve some oat mixture for the top before pressing the base — makes a beautiful crumble finish. Let cool fully before slicing or the raspberry layer will run.