

My First No-Bake Surprise
I first made this cake on a hot summer day. My oven was broken. I felt so frustrated. But I mixed what I had in the fridge. The result was this cool, fluffy dream. I still laugh at that happy accident.
This matters because you don’t need fancy tools. You just need a bowl and a spoon. It proves good things come from simple fixes. What’s your favorite “happy accident” in the kitchen? I’d love to hear your story.
The Magic of Marshmallow Fluff
That jar of marshmallow fluff is magic. It makes the filling sweet and cloud-like. *Fun fact: Marshmallow fluff was invented in a kitchen, just like ours!* It was a experiment that worked perfectly.
Fold in the whipped topping gently. You want to keep all that air. Doesn’t that smell amazing? It’s like sweet vanilla clouds. This step matters. It gives the cake its dreamy, light texture.
Why a Chilled Crust Matters
Don’t skip chilling the crust. I learned this the hard way. Once, I was in a rush. The crust crumbled everywhere. It was a mess! Now I always let it get firm and cold.
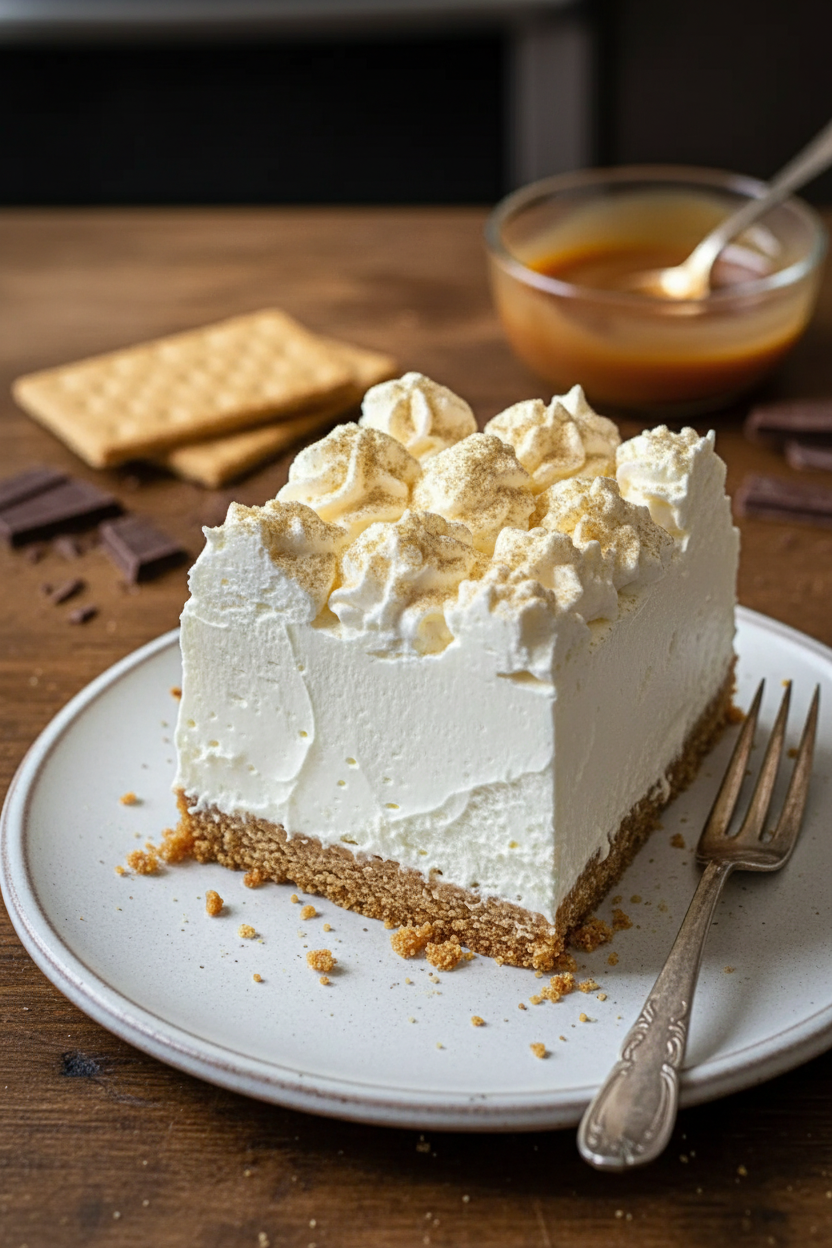
A firm crust is your foundation. It holds everything together. It’s the first thing you taste. That buttery, crunchy bite is so important. Do you prefer graham cracker crust or a cookie crust? Tell me your pick.
The Topping Party
This is the fun part. Let everyone choose their own topping. My grandkids love mini marshmallows. I adore fresh berries. It makes each slice special for the person eating it.
This matters because food should bring joy. A little drizzle of chocolate is a smile on a plate. It’s not just about eating. It’s about sharing and making memories. What topping would make you smile the most?
Patience is a Sweet Ingredient
Waiting is the hardest part. You must let it chill for hours. I know you want to eat it right away. But trust me, waiting makes it perfect. The flavors become friends.
This teaches us a good lesson. Some things can’t be rushed. Good food, like good times, needs a little patience. The wait is always worth it for a slice of this cool, creamy dream.
Ingredients:
| Ingredient | Amount | Notes |
|---|---|---|
| Graham cracker crumbs | 1½ cups | For the crust |
| Granulated sugar | ⅓ cup | For the crust |
| Unsalted butter, melted | ½ cup (1 stick) | For the crust |
| Cream cheese, softened | 16 oz | For the filling |
| Marshmallow fluff | 7 oz (1 jar) | For the filling |
| Vanilla extract | 1 tsp | For the filling |
| Whipped topping (e.g., Cool Whip) | 8 oz (1 container) | Thawed; for the filling |
| Fresh berries, mini marshmallows, chocolate, etc. | As desired | Optional toppings |

Instructions
Step 1: Let’s make the crust first. Mix your graham crumbs and sugar in a bowl. Pour in the melted, golden butter. Stir until it looks like wet sand. Press it firmly into your pan. (Use a cup to press it down flat!) Pop it in the fridge to get cold.
Step 2: Now for the fluffy filling. Beat the cream cheese until it’s super smooth. Add the marshmallow fluff and vanilla. Doesn’t that smell amazing? Fold in the whipped topping gently. This keeps it light and dreamy. What’s your favorite fluffy dessert? Share below!
Step 3: Time to put it all together. Spread your creamy filling over the cold crust. Smooth the top with a spatula. Cover it and let it sleep in the fridge. Wait at least four hours. I know, waiting is the hardest part!
Step 4: The fun part is here! Unlock the springform pan carefully. Now, decorate your masterpiece. Add berries, mini marshmallows, or chocolate drizzle. Slice it with a warm knife for clean pieces. (Run your knife under hot water first!) Serve it cold and enjoy every bite.
Creative Twists
Campfire S’mores: Use chocolate graham crumbs for the crust. Mix mini chocolate chips into the filling. Top with toasted marshmallows.
Berry Patch Dream: Swirl raspberry jam into the filling before chilling. Top with a mountain of fresh, juicy mixed berries.
Chocolate Caramel Swirl: Drizzle caramel and chocolate sauce over the top. Use a toothpick to swirl them into pretty patterns.
Which one would you try first? Comment below!
Serving & Pairing Ideas
This cheesecake is perfect all on its own. For a special touch, add a dollop of fresh whipped cream. A few mint leaves make it look so pretty. I love serving it with a cup of cold milk. It reminds me of summer evenings on the porch. Which would you choose tonight?
Keeping Your Dream Dessert Dreamy
Let’s talk about keeping your cheesecake perfect. First, the fridge is its best friend. Cover it tightly with plastic wrap. This keeps other food smells away. It will stay fresh for about four days. The freezer is great for longer storage. Wrap the whole pan or slices in plastic, then foil.
I remember my first no-bake cheesecake. I just covered the top of the pan with a plate. The next day, my cheesecake tasted like onions! Now I wrap it tight. You can also freeze individual slices. This lets you have a sweet treat anytime. Thaw a slice in the fridge for a few hours.
Batch cooking matters because life gets busy. Making two crusts at once saves time. You can freeze one for later. Having a dessert ready in the freezer is a gift to your future self. It means you’re always ready for guests or a craving. Have you ever tried storing it this way? Share below!
Three Little Hiccups and How to Fix Them
Even easy recipes can have small issues. Here are three common ones. First, a soggy crust. This happens if the butter is too hot. Let your melted butter cool a bit before mixing. Press the crust in firmly and chill it well.
Second, a lumpy filling. Your cream cheese must be very soft. I leave mine on the counter for an hour. I once tried to beat cold cream cheese. My arm got tired and the filling was grainy. Soft cheese blends smoothly with the fluff.
Third, a cheesecake that won’t set. This is about patience. It needs a full four hours in the cold fridge. Overnight is even better. Letting it set matters for the perfect slice. It builds your confidence when it turns out right. Fixing small problems matters because it makes cooking fun, not frustrating. Which of these problems have you run into before?
Your Quick Questions, Answered
How do you make a no-bake marshmallow fluff cheesecake?
Start with a simple crust. Mix graham cracker crumbs and sugar with melted butter. Press it into a pan and chill. For the filling, beat softened cream cheese until smooth. Then mix in the marshmallow fluff and vanilla. Finally, gently fold in the whipped topping. Spread this fluffy filling over your crust. Smooth the top and refrigerate it for at least four hours. This chill time is key for the perfect slice.
What can I use instead of marshmallow fluff in cheesecake?
You can use marshmallow creme, it is the same thing. Another good swap is homemade marshmallow fluff. You can also melt regular marshmallows with a little corn syrup. Just let the mixture cool before using it. Some folks use a jar of store-bought frosting for a different flavor. The texture will be a bit denser but still delicious. The goal is to keep that sweet, creamy quality in your filling.
How do you keep a no-bake cheesecake from falling apart?
Make sure your crust is packed down firmly. Use the bottom of a cup to press it. Chill the crust before adding the filling. This helps it stick together. Most importantly, let the cheesecake chill long enough. Four hours is the minimum, but overnight is best. This gives the filling time to firm up properly. When you slice it, use a sharp knife wiped clean between cuts.
Can you freeze a no-bake marshmallow fluff cheesecake?
Yes, you can freeze this cheesecake very well. First, let it set completely in the refrigerator. Then, wrap the whole pan tightly in plastic wrap. Cover that with a layer of aluminum foil. You can also freeze individual slices for a quick treat. To serve, thaw it overnight in your fridge. The texture will be just as creamy and delightful as the day you made it.
What is the difference between marshmallow fluff and marshmallow creme?
There is no real difference. Marshmallow fluff and marshmallow creme are the same product. They are just different brand names for that fluffy, spreadable marshmallow. They both work perfectly in this recipe. *Fun fact: The first marshmallow creme was made in Massachusetts over 100 years ago!* So feel free to use whichever jar you find at your local grocery store. They will give you the same sweet, airy result.
How long does no-bake marshmallow cheesecake last in the fridge?
Your cheesecake will keep well for about four to five days. Always keep it covered tightly with plastic wrap. Store it in the coldest part of your refrigerator. This keeps it fresh and prevents it from picking up other odors. For the best taste and texture, try to enjoy it within the first three days. The crust may get a little softer, but it will still be delicious.
Which tip will you try first?
From My Kitchen to Yours
I hope you love making this dreamy dessert. It is such a joy to share. Recipes are best when they create happy memories. I would love to hear about your kitchen adventures.
Tell me about your favorite topping. Did your family gobble it up? Your stories make my day. Have you tried this recipe? Please leave a comment below and let me know how it went.
Happy cooking!
—Elena Rutherford