

A Sweet Start
Hello, my dear. Come sit. The kettle is on. Today we are making magic with peppermint. These cookies are like little holiday pinwheels. They spin with red and white. I think they look like happy little presents.
My grandson calls them “candy cane cookies.” He helps me grind the candies. The sound is so loud and cheerful. I still laugh at that. What is your favorite holiday candy? Tell me in the comments.
The Heart of the Dough
First, we make one big batch of plain dough. It is sweet and simple. Then we split it in two. This is where the fun begins. One half stays plain and cozy.
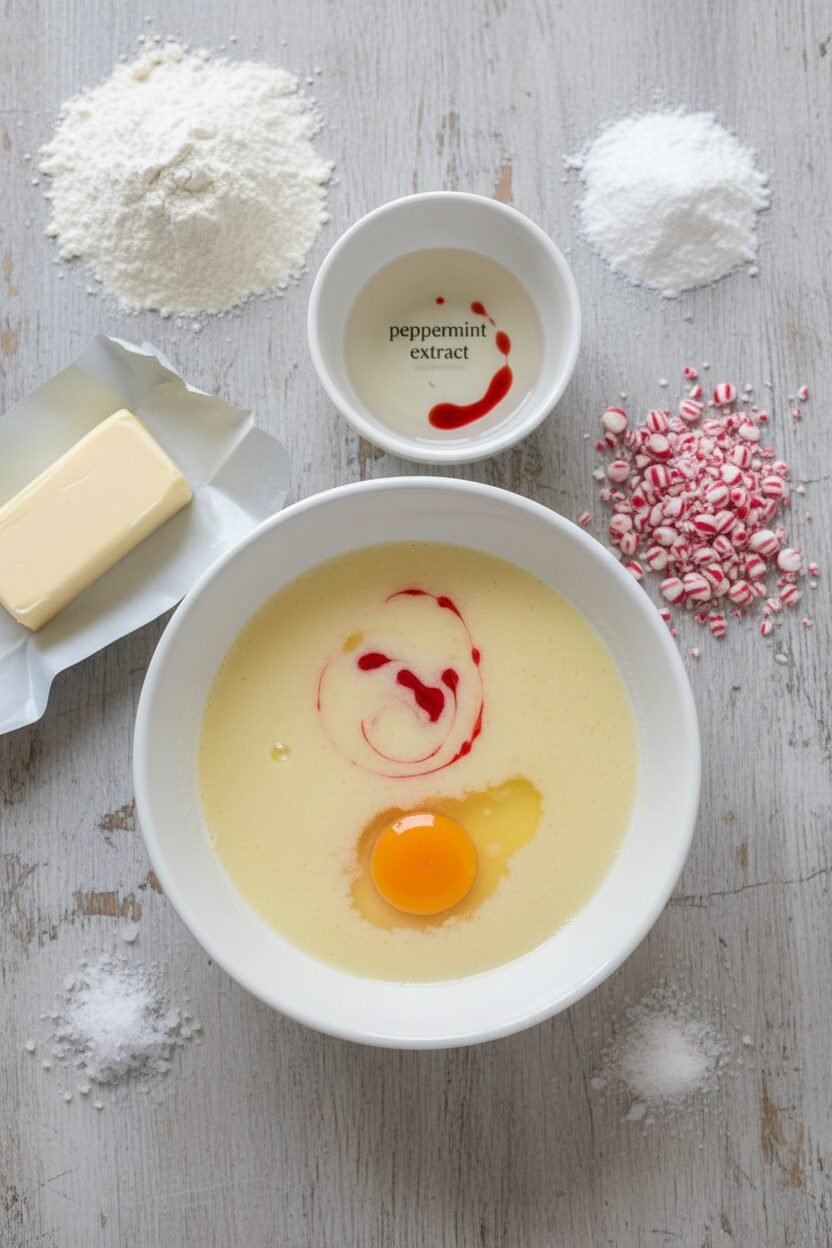
The other half gets a big personality. We add peppermint extract and red color. Then comes the crushed candy canes. They add a little crunch and sparkle. Fun fact: Peppermint can help settle your tummy. So these are almost like medicine!
Rolling Up the Joy
Now we roll each dough into a flat sheet. The red one and the white one. We chill them to make them behave. Then, we layer them together. Red on top of white.
We roll them up tight, like a sleeping bag. This makes the swirl inside. The secret is a firm, cold roll. This matters because a warm dough won’t hold its shape. It wants to be a puddle, not a pinwheel.
A Story from the Chill
Patience is the hardest ingredient. The dough log must rest in the cold. For two whole hours! I know it is hard to wait. I used to peek every ten minutes.
My Nana would swat my hand away. She said, “Good things take the time they take.” She was right. The wait makes the slices so clean and pretty. Do you find it hard to wait for treats?
Slice, Bake, and Share
Slice your cold log into thin rounds. See the perfect swirl? Place them on a tray. They need a little space to breathe. Then into the hot oven they go.
Watch them carefully. You want just a hint of gold on the edges. Doesn’t that smell amazing? That smell is pure holiday joy. This matters because sharing food you made is a special kind of love. Would you rather leave these out for Santa or share them at a party?
Ingredients:
| Ingredient | Amount | Notes |
|---|---|---|
| All-purpose flour | 3 cups | |
| Baking powder | ¾ teaspoon | |
| Salt | ¼ teaspoon | |
| Unsalted butter | 16 tablespoons (2 sticks) | Softened |
| Granulated sugar | 1 cup | |
| Egg | 1 large | |
| Vanilla extract | 1 teaspoon | |
| Peppermint extract | 1 teaspoon | |
| Peppermint candies | ½ cup | Finely ground (approx. 20 candies) |
| Red food coloring | 6 drops |
Candy Cane Swirl Delights
Hello, my dear. Come sit at the counter. I want to tell you about my Candy Cane Pinwheels. They remind me of my first Christmas with Grandpa. We hung candy canes on our tiny tree. I still laugh at that memory. Now we bake it into a cookie. Doesn’t that smell amazing? The swirl is like a sweet little secret inside. Let’s make some magic together. It’s easier than you think. I’ll walk you through every step.
Instructions
Step 1: First, mix your flour, baking powder, and salt in a bowl. Just whisk it until it’s friendly. Set this dry mix aside for now. It’s like making a soft bed for your cookies. I always do this first. It makes everything else smoother.
Step 2: Now, beat the soft butter and sugar together. Keep going until it’s fluffy and pale. It should look like a sweet, yellow cloud. Add the egg and vanilla and mix again. This is the heart of your cookie dough. Can you guess what makes it fluffy? Share below!
Step 3: Gently mix your dry ingredients into that fluffy butter cloud. Go slow so flour doesn’t fly everywhere! You’ll get a soft, plain dough. Take out half of it and wrap it up. We’ll use it in a minute. (A tip: scrape the bowl sides often for a perfect mix.)
Step 4: To the dough left in the bowl, add peppermint extract, red coloring, and crushed candy. Mix until it’s a cheerful pink. This part always makes me smile. It smells like a holiday party. Now you have two doughs: one plain, one peppermint.
Step 5: Roll each dough between parchment paper into a rectangle. Chill them for 15 minutes. This helps them behave. Then, lay the pink sheet right on top of the plain one. Press them together gently. Start from the long side and roll it up tight, like a sleeping bag.
Step 6: Wrap your dough log in plastic. Let it get firm in the fridge for two hours. I know, waiting is hard! But it makes slicing so easy. Preheat your oven to 375°F while you wait. Line your baking sheets with parchment paper, too.
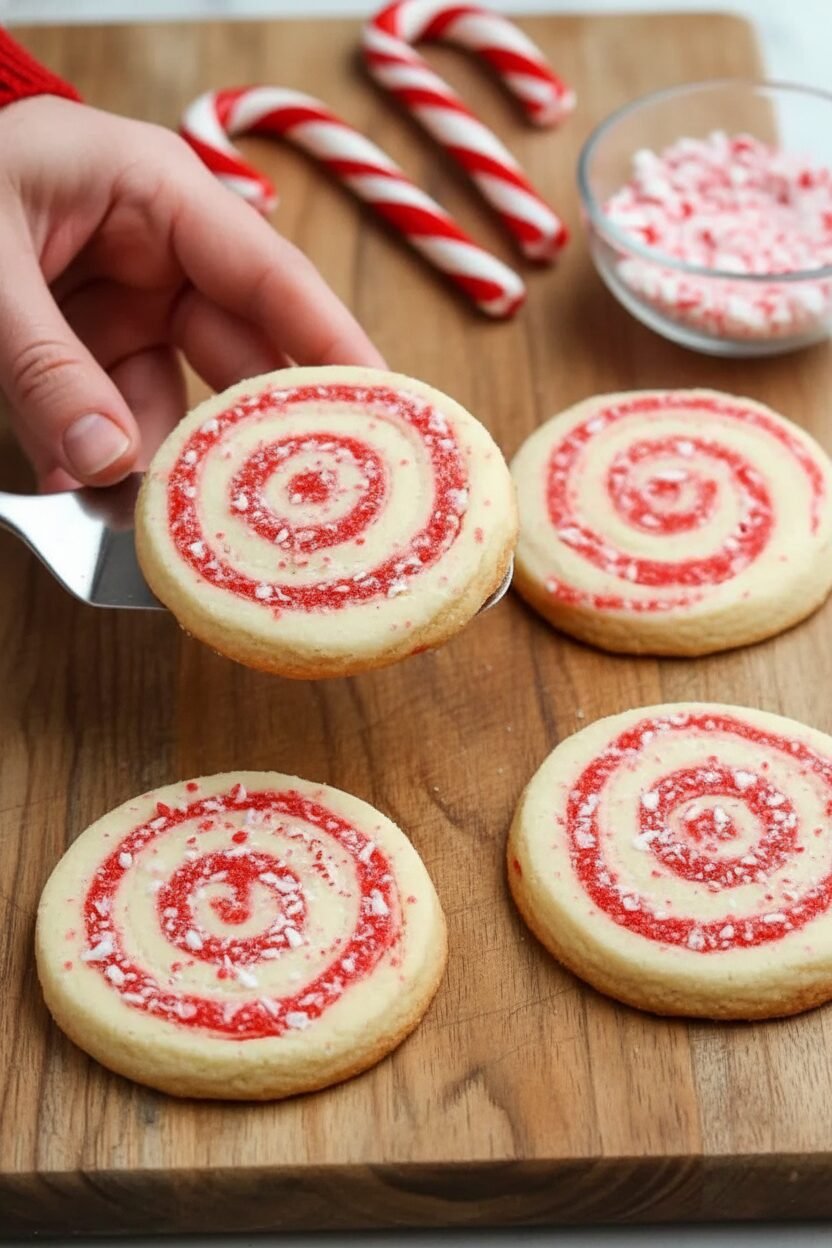
Step 7: Time to slice! Use a sharp knife to cut ¼-inch rounds. Place them on your sheets. They look like little pinwheels already. Bake for 12-14 minutes until the edges are just golden. Let them cool for 10 minutes on the sheet. Then move them to a rack. Aren’t they pretty?
Creative Twists
Chocolate Dip: Melt some chocolate. Dip half of each cooled cookie in it. Let it set. It’s so good.
Sparkling Sugar: Roll your dough log in red sanding sugar before slicing. You’ll get a sparkling, crunchy edge.
Peppermint Sandwich: Spread vanilla frosting between two cookies. It’s a minty, creamy dream.
Which one would you try first? Comment below!
Serving & Pairing Ideas
These cookies shine on a pretty plate. Stack them high on a cake stand. You could also crush a candy cane for a snowy sprinkle on top. For a cozy night, pair them with a mug of rich hot chocolate. The mint and chocolate are old friends. For the grown-ups, a small glass of peppermint schnapps is a festive match. It’s like the cookie in a sip. Which would you choose tonight?
Keeping Your Pinwheels Perfect
These cookies keep beautifully. Let them cool completely first. Then store them in a tin at room temperature. They will stay fresh for about five days.
You can also freeze the dough log. Wrap it tightly in plastic wrap. I once tucked a log in my freezer for a month. It baked up perfectly for a surprise guest.
Batch cooking saves your future self time. Make a double batch of dough logs. Bake one now and freeze one for later. This matters because it makes holiday joy easy to share.
Have you ever tried storing it this way? Share below!
Cookie Troubles? Easy Fixes Right Here
Is your dough too soft to roll? Chill it longer. I remember when my first batch was like paste. Twenty more minutes in the fridge fixed it.
Are your pinwheels cracking when you slice them? Your dough log is too cold. Let it sit on the counter for five minutes. This matters because clean slices make pretty cookies.
Are the candies bleeding color? Your food coloring might be the cause. Try a gel color instead of liquid. Fixing small issues builds your cooking confidence. You learn as you go.
Which of these problems have you run into before?
Your Quick Questions, Answered
Q: Can I make these gluten-free?
A: Yes. Use a good gluten-free flour blend. The results will be just as tasty.
Q: How far ahead can I make the dough?
A: You can make the log up to three days ahead. Keep it wrapped in the fridge until you are ready.
Q: I don’t have peppermint extract. What can I use?
A: Use one extra teaspoon of vanilla. Add a bit more crushed candy canes for minty flavor.
Q: Can I double this recipe?
A: Absolutely. Just mix it in two separate batches. This ensures everything blends together well.
Q: Any optional tips?
A: Sprinkle a little extra crushed candy on top before baking. It adds a nice crunch. *Fun fact: The candy cane’s shape is said to represent a shepherd’s crook.*
Which tip will you try first?
From My Kitchen to Yours
I hope you love making these swirls. They always remind me of snowy days. My kitchen window would fog up from the oven’s heat.
Baking is about sharing warmth and stories. I would love to hear yours. Tell me all about your baking adventure.
Have you tried this recipe? Let me know how it went in the comments. Happy cooking!
—Elowen Thorn.


Candy Cane Swirl Delights
Description
Festive and delicious peppermint pinwheel cookies with a beautiful red swirl, perfect for the holiday season.
Ingredients
Instructions
- Prepare Dry Ingredients: In a medium mixing bowl, whisk together the all-purpose flour, baking powder, and salt until evenly combined. Set aside.
- Cream Butter and Sugar: In the bowl of a stand mixer fitted with the paddle attachment, beat the unsalted butter and granulated sugar on medium-high speed until the mixture is light and fluffy, approximately 2 minutes.
- Incorporate Egg and Vanilla: Add the large egg and vanilla extract to the butter mixture. Beat on medium speed until fully incorporated.
- Add Dry Ingredients to Wet: Reduce the mixer speed to low and gradually add the flour mixture. Continue mixing until a smooth dough forms.
- Divide Dough and Flavor: Remove half of the dough from the mixing bowl and wrap it in plastic wrap; set aside. To the remaining dough in the mixer, add the peppermint extract, finely ground peppermint candies, and red food coloring. Mix on low speed until the ingredients are fully combined and the dough is evenly tinted.
- Roll Dough Layers: Place the peppermint dough between two sheets of parchment paper. Roll it into a rectangle approximately 14 inches by 8 inches. Chill in the refrigerator for 15 minutes. Repeat this process with the reserved plain dough.
- Assemble Pinwheels: After chilling, carefully place the peppermint dough layer on top of the plain dough layer, aligning the edges. Gently press to adhere the layers together. With the long side facing you, tightly roll the dough into a log shape. Wrap the dough log in plastic wrap and refrigerate until firm, at least 2 hours.
- Preheat Oven: Preheat the oven to 375°F (190°C). Line two baking sheets with parchment paper.
- Slice and Bake: Using a sharp knife, slice the chilled dough log into ¼-inch thick rounds. Arrange the cookie slices on the prepared baking sheets, spacing them 1 inch apart.
- Bake Cookies: Bake the cookies in the preheated oven for 12 to 14 minutes, rotating and switching the baking sheets halfway through, until the edges are just beginning to turn golden.
- Cool and Serve: Allow the cookies to cool on the baking sheets for 10 minutes before transferring them to a wire rack to cool completely. Repeat with any remaining dough.
Notes
- For best results, ensure the dough is thoroughly chilled before slicing to get clean, defined swirls. Store in an airtight container for up to a week.