

The Secret in the Fridge
Let me tell you a little secret. It happens before the oven is even on. You wrap that roast in salt and plastic. Then you tuck it in the fridge. This is not just waiting. It is the salt getting cozy deep inside the meat. It makes every single bite taste wonderful.
I learned this from my own grandma. She would wink and say, “Patience, Ellie. Good food takes a quiet minute.” She was right. That quiet hour matters. It turns a simple roast into something special. Do you have a kitchen secret passed down in your family?
Why We Use the Cast Iron
That big, heavy pan is my favorite. It goes from the stove to the oven. One pan for everything. This is so smart. All the little brown bits from searing the meat stay in the pan. They are full of flavor. Later, they become your gravy.
Fun fact: That browning on the meat and veggies is called the “fond.” It is the best part! It matters because it gives your gravy a deep, rich taste. No flavor gets left behind. Doesn’t that smell amazing when you start to cook the vegetables?
A Low and Slow Oven
Now, the oven is very low. Only 225 degrees. This seems wrong, I know. We want it hot! But trust this old grandma. The low heat cooks the meat gently. It will not get tough or dry out. It just gets tender all the way through.
You wait for the thermometer to say 120 degrees. This takes a couple of hours. Use that time. Set the table. Talk with your family. The waiting is part of the love you put in the meal. What is your favorite thing to do while dinner cooks?
The Rest is Not a Break
When the roast is done, you must let it rest. Take it out and cover it loosely. This might be the hardest step! You want to slice it right away. But if you wait, magic happens. The juices inside settle down.
If you cut it too soon, all the good juice runs onto the board. Your meat will be dry. Letting it rest keeps the juice in the meat. This matters for every single slice. It is the difference between good and great. I still laugh at the time I didn’t wait. My poor roast was so thirsty!
Making the Gravy Story
Now for the gravy. This is where the story in the pan comes out. You put the skillet back on the stove. See all those brown bits? Add the broth and water. As you stir, the story lifts from the pan. It becomes this beautiful, dark gravy.
You strain out the vegetables. They have given all their flavor. What you pour into the bowl is pure Christmas color. Taste it. It is the soul of the meal. Do you like your gravy thick or a little thinner?
Slicing it Right
Finally, take off the string. Find the direction of the grain. See those little lines in the meat? You must slice across them, not with them. This breaks up the tough threads.
Your knife will glide through. Each slice will be tender. This matters more than you think. It makes the meat easy to chew and soft on your tongue. Then, just add a spoonful of that gravy. The story is complete, from the salty start to the very last bite.
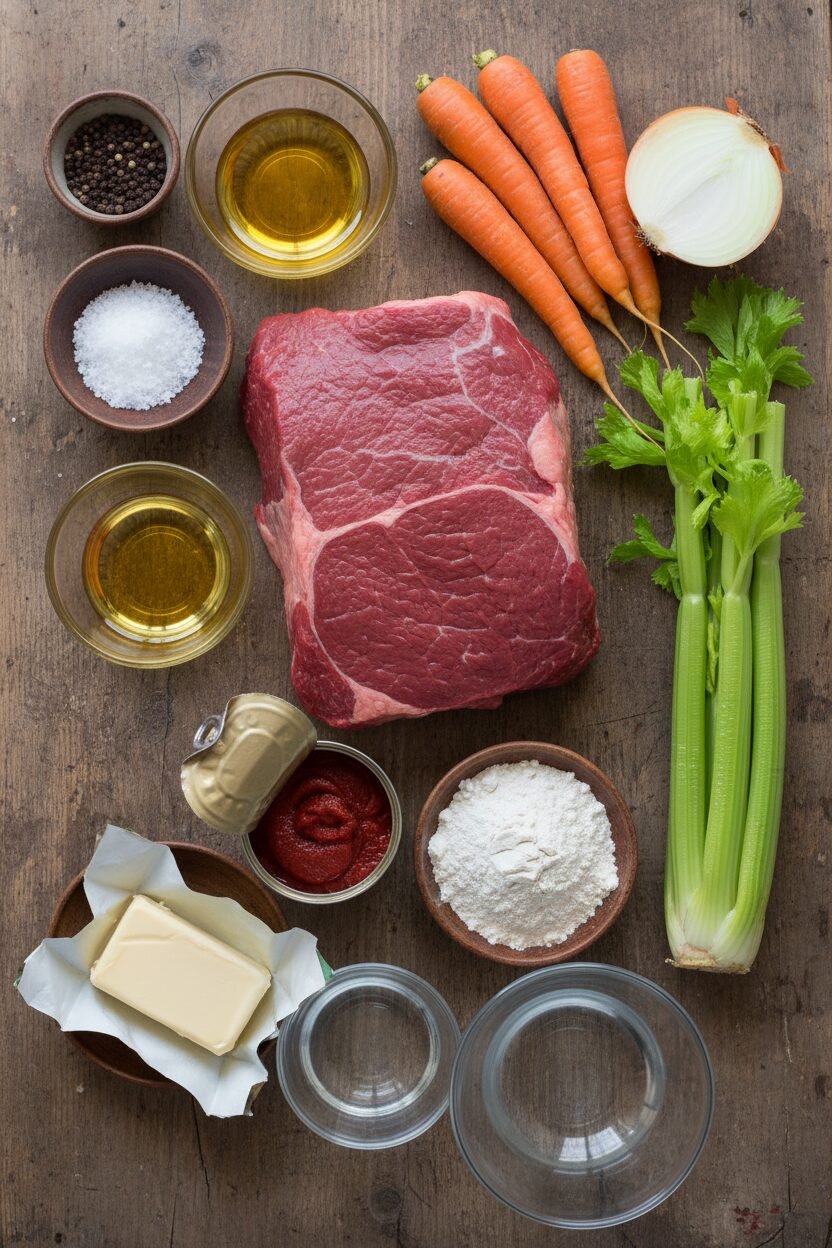
Ingredients:
| Ingredient | Amount | Notes |
|---|---|---|
| boneless top round roast | 1 (4- to 5-pound) | trimmed and tied at 1-inch intervals |
| Salt and pepper | for seasoning | |
| vegetable oil | 1 tablespoon | plus extra as needed |
| carrots | 2 | peeled and cut into 2-inch pieces |
| onion | 1 | sliced into ½-inch-thick rounds |
| celery rib | 1 | cut into 2-inch pieces |
| unsalted butter | 4 tablespoons | |
| all-purpose flour | ⅓ cup | |
| tomato paste | 1 teaspoon | |
| beef consommé | 2 (10.5-ounce) cans | |
| water | 1 ½ cups |
Instructions
Step 1: First, give your roast a good sprinkle of salt. Wrap it up tight and let it rest in the fridge. This makes it so juicy and tender. I do this the night before. It feels like a little secret head start. (This resting time is the real key to flavor!)
Step 2: Now, heat your big cast iron skillet. Pat the roast dry and add pepper. Get that oil nice and hot. Brown your roast on every side until it’s a lovely color. This gives our gravy its wonderful taste. Do you know what “searing” means? Share below!
Step 3: Pour off most of the fat, but save a little. Toss in your chopped carrots, onion, and celery with butter. Let them get soft and happy. Stir in flour and tomato paste until it looks rusty. Then nestle the roast right on top of the veggies. The whole pan goes into a low oven. It will smell amazing soon.
Step 4: Carefully take the hot skillet out. Move the roast to a board and cover it loosely. Let it have a nice, long rest. All the juices will settle back inside. This waiting is the hardest part for me. I always want to peek!
Step 5: Time for gravy! Put the skillet with veggies back on the stove. Cook them until they are a deep, golden brown. Slowly whisk in the consommé and water. Scrape up all those tasty brown bits. Let it bubble and thicken into a rich, beautiful gravy. (Always add the meat juices from the board—that’s liquid gold!)
Step 6: Strain your gravy into a bowl, pushing on the veggies. Then, slice your roast thin against the grain. See the lines in the meat? Cut across them. Serve it all up warm. I still laugh at how my grandkids cheer for this gravy.
Creative Twists
This recipe is a wonderful classic. But sometimes, a little twist is fun. Try adding a few whole garlic cloves with the veggies. They become sweet and soft. Or, stir a spoonful of red currant jelly into your finished gravy. It adds a festive, tangy sweetness. For a herby note, tuck a few sprigs of fresh rosemary under the twine before roasting. Your kitchen will smell like a holiday dream. Which one would you try first? Comment below!
Serving & Pairing Ideas
Slice that beautiful roast onto a warm platter. I love it with fluffy mashed potatoes to catch all the gravy. Buttery roasted Brussels sprouts are perfect on the side. For a drink, a glass of smooth red wine pairs nicely. For the youngsters, a sparkling apple cider feels special. Pour it into a pretty glass. Doesn’t that sound cozy? Which would you choose tonight?
Keeping Your Feast Fresh
Let’s talk about leftovers. They are a gift! First, let the roast cool completely. Then slice it. Store slices in gravy in a sealed container. It will keep for three days in the fridge.
You can freeze it, too. Portion slices and gravy into freezer bags. Squeeze out all the air. It will be good for two months. Thaw it overnight in your fridge.
Reheating is simple. Warm it gently in a pan with the gravy. Don’t let it boil. I once microwaved it dry. The meat got tough! Low and slow is the secret.
Batch cooking saves busy days. Make two roasts! Enjoy one now, freeze one for later. This matters because a ready-made meal brings peace. It is a hug from your past self. Have you ever tried storing it this way? Share below!
Simple Fixes for Common Hiccups
First, your gravy might be lumpy. Do not worry. Just pour it through a strainer. Press on the veggies. You will get smooth, rich gravy every time.
Second, the roast may not brown well. Your pan must be very hot. Pat the meat totally dry first. I remember when my roast steamed instead of seared. The pan was not hot enough!
Third, the meat can be tough. Always slice it thin against the grain. See those lines on the meat? Cut across them. This matters for tender bites.
Fixing small problems builds your confidence. It also makes the flavor so much better. Good technique turns ingredients into love. Which of these problems have you run into before?
Your Quick Questions, Answered
Q: Can I make this gluten-free? A: Yes! Use a gluten-free flour blend for the gravy. It works just the same.
Q: Can I prep anything ahead? A: Salt the roast a day early. Chop your veggies, too. This makes day-of cooking faster.
Q: What if I don’t have beef consommé? A: Use two cans of beef broth instead. The gravy will still be delicious.
Q: Can I make a smaller roast? A: Absolutely. Just reduce the cooking time. Use a meat thermometer to check.
Q: Any optional tips? A: Add a few sprigs of fresh thyme with the veggies. *Fun fact: Thyme was a symbol of courage in ancient times!* Which tip will you try first?
From My Kitchen to Yours
I hope you enjoy making this cozy meal. The smell filling your kitchen is the best part. It is a tradition waiting to happen in your home.
I would love to hear about your cooking adventure. Tell me about your family’s smiles at the table. Your stories are my favorite thing to read. Have you tried this recipe?
Happy cooking!
—Elowen Thorn.
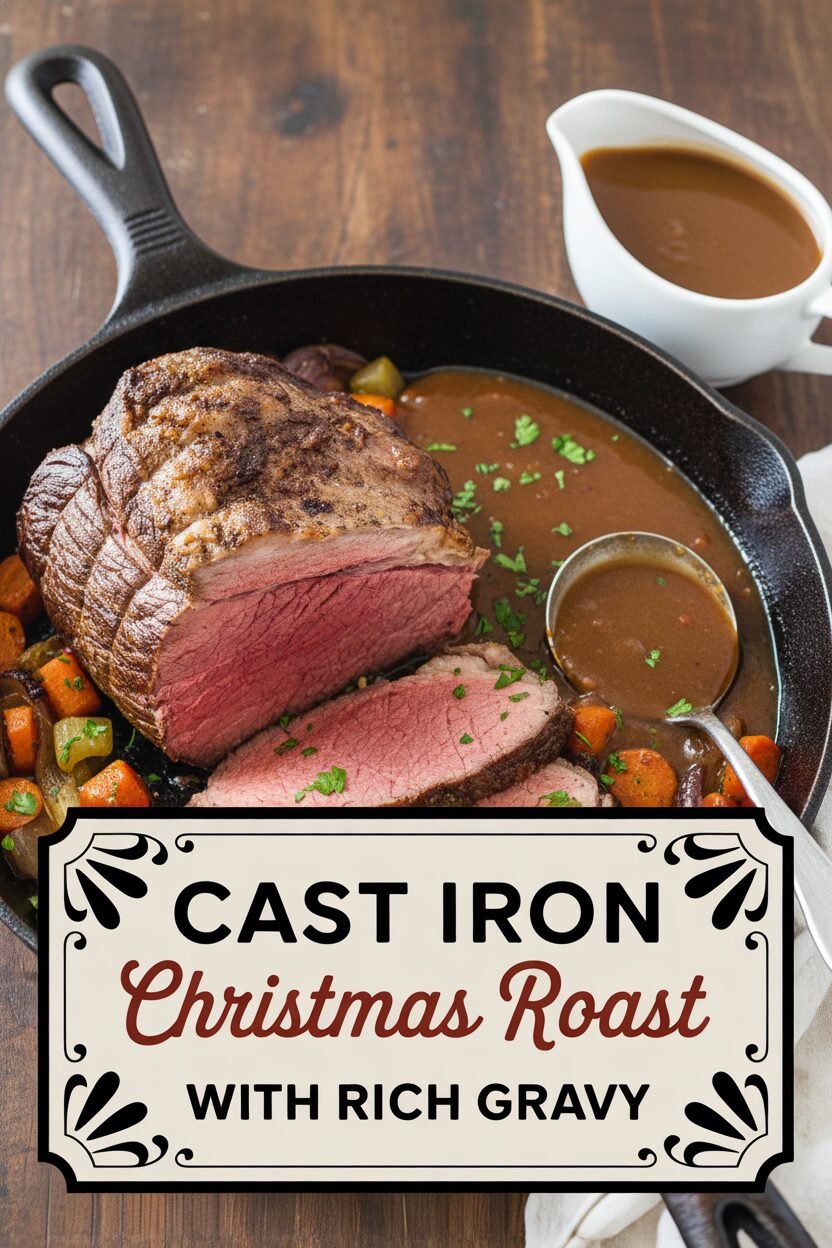

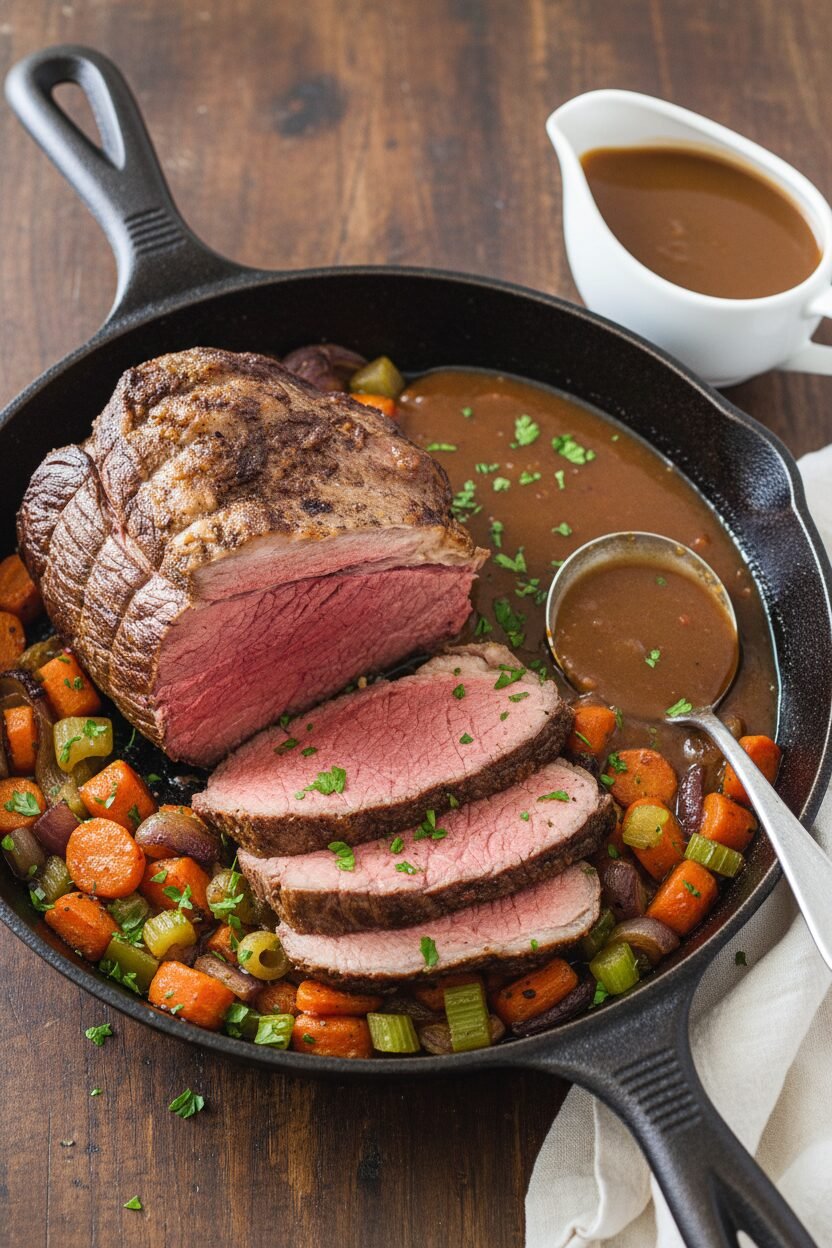
Cast Iron Christmas Roast with Rich Gravy
Description
A classic and impressive holiday centerpiece, this Cast Iron Christmas Roast features a perfectly cooked top round with a rich, deeply flavorful gravy.
Ingredients
Instructions
- Sprinkle roast with 2 teaspoons salt, wrap tightly with plastic wrap, and refrigerate for at least 1 hour or up to 24 hours.
- Adjust oven rack to middle position and heat oven to 225 degrees. Pat roast dry with paper towels and sprinkle with 2 teaspoons pepper. Heat 12-inch cast-iron skillet over medium heat for 5 minutes. Add oil and heat until just smoking. Brown roast on all sides, 8 to 12 minutes; transfer to plate.
- Pour off all but 2 tablespoons fat from skillet. (If necessary, add extra oil as needed to equal 2 tablespoons.) Add carrots, onion, celery, and butter and cook until vegetables are softened and lightly browned, 5 to 7 minutes. Stir in flour and tomato paste and cook until mixture begins to darken, about 2 minutes. Off heat, push vegetables to center of skillet. Place browned roast on top of vegetables, transfer skillet to oven, and roast until meat registers 120 to 125 degrees (for medium-rare), 1½ to 2 hours.
- Using potholders, remove skillet from oven. Transfer roast to carving board, tent loosely with aluminum foil, and let rest while making gravy.
- Being careful of hot skillet handle, place skillet with vegetables over medium heat and cook, stirring occasionally, until vegetables are deep golden brown, about 5 minutes. Slowly whisk in consommé and water, scraping up any browned bits and smoothing out any lumps. Bring to simmer and cook until gravy is thickened, 10 to 15 minutes. Stir in any accumulated meat juices.
- Strain gravy through fine-mesh strainer into serving bowl, pressing on vegetables to extract as much liquid as possible; discard solids. Season with salt and pepper to taste. Remove kitchen twine from roast and slice thin against grain. Serve with gravy.
Notes
- For best results, let the salted roast rest in the fridge overnight. Use a good instant-read thermometer to ensure perfect doneness. The gravy can be made ahead and reheated.