

My Kitchen Crunch Time
I love the sound of crushing Butterfingers. It is a happy noise. I put them in a bag and use my rolling pin. Some pieces stay big for a nice crunch later. It reminds me of my grandson helping. He always sneaks a piece. I still laugh at that.
Melting butter and marshmallows is pure magic. Doesn’t that smell amazing? Stirring in the peanut butter makes it so creamy. This matters because the peanut butter holds everything together. It makes each bite rich and soft. You can find more ways to use this candy in a fun Butterfinger treat.
Why We Mix It This Way
Always take the pot off the heat first. Then add your peanut butter. This keeps it from getting too hot. It mixes in smooth and perfect. I learned this the hard way years ago. My first batch was a sticky mess!
Next, fold in the cereal gently. You want every piece coated. But you do not want to smash the Krispies. This matters for the final texture. You get a treat that is both chewy and crisp. For another crispy, chewy delight, try these caramel crunch bars.
A Sweet Little Fact
*Fun fact*: The Rice Krispies cereal was invented in 1927. People loved the snap, crackle, pop! Adding candy to it is a newer, brilliant idea. It turns a simple snack into a party.
Using mini marshmallows is my secret. They melt faster than big ones. This means less time stirring over the stove. What is your favorite candy to add to treats? I would love to hear your ideas. A great Butterfinger dip is another easy idea for parties.
The Hardest Part
You must let the pan cool completely. This takes about an hour. I know, it is so hard to wait! The smell fills the whole kitchen. But waiting is the most important step.
If you cut too soon, the bars will fall apart. Letting them set makes them neat and easy to share. This matters if you are taking them to a friend. You want them to look as good as they taste. Do you have trouble waiting for treats to cool? I sometimes set a timer to keep myself busy. For a no-bake dessert that sets in the fridge, this poke cake is wonderful.
Make It Your Own
This recipe is like a friendly base camp. You can add so many things. Try a sprinkle of sea salt on top. Or mix in some chocolate chips. What would you add to make it special for you?
Sharing food is sharing joy. That is the real lesson here. A simple pan of treats can make a tough day better. It is a small act of love. I think that is why we keep making them. For another shareable bar with caramel, look at this caramel crunch recipe. Now, tell me, who will you share your batch with first?
Instructions
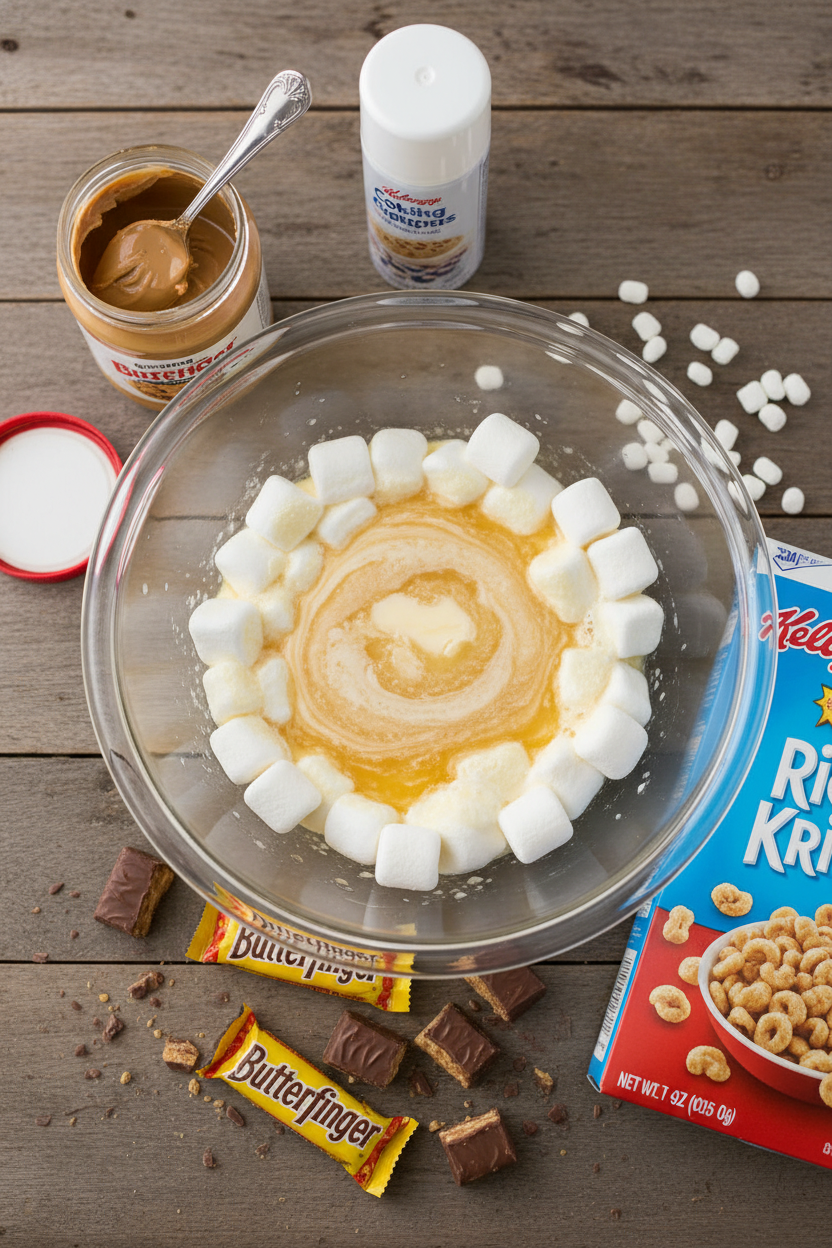
Step 1: First, spray your baking dish. This stops everything from sticking. I use my favorite non-stick spray. Now, put the Butterfingers in a bag. Crush them with a rolling pin. I still laugh at the noise it makes. (A tip: leave some big chunks for a fun crunch!)
Step 2: Melt the butter in a big pot. Use medium heat. Add all those mini marshmallows. Stir until they are gooey and smooth. Doesn’t that smell amazing? It reminds me of my grandkids’ smiles when they visit.
Step 3: Take the pot off the heat. Stir in the creamy peanut butter. Mix it in completely. Now, add your crushed candy. The colors look so cheerful. What’s your favorite part of a Butterfinger bar? Share below!
Step 4: Gently fold in the Rice Krispies cereal. You want every piece coated. Pour it into your prepared pan. Use a greased spatula to press it flat. (Press gently so treats stay soft!). Let them cool for an hour. This is the hardest part, waiting!
Creative Twists
Drizzle melted chocolate on top for extra fun.
Swap peanut butter for a chocolate hazelnut spread.
Press mini chocolate chips into the top before it cools. Which one would you try first? Comment below!
Serving & Pairing Ideas
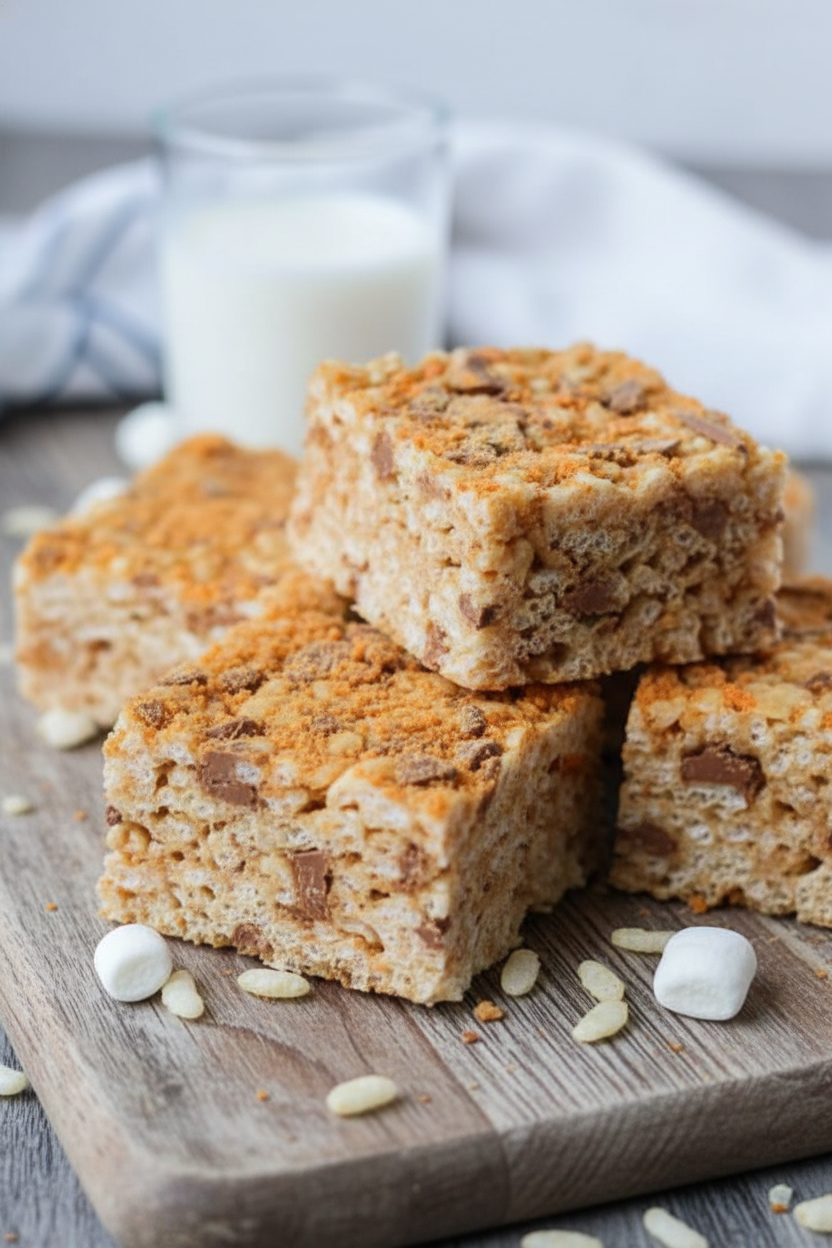
Serve these squares with a cold glass of milk. It’s the classic way. For a party, cut them into tiny bites. You could even add a scoop of vanilla ice cream. My other Butterfinger cake is perfect for that! Which would you choose tonight?
Keeping Your Treats Tasty
Let’s talk about storing these bars. They keep well at room temperature for three days. Just cover the pan tightly with foil. For longer storage, the freezer is your friend. Wrap individual bars in plastic wrap. Then place them all in a freezer bag. They will stay delicious for up to two months.
I remember my first batch of these treats. I left them out uncovered overnight. They became hard and stale by morning. Now I always cover them right away. Batch cooking these bars is a great idea. You can make a double batch easily. It saves time for busy weeks or surprise guests. Storing food well means less waste and more joy. Have you ever tried storing it this way? Share below!
Simple Fixes for Common Snags
First, sticky marshmallows can be a mess. Just grease your spoon and spatula first. This keeps everything from sticking. Second, bars can be too hard. This happens if you cook the marshmallow mix too long. Melt it just until smooth, then remove from heat.
Third, the mixture might not stick together. Press it firmly into the pan with greased hands. I once didn’t press enough and my bars crumbled. Getting the texture right builds your cooking confidence. It also makes the flavor perfect in every bite. For another great no-bake bar, try this Butterfinger caramel crunch bars recipe. Which of these problems have you run into before?
Your Quick Questions, Answered
How to make Butterfinger peanut butter crispy bars?
You start by melting butter and marshmallows together. Then you stir in creamy peanut butter. Next, mix in crushed Butterfinger candy bars. Finally, fold in the Rice Krispies cereal. Press the mix firmly into a greased pan. Let it cool completely before you cut into squares. It is a simple, no-bake treat the whole family will love.
What are the ingredients for Chefs Secret Butterfinger bars?
The key ingredients are Butterfingers, peanut butter, and cereal. You need unsalted butter, mini marshmallows, and creamy peanut butter. The recipe also calls for Rice Krispies cereal. Of course, you need the star of the show: Butterfinger candy bars. Crushing them adds wonderful texture and flavor. It is a classic combination that always satisfies a sweet tooth.
Can I use homemade peanut butter in this recipe?
Yes, you can use homemade peanut butter. Make sure it is creamy and not too oily. The texture needs to be similar to store-bought kinds. If your homemade version is very runny, the bars may not set. For best results, use a standard creamy peanut butter. This ensures your bars hold together nicely when you cut them.
How do I get the perfect crispy layer in Butterfinger bars?
The secret is to not over-mix. Gently fold the cereal into the marshmallow mix. Stop as soon as it is evenly coated. Press the mixture lightly into the pan. Do not pack it down too hard. This keeps the cereal from getting crushed and soggy. *Fun fact: The cereal stays crispy by creating tiny air pockets.
Are there any substitutions for corn syrup in the recipe?
Good news, this recipe does not use corn syrup. The marshmallows and peanut butter provide all the sticky sweetness. So you do not need to find a substitute. If you love peanut butter desserts, you might enjoy this creamy Butterfinger dip. It is perfect for parties and also has no corn syrup.
How should I store and how long do these bars last?
Store cooled bars in an airtight container at room temperature. They are best eaten within three to four days. For longer storage, freeze them. Wrap each bar tightly and place in a freezer bag. They will keep for about two months. Thaw at room temperature for an hour before eating. Which tip will you try first?
From My Kitchen to Yours
I hope you love making these crunchy, peanut buttery treats. They always bring a smile. Cooking is about sharing joy and creating memories. I would love to hear about your baking adventures. For another fun twist, this Butterfinger poke cake is always a crowd-pleaser. Have you tried this recipe? Tell me all about it in the comments below.
Happy cooking!
—Elowen Thorn

Chefs Secret Butterfinger Peanut Butter Crispy Bars
Description
Butterfinger Rice Krispie Treats
Ingredients
Instructions
- Prepare a 9 X 13-inch baking dish by spraying it with cooking spray.
- Place Butterfingers into a plastic bag and crush with a rolling pin or mallet. They do not have to be completely crushed and can have larger pieces.
- In a large non-stick pot over medium heat melt the butter.
- Add marshmallows and stir until melted.
- Remove from heat and add the peanut butter, stirring constantly until it has melted and is thoroughly mixed.
- Mix in crushed Butterfingers.
- Add Rice Krispies and mix completely.
- Pour contents into the prepared pan and spread evenly with a greased rubber spatula.
- Allow bars to cool completely before cutting, about an hour.