

A Cookie That Looks Like Christmas
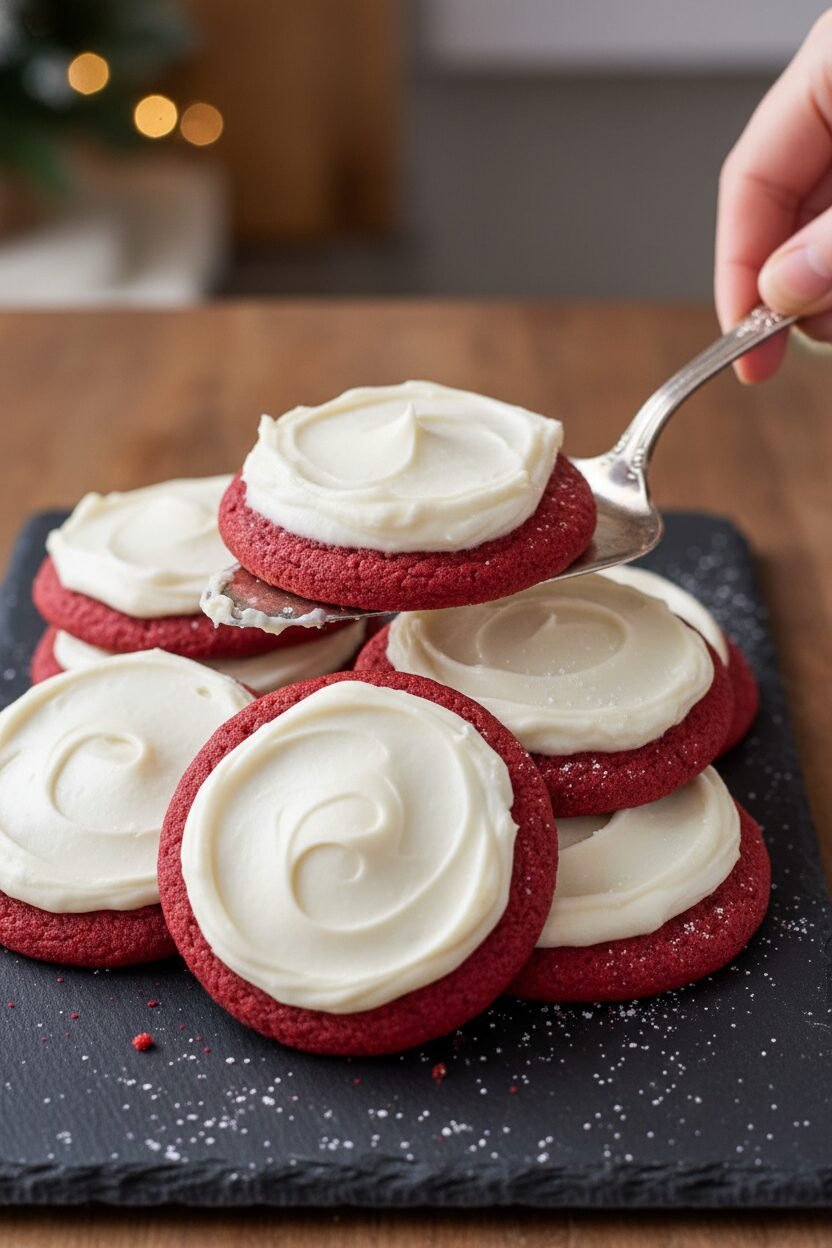
Hello, my dear. Come sit. Let me tell you about my Crimson Snowdrift cookies. They are pure joy on a plate. Imagine a red velvet cake turned into a soft cookie. Then imagine it wearing a fluffy white coat of frosting. That’s our cookie.
I first made these for my grandson, Leo. He saw the red dough and his eyes got so wide. He called them “Christmas snow cookies.” The name just stuck. I still laugh at that. What food reminds you of a happy holiday memory? I would love to know.
Why the Little Things Matter
These cookies teach a good lesson. The best food is not about being fancy. It is about sharing a feeling. A red cookie feels special. A creamy frosting feels like a hug. That is why this matters. It turns a simple treat into a tiny celebration.
Here is a fun fact for you. The red color in old-fashioned red velvet cake came from a chemical reaction between cocoa and buttermilk. We use food coloring now for that bright crimson. But the cocoa is still the secret. It gives the cookie its deep, rich flavor.
Mixing Up the Magic
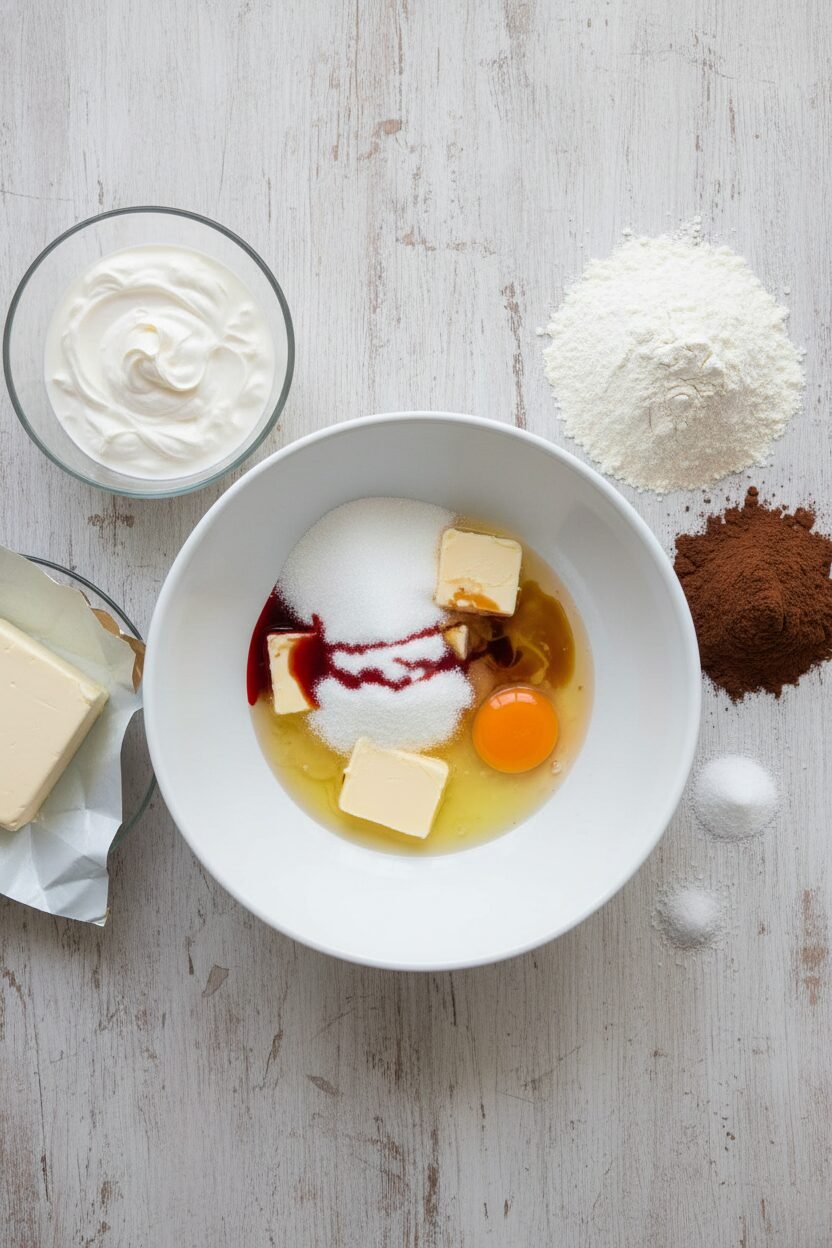
Making the dough is my favorite part. You cream the butter and sugar until it is pale and fluffy. This makes the cookie tender. Then you add that bold red color. It is so vibrant. Doesn’t that smell amazing? The vanilla and cocoa fill the whole kitchen.
The sour cream is the magic trick. It keeps the cookie wonderfully soft. My tip? Do not over-mix once you add the flour. Just mix until you see no more dry spots. A gentle hand makes a soft cookie. Do you prefer your cookies chewy or crisp? I am always curious.
The Fluffy White Snowdrift
Let the cookies cool completely. This is important. If they are warm, the frosting will melt right off. Patience is a cook’s best friend. While you wait, make the frosting. It is simply cream cheese, butter, and sugar.
Beat it until it is light and fluffy. This takes a minute or two. Do not rush. The air you whip into it makes the frosting cloud-like. Spreading it on is the final, happy step. You are tucking each red cookie under a white blanket.
Sharing the Warmth
This brings me to the second reason this matters. Food made with care carries love. When you bake these for someone, you are giving them more than a cookie. You are giving them a moment of sweetness. A memory.
I love to pack them in a tin with a bow. They look so cheerful. If you bake these, who will you share them with? Tell me about your favorite person to bake for. My heart smiles just thinking about it.
Ingredients:
| Ingredient | Amount | Notes |
|---|---|---|
| All-purpose flour | 1 ¾ cups (8 ¾ ounces/248 grams) | For the cookies |
| Natural unsweetened cocoa powder | 1 tablespoon | For the cookies |
| Baking soda | ½ teaspoon | For the cookies |
| Salt | ¼ teaspoon | For the cookies |
| Unsalted butter, softened | 12 tablespoons | For the cookies |
| Granulated sugar | 1 cup (7 ounces/198 grams) | For the cookies |
| Large egg | 1 | For the cookies |
| Red food coloring | 1 tablespoon (½ ounce) | For the cookies |
| Vanilla extract | 1 ½ teaspoons | For the cookies |
| Sour cream | ¼ cup | For the cookies |
| Cream cheese, softened | 4 ounces (113 grams) | For the frosting |
| Confectioners’ sugar | 1 ¼ cups (5 ounces/142 grams) | For the frosting |
Instructions
Step 1: First, get your oven ready. Move the racks to the middle spots. Heat the oven to 350 degrees. Line your baking sheets with parchment paper. This keeps the cookies from sticking. I always do this now. It saves so much scrubbing later!
Step 2: Let’s mix the dry things. Whisk the flour, cocoa, baking soda, and salt together. In another bowl, beat the softened butter and sugar. Beat until it looks pale and fluffy. Now add the egg, red food coloring, and vanilla. Doesn’t that color just make you smile? (Remember to scrape the bowl’s sides with a spatula.)
Step 3: Time to combine everything. Mix in half the flour mixture on low speed. Then add all the sour cream. Finally, mix in the last of the flour. The dough will be a beautiful, shocking red. Drop big spoonfuls onto your sheets. What’s your favorite cookie color? Share below!
Step 4: Bake your cookies for about 16 minutes. Switch the tray positions halfway through. This helps them bake evenly. Let them cool on the sheet for 5 minutes. Then move them to a wire rack. The smell is just amazing. I still laugh at how red my fingers get.
Step 5: Finally, the frosting! Beat the cream cheese and butter together. Add a little vanilla. Slowly mix in the powdered sugar. Then beat it fast until it’s fluffy. Spread a generous spoonful on each cool cookie. (Softened butter is key here, or your frosting will be lumpy.) Now, take a bite. You’ve earned it.
Creative Twists
These cookies are wonderful as they are. But sometimes, a little change is fun. You can make them your own. Here are three simple ideas for you to try. They add a special touch. I think my grandkids love the sprinkle version best.
- Add a tiny pinch of cinnamon to the dry ingredients. It gives a warm, cozy hint.
- Press a few white chocolate chips into the dough mounds before baking.
- Sprinkle the frosted cookies with edible glitter or red sugar.
Which one would you try first? Comment below!
Serving & Pairing Ideas
These cookies are a celebration on a plate. For a pretty plate, dust them with a little extra powdered sugar. It looks like fresh snow on a red roof. Serving them with orange slices is nice. The bright citrus is a happy contrast. A small bowl of fresh berries works, too.
For drinks, a cup of cold milk is the classic choice. It’s perfect for dunking. For the grown-ups, a glass of creamy eggnog pairs beautifully. It feels so festive and rich. Which would you choose tonight?
Keeping Your Crimson Snowdrifts Fresh
These cookies stay soft for days. Just store them in a sealed container. Layer them with parchment paper to keep the frosting pretty.
You can freeze the dough for later fun. Roll it into a log and wrap it well. Slice and bake whenever you need a red velvet smile.
I once frosted all the cookies before freezing. Big mistake! The frosting got soggy. Now I freeze the plain cookies and frost them fresh.
This matters because good planning spreads joy. You can have warm cookies anytime. It makes busy days feel special and sweet.
Have you ever tried storing cookie dough this way? Share below!
Cookie Troubles? Let’s Fix Them
Problem one: cookies spread too flat. Your butter was too warm. Chill your dough for 30 minutes before baking.
Problem two: the color isn’t vibrant. Use a good gel food coloring. The liquid kind can make the dough too wet.
I remember when my first batch came out pale pink. I was so disappointed! A strong gel color fixes this.
Problem three: frosting is too runny. Your cream cheese or butter was too soft. Chill them both for 10 minutes and re-whip.
Fixing small issues builds kitchen confidence. It also makes your food taste and look its very best. You deserve that.
Which of these problems have you run into before?
Your Quick Questions, Answered
Q: Can I make these gluten-free?
A: Yes! Use a good gluten-free flour blend. Make sure it has xanthan gum in it.
Q: Can I make them ahead?
A: Absolutely. Bake the cookies up to two days early. Frost them the day you plan to serve.
Q: What can I use instead of sour cream?
A: Plain, full-fat yogurt works perfectly. It gives the same tender crumb.
Q: Can I double the recipe?
A: You can. Just mix in two separate batches. This keeps the dough easy to handle.
Q: Any optional tips?
A: A tiny sprinkle of edible glitter looks like snow. Fun fact: red velvet was originally a reaction between cocoa and acid!
Which tip will you try first?
From My Kitchen to Yours
I hope you love making these crimson cookies. They always make my kitchen feel like a holiday.
Baking is about sharing warmth. It is about creating sweet memories with your own two hands.
I would love to hear about your baking adventure. Tell me all about it in the comments below.
Have you tried this recipe? I can’t wait to hear your story.
Happy cooking!
—Elowen Thorn.


Crimson Snowdrift Christmas Cookies
Description
Frosted Red Velvet Cookies with a cream cheese frosting, perfect for the holidays.
Ingredients
For the Cookies:
For the Frosting:
Instructions
- Adjust oven racks to upper-middle and lower-middle positions and heat oven to 350 degrees. Line 2 baking sheets with parchment paper.
- Whisk flour, cocoa, baking soda, and salt together in a bowl. Using a stand mixer fitted with paddle, beat 8 tablespoons butter and granulated sugar on medium-high speed until pale and fluffy, about 2 minutes. Add egg, food coloring, and 1 teaspoon vanilla and beat until combined, about 30 seconds. Reduce speed to low and add half of flour mixture, followed by sour cream, then remaining flour mixture until combined. Drop 2-tablespoon mounds of dough onto prepared sheets, spacing them about 2 inches apart.
- Bake cookies until centers are set, 16 to 18 minutes, switching and rotating sheets halfway through baking. Let cookies cool on sheets for 5 minutes, then transfer to a wire rack. Let cookies cool completely.
- Using a clean, dry mixer bowl and paddle, mix cream cheese, remaining 4 tablespoons butter, and remaining ½ teaspoon vanilla on medium-low speed until combined, about 30 seconds. Reduce speed to low, slowly add confectioners’ sugar, and mix until smooth, about 1 minute. Increase speed to medium-high and beat until light and fluffy, 1 to 2 minutes. Spread 1 tablespoon frosting evenly on each cookie before serving.
Notes
- Ensure cookies are completely cool before frosting to prevent the frosting from melting. Store frosted cookies in the refrigerator.