

My First Red Velvet Surprise
I made my first red velvet cake in 1978. It was for my neighbor’s birthday. I used a whole bottle of food coloring. My hands were red for two days. I still laugh at that.
This recipe is like that cake’s fun cousin. It is a cookie with a creamy heart. Why does this matter? Because food should be a little playful. It should make you smile before you even take a bite.
Let’s Make the Creamy Heart
Start with the filling. Mix the soft cream cheese and sugar. Doesn’t that smell amazing? It is sweet and tangy all at once.
You will make little frozen disks. Pop them in the freezer. This step is very important. A frozen heart means a creamy surprise inside your baked cookie. No leaks allowed.
The Crimson Cookie Dough
Now for the fun red part. Mix your melted butter and sugars. Then add the eggs and that red color. It looks like magic paint.
Stir in the flour, chips, and nuts. The dough will be stiff. Use your hands. I love this part. You can feel the dough come together. Fun fact: The red color used to come from beets a long time ago!
The Big Hug
Take a dough ball. Flatten it like a little pancake. Place a frozen cream cheese disk right in the center. Now, wrap the dough around it. Give it a big hug.
Seal it up tight. Make it a smooth disk again. This is the secret step. Why does this matter? A good seal keeps the surprise inside. It makes every bite perfect. Do you like cookies with a surprise inside?
Bake and Watch the Magic
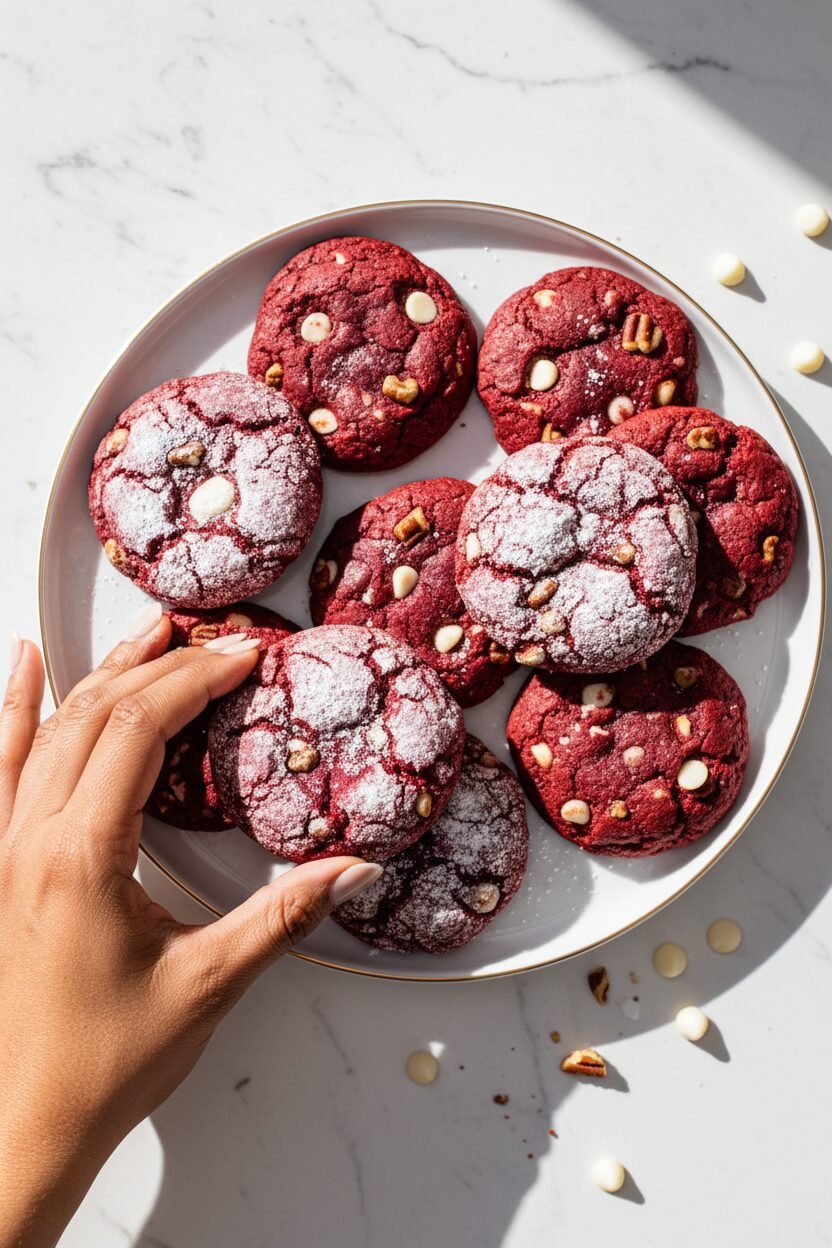
Bake them one sheet at a time. The oven is very hot. This makes the edges puff up fast. It gives them those pretty cracks.
Let them cool completely. I know, it is hard to wait. But trust me. The filling needs this time to set. What is harder for you, the mixing or the waiting?
Your Turn in the Kitchen
These cookies are a celebration. They are red and sweet and full of joy. Share them with someone you love.
Tell me, what is your favorite holiday cookie to bake? Would you use pecans or more chocolate chips? I love hearing your family recipes. My grandson always picks extra chips.
Ingredients:
| Ingredient | Amount | Notes |
|---|---|---|
| Filling: | ||
| Confectioners’ sugar | ½ cup (2 oz / 57g) | |
| Cream cheese | 4 oz (113g), softened | |
| Unsalted butter | 2 tbsp, softened | |
| Table salt | Pinch | |
| Vanilla extract | ⅛ tsp | |
| Cookies: | ||
| All-purpose flour | 2⅔ cups (13⅓ oz / 378g) | |
| Whole-wheat flour | ⅔ cup (3⅔ oz / 104g) | |
| Unsweetened cocoa powder | 1 tbsp | Dutch-processed or natural |
| Table salt | 1¼ tsp | |
| Baking soda | 1 tsp | |
| Unsalted butter | 16 tbsp, melted | |
| Light brown sugar | 1 cup packed (7 oz / 198g) | |
| Granulated sugar | ½ cup (3½ oz / 99g) | |
| Large eggs | 2 | |
| Lemon zest | 1½ tsp, grated | |
| Vanilla extract | 2 tsp | |
| Red food coloring | 1 tbsp | Liquid or gel |
| White chocolate chips | 1 cup (6 oz / 170g) | |
| Pecans | ½ cup, finely chopped | Can sub ½ cup white chocolate chips |

Instructions
Step 1: Let’s make the creamy heart of our cookie. Beat the filling ingredients in a mixer until fluffy. It should look like pink clouds. Drop twelve little dollops onto a parchment-lined plate. Flatten each into a small disk. Pop the whole plate into the freezer. Those need to get very solid, for at least two hours. (A hot kitchen softens the filling fast, so work quickly later!)
Step 2: Now, for the main cookie dough. Whisk your dry ingredients in one big bowl. In another, whisk the melted butter and sugars. Then mix in the eggs, zest, vanilla, and that glorious red color. Doesn’t that smell amazing? Stir in half the flour mix. Then add the chips, nuts, and the rest of the flour. You might need to use your hands at the end.
Step 3: Divide that beautiful red dough into twelve equal balls. Flatten each into a wide disk. Working fast, place a frozen filling disk in the center of each. Wrap the dough up and around it, like a little present. Pinch it sealed and shape it into a smooth, thick disk. I still laugh at how my first one looked! Do you think the filling stays hidden, or will it peek out? Share below!
Step 4: Place six cookies on each lined baking sheet. Bake one sheet at a time in your hot oven. They only need 7 to 8 minutes. Watch for the edges to puff and get little cracks. Let them cool completely on the sheet. This patience is the hardest part! (Leaving them on the sheet lets them set up perfectly.) In two hours, you’ll have the most magical, stuffed cookie puffs.
Creative Twists
These cookies love to play dress-up. Try a different filling for a fun surprise. Use orange zest and a sprinkle of cinnamon for a cozy, spiced version. Swap the white chocolate chips for dark chocolate chunks. The deep flavor is wonderful with the red velvet. Roll the sealed cookie dough balls in coarse sugar before you flatten them. You’ll get a delightful, sparkly crunch. Which one would you try first? Comment below!
Serving & Pairing Ideas
These cookies are a celebration all by themselves. Serve them on a vintage cake stand for a special touch. A tiny dusting of powdered sugar makes them look snowy. For a real treat, crumble one over a bowl of vanilla ice cream. The perfect drink? For grown-ups, a small glass of creamy Irish cream liqueur is lovely. For everyone, a cold glass of frothy milk is the classic choice. Which would you choose tonight?
Keeping Your Cookie Puffs Happy
These puffs are best enjoyed the day you bake them. Their centers stay wonderfully soft. You can store leftovers in a sealed container. They will keep for two days at room temperature.
To freeze them, wrap each cooled cookie tightly. Use plastic wrap or foil first. Then pop them into a freezer bag. They will be good for a month. I once forgot a batch in my freezer for weeks. It was a lovely surprise find for unexpected guests!
Thaw frozen cookies on the counter for an hour. Want a warm cookie? Reheat it in a 300-degree oven for five minutes. This little effort makes them taste fresh-baked. Batch cooking and proper storage save time and reduce waste. It means you always have a sweet treat ready to share. Have you ever tried storing cookies this way? Share below!
Cookie Troubles? Let’s Fix Them
First, your filling might leak. This happens if it isn’t frozen solid. Make sure those cream cheese disks are rock-hard. I remember when my filling was too soft. It made a delicious but messy cookie pool!
Second, the dough can be stiff and crumbly. This is normal. Just use your clean hands to mix it. Warm hands soften the dough perfectly. Getting the dough right builds your kitchen confidence. You learn to feel when a recipe is just right.
Third, the cookies might spread too much. Chilling the filled dough for 15 minutes before baking helps. So does using a cool baking sheet for each batch. Controlling the spread gives you a prettier, puffier cookie. A good-looking bake tastes even better. Which of these problems have you run into before?
Your Quick Questions, Answered
Q: Can I make these gluten-free?
A: Yes. Use a good gluten-free flour blend. Replace both the all-purpose and whole-wheat flours with it.
Q: How far ahead can I make them?
A: You can freeze the filling disks for a week. You can also freeze the shaped, unbaked cookies for a month.
Q: I don’t like pecans. What can I use?
A: Use more white chocolate chips instead. Or try chopped dried cranberries for a tart twist.
Q: Can I make a half-batch?
A: Absolutely. Just halve all the ingredients. This is great for a smaller family test run.
Q: Is the lemon zest important?
A: It adds a bright little note. But you can skip it if you don’t have a lemon. The cookies will still be wonderful. Which tip will you try first?
From My Kitchen to Yours
I hope you love making these crimson puffs. They are a joyful little project. The red color makes them perfect for sharing. *Fun fact: red velvet cake became a holiday tradition during the Great Depression. The red color made simple ingredients feel special.*
Baking is about creating sweet memories. It is also about sharing them with people you love. I would love to hear about your baking adventure. Tell me all about it in the comments. Have you tried this recipe? I am cheering for you from my cozy kitchen.
Happy cooking!
—Elowen Thorn.
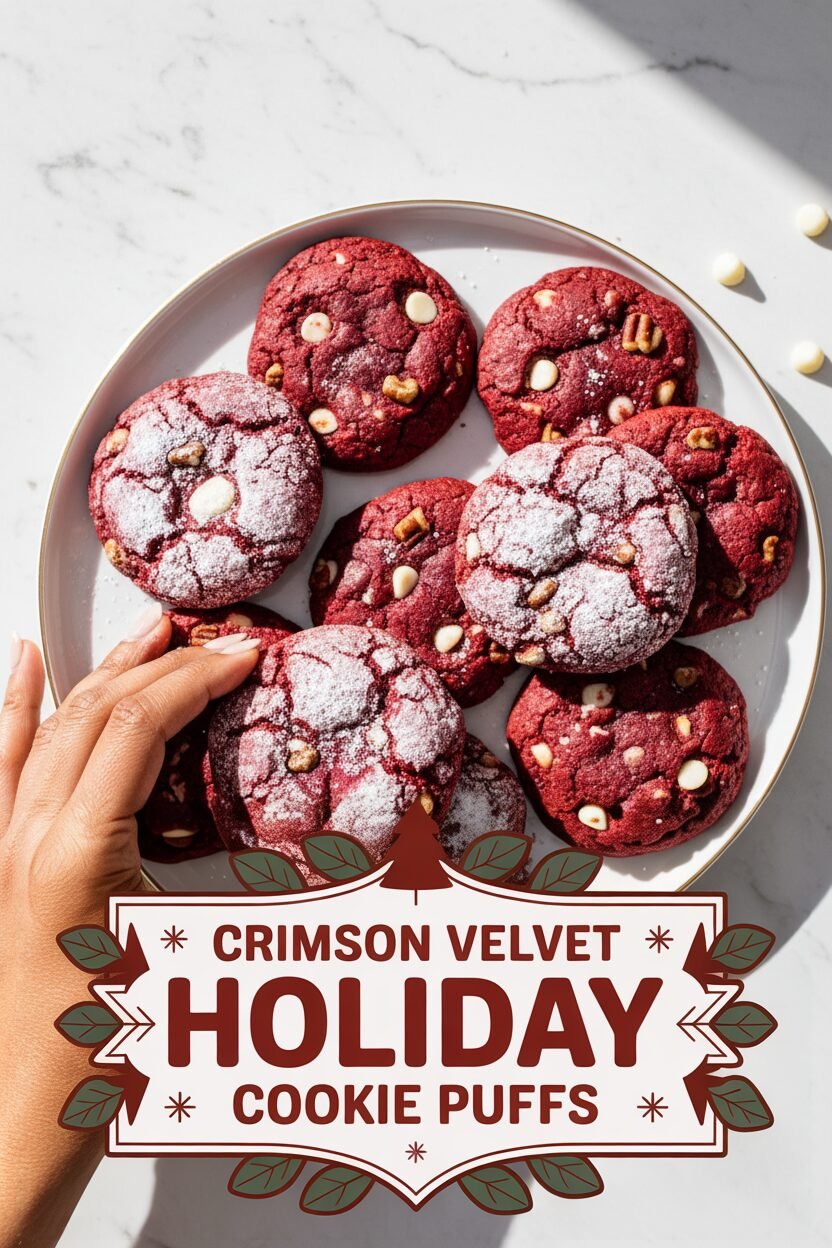

Crimson Velvet Holiday Cookie Puffs
Description
Stuffed Red Velvet Cookies
Ingredients
Filling:
Cookies:
Instructions
- For the filling: Using stand mixer fitted with paddle, beat all ingredients on low speed until sugar is mostly moistened, about 1 minute. Increase speed to medium-high and beat until fluffy and smooth, 2 to 3 minutes, scraping down bowl as needed.
- Line rimmed baking sheet or large, flat plate with parchment paper. Using tablespoon measure and small spoon (or #60 scoop), divide filling into 12 equal portions on prepared plate. Use back of spoon to lightly flatten each portion into rough disk shape (no greater than 1½ inches in diameter). Freeze until solid, at least 2 hours. (Filling can be frozen for up to 1 week.)
- For the cookies: Adjust oven rack to middle position and heat oven to 425 degrees. Line 2 rimmed baking sheets with parchment paper. Whisk all-purpose flour, whole-wheat flour, cocoa, salt, and baking soda together in large bowl.
- Whisk melted butter, brown sugar, and granulated sugar in second large bowl until smooth. Whisk in eggs, lemon zest, vanilla, and food coloring until smooth and creamy, about 30 seconds. Stir in half of flour mixture with rubber spatula or wooden spoon. Stir in chocolate chips, pecans, and remaining flour mixture. (Mixture will be stiff; once dough begins to stiffen, you can mix with your hands until dough is evenly combined.)
- Divide dough into 12 equal portions (about 3½ ounces; 99 grams; or ⅓ cup each). Flatten each dough portion into disk shape, about 3 inches in diameter. Working quickly, place 1 disk of frozen filling in center of each dough disk. Wrap edges of dough up and around filling, seal dough, and shape into smooth disk shape (about 3½ inches in diameter and ½ inch thick), taking care to ensure filling remains in center of each cookie. Space cookies evenly on prepared sheets, 6 cookies per sheet.
- Bake cookies, 1 sheet at a time, until edges of cookies are beginning to puff and crack, 7 to 8 minutes. Let cookies cool completely on sheets, about 2 hours. Serve.
Notes
- You can use either Dutch-processed or natural cocoa powder and liquid or gel food coloring in this recipe. You can substitute an additional ½ cup of white chocolate chips for the pecans if you prefer.