

The Secret is in the Salt
Hello, dear. Come sit. Let’s talk turkey. The secret to a juicy bird is simple. It’s just salt and time. You rub salt under the skin and wait. This makes the meat tender and full of flavor. It’s like a little magic trick in your fridge.
My grandson once tried to skip this step. He was in a hurry. His turkey was dry as a bone. I still laugh at that. Now he never rushes the salt. Patience makes perfect. What’s your biggest kitchen rush-job mistake?
A Cold Trick for Crispy Skin
Now, here’s my funny little trick. You rest the turkey on bags of ice. It sounds strange, I know. But the cold makes the skin dry out. A dry skin gets wonderfully crisp in the oven. The meat stays juicy underneath.
Why does this matter? Crispy skin is the best part. Everyone fights over it at my table. *Fun fact: This ice trick helps the white meat and dark meat cook more evenly.* It’s a clever bit of science. Doesn’t that smell amazing when it starts to roast?
Butter and a Hot Start
Heat your oven nice and hot at first. We start at 425 degrees. Brush that cold turkey with melted butter. The butter helps the skin turn a beautiful golden brown. It also adds a rich, savory taste.
We roast it breast-side down first. This protects the delicate breast meat. It keeps it from drying out. Later, we flip it to finish. That beautiful color makes the whole table happy. Do you prefer dark meat or white meat?
The Waiting is the Hardest Part
When the turkey is done, you must let it rest. Take it out and leave it alone for 30 minutes. This is very important. The juices need to settle back into the meat. If you carve it right away, all the juice runs out onto the board.
Why does this matter? Resting gives you a moister bite. It makes all your careful work worth it. Use this time to finish your gravy. The wait makes the first slice even better. What’s your favorite side dish to make while you wait?
A Simple, Savory Feast
This recipe has few ingredients. It’s just turkey, salt, ice, and butter. But each one does an important job. Salt for flavor. Ice for crispness. Butter for color. Together, they make something special.
Good food doesn’t need to be complicated. It needs care. This turkey taught me that. It’s about trusting simple steps. The result is a holiday centerpiece everyone will remember. Share your table with love.
Ingredients:
| Ingredient | Amount | Notes |
|---|---|---|
| Turkey | 12 to 14 pounds | Giblets and neck reserved for gravy, if making |
| Kosher salt | 5 tablespoons | |
| Ice cubes | 1 bag (5 pound) | |
| Unsalted butter | 4 tablespoons | Melted |

My Holiday Turkey Secret
Hello, my dear. Come sit. Let’s talk turkey. I used to worry so much about my holiday bird. Would it be dry? Would it be bland? Then I learned this little trick. It makes the skin so crisp. The meat stays wonderfully juicy. It’s like a magic spell for your roast. My grandson calls it “Grandma’s Golden Turkey.” Doesn’t that sound lovely? I still smile when he says that. The secret is just time, salt, and a bit of ice. Simple things, done with care. That’s how the best memories are made, isn’t it?
Instructions
Step 1: Two days before, gently loosen the turkey skin. Be careful, like you’re tucking in a blanket. Rub salt everywhere under the skin and inside. Wrap it up tight and let it rest in the fridge. This makes the meat taste amazing. (Your hands are your best tools here, feel your way!). What’s your favorite part of prepping the feast? Share below!
Step 2: The next day, rinse the turkey and pat it very dry. Now for the fun part! Fill bags with ice. Place the turkey breast-down on the ice bags. Put little bags of ice inside it too. Let it sit for one hour. This keeps the breast extra moist. I always set a timer so I don’t forget.
Step 3: Heat your oven nice and hot. Prepare your roasting rack with foil. Poke lots of little holes in the foil with a skewer. This lets the fat drip away. Your turkey won’t sit in grease. It makes the skin so perfectly crisp. The kitchen is starting to smell wonderful already.
Step 4: Dry the turkey again. Tuck its legs and wings neatly. Brush it all over with melted butter. Place it breast-down on your prepared rack. Roast it like this for the first 45 minutes. (Starting upside-down is the key to a juicy breast!). I love this part, the waiting begins.
Step 5: Take the turkey out and turn the oven down. Carefully flip your turkey right-side up. This is a two-person job, ask for help! Roast it until your thermometer says it’s done. Let it rest for a full 30 minutes. This lets all the juices settle. Then carve, serve, and enjoy your beautiful work.
Creative Twists
Herb Garden Butter: Mix chopped rosemary and sage into your melted butter before brushing.
Citrus Zest Salt: Add the zest of an orange to your kosher salt before rubbing it on.
Maple Glaze: In the last 20 minutes, brush the skin with a mix of maple syrup and butter.
Which one would you try first? Comment below!
Serving & Pairing Ideas
Slice it thick on a big, warm platter. Scatter fresh herbs like parsley all around. Serve with mashed potatoes and cranberry sauce. For a drink, a chilled apple cider is perfect for everyone. For the grown-ups, a glass of rich Chardonnay pairs nicely. It’s a feast for the eyes and the belly. Which would you choose tonight?
Keeping Your Turkey Tasty Later
Let’s talk about leftovers. They are the best part. First, let the turkey cool completely. Then, take the meat off the bone. Store it in a sealed container in the fridge. It will be good for three to four days.
You can freeze it for longer. I pack the meat in a freezer bag. I press out all the air. It keeps for two months. Thaw it in the fridge overnight when you are ready.
To reheat, be gentle. Place slices in a baking dish. Add a splash of broth or water. Cover it with foil. Warm it in a 325-degree oven until hot. This keeps it moist.
I once reheated turkey in the microwave. It got dry and tough. Now I always use the oven. Storing food well saves money and time. It turns one big meal into many easy ones. Have you ever tried storing it this way? Share below!
Turkey Troubles and Simple Fixes
Sometimes cooking a turkey can be tricky. Do not worry. Here are common problems and their easy fixes.
First, the skin is not crispy. This often means the bird was not dry enough. Pat it very dry with paper towels before roasting. A dry skin gets beautifully crisp in the oven.
Second, the breast cooks faster than the legs. I remember when my white meat was dry. Start the turkey breast-side down. This protects the delicate breast meat at first.
Third, the turkey is bland. The salt needs time to work. Salting a day ahead is the secret. It seasons the meat deep inside, not just on the surface. This makes every bite flavorful. Fixing these issues builds your cooking confidence. Which of these problems have you run into before?
Your Quick Questions, Answered
Q: Is this recipe gluten-free?
A: Yes, it is. The recipe uses only salt, butter, and ice.
Q: Can I make any parts ahead?
A: Absolutely. Salt the turkey one to two days before. Keep it wrapped in the fridge.
Q: What if I don’t have kosher salt?
A: Use half the amount of table salt. Table salt is finer and saltier.
Q: Can I cook a bigger turkey?
A: You can. Just add more salt and roasting time. Use a meat thermometer to know when it’s done.
Q: Is the ice step really needed?
A: It helps a lot. The ice keeps the breast cold. This lets the legs cook more without drying the breast. Fun fact: This method is called “thermal shielding”! Which tip will you try first?
From My Kitchen to Yours
I hope you feel ready to try this recipe. It might seem like many steps. But each one has a good reason. They all work together for a perfect turkey.
My door is always open for cooking chat. Tell me about your holiday table. I love hearing your stories and tips. Have you tried this recipe? Let me know how it went in the comments below.
Happy cooking!
—Elowen Thorn.


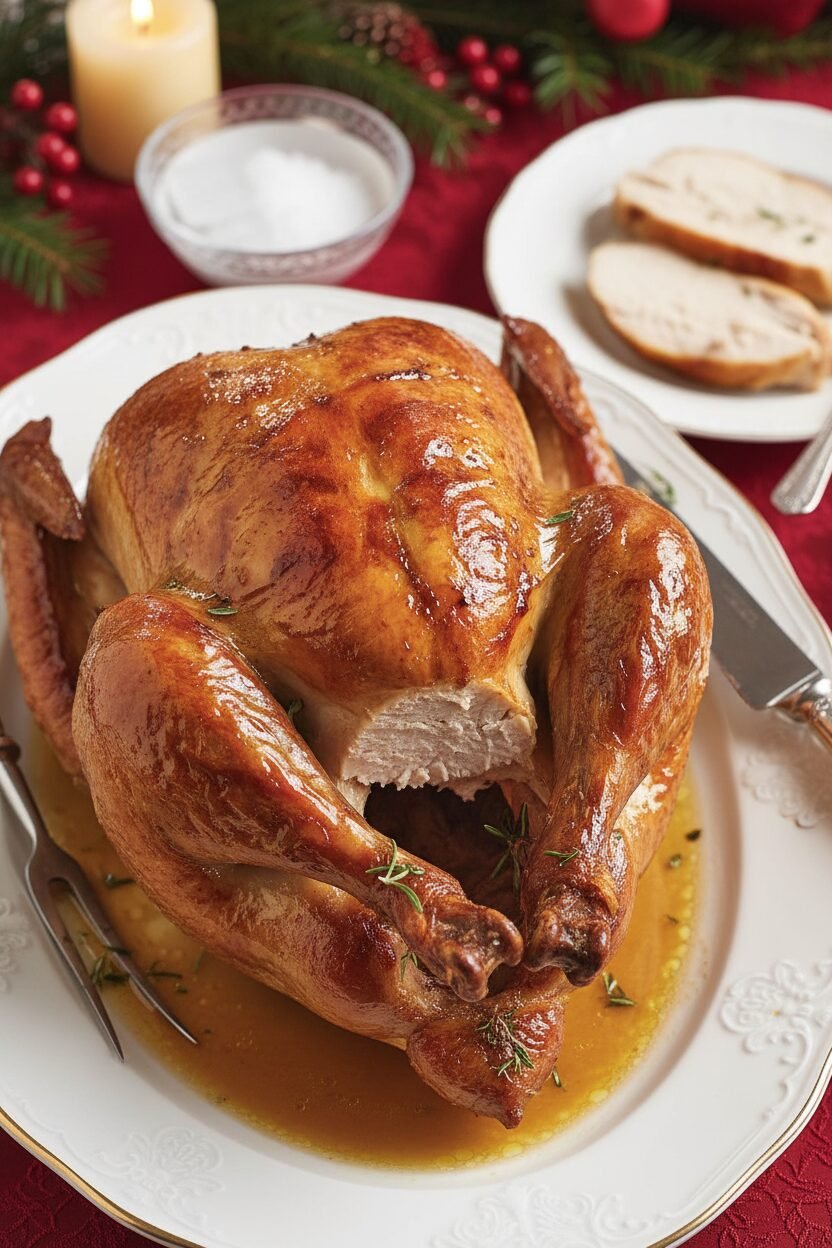
Crisp and Savory Holiday Turkey
Description
A perfectly seasoned and roasted turkey with crispy, savory skin and juicy, tender meat, ideal for holiday feasts.
Ingredients
Instructions
- Following illustration 1, carefully separate turkey skin from meat on breast, legs, thighs, and back; avoid breaking skin. Following illustrations 2 through 4, rub 2 tablespoons salt evenly inside cavity of turkey, 1 tablespoon salt under skin of each breast half, and 1 1/2 teaspoons salt under skin of each leg. Wrap turkey tightly with plastic wrap; refrigerate 24 to 48 hours.
- Remove turkey from refrigerator. Following illustrations 5 and 6, rinse off excess salt between meat and skin and in cavity, then pat dry inside and out with paper towels. Add ice to two 1-gallon zipper-lock bags until each is half full. Place bags in large roasting pan and lay turkey breast side down on top of ice. Add ice to two 1-quart zipper-lock bags until each is one-third full; place one bag ice in cavity of turkey and other bag in neck cavity. (Make sure that ice touches breast only, not thighs or legs.) Keep turkey on ice for 1 hour (roasting pan should remain on counter).
- Meanwhile, adjust oven rack to lowest position and heat oven to 425 degrees. Line large V-rack with heavy-duty foil and use paring knife or skewer to poke 20 to 30 holes in foil.
- Remove turkey from ice and pat dry with paper towels (discard ice). Tuck tips of drumsticks into skin at tail to secure and tuck wingtips behind back. Brush turkey breast with 2 tablespoons butter. Set prepared V-rack in roasting pan; set turkey breast side down on V-rack; brush back and legs with remaining 2 tablespoons butter. Roast for 45 minutes.
- Remove roasting pan with turkey from oven (close oven door to retain oven heat); reduce oven temperature to 325 degrees. Using clean potholders or kitchen towels, rotate turkey breast side up; continue to roast until thickest part of breast registers 160 degrees and thickest part of thigh registers 170 to 175 degrees on instant-read thermometer, 1 to 1 1/2 hours longer. Transfer turkey to carving board; let rest 30 minutes. Carve and serve.
Notes
- Ensure the turkey is completely dry before roasting for the crispiest skin. Letting the turkey rest after roasting is crucial for juicy meat.