

The Little Onion That Could
Have you ever seen a blooming onion? It looks like a flower. I think it’s magic. You take a plain onion and turn it into something special.
My first one was a mess. I almost cut right through it! I still laugh at that. But you learn. Now, making them is my happy kitchen time. What’s your favorite fun food to make with family?
Why We Love This Snack
This recipe matters because it’s a treat you can feel good about. The air fryer uses hot air, not a lot of oil. So you get that wonderful crunch without the guilt.
It also turns cooking into play. You get to paint with buttermilk and dust with flour. Doesn’t that smell amazing? Sharing food you made with your hands is a special kind of love.
A Tip From My Kitchen
The secret is in the cut. Slice off just a tiny bit of the top. Then make your cuts down, but stop before the bottom. This keeps your onion flower together.
Be patient when you coat it. Get that seasoned flour into every little “petal.” This gives you flavor in every single bite. Do you prefer spicy snacks or mild ones?
The Magic of Hot Air
Don’t crowd your air fryer basket. Give each onion some space. The hot air needs to dance all around it to make it crispy. This is a good lesson for life, too. We all need a little space to become our best.
*Fun fact: The air fryer is like a tiny, super-fast oven. It cooks with a fan that blows hot air everywhere. That’s how it gets things so crunchy!*
Dip and Share
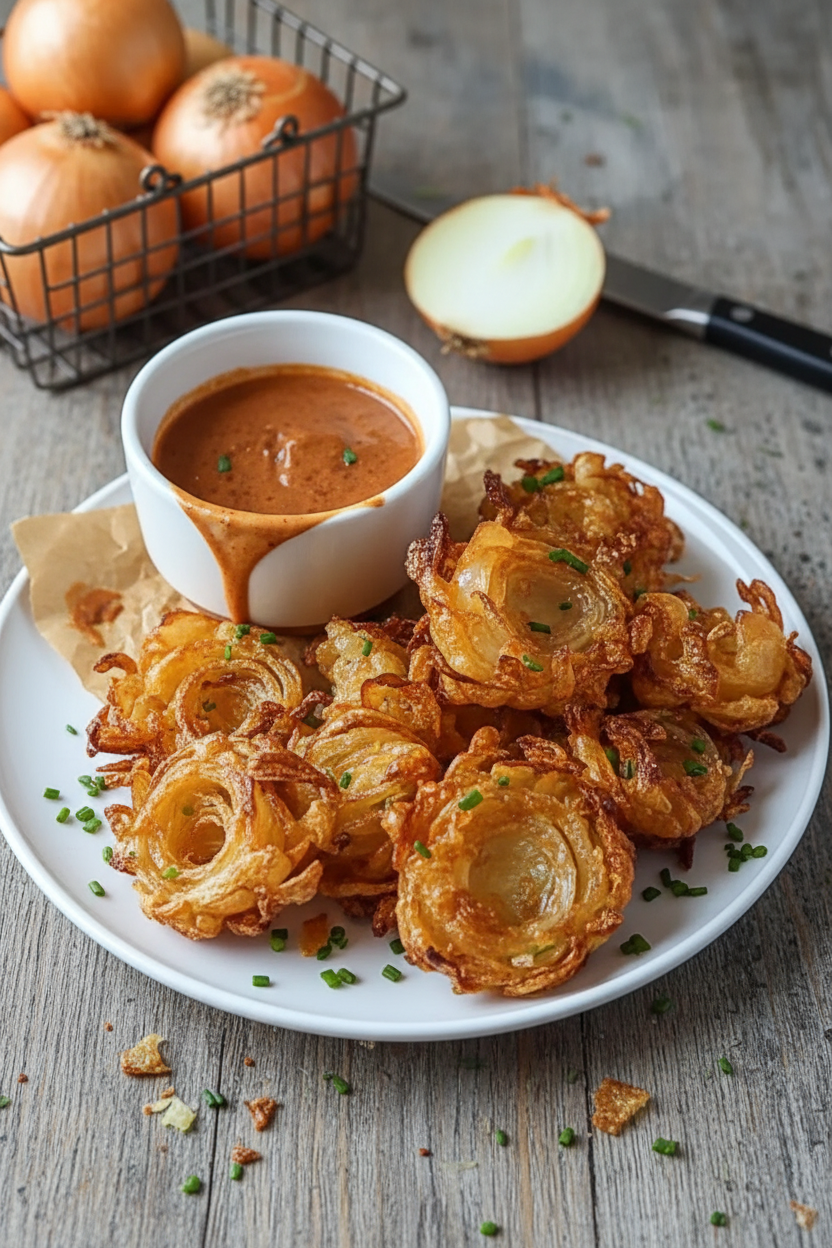
While your onions cook, make the sauce. Mix mayo, ketchup, and a little horseradish. A squeeze of lemon makes it perfect. This creamy dip is the best partner for the crispy onion.
Pull them out when they are golden brown. Let them cool just a minute. Then pull apart the petals and dip. I love the sound of that first crunchy bite. What’s your favorite dipping sauce for snacks? Tell me yours.
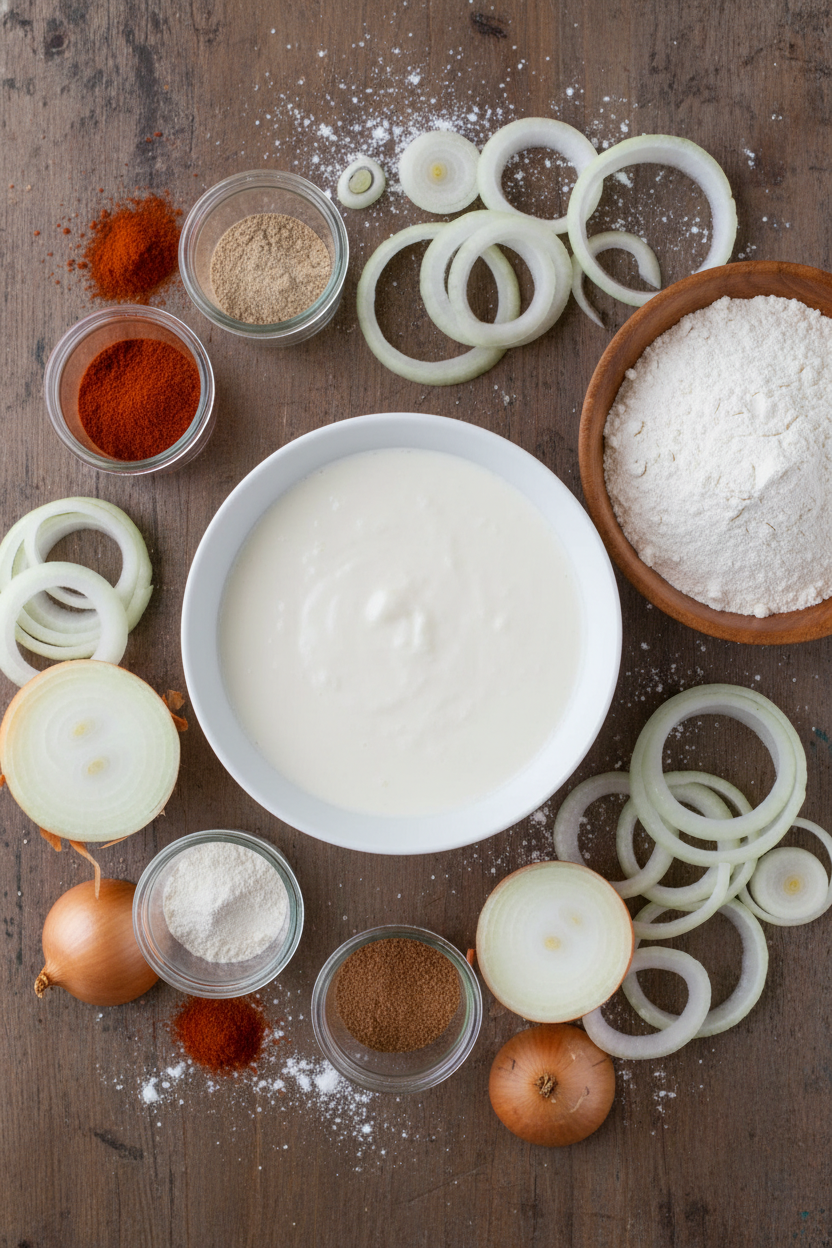
Ingredients:
| Ingredient | Amount | Notes |
|---|---|---|
| Buttermilk | 1 cup | or milk with lemon juice |
| All-Purpose Flour | 1 cup | substitute with gluten-free flour if needed |
| Paprika | 1 tbsp | smoked paprika recommended for extra flavor |
| Garlic Powder | 1 tsp | |
| Onion Powder | 1 tsp | |
| Cayenne Pepper | 0.5 tsp | adjust to taste |
| Salt | 1 tsp | |
| Black Pepper | 1 tsp | |
| Sweet Onions (e.g., Vidalia) | 2 medium | |
| Cooking Spray or Oil | as needed | for spraying/brushing |
Instructions
Step 1: First, make your buttermilk. Pour milk into a bowl. Add a squeeze of lemon juice. Let it sit for five minutes. It will look a little funny, but that’s okay. Doesn’t that smell amazing?
Step 2: Now, prepare your onions. Peel them and cut off the tops. Leave the root end on. Make cuts down into them to make petals. (A spoon underneath helps you not cut all the way through!)
Step 3: Mix your flour and spices in another bowl. I use paprika, garlic powder, and a pinch of cayenne. This is where the magic flavor happens. What’s your favorite spice? Share below!
Step 4: Dip each onion in the buttermilk. Let the extra drip off. Then roll it in the flour mix. Really get the flour into all the little cracks. I still laugh at the messy fingers.
Step 5: Preheat your air fryer to 380°F. Place the onions inside, don’t crowd them. Give them a light spray with oil. Cook for about 12 minutes, shaking once. They will be golden and perfect.
Creative Twists
Swap the spices for taco seasoning. Use the same batter on zucchini flowers. Drizzle with a little honey after cooking. Which one would you try first? Comment below!Serving & Pairing Ideas
These are perfect on their own with dipping sauce. For a meal, try them beside a simple burger. A crisp green salad balances the crunch nicely. Which would you choose tonight?
Keeping Your Mini Blooms Crispy
Let’s talk about storing these little treasures. They are best eaten right away. But life happens. To store, let them cool completely first. Then place them in a single layer in the fridge. They will keep for two days. You can freeze them too. Use a freezer-safe bag for up to a month.
Reheating is key. Use your air fryer again. It brings back the crunch. I remember my first batch. I put them in a container while warm. They got soggy fast. I learned my lesson. Now I always let them cool. Batch cooking is a wonderful help. Make a big batch for easy snacks. It saves you time on busy nights.
This matters because good food should not go to waste. A little care keeps your treats delicious. Have you ever tried storing it this way? Share below!
Simple Fixes for Common Snags
We all face little problems in the kitchen. Here are three common ones. First, the onion falls apart while cutting. The fix is simple. Leave the root end on. It holds everything together. I once cut it all off. My onion became a pile of slices. It was a funny mess.
Second, the breading won’t stick. Make sure your onion is very wet from the buttermilk. Let the excess drip. Then press the flour on firmly. Third, the petals don’t bloom open. Your cuts might not be deep enough. Cut almost to the root, but not through. This matters for confidence. Fixing small issues makes you a happier cook. It also matters for flavor. A well-coated, whole onion tastes so much better.
Which of these problems have you run into before?
Your Quick Questions, Answered
How to make blooming onion in air fryer without falling apart?
Do not cut off the root end. It is the onion’s anchor. Cut from the top down, stopping about half an inch from the root. This keeps all the petals connected. Also, handle the onion gently after cutting. Be careful when dipping and coating. A firm root base and gentle hands will keep your bloom whole and beautiful for cooking.
What is the best onion for blooming onion?
Sweet onions are the best choice. Vidalia or Walla Walla onions are perfect. They are mild and naturally sweet. This sweetness gets even better when cooked. Their larger, round shape is also ideal. It gives you more room to make those pretty petal cuts. A fun fact: Vidalia onions are only grown in Georgia!
How do you cut an onion for blooming onion?
First, peel the onion. Slice off only the top pointy part. Leave the root end completely untouched. Place the onion root-side down. Make cuts straight down from the top, like a pie. Make 12 to 16 cuts around the onion. Stop cutting about half an inch from the root base. Then gently spread the sections apart to bloom.
Can you make blooming onion sauce ahead of time?
Yes, you absolutely can. In fact, I recommend it. Mix the sauce ingredients in a small bowl. Then cover it and put it in the fridge. Making it ahead lets the flavors mingle and get cozy. The sauce tastes even better after an hour or two. It can sit in your fridge for up to three days before you need it.
What can I use instead of buttermilk for blooming onion?
No buttermilk? No problem. Use regular milk. Add one tablespoon of lemon juice or vinegar to one cup of milk. Stir it and let it sit for five minutes. It will thicken slightly and work just like buttermilk. This is a great trick for many recipes. Plain yogurt thinned with a little milk is another good substitute you can try.
How do you get breading to stick to air fryer blooming onion?
The secret is in the dip and press. First, soak the onion well in the buttermilk. Let the extra drip off. Then place it in your flour mix. Use your fingers to gently press the flour into all the cuts and crevices. Get flour on every wet surface. A good, thorough coating here means a crispy, even breading later.
Which tip will you try first?
From My Kitchen to Yours
I hope you love making these mini blooming onions. They remind me of county fair food, but simpler. Cooking should be fun, not fussy. I would love to hear about your kitchen adventures. Tell me how your blooms turned out. Did your family gobble them up? Share your story with me.
Have you tried this recipe? Let me know in the comments below. Your notes and tips help everyone learn. Thank you for cooking with me today.
Happy cooking!
—Grace Hollander.
