

My Kitchen Window View
I make this slice on sunny afternoons. The light hits my mixing bowl just right. I watch the custard turn thick and golden.
It reminds me of my Nana. She taught me to press the pastry flat. I still laugh at that. She said it stops it from getting too proud and puffy. What’s your favorite treat to make with someone special? I’d love to know.
The Secret of the Pastry
Pricking and pressing is the big secret. It gives you a flat, crisp base. It also stops big air bubbles from forming.
Why does this matter? A flat base holds the custard without cracking. It makes the slice neat to cut later. *Fun fact:* The pressing step is called “docking.” It’s like telling the pastry to calm down and behave.
Stirring the Custard Heart
This is the cozy part. You stand and stir the pot. The smell of vanilla fills the kitchen. Doesn’t that smell amazing?
Adding the egg mixture last is key. It makes the custard extra rich and smooth. Why does this matter? Taking your time here makes the slice creamy, not lumpy. It’s the heart of the whole treat.
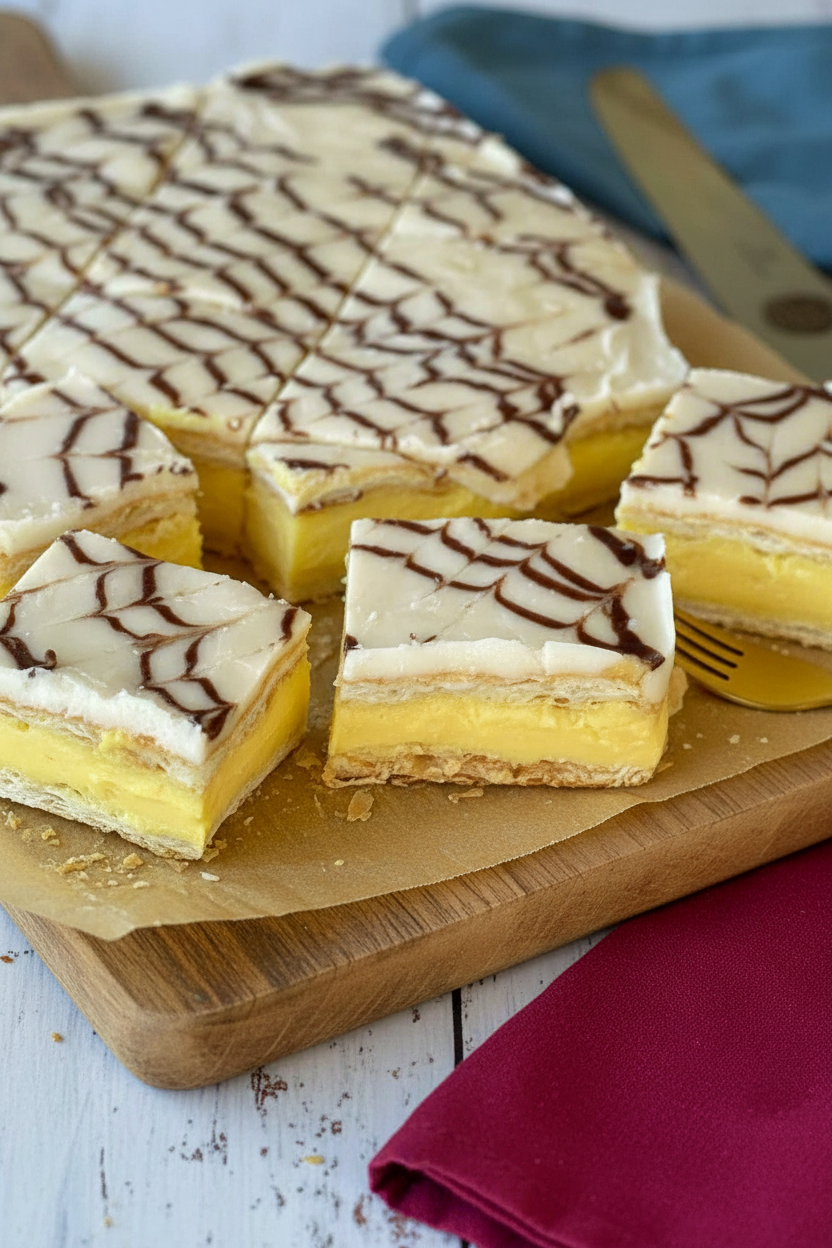
The Magic of the Icing Swirl
The icing is like playtime. You make two kinds: white and chocolate. Then you get to swirl them together. It’s so simple but looks so fancy.
I use a skewer from my kebab night. Just drag it through the lines. See the pretty pattern appear? Do you think you’ll try a swirl, or keep the icing plain?
The Long Wait
This is the hardest part. You must let it set for hours. I put it in the fridge overnight. It needs to become one solid, beautiful slice.
Use a bread knife to cut it. Saw gently back and forth. This keeps the pastry from crumbling. What’s the hardest part of waiting for a dessert for you? For me, it’s not sneaking a spoonful of custard!
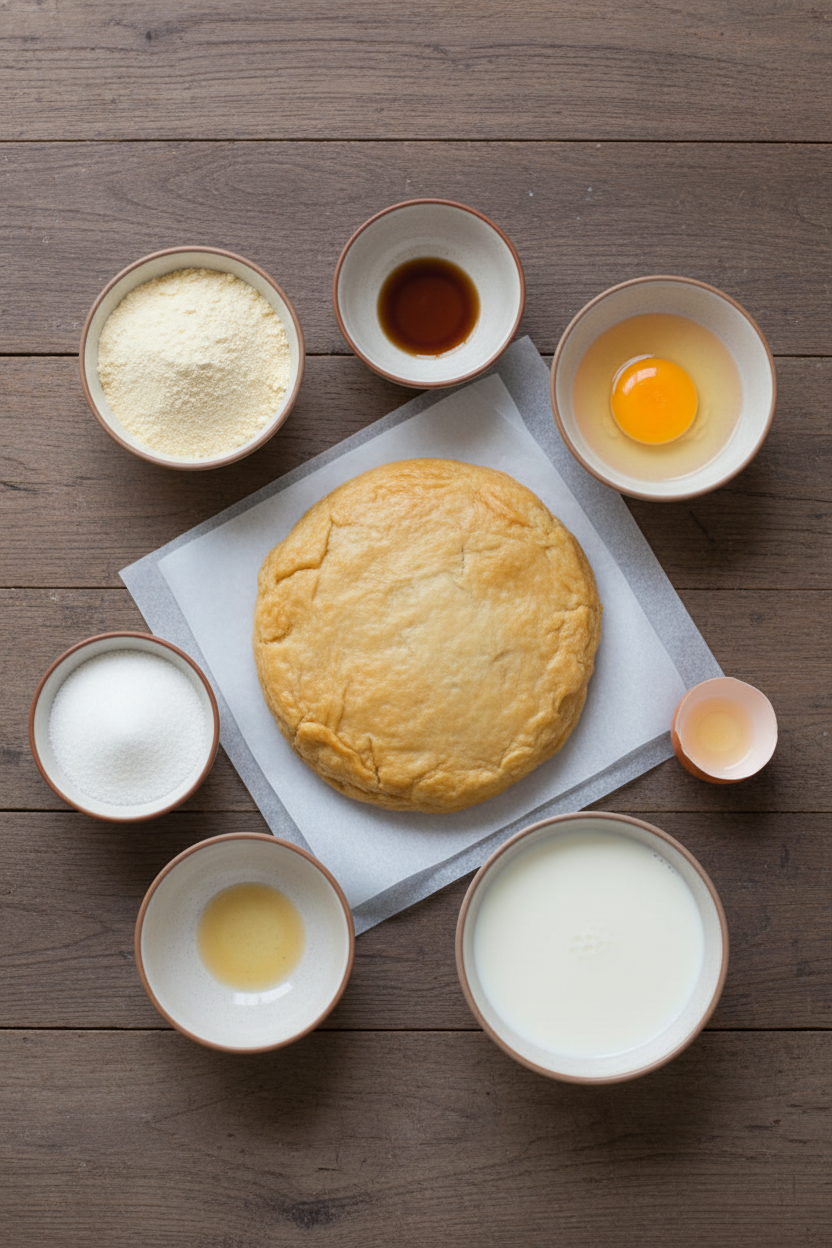
Ingredients:
| Ingredient | Amount | Notes |
|---|---|---|
| Flaky puff pastry | 2 sheets | Defrosted |
| Custard powder | ⅔ cup | |
| Sugar | ⅔ cup | |
| Vanilla essence | 2 tsp | |
| Milk | 1L | |
| Egg | 1 | |
| Butter | 50g | |
| For the Icing: | ||
| Icing sugar | 2 cups | |
| Butter, softened | 25g | |
| Hot water | 4-5 Tbsp | |
| Cocoa | 1 Tbsp | |
Instructions
Step 1: First, heat your oven nice and hot. Line your square tin with paper. Prick your pastry sheets all over with a fork. Bake them for 8 minutes. They will puff up like little pillows! Press them flat with another tray. (This keeps them from getting too tall later.)
Step 2: Now, let’s make the custard heart. Mix custard powder, sugar, vanilla, and some milk. In another bowl, whisk the egg with more milk. Doesn’t that smell amazing already? I always do this part first. It makes everything come together smoothly.
Step 3: Heat the rest of the milk in a saucepan. Stir in your custard mix. Keep stirring until it thickens nicely. This takes about 5 minutes. Then, mix in the egg and butter. Stir for 2 more minutes. Let it cool a bit. What’s your favorite part of making custard? Share below!
Step 4: Trim one pastry sheet to fit your tin. Press it in. Pour the lovely custard on top. Cover it with the second pastry sheet. Press down gently. I still laugh at how messy my fingers get. (Chilling the custard first helps it set better.)
Step 5: Time for the fancy top! Make the white icing and smooth it over. Put some icing in a bag with cocoa. Snip a tiny hole. Draw chocolate lines. Drag a skewer through to make a pattern. It’s like magic! Chill it for hours. Cut with a serrated knife.
Creative Twists
Berry Swirl: Swirl some raspberry jam into the custard before chilling.
Citrus Zest: Add lemon or orange zest to the icing for a sunny zing.
Caramel Drizzle: Skip the chocolate lines. Drizzle with salted caramel instead.
Which one would you try first? Comment below!
Serving & Pairing Ideas
Serve each slice on a little plate. A few fresh berries on the side look pretty. For a real treat, have it with a cup of milky tea. The warmth and cool custard are perfect together. Which would you choose tonight?
Keeping Your Custard Slice Perfect
Let’s talk about storing these lovely slices. Always keep them in the fridge. They need that cool space to stay firm. I keep mine in a sealed container. This stops them from picking up other fridge smells.
You can freeze them too. Wrap each slice tightly in plastic wrap. Then pop them all in a freezer bag. They will keep for a month. Thaw them in the fridge overnight.
I learned this the hard way. My first batch sat on the counter. The icing wept and the custard went soft. What a mess! Now, the fridge is my best friend for dessert.
Batch cooking is a wonderful trick. Make a whole tray for the week. It saves so much time later. This matters because good food should bring joy, not stress. Have you ever tried storing it this way? Share below!
Three Little Hiccups and How to Fix Them
First, soggy pastry is a common worry. The secret is pricking and pressing it. This stops big air bubbles from forming. I remember my pastry once puffed up like a pillow. It was impossible to stack!
Second, lumpy custard can happen. Always mix your powder with cold milk first. This makes a smooth paste. Adding it to hot milk will give you silky custard every time.
Third, runny icing is frustrating. Your water must be very hot. It melts the butter and sugar properly. If it’s too thin, just add a bit more icing sugar.
Fixing these issues builds your confidence. You learn that little steps make big differences. It also means your treat will taste just right. Which of these problems have you run into before?
Your Quick Questions, Answered
What is the secret to a crisp, not soggy, pastry in a custard slice?
Prick the pastry sheets all over with a fork before baking. This lets steam escape. Then, press the pastry flat with a tray halfway through cooking. Do it again when it comes out. This stops it from puffing up too much. A flat, crisp base is the goal. Let it cool completely before adding the custard. This keeps the layers separate and crisp.
How do you make a thick and creamy homemade custard for slices?
First, mix the custard powder and sugar with a little cold milk. This makes a smooth paste. Heat the rest of the milk in a saucepan. Whisk in the paste and keep stirring until it boils. Let it simmer until nicely thickened. Finally, stir in the egg mixture and butter for extra richness. Constant stirring is the key to creamy custard.
Can you make custard slices ahead of time, and how do you store them?
Yes, they are perfect for making ahead. After icing, let the whole slice set in the fridge. Leave it there for at least five hours, or overnight. Keep it in a sealed container in the refrigerator. This helps the flavors meld and makes cutting easier. You can also freeze individual slices wrapped well for a future treat.
What’s the best way to cut a custard slice without squashing it?
Use a very sharp serrated knife, like a bread knife. Make sure the slice is completely cold from the fridge. Do not press down. Use a gentle sawing motion to go through the top pastry layer first. Let the knife do the work. Clean the knife with a hot cloth between cuts for the neatest slices every single time.
Is there a simpler version of a custard slice recipe for beginners?
You can simplify the icing. Just make the plain white icing. Skip the chocolate piping design. Smooth the white icing over the top and let it set. The taste is just as wonderful. You can also use store-bought custard powder for the filling. Follow the packet instructions to make a very thick custard. It still makes a delicious dessert.
How do you get the classic icing on top without it melting into the custard?
The custard layer must be completely cool first. If it is warm, it will melt the icing. Also, make sure your icing is thick. It should coat the back of a spoon. Spread it gently over the cool, firm custard and top pastry. A fun fact: the butter in the icing helps it set firmly on the slice. Which tip will you try first?
From My Kitchen to Yours
I hope you feel ready to make this classic slice. It is a recipe full of sweet memories for me. Sharing it with you brings me great joy. I love hearing your stories too.
Tell me about your baking adventures. Did your family enjoy it? What little change did you make? Your kitchen is a place for happy experiments.
Have you tried this recipe? Let me know how it went in the comments below. I read every single one.
Happy cooking!
—Grace Hollander.
