

My Grandson’s Favorite Treat
My grandson Leo calls these his “rich bars.” I still laugh at that. He asked for them every Friday after school. The smell of graham crackers and butter baking is pure comfort. Doesn’t that smell amazing? It tells everyone something good is coming.
That crust is the most important part. Press it down firmly with your hands. This matters because a solid crust holds everything together. It’s like a strong foundation for a house. You can find more tips for a perfect crust in this easy guide.
The Heart of the Cheesecake
Let your cream cheese get soft on the counter. This makes it easy to beat smooth. No one wants lumpy cheesecake! Add the sugar and eggs slowly. It makes the filling silky.
Here’s a fun fact: the sour cream is the secret. It gives a little tang. This matters because it balances all the sweetness. Your first bite will be perfect. For a creamy filling every time, check out these simple steps.
A Chocolate Surprise Inside
Now for the magic. Sprinkle those chocolate chips right on top. They will sink in a little as it bakes. You get little pockets of melted chocolate. It’s a wonderful surprise in every bite.
I use semi-sweet chips. But milk chocolate is lovely too. What kind of chocolate do you like best in your treats? Let me know! You can explore more delicious topping ideas here.
The Waiting is the Hard Part
Take the pan out when the center still jiggles a bit. It will set as it cools. This is the hardest step. You must let it cool, then chill it for hours. Patience makes the best bars.
I always make mine the night before. Waiting overnight makes the flavor richer. This matters for the perfect texture. A chilled slice is dreamy. Find the full chilling instructions in this helpful recipe.
Time to Share the Joy
Lift the whole slab out with the parchment paper. This makes cutting so clean. Add a drizzle of caramel if you’re feeling fancy. A little extra joy never hurt anyone.
These bars are for sharing. They bring people together. Who will you make these for first? I’d love to hear your story. What’s your favorite dessert to share with friends?
Instructions
Step 1: First, let’s make the crust. Mix your graham crumbs, sugar, and melted butter in a bowl. Press it firmly into your lined pan. I always use the bottom of a cup to press it flat. Bake it for 8 minutes until it smells toasty. Let it cool on the counter. (A hot crust makes the filling weep, so patience is key!)
Step 2: Now for the creamy filling. Beat the softened cream cheese until it’s smooth. Add the sugar and mix it well. Then, beat in the eggs, one at a time. Finally, stir in the vanilla, flour, and sour cream. Doesn’t that smell amazing already?
Step 3: Pour your filling over the cool crust. Smooth the top with a spoon. Now, sprinkle all those chocolate chips evenly over it. Milk or semi-sweet chocolate? Share below! This is my favorite part. It looks so pretty before it even bakes.
Step 4: Bake for about 35 minutes. The edges should be set, but the center will jiggle a little. Let it cool for a full hour. Then, it must go in the fridge. I know it’s hard to wait! For the best cheesecake bars, chill it overnight.
Step 5: The final touch! Drizzle with caramel sauce if you like. You can add crushed candy for fun. Then, lift the bars from the pan using the paper. Slice them into squares with a warm knife. This simple trick gives you clean cuts every time. Serve them cold and enjoy the rich layers.
Creative Twists
Cookie Crust: Use crushed chocolate sandwich cookies instead of graham crackers. Leave the filling creamy white for a cool look.
Fruit Swirl: Drop spoonfuls of raspberry jam on the filling before baking. Use a knife to swirl it gently for a marbled finish.
Salted Pretzel Topping: Sprinkle crushed salty pretzels over the chocolate chips. It gives a wonderful sweet-and-salty crunch. Which one would you try first? Comment below!
Serving & Pairing Ideas
Serve these bars chilled on a pretty plate. A dollop of whipped cream on the side is lovely. For a special treat, pair a bar with a glass of cold milk. You could also crumble one over a scoop of vanilla ice cream. It’s a fantastic dessert idea for sharing. Which would you choose tonight?
Keeping Your Cheesecake Bars Happy
Let’s talk about storing these sweet treats. Cool them completely first. Then, cover the pan tightly. Pop them in the fridge for up to five days. For longer keeping, the freezer is your friend. Wrap bars individually in plastic wrap. Then, place them in a freezer bag. They will keep for about two months.
I remember my first batch. I left them uncovered overnight. The next day, they tasted like my fridge! Now I always cover them. This simple step keeps flavors fresh and prevents smells. Batch cooking these bars is a smart move. Making a double batch saves future you time. You can find more clever storage ideas for easy cheesecake bars online.
Having a ready-made dessert matters. It brings a little joy on busy days. It means you can share a sweet moment anytime. Have you ever tried storing it this way? Share below!
Little Fixes for Common Kitchen Hiccups
We all face little problems when baking. First, a soggy crust. Press your crumb mix very firmly into the pan. Bake it alone first to set. This creates a strong barrier for the creamy filling. I once skipped pre-baking the crust. The whole bottom was mushy. What a lesson that was!
Second, overmixing the batter. Mix just until everything is smooth. Overbeating adds too much air. This can cause cracks as it bakes. Third, guessing when it’s done. The edges should look set. The center should have a slight jiggle, like jelly. It will firm up as it chills. This technique is key for perfect chocolate chip cookie topping bars.
Fixing these issues matters. It builds your confidence in the kitchen. You learn how ingredients work together. It also ensures every bite is delicious. Which of these problems have you run into before?
Your Quick Questions, Answered
How do you prevent cheesecake bars from cracking?
Keep your oven temperature low and steady. Do not overmix the batter after adding eggs. Let the bars cool slowly in the turned-off oven with the door cracked. Then, cool them completely at room temperature before chilling. Sudden temperature changes are the main cause of cracks. A smooth top makes for a prettier dessert to share with friends.
Can I use a different type of chocolate in cheesecake bars?
Yes, you absolutely can. Use milk chocolate for a sweeter taste. Try dark chocolate for a richer flavor. White chocolate chips or peanut butter chips work great too. You can even chop up a candy bar you love. The recipe is very forgiving. Choosing your favorite chocolate makes the decadent millionaires cheesecake bars truly your own.
What’s the best way to store chocolate chip cheesecake bars?
Store them covered in the refrigerator. Use an airtight container or wrap the pan well. They will stay fresh for four to five days. The cold keeps the creamy texture perfect. For longer storage, freeze them as described above. Proper storage keeps your hard work tasting wonderful. It’s the best way to enjoy them later.
Can I make cheesecake bars without a springform pan?
You do not need a special pan. A regular 8×8 or 9×9 square baking pan works perfectly. Just line it with parchment paper. Let the paper hang over two sides. This creates “handles” to lift the whole block out later. It makes cutting clean bars so simple. This is a great easy cheesecake bars trick for any baker.
How do you know when cheesecake bars are done baking?
Look at the edges first. They should be puffed and look set. Gently shake the pan. The center, about the size of a jar lid, should jiggle slightly. It should not look liquidy. Remember, it keeps cooking from residual heat as it cools. This gentle method ensures a creamy, not dry, final texture every single time.
Can I freeze creamy chocolate chip cheesecake bars?
Freezing them works beautifully. First, chill them completely so they are firm. Wrap each bar tightly in plastic wrap. Then, place them in a freezer-safe bag. Squeeze out all the air. To serve, thaw a bar in the fridge overnight. *Fun fact: Freezing actually helps the flavors meld together!* You can find more on freezing cheesecake bars online. Which tip will you try first?
From My Kitchen to Yours
I hope you love making these bars as much as I do. Baking is about sharing joy and creating memories. The kitchen is the heart of the home. I would love to hear about your baking adventures. Tell me about your family’s favorite part. Have you tried this recipe? Let me know how it turned out in the comments below. Happy cooking!
—Grace Ellington.

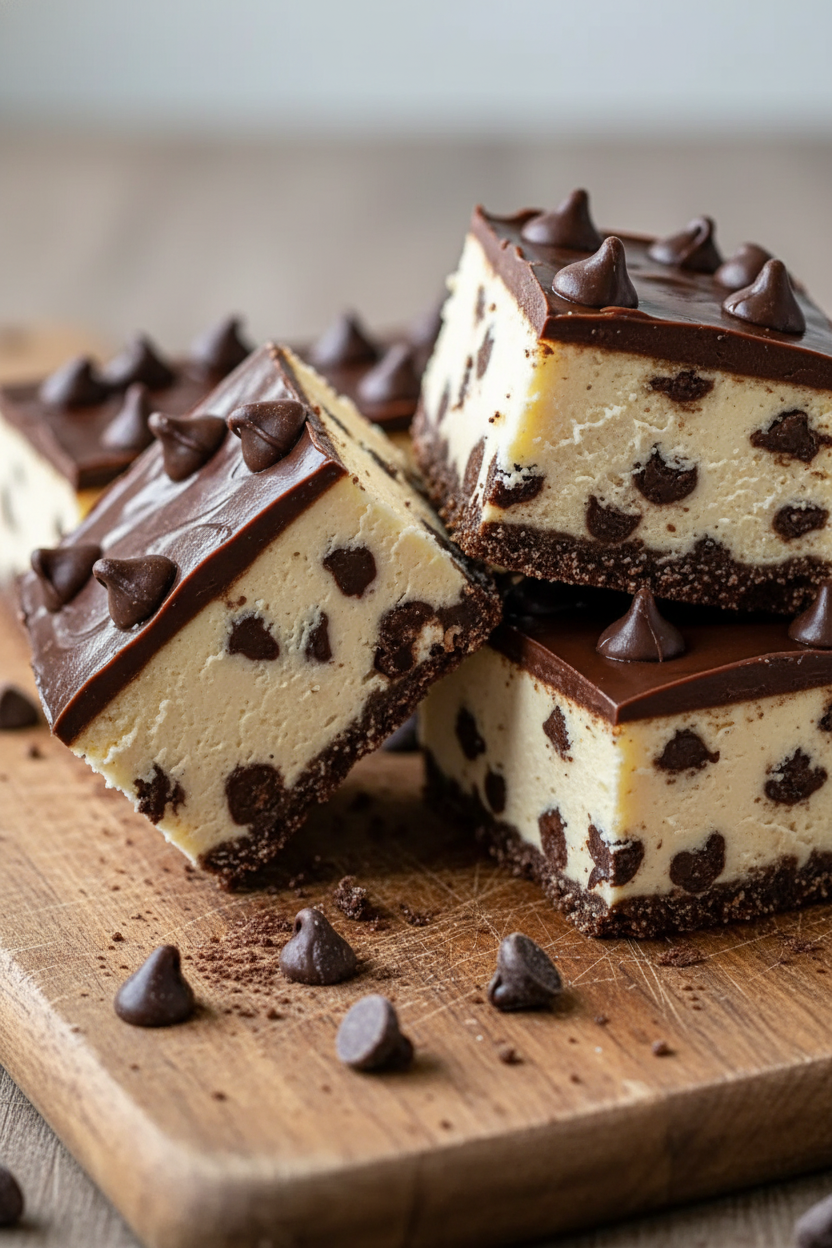
Easy Creamy Chocolate Chip Cheesecake Bars
Description
Easy, creamy cheesecake bars with a graham cracker crust, rich chocolate chips, and optional caramel topping.
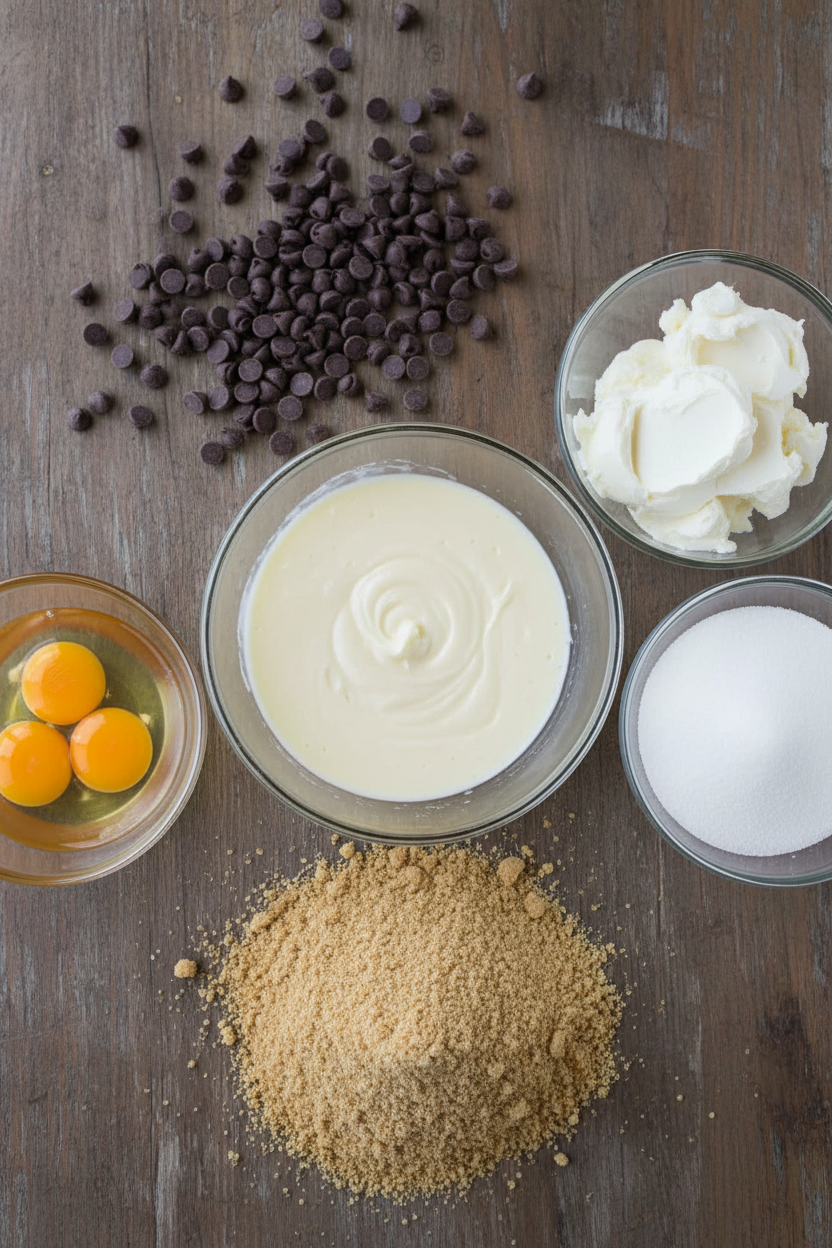
Ingredients
For the crust:
For the cheesecake layer:
For the topping:
Instructions
- Preheat your oven to 325°F (163°C) and line your baking pan with parchment paper. This makes it easier to lift and cut the bars cleanly.
- Prepare the crust by mixing graham cracker crumbs, melted butter, and sugar. Press firmly into the bottom of the pan in an even layer. Bake for 8–10 minutes, then let cool while you prepare the filling.
- Make the cheesecake filling by beating cream cheese until smooth. Add sugar and mix until combined. Then beat in the eggs one at a time, followed by vanilla, flour, and sour cream. Mix until smooth and creamy, but don’t overbeat.
- Pour the filling over the crust and smooth the top. Sprinkle chocolate chips evenly over the cheesecake layer.
- Bake for 30–35 minutes or until the edges are set and the center is slightly jiggly. Remove and cool at room temperature for 1 hour, then refrigerate for at least 3 hours or overnight.
- Top with caramel sauce or candy pieces if desired. Slice into bars and serve chilled for best texture.
Notes
- For a clean cut, use a sharp knife dipped in hot water and wiped dry between slices.