

My First Cannoli Surprise
I remember my first real cannoli. I was visiting my cousin in the city. We walked past a little bakery. The smell of sweet cheese and fried dough pulled us right in. I took one bite and my eyes got wide. It was pure happiness in a crispy shell. I knew I had to make something that good at home.
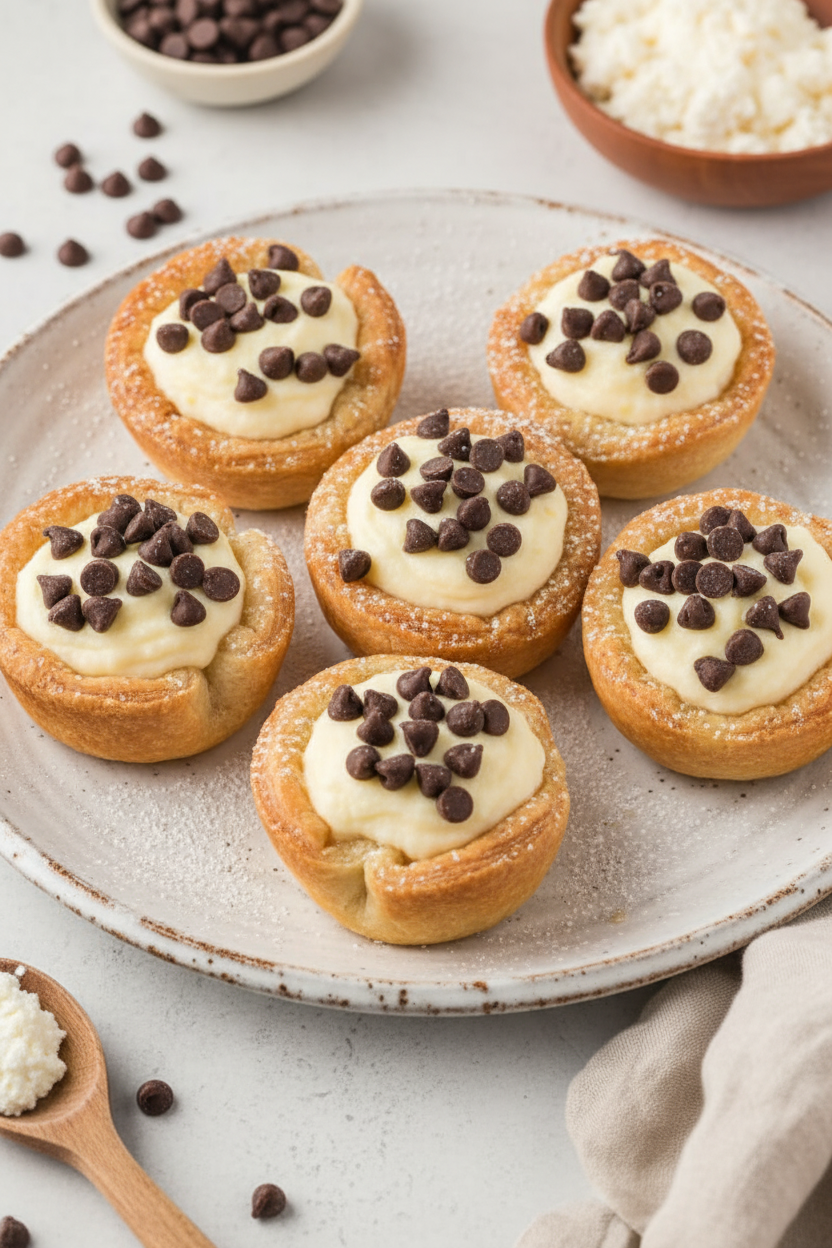
That’s why I love these mini cannoli cups. They capture that magic. But they are so much easier for busy hands. Using the pre-made shells is my little secret. It lets us focus on the best part—the creamy filling. What’s a food memory that always makes you smile?
The Heart of the Matter
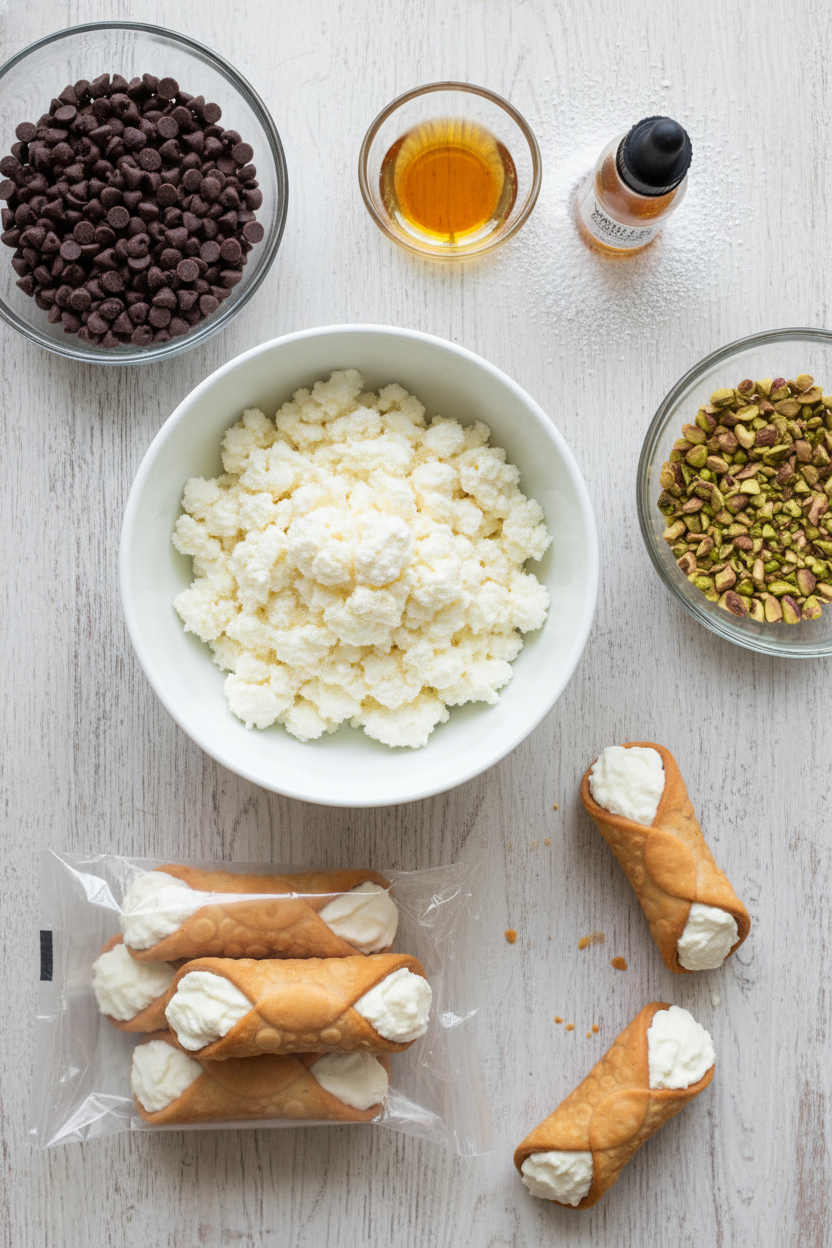
Let’s talk about the filling. It’s just three simple things. Ricotta cheese, powdered sugar, and a splash of vanilla. You mix it until it’s smooth. This matters because the filling is the soul of the treat. Getting it silky and sweet is the whole goal. Doesn’t that smell amazing when you mix it?
*Fun fact: Real traditional cannoli filling is often made with sheep’s milk ricotta!* Our cow’s milk version is easier to find and just as tasty. Folding in the mini chocolate chips is my favorite step. It adds little bursts of joy. For a fun twist, try this lemon meringue version someday too.
A Crispy Little Cup
Now, for the shell. We use those tiny, flaky phyllo cups. You just bake them for a few minutes. This makes them extra crisp. I still laugh at that. Such a tiny step makes a huge difference. A soft shell is a sad shell. The crunch is what makes the first bite so wonderful.
Here’s a pretty idea. After they cool, dip the cup rims in melted chocolate. Let it harden. It looks fancy and tastes even better. This little effort shows you care. It turns a simple bite into a tiny gift. Do you prefer your desserts crunchy, chewy, or soft?
Putting It All Together
Assembly is the fun part. You can spoon the filling in. Or, for a fancy look, pipe it in with a bag. Then comes the garnish. This is where you can play. I love the green from chopped pistachios. Bright sprinkles are wonderful for a party. More chocolate chips are always a good choice.
This matters because food should be joyful. Making it look pretty is part of the fun. It’s like dressing up a friend. These are perfect for sharing. If you love the filling, you might also enjoy it as a creamy cannoli dip with fruit.
Your Turn in the Kitchen
The best thing about this recipe? You can’t really mess it up. The shells are done for you. The filling is simple to mix. It’s a perfect first dessert for a young cook. Or a quick treat for a grandma like me. What will you garnish your cups with? Tell me your pick!
Remember to fill them close to when you’ll eat them. This keeps the shells crisp. You can store any extra shells and filling apart. Then build them fresh. For another no-bake idea, this cannoli icebox cake is a dream. Cooking is about sharing love, one little cup at a time.
Instructions
Step 1: First, warm your oven to 350°F. Place your mini phyllo shells on a baking sheet. Bake them until they are crisp and golden. Let them cool completely on the counter. I always tap one to hear its little crunch.
Step 2: Now, make the sweet filling. Grab a medium bowl. Combine the ricotta, powdered sugar, and vanilla. Whisk it all until it’s dreamy and smooth. (A hard-learned tip: Let your ricotta drain a bit first for a thicker filling.) Doesn’t that smell amazing already?
Step 3: Gently fold in your mini chocolate chips. Be careful not to over-mix. Think of it as giving the filling a gentle hug. This is where the magic happens, my dears. Do you prefer chocolate chips or fruit in your cannoli? Share below!
Step 4: Next, the fun part! Spoon or pipe the filling into the cooled cups. If you’re feeling fancy, dip the cup rims in melted chocolate first. Let that chocolate set. It makes them look so professional. I still laugh at my first messy tries.
Step 5: Finally, garnish your little creations. Use more chips, chopped pistachios, or bright sprinkles. Serve them right away for the best crispy bite. They bring such joy to a table. Store any extras separately so the shells stay snappy.
Creative Twists
Lemon Sunshine: Add a little lemon zest to the filling. It’s so fresh and bright.
Berry Happy: Top each cup with a single raspberry or strawberry piece.
Coffee Kiss: Mix a tiny bit of instant espresso into the filling. A grown-up flavor kids love too.
Which one would you try first? Comment below!
Serving & Pairing Ideas
Serve these on a pretty platter with a dusting of powdered sugar. A few fresh berries on the side look lovely. For a real treat, pair them with a small cup of strong Italian coffee. It’s a perfect little bite after dinner. You could also offer a cannoli dip alongside for a double delight. Which would you choose tonight?
Keeping Your Cannoli Cups Happy
These little cups are best eaten fresh. But we all have leftovers sometimes. Store any extra filling in a sealed container in the fridge. It will keep for about three days. Keep the empty, baked shells in a tin at room temperature. This keeps them wonderfully crisp for your next cup indulgence.
I learned this the hard way. I once filled all the shells at once. The next day, they were sadly soggy. Now I only fill what I will serve right away. It makes all the difference. Have you ever tried storing it this way? Share below!
This small step matters so much. It means no food goes to waste. You can make a quick, special treat days later. It turns one baking session into many happy moments. That is the magic of smart storing.
Three Little Fixes for Bigger Smiles
First, if your filling seems loose, drain your ricotta. Place it in a fine strainer for an hour. I remember when my first filling was a puddle. Draining fixes it. Second, work fast with phyllo. It dries out. Keep unused shells covered with a damp towel. This keeps them flexible for your sweet filling.
Third, for the best flavor, let your filled cheese mixture rest. Chill it for one hour before filling cups. This lets the sugar melt into the cheese. Which of these problems have you run into before?
Fixing these small issues builds your cooking confidence. You feel like a kitchen pro. It also makes the flavors perfect. Good texture and taste make every bite a joy. That is the goal of all my easy creamy recipes.
Your Quick Questions, Answered
How to make cannoli cups without cannoli shells?
Use mini phyllo shells. They are in the freezer aisle. You bake them for a few minutes. They become crispy cups. You can also use wonton wrappers pressed into a mini muffin tin. Brush them with butter and bake until golden. This is a fun way to make homemade effortless cannoli cups.
What is a substitute for ricotta in cannoli filling?
You can use cottage cheese. Drain it very well first. Then blend it until super smooth. Another good choice is farmer’s cheese. Both will give you a creamy, tangy filling. It will be just as delicious as the classic kind.
Can you make cannoli cups ahead of time?
Yes, but in parts. Bake the shells up to two days ahead. Keep them in an airtight container. Make the filling one day ahead. Store it separately in the fridge. Assemble them a few hours before you serve. This keeps the shells crisp and perfect.
How do you keep cannoli cups crispy?
The key is to keep the filling and shells apart. Only fill the cups right before you eat them. Store any extra empty shells in a tight cookie tin. *Fun fact: a piece of bread in the tin can help keep them soft, so don’t do that!* You want them dry and crisp.
What can I use instead of mini muffin tin for cannoli cups?
You can use a regular muffin tin for bigger cups. Just shape your phyllo or wonton wrappers into the larger cups. You can also use small, clean oven-safe ramekins. They will help the shells hold their shape while baking. It’s a great trick for a creamy delight in any size.
Can I use mascarpone instead of ricotta for cannoli filling?
Yes, mascarpone works beautifully. It is richer and thicker than ricotta. You may need a little less powdered sugar. Just mix it with vanilla and your chocolate chips. It makes a very luxurious, smooth filling. It’s perfect for a special icebox cake too. Which tip will you try first?
From My Kitchen to Yours
I hope you love making these little bites. They hold so much joy in one small cup. Cooking is about sharing happiness with those you love. I would be so pleased to hear about your kitchen adventures. Tell me all about it in the comments below. Have you tried this recipe? I am cheering for you from my cozy kitchen. Happy cooking!
—Grace Ellington.

Easy Mini Cannoli Cups with Ricotta Filling
Description
Easy, elegant, and delicious mini cannoli cups made with pre-made phyllo shells and a sweet ricotta filling. Perfect for parties and gatherings.
Ingredients
Instructions
- Preheat the oven to 350°F (175°C). Place the mini phyllo shells on a baking sheet and bake according to package directions, typically for 3-5 minutes, until crisp. Let them cool completely.
- While the shells cool, make the filling. In a medium bowl, combine the ricotta cheese, powdered sugar, and vanilla extract. Beat with a hand mixer or whisk until smooth and well combined.
- Gently fold in the 1/2 cup of mini chocolate chips.
- If desired, dip the edges of the cooled phyllo cups into melted chocolate and let the chocolate set.
- Spoon or pipe the cannoli filling into the cooled phyllo cups.
- Garnish the tops with additional mini chocolate chips, chopped pistachios, or sprinkles.
- Serve immediately. For best texture, assemble within a few hours of serving. Store any leftover unfilled shells at room temperature in an airtight container. Store leftover filling separately in the refrigerator.
Notes
- For a firmer filling, you can drain the ricotta in a fine-mesh sieve for 30 minutes before mixing. For a sweeter filling, add a little more powdered sugar to taste.