

Little Jars of Spring Joy
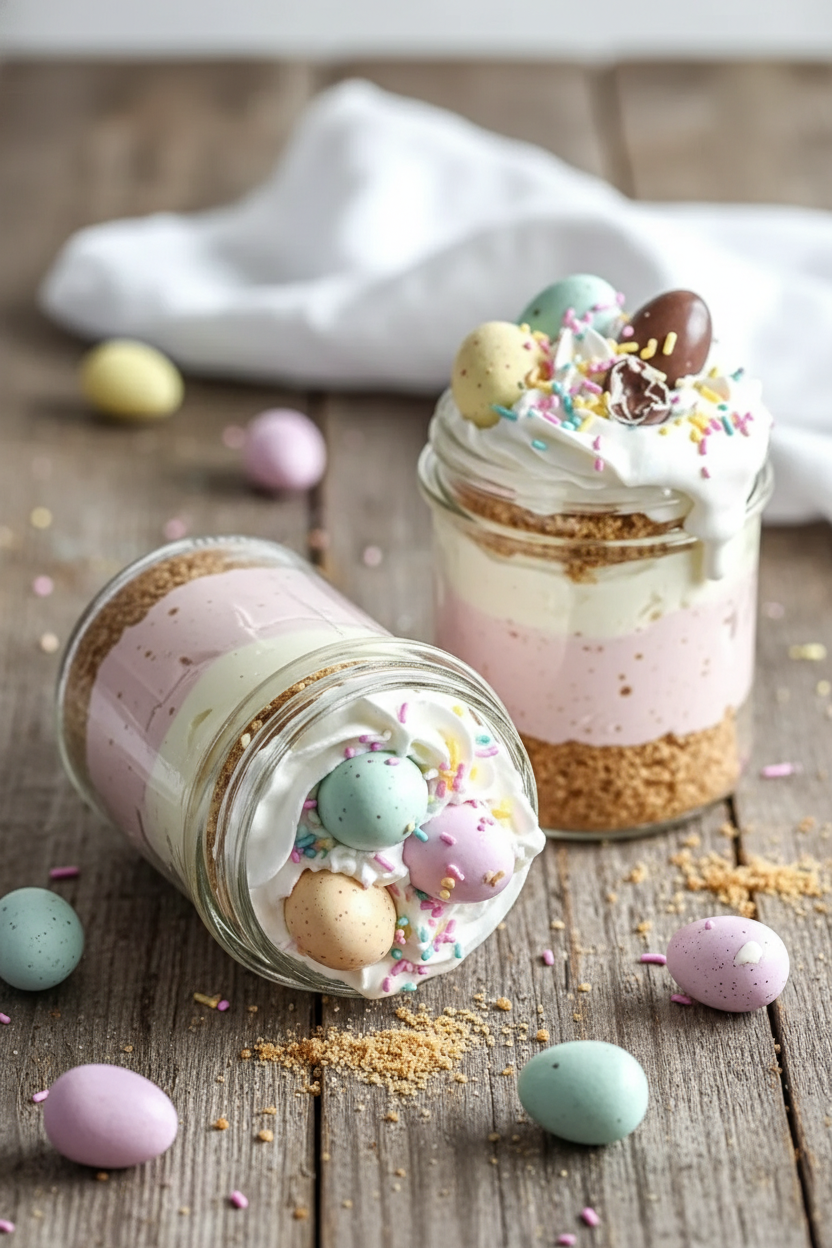
Hello, my dear. It’s Elowen. Let’s make some sunshine in a jar. These Easter Egg Cheesecake Jars are pure happiness. They are easy, fun, and perfect for little hands to help with. I love making treats that feel like a celebration. Doesn’t that sound nice?
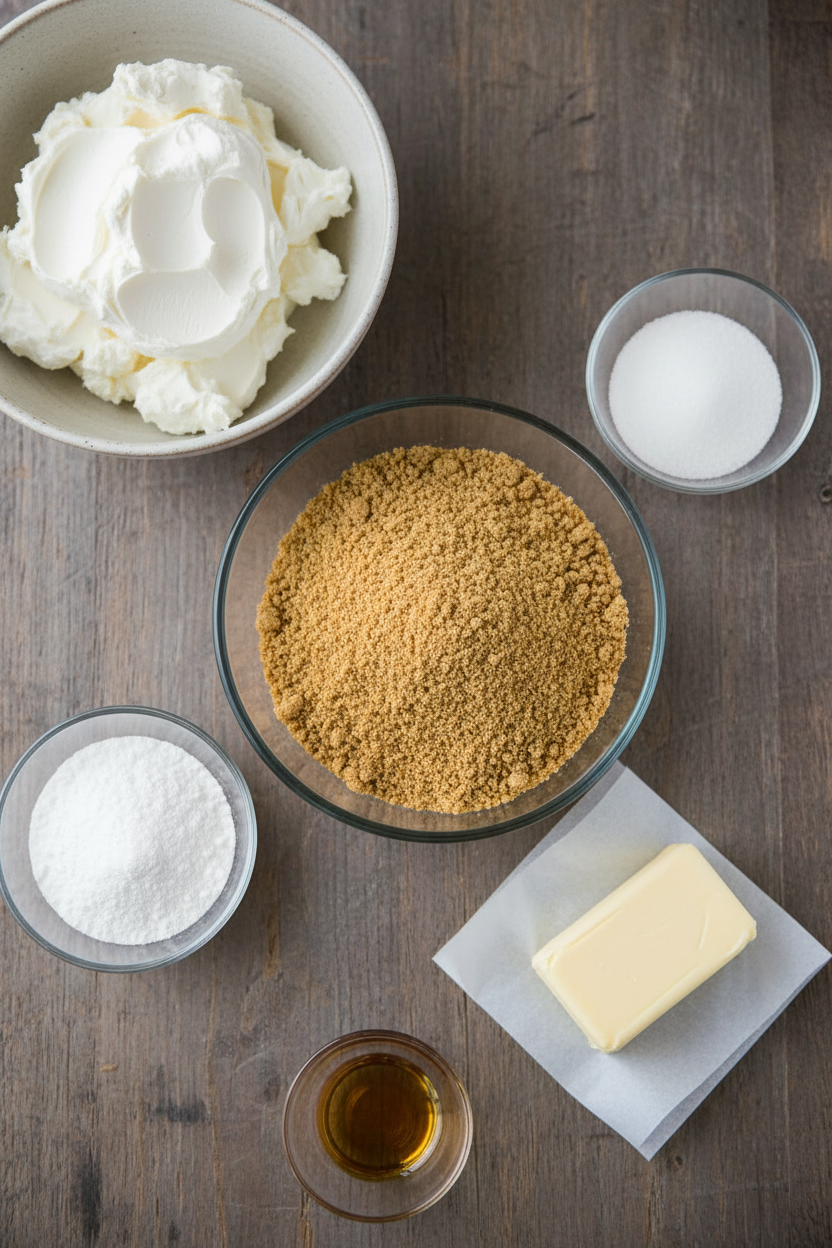
We start with a simple crust. It’s just crumbs, sugar, and melted butter. You mix it until it feels like sand at the beach. Then you press it into your jars. This matters because a good crust holds everything together. It’s the first friendly hello to your taste buds. Do you have a favorite crust? I always think a graham cracker crust feels like home.
The Fluffy Cloud Filling
Now for the magic. Beat your cream cheese until it’s smooth. Add powdered sugar and vanilla. Then comes the whipped cream. Folding it in gently is the secret. It makes the filling light as a cloud. I still laugh at the time I beat it too fast. We had cream cheese rain in my kitchen!
We split the filling to make a pink layer. Use a little food coloring or strawberry powder. The strawberry powder gives a lovely, real fruit taste. It reminds me of my strawberry almond cheesecake bites. Swirling the pink and white together looks so pretty. This matters because we eat with our eyes first. Doesn’t that smell amazing?
A Story of Sweetness
My granddaughter once made these for her school party. She was so proud. She said they looked like little gardens. That’s the best part. You can play with the colors and toppings. It’s your own sweet world in a jar. What color would you make your cheesecake layer? A soft yellow or a light blue?
*Fun fact*: The idea of layered desserts in jars became popular for picnics. No plates needed! It’s a handy trick I use for other treats, like my white chocolate blueberry cheesecake cupcakes. The jar keeps everything neat and tidy.
Time to Decorate!
This is where you shine. Add a swirl of whipped cream on top. Then, the candy eggs and sprinkles. Use your favorite colors. I love the pastel ones for spring. They look like tiny treasures. The final chill in the fridge makes everything set just right.
This last step matters more than you think. It turns simple ingredients into a gift. Sharing something you made with love is special. It’s like the feeling you get from a perfect vanilla butter cake. What’s your favorite candy to use for decorating?
Your Cheesecake Adventure
I hope you try these little jars. They are a wonderful start to baking. Cheesecake is so forgiving and fun. Once you get the feel for it, you can try all sorts. Maybe a blackberry cheesecake next, or a swirled red velvet cake.
Remember, the best recipes are the ones you make your own. Add a different fruit powder. Use chocolate eggs. Have fun with it! Tell me, what’s the first dessert you ever felt proud of making? I’d love to hear your story.
Instructions
Step 1: Mix your graham cracker crumbs, sugar, and melted butter. Stir until it looks like wet sand. I love the smell of that buttery crust. Spoon it into your little jars. Press it down gently with a spoon. (A firm press makes a sturdy base for your cheesecake layers.)
Step 2: Beat the softened cream cheese until it’s super smooth. Add the powdered sugar and vanilla. Beat it all again until it’s fluffy. Doesn’t that smell amazing? This is just like the start of my favorite vanilla cake.
Step 3: Gently fold your whipped cream into the cream cheese. Do it in two parts. This keeps everything light and airy. Now, divide the mixture in half. Tint one bowl with pink coloring or strawberry powder. What’s your favorite spring color? Share below!
Step 4: Spoon the pink layer over the crust. Then, add the white layer on top. I still laugh at my first messy try. Add a fluffy swirl of whipped cream. Decorate with candy eggs and sprinkles. Chill your jars for at least two hours. (Chilling makes the flavors blend together perfectly.)
Creative Twists
Chocolate Bunny Twist: Use crushed chocolate cookies for the crust.
Berry Surprise: Hide a fresh berry in the middle of the pink layer.
Citrus Sunshine: Add a little lemon zest to the white filling.
Which one would you try first? Comment below!
Serving & Pairing Ideas
Serve these on a big platter with fresh spring flowers. A cup of milky tea is a lovely pairing. For a fancier look, tie a ribbon around each jar. You could even serve them with a slice of red velvet cake for a bigger dessert table. Which would you choose tonight?
Keeping Your Cheesecake Jars Happy
Let’s talk about storing these sweet jars. They need to live in the fridge. A tight lid keeps them fresh for up to four days. You can also freeze them for a month. Thaw them in the fridge overnight before eating.
I remember my first batch. I didn’t press the crust down firmly. It got a bit crumbly when I took a bite. Now I press it gently but with purpose. This makes a perfect base for your creamy cheesecake layers.
Batch cooking these jars saves so much time. Make them a day before your party. This lets the flavors get cozy together. Storing food well means less stress and more joy later. Have you ever tried storing it this way? Share below!
Little Fixes for Common Kitchen Hiccups
Is your cream cheese lumpy? Let it sit on the counter first. Soft cheese blends smoothly with sugar. I once tried to beat it cold. My arm got tired and the mix was grainy.
Is your whipped cream too soft? Make sure your bowl and cream are very cold. This helps it form stiff peaks. A stable whip makes your cheesecake filling light and fluffy.
Are the layers mixing? Chill the first layer for ten minutes. Then add the next one. This keeps your pink and white stripes pretty. These small steps build your cooking confidence. They also make your dessert taste and look wonderful. Which of these problems have you run into before?
Your Quick Questions, Answered
What is the easiest no-bake Easter dessert?
These cheesecake jars are the easiest! You just mix, layer, and chill. No oven is needed at all. They are perfect for little helpers in the kitchen. You can even make them look like a spring garden with your toppings. It is a simple, fun treat for everyone.
Can I make cheesecake filling ahead of time for jars?
Yes, you absolutely can. Make the filling one day ahead. Keep it covered in your fridge. Give it a gentle stir before you layer it in the jars. This helps you get a head start on your party prep. The flavor is still perfectly delicious.
What are some easy Easter toppings for mini cheesecakes?
Use pastel candy eggs and colorful sprinkles. You can also try crushed cookies or fresh berries. A little swirl of whipped cream is always nice. For another fruity idea, my strawberry almond bites have great topping tips. Let your creativity shine with spring colors.
How long do cheesecake jars last in the fridge?
They will last for three to four days. Just make sure the lids are on tight. The crust may get a little softer over time. But they will still taste very good. It is best to eat them before the end of the week for the best texture.
Can I use a different cookie for the crust in cheesecake jars?
You can use many different cookies. Try crushed vanilla wafers or chocolate sandwich cookies. Biscoff cookies also make a tasty crust. Use the same amount as the graham crumbs. The buttery, crunchy base is my favorite part. *Fun fact: Graham crackers were first made to stop bad habits!*
How do you prevent cheesecake jars from getting soggy?
Press your crust down firmly in the jar. This creates a solid barrier. Also, make sure your filling is thick and not runny. Assemble the jars just a few hours before serving if you can. This keeps every layer perfect. Which tip will you try first?
From My Kitchen to Yours
I hope you love making these cheerful jars. Cooking is about sharing joy and sweet moments. These little desserts are perfect for that. If you enjoy this, you might also like a classic vanilla cake for your next celebration.
Thank you for letting me share my kitchen stories with you. I would love to hear about your own cooking adventures. Have you tried this recipe? Please tell me all about it in the comments below.
Happy cooking!
—Elowen Thorn.

Easy Mini Easter Cheesecake Jars I Make Yearly
Description
Easy, no-bake mini cheesecakes layered in jars with a graham cracker crust, a creamy filling, and festive Easter toppings.
Ingredients
For the crust:
For the cheesecake layers:
For the topping:
Instructions
- In a bowl, combine graham cracker crumbs, sugar, and melted butter. Stir until it resembles wet sand.
- Spoon the crumb mixture into mini jars and press gently to form the crust base.
- In a mixing bowl, beat the cream cheese until smooth. Add powdered sugar and vanilla and beat again until fluffy.
- Fold whipped cream into the cream cheese mixture in two batches until fully combined.
- Divide mixture into two bowls. Tint one with pink food coloring or strawberry powder for a fruity layer.
- Spoon or pipe the pink layer over the crust. Follow with the white layer on top.
- Add a swirl of whipped cream on each jar.
- Decorate with candy eggs and sprinkles. Chill until ready to serve.
Notes
- For best results, ensure cream cheese is fully softened to avoid lumps. Chill for at least 1 hour before serving to set.