

My First Campfire Cookie
I tried this recipe on a cold winter night. My grandson wanted s’mores. But it was too snowy for a campfire. So we brought the campfire inside. I still laugh at that.
We mixed everything in my big yellow bowl. The kitchen smelled like a sweet, toasty hug. Doesn’t that smell amazing? It matters because food can bring a feeling home. Even when you can’t go outside.
What Makes Them So Good
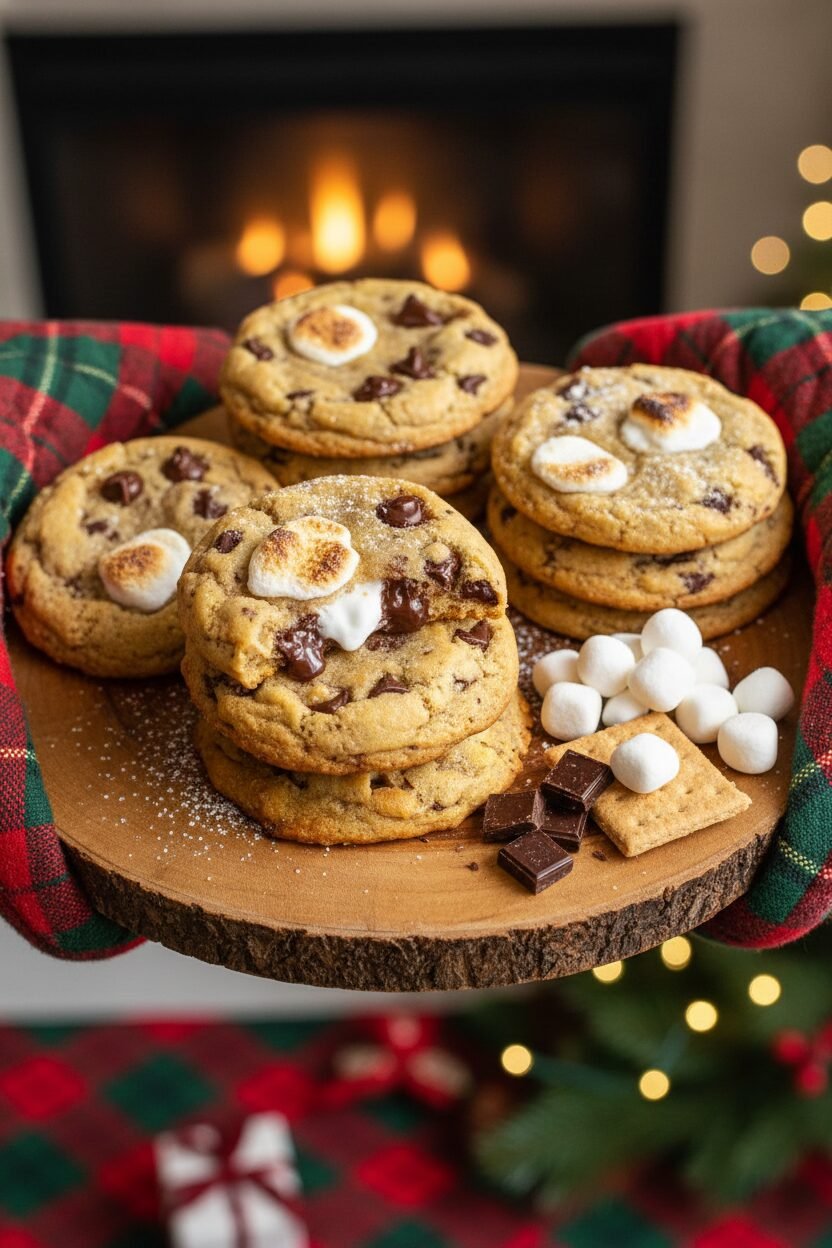
These cookies are chewy and soft. You get little pockets of melted chocolate. The graham cracker bits add a gentle crunch. And the mini marshmallows get all toasty inside.
Why does this work? The warm butter and brown sugar make them rich. The high heat makes the tops crackle. *Fun fact:* The very hot oven is the secret. It puffs them up fast, keeping the center soft.
Let’s Make the Dough
First, melt your butter. Let it cool just a bit. Mix it with the sugars until it looks like wet sand. Then add your eggs and vanilla. Give it a good stir.
Now, add your flour mix. Stop when you still see a few white streaks. This keeps the cookies tender. Finally, fold in the goodies. Do you like more chocolate or more marshmallow? I always add a few extra chocolate chunks.
The Baking Trick
Here is the important part. Your cookies will look pale and puffy when you take them out. Do not bake them until they are brown. They seem underdone, but they are perfect.
Let them cool on the sheet. They will finish cooking there. This matters because it gives you that gooey center. It’s the heart of a good cookie. What’s your favorite part of a cookie? The crispy edge or the soft middle?
Share the Warmth
These cookies are best shared warm. The chocolate will be a little melty. They taste like a holiday and a summer night all at once. That is a wonderful feeling.
Wrap a few in a napkin for a friend. It’s a small gift of warmth. Tell me, what food makes you feel cozy? I would love to hear your story. Maybe I’ll try your recipe next.
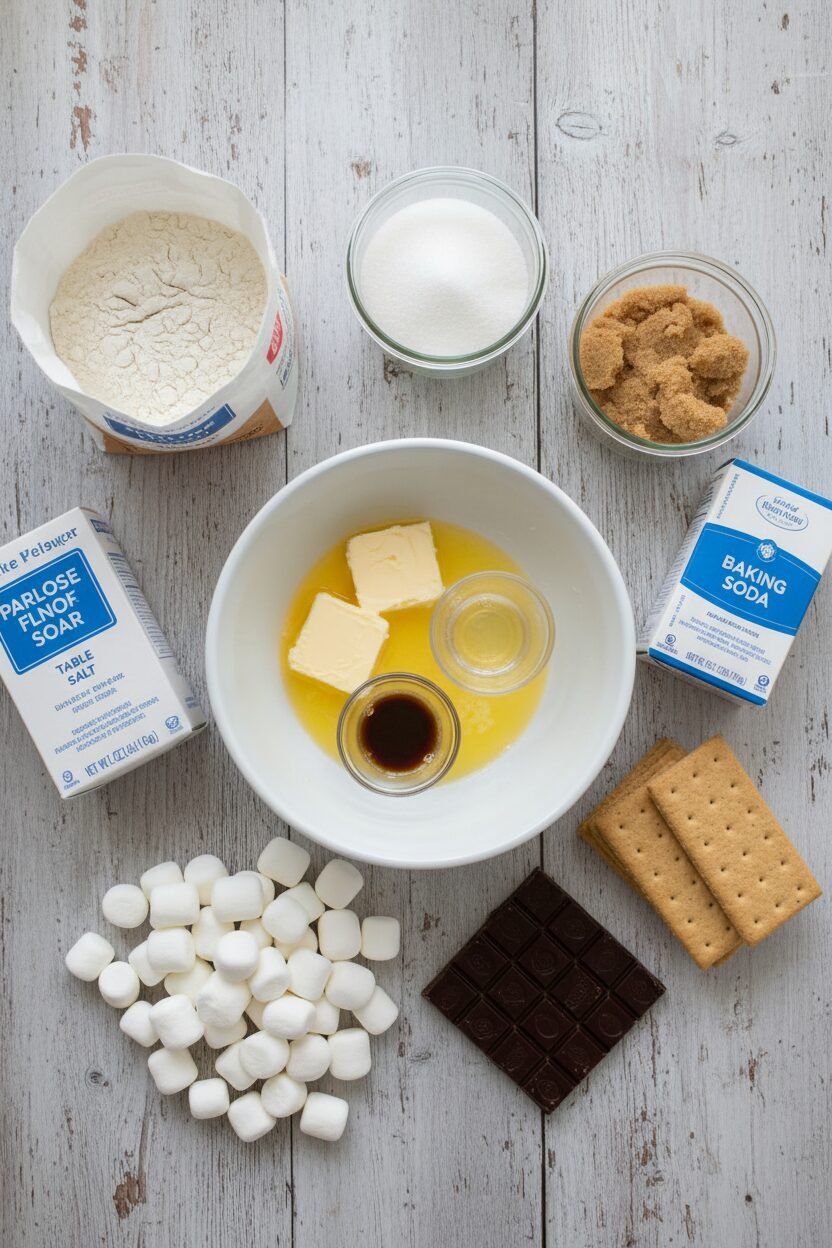
Ingredients:
| Ingredient | Amount | Notes |
|---|---|---|
| All-purpose flour | 2¼ cups (11¼ ounces/319 grams) | |
| Table salt | 1 teaspoon | |
| Baking soda | ¾ teaspoon | |
| Light brown sugar | 1 cup packed (7 ounces/198 grams) | |
| Unsalted butter | 12 tablespoons, melted | |
| Granulated sugar | ½ cup (3½ ounces/99 grams) | |
| Eggs | 2 large | |
| Vanilla extract | 1½ teaspoons | |
| Mini marshmallows | ¾ cup | |
| Graham crackers | ¾ cup | Lightly crushed |
| Bittersweet chocolate | 4 ounces (113 grams) | Chopped |
Instructions
Step 1: First, get your oven ready. Move a rack to the middle. Heat the oven to 425 degrees. Line two big baking sheets with parchment paper. Grab a bowl for your flour, salt, and baking soda. Mix them together gently. Doesn’t that smell amazing already?
Step 2: Now, let’s make the sweet base. Use your mixer for this. Beat the brown sugar, melted butter, and white sugar together. Do this for about one minute. It will look like wet sand. Then add the eggs and vanilla. Mix until it’s all one happy, creamy family. (A tip: Let the butter cool a tiny bit first so it doesn’t cook the eggs!)
Step 3: Time to bring in the dry team. Turn your mixer speed to low. Slowly add your flour mixture. Stop when you see just a few flour streaks. Now the fun part! Toss in the mini marshmallows, crushed grahams, and chocolate chunks. Mix until they’re all tucked in. What’s your favorite part of a s’more? Share below!
Step 4: Let’s shape our cookies. Scoop the dough into 16 portions. I use my hands for this. Wet your hands a little first. Roll each portion into a ball. This keeps the dough from sticking. I still laugh at my first messy attempt. Space 8 balls on each prepared sheet.
Step 5: Gently flatten each dough ball with your palm. Make them about ¾-inch thick. Bake just one sheet at a time for even heat. They need 8 to 10 minutes. They will look pale and puffy. That’s perfect! They keep baking on the hot sheet. Let them cool there for 5 minutes.
Step 6: Finally, move the cookies to a rack. Use a spatula for this. Let them cool for about 10 minutes. They are best served warm. The chocolate will be soft and the marshmallows gooey. It’s like a campfire in your kitchen. Enjoy your creation!
Creative Twists
These cookies love to play dress-up. Try a new look for them. It makes baking feel like an adventure. My grandkids love to pick the twist.
Peppermint Sparkle: Add ½ cup crushed candy canes to the dough. It tastes like a Christmas party.
Salty Sweet: Sprinkle a little flaky sea salt on top before baking. It makes the chocolate sing.
Cookie Sandwich: Spread marshmallow fluff between two cooled cookies. It’s wonderfully messy.
Which one would you try first? Comment below!
Serving & Pairing Ideas
These cookies are a full celebration. Serve them warm on a big platter. A glass of cold milk is the classic friend. For a cozy night, try hot cocoa with a cinnamon stick. Grown-ups might like a sip of coffee liqueur over ice. It’s rich and smooth. You could also crumble a cookie over vanilla ice cream. That’s my husband’s favorite trick. It turns a simple dessert into something special. The choices are half the fun.
Which would you choose tonight?
Keeping Your Cookie Joy
These cookies are best warm and gooey. But they keep well for three days in a sealed tin. Just layer them with parchment paper. I once stacked them without paper. What a sticky mess we had!
You can freeze the dough balls for later joy. Place them on a tray until solid. Then pop them into a freezer bag. Bake straight from frozen, adding a minute or two. This matters because fresh cookies chase away any gray day.
Batch cooking lets you share happiness anytime. Warm a cold cookie for ten seconds in the microwave. You will have a soft, melty treat instantly. Have you ever tried storing cookie dough this way? Share below!
Cookie Troubles, Simple Fixes
First, your cookies might spread too thin. Your butter was likely too warm. Make sure it is just melted, not hot. I remember when my first batch turned into one giant cookie! Chilling your dough balls for 20 minutes fixes this.
Second, the marshmallows might burn. They brown faster than the dough. That is why we bake at a high heat for less time. Trust the recipe, even if they look pale. Getting this right means a perfect soft center.
Third, the cookies can seem too soft after baking. Let them cool on the sheet as instructed. They firm up beautifully as they sit. This builds your confidence. You learn to trust the process. Which of these problems have you run into before?
Your Quick Questions, Answered
Q: Can I make these gluten-free? A: Yes! Use a good gluten-free flour blend. Add 1/4 teaspoon xanthan gum if your blend lacks it.
Q: Can I make the dough ahead? A: Absolutely. Keep it covered in the fridge for up to two days. Let it soften a bit before rolling.
Q: What can I swap for bittersweet chocolate? A: Milk chocolate chips work well. So do chopped chocolate bars from your candy stash.
Q: Can I make a smaller batch? A: You can halve all the ingredients easily. Just use one egg and whisk it first. Then use half.
Q: Any optional tips? A: Sprinkle a little sea salt on top before baking. Fun fact: Salt makes sweet flavors taste even sweeter! Which tip will you try first?
From My Kitchen to Yours
I hope your kitchen fills with the smell of happy memories. It is my favorite scent in the world. Sharing food is how we share our hearts.
I would love to hear about your baking adventure. Tell me all about it in the comments. Have you tried this recipe? Your stories are my favorite thing to read.
Happy cooking!
—Elowen Thorn.


Festive Campfire S’mores Christmas Cookies
Description
Loaded S’mores Cookies
Ingredients
Instructions
- Adjust oven rack to middle position and heat oven to 425 degrees. Line 2 rimmed baking sheets with parchment paper. Combine flour, salt, and baking soda in bowl.
- Using stand mixer fitted with paddle, beat brown sugar, melted butter, and granulated sugar on medium speed until well combined, about 1 minute, scraping down bowl as needed. Add eggs and vanilla and beat until fully incorporated, about 30 seconds.
- Reduce speed to low. Slowly add flour mixture and mix until mostly incorporated but some streaks of flour remain, about 30 seconds. Add marshmallows, graham crackers, and chocolate and mix until evenly distributed throughout dough, about 30 seconds.
- Divide dough into sixteen 2½-ounce (71-gram) portions, about ¼ cup each. Divide any remaining dough evenly among dough portions. Roll dough portions between your wet hands to make dough balls.
- Evenly space dough balls on prepared sheets, 8 balls per sheet. Using your hand, flatten dough balls to ¾-inch thickness.
- Bake cookies, 1 sheet at a time, until centers of cookies are puffed and still very blond, 8 to 10 minutes. (Cookies will seem underdone but will continue to bake as they cool.) Let cookies cool on sheet for 5 minutes. Using spatula, transfer cookies to wire rack and let cool for 10 minutes. Serve warm.
Notes
- Nutritional information is an estimate per cookie based on standard ingredient data. For best results, serve cookies warm when the marshmallows and chocolate are still soft.