

My Chocolate Wreath Secret
I have a little secret for these cookies. It’s the espresso powder. You won’t taste coffee. It just makes the chocolate taste more like itself. Deeper and richer. I learned that from my friend Margie years ago. I still laugh at that. I thought she was playing a trick on me!
This matters because good food is about layering flavors. One little thing can lift everything else up. Doesn’t that smell amazing? Now, tell me, what’s your secret kitchen ingredient that sounds strange but works?
Why Let the Dough Rest?
The recipe says to let the dough sit for 30 minutes. This is important. The gluten-free flour needs time to drink up the wet ingredients. It makes the dough easier to handle. Your cookies will bake up nicer.
This waiting time is a gift. Use it to wash your bowls. Or just sit with a cup of tea. Good baking isn’t always rushing. It’s about little pauses. Do you like a quiet moment in the kitchen, or do you prefer to keep moving?
The Perfect Bake
Here is the trickiest part. You must take them out when they look underdone. The centers will be very soft. They will look raw in the cracks. This is perfect. Trust me. They set up as they cool.
If you bake them until they look done, they will be dry. We want a fudgy middle. Let them cool on the sheet for five minutes. Then move them to a rack. *Fun fact: the cracks on top are called “crazing.” They are a sign of a good, chewy cookie.
A Story of Sticky Fingers
The dough will be sticky. My grandson, Leo, helped me once. He got dough all over his fingers. He said it was chocolate glue. We laughed so hard. Rolling the balls is messy fun.
Lightly oil your hands. It helps a lot. This matters because cooking should be fun, not perfect. A little mess means memories are being made. What’s the funniest kitchen mess you’ve ever made?
Serving With Love
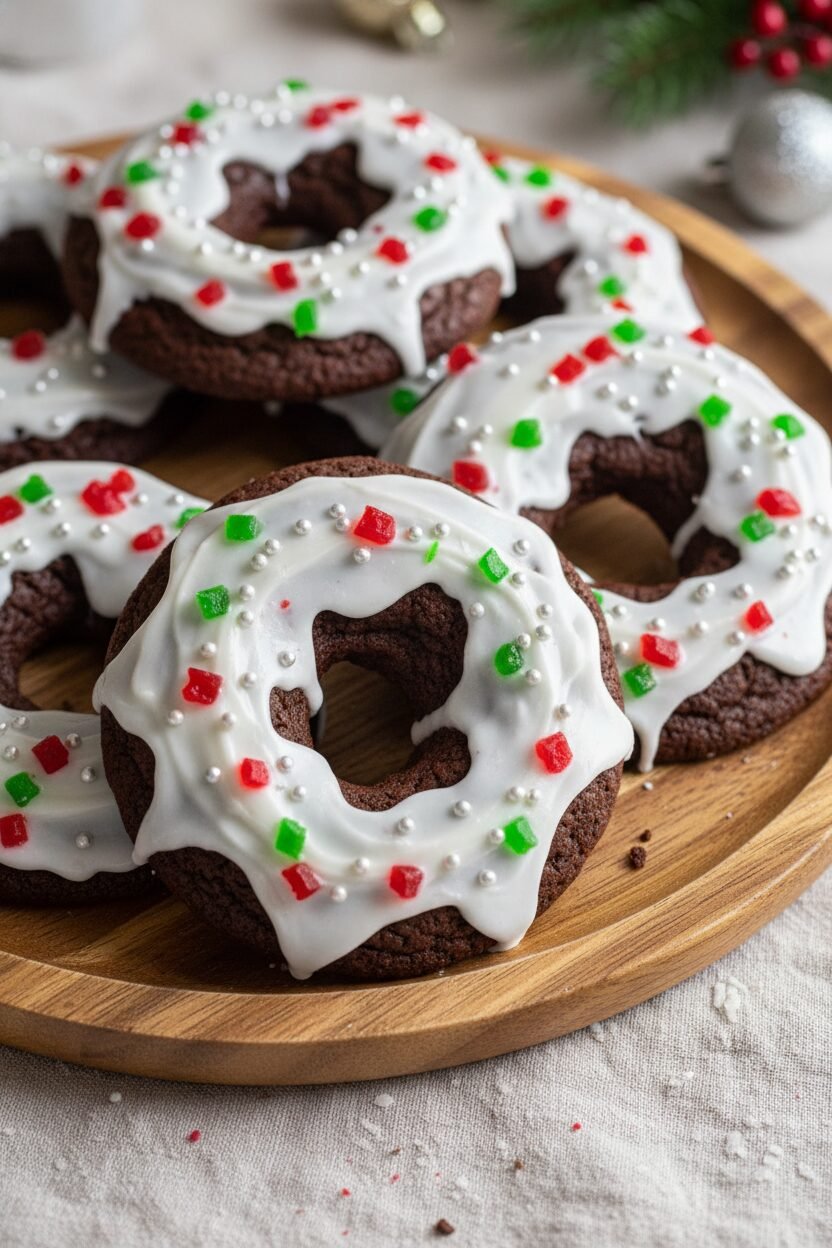
These cookies are wonderful warm. The chocolate chips will be soft. They are also great the next day with a glass of cold milk. I like to dust them with a little powdered sugar. It looks like snow on a chocolate wreath.
Sharing food you made is a special kind of love. You are sharing your time and care. That is the real recipe. Always share with someone who needs a smile.
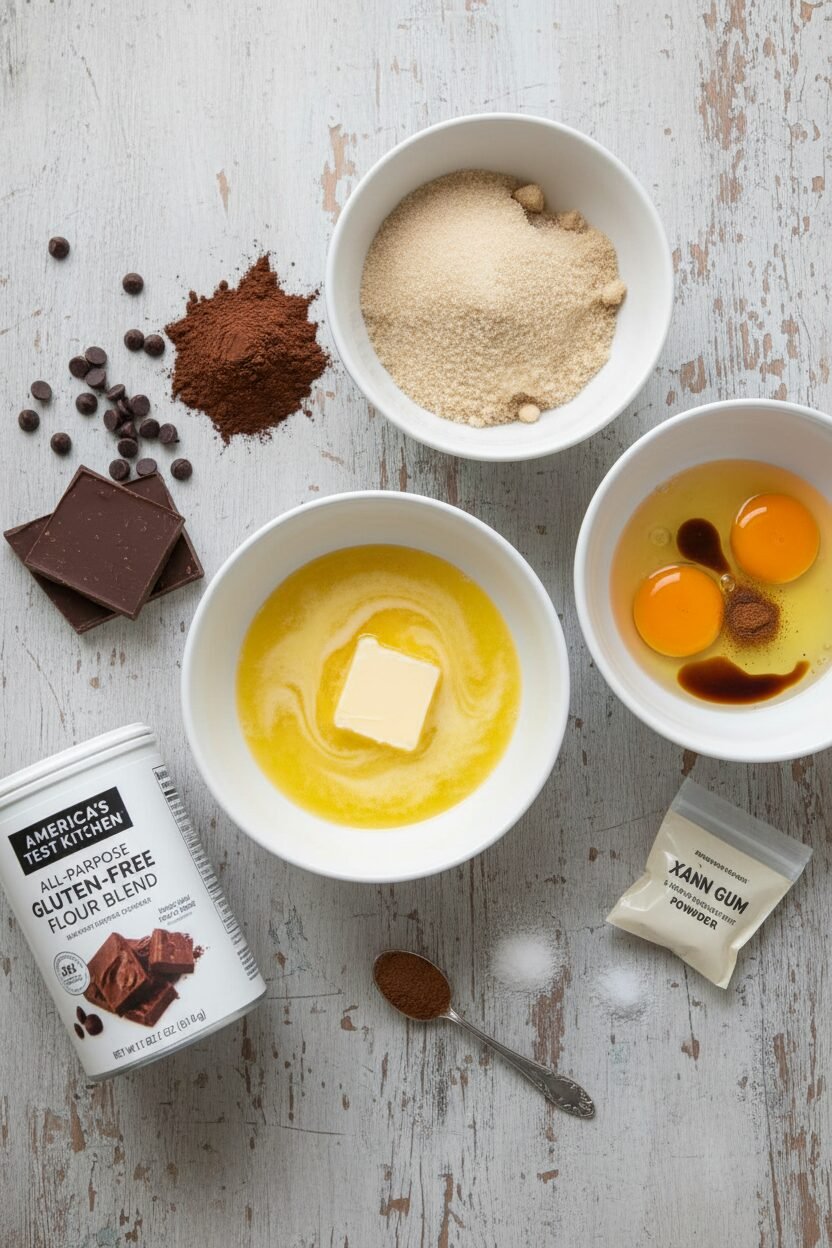
Ingredients:
| Ingredient | Amount | Notes |
|---|---|---|
| Semisweet chocolate, chopped | 12 ounces (340 grams) | |
| America’s Test Kitchen All-Purpose Gluten-Free Flour Blend | 4 ounces (¾ cup plus 2 tablespoons / 113 grams) | |
| Unsweetened cocoa powder | ¾ ounce (¼ cup / 21 grams) | |
| Baking soda | ½ teaspoon | |
| Salt | ½ teaspoon | |
| Xanthan gum | ¼ teaspoon | |
| Light brown sugar | ¾ cup packed (5 ¼ ounces / 149 grams) | |
| Granulated sugar | ¼ cup (1 ¾ ounces / 50 grams) | |
| Large eggs | 2 | |
| Vegetable oil | 5 tablespoons | |
| Unsalted butter | 2 tablespoons | Melted and cooled |
| Vanilla extract | 1 teaspoon | |
| Instant espresso powder | ½ teaspoon | |
| Bittersweet chocolate chips | 9 ounces (1 ½ cups / 255 grams) |
Instructions
Step 1: First, melt your chopped chocolate. Use the microwave at half power. Stir it every minute until smooth. Let it cool a bit. Now, grab a medium bowl. Whisk your flour, cocoa, baking soda, salt, and xanthan gum together. Set this dry mix aside. Doesn’t that cocoa smell wonderful? It reminds me of my old pantry.
Step 2: In a big bowl, whisk both sugars with the eggs, oil, melted butter, vanilla, and espresso powder. Whisk until it’s all smooth and happy. Then, whisk in your cooled chocolate. It will look like a rich, dark batter. Stir in the dry ingredients with a spatula. Fold in those chocolate chips last. (A hard-learned tip: let your melted butter cool so it doesn’t cook the eggs!). Cover the bowl and walk away for 30 minutes.
Step 3: Heat your oven to 350 degrees now. Line your baking sheets with parchment paper. Your dough will be quite sticky. That’s perfect! Roll two-tablespoon scoops into balls. Place them two inches apart on the sheets. I still laugh at my first messy attempt. Do you like chewy or crispy cookies more? Share below!
Step 4: Bake just one sheet at a time for even cooking. Bake for 12 to 14 minutes. Rotate the sheet halfway through. The cookies will look puffed and cracked. The centers will seem soft. That’s how you get a fudgy center! Let them cool on the sheet for 5 minutes. Then move them to a rack. I love them slightly warm.
Creative Twists
These cookies are lovely as they are. But you can play with them too! Here are some fun ideas for your next batch. They make the kitchen feel like a holiday workshop. My grandkids love choosing a new twist each year.
Peppermint Sparkle: Add 1/2 teaspoon peppermint extract to the dough. Press a candy cane piece on top after baking.
Orange Zest Joy: Stir the zest of one orange into the wet ingredients. It’s a bright, sunny flavor.
Salty Sweet Surprise: Use salted caramel chips instead of bittersweet chocolate chips. Sprinkle with flaky sea salt before baking.
Which one would you try first? Comment below!
Serving & Pairing Ideas
These cookies are a celebration on a plate. I like to serve them on my big wooden board. Arrange them in a circle like a real wreath. You can dust them with powdered sugar “snow.” A bowl of fresh berries adds a pretty, tart contrast. It makes the table look so festive.
For drinks, I have two favorites. For a cozy night, try a glass of cold milk. It’s the classic choice. For the grown-ups, a small glass of cherry port wine is lovely. The fruity notes sing with the chocolate. Which would you choose tonight?
Keeping Your Cookie Wreaths Merry and Bright
These cookies keep well for days. Just store them in a tight tin at room temperature. They stay wonderfully chewy this way. For longer keeping, freeze the baked cookies. Layer them between parchment in a freezer bag. They will keep for a month.
You can also freeze the dough balls. This is my favorite batch-cook trick. Pop the dough balls on a tray until solid. Then bag them up. You can bake a few fresh anytime. I once forgot I had dough in the freezer. Finding it felt like a holiday gift to myself!
This matters because it saves time during the busy season. Warm cookies make any day feel special. Have you ever tried storing cookie dough this way? Share below!
Cookie Troubles? Let’s Fix Them Together
Is your dough too sticky to roll? Wet your hands with cold water. The dough won’t stick to you. I remember my first batch was a sticky mess. Wet hands saved the day.
Do your cookies spread too much? Make sure your dough rested for 30 minutes. This lets the flour absorb the moisture. Also, check your oven temperature with a thermometer.
Are the centers too gooey? The cookies should look underdone when you take them out. They set as they cool on the sheet. This gives you that perfect fudgy center. Fixing small issues builds your cooking confidence. It also makes your treats taste just right. Which of these problems have you run into before?
Your Quick Questions, Answered
Q: Can I use a different gluten-free flour? A: I recommend the one listed. Other blends can change the texture.
Q: Can I make the dough ahead? A: Yes! Rest it in the fridge overnight. Let it warm up a bit before rolling.
Q: What if I don’t have espresso powder? A: You can skip it. It just deepens the chocolate flavor.
Q: Can I double the recipe? A: Absolutely. Just mix in a very large bowl. Bake one sheet at a time.
Q: Any fun decorating tips? A: While warm, press a few extra chips on top. It makes them look extra festive. Which tip will you try first?
Fun fact: The first chocolate chip cookie was invented by accident in the 1930s!
From My Kitchen to Yours
I hope you love making these chocolatey wreaths. They always fill my kitchen with joy. Baking is about sharing warmth with others. I would love to hear about your baking adventures.
Tell me all about it in the comments below. Have you tried this recipe? Your stories are my favorite thing to read. Thank you for spending this time with me.
Happy cooking! —Elowen Thorn.


Frosted Holiday Chocolate Cookie Wreaths
Description
Gluten-Free Chocolate Cookies
Ingredients
Instructions
- Microwave semisweet chocolate in bowl at 50 percent power, stirring occasionally, until melted, 2 to 4 minutes; let cool slightly. Whisk flour blend, cocoa, baking soda, salt, and xanthan gum together in bowl; set aside.
- Whisk brown sugar, granulated sugar, eggs, oil, melted butter, vanilla, and espresso powder in large bowl until well combined and smooth, then whisk in cooled chocolate. Stir in flour mixture with rubber spatula until soft, homogeneous dough forms. Fold in chocolate chips. Cover bowl with plastic wrap and let dough rest for 30 minutes. (Dough will be sticky and soft.)
- Adjust oven rack to middle position and heat oven to 350 degrees. Line 2 baking sheets with parchment paper. Working with 2 generous tablespoons dough at a time, roll into balls and space them 2 inches apart on prepared sheets.
- Bake cookies, 1 sheet at a time, until puffed and cracked and edges have begun to set but centers are still soft (cookies will look raw between cracks and seem underdone), 12 to 14 minutes, rotating sheet halfway through baking. Let cookies cool on sheet for 5 minutes, then transfer to wire rack. Serve warm or at room temperature.
Notes
- Estimated yield is 24 cookies. Nutrition information is an estimate per cookie.