

The Salt Water Secret
Let me tell you about the salt water bath. It sounds odd, I know. You soak the turkey in salty water for hours. This is called brining. It makes the meat so juicy and tender. No one likes a dry turkey.
I learned this from my friend Martha years ago. I thought she was playing a trick on me. But it works like magic. The meat soaks up just enough flavor. It matters because it gives you a safety net. Even if you cook it a little long, it stays moist.
Patience for Perfect Skin
After the bath, you must dry the bird well. Then let it sit in the fridge, uncovered. This seems like a strange step. But it is the key to crispy, golden skin. The air dries the outside perfectly.
I still laugh at that. The turkey sits in the fridge for a whole day. It feels like waiting for a special guest to arrive. This step matters because crispy skin is a joy. It’s the best part for many folks. Do you fight over the crispy skin at your table?
A Cozy Bed of Veggies
Now, we make a little bed in the pan. We use chopped onions, carrot, and celery. Throw in some thyme sprigs too. Then we pour a cup of water over them. This isn’t for eating. It’s for the most amazing smell in your house.
As the turkey roasts, the veggies and water steam. They keep the drippings from burning. Doesn’t that smell amazing? It fills your whole home with warmth. Fun fact: Those steamed veggies and drippings are the secret start to a great gravy later.
The Stuffing Story
We warm some stuffing before putting it in the turkey. This helps everything cook evenly and safely. You put the rest in a dish to bake later. That way, everyone gets plenty.
My grandson once ate only the stuffing from the pan. He had three helpings! I told him he was a stuffing monster. What’s your favorite part of the Thanksgiving plate? Is it the stuffing, the turkey, or something else?
The Grand Finale
Roasting starts hot, then goes low and slow. Later, we turn the heat back up. We flip the turkey breast-side up for the last hour. This makes the breast beautiful and brown. Use your thermometer. It tells you exactly when it’s done.
Then, the most important step. You must let the turkey rest. I know it’s hard to wait. But this lets the juices settle back into the meat. If you carve it right away, all the juice runs out. Trust your grandma on this one. What’s the hardest dish for you to wait to eat?
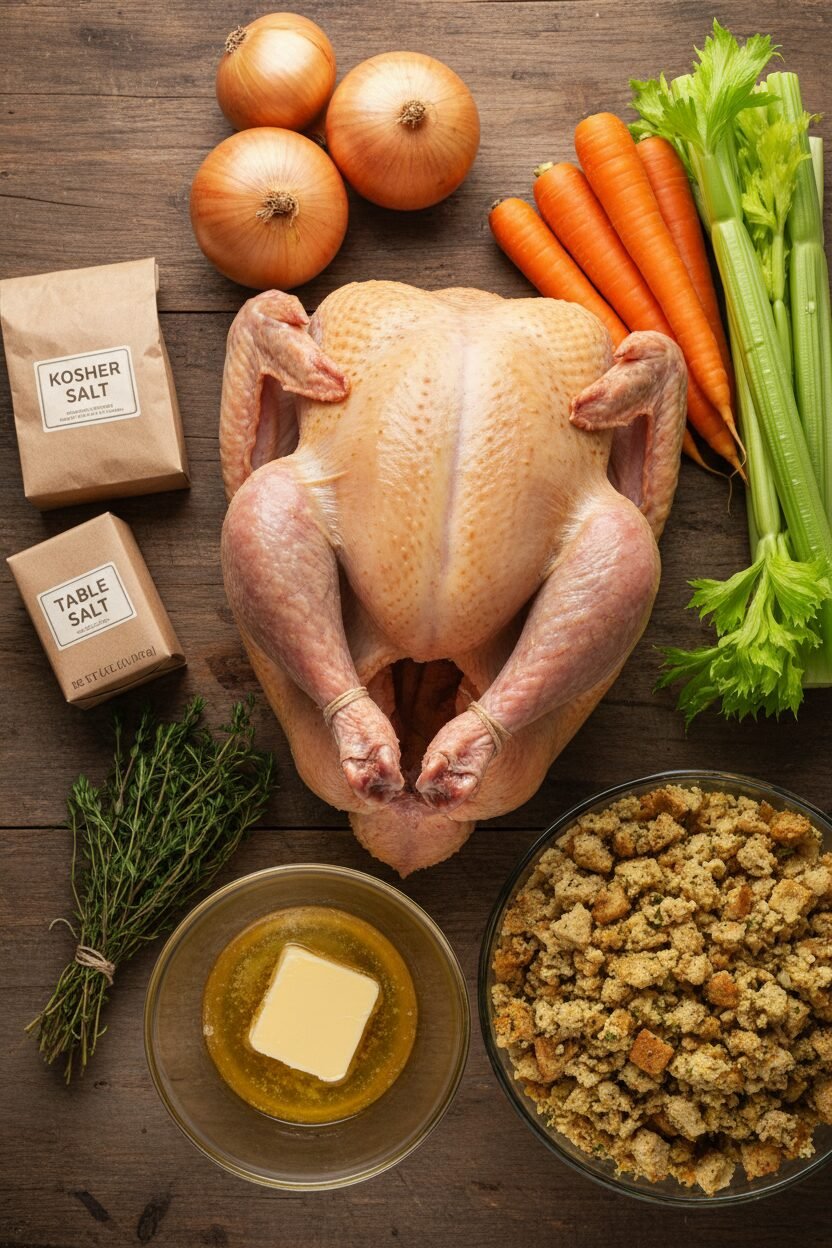
Ingredients:
| Ingredient | Amount | Notes |
|---|---|---|
| Kosher salt (or table salt) | 4 cups (or 2 cups) | For the brine |
| Turkey | 12 to 14 pounds gross weight | Rinsed, giblets/neck/tailpiece removed for gravy |
| Onions, medium | 2 | Chopped coarse |
| Carrot, medium | 1 | Chopped coarse |
| Celery rib | 1 | Chopped coarse |
| Fresh thyme | 4 sprigs | |
| Prepared stuffing | 12 cups | Divided use |
| Unsalted butter | 4 tablespoons | Melted, plus extra for greasing |
Instructions
Step 1: First, make your salt bath. Dissolve all that salt in two gallons of cold water. I use my big stockpot. Submerge your rinsed turkey in it. This brine makes the meat so juicy. Pop it in the fridge for 4 to 6 hours. A cool garage works too, if it’s about 40 degrees. (This step is key for flavor, don’t skip it!)
Step 2: Take the turkey out and rinse it. Pat it very dry with paper towels. This helps the skin get crispy later. Place it on a rack over a pan. Let it sit uncovered in the fridge for 8 hours or up to a day. The skin will dry out. I know, it seems odd to leave it out! But trust me.
Step 3: Heat your oven to 400 degrees. Scatter the chopped veggies and thyme in your roasting pan. Add a cup of water over them. Now, warm about 6 cups of stuffing in the microwave. It should feel quite warm to the touch. Carefully spoon that hot stuffing into the turkey’s cavity. Close it up with skewers or string. Why do we heat the stuffing first? Share below!
Step 4: Tuck the wings and tie the legs. Brush the breast with melted butter. Place the turkey breast-side down on your V-rack. Brush its back with butter too. Roast for one hour. Then, lower the heat to 250 degrees. Roast for two more hours. (Starting upside-down keeps the breast moist!) Put the extra stuffing in a buttered dish and refrigerate it.
Step 5: Now, the big flip! Take the pan out. Use towels to carefully turn the turkey breast-side up. Brush it with the last of the butter. Turn the oven back up to 400 degrees. Roast until a thermometer says 165° in the breast. This takes about 1 to 1 1/2 hours. Let the turkey rest before you carve. It needs a nap, just like we do after a big meal!
Step 6: While the turkey rests, bake your extra stuffing. Take it from the fridge and uncover it. Bake until the top is golden and crisp. This takes about 35 minutes. Doesn’t that smell amazing? I love this part. The waiting is almost over.
Creative Twists
You can make this recipe your own. Try adding different herbs to the salt water. A few sprigs of rosemary are lovely. Or, mix some orange zest into your butter for brushing. It gives a sunny, sweet hint. For the stuffing, try adding chopped apples or dried cranberries. They add a little pop of color and fun. Which one would you try first? Comment below!
Serving & Pairing Ideas
Slice your turkey onto a big, warm platter. I always pour a little pan juice over it. Serve with that crispy baked stuffing and smooth gravy. A side of tart cranberry sauce is perfect. For drinks, a sparkling apple cider is so festive. The grown-ups might like a glass of rich Chardonnay. It sips nicely with the savory turkey. Which would you choose tonight?
Keeping Your Feast Fresh
Let’s talk about leftovers. They are a happy problem to have. First, carve all the meat off the bird. Store it in shallow containers. This helps it cool quickly and safely.
Keep the stuffing separate from the turkey. It will stay fresher that way. Everything goes in the fridge for up to four days. For longer storage, use the freezer. Wrap slices tightly. They will be good for two months.
Reheating is key. No one likes dry turkey. Place slices in a baking dish. Add a splash of broth or water. Cover it with foil. Warm it in a 325-degree oven. This keeps it moist.
I once reheated stuffing in a dry pan. It was like eating toast crumbs! Now I add a pat of butter and cover it. Why does this matter? Good storage means more joyful meals later. It stretches your hard work. Have you ever tried storing it this way? Share below!
Turkey Troubles and Simple Fixes
First issue: soggy skin. The secret is a dry bird. Pat it very dry before roasting. Letting it sit uncovered in the fridge helps too. This makes the skin crisp and golden.
Second issue: dry breast meat. Cooking breast-side down first protects it. The juices run into the breast. I remember when I forgot this step. The white meat was so tough!
Third issue: undercooked stuffing. You must check its temperature. Use your thermometer. It should read 165 degrees. This keeps everyone safe and happy.
Why fix these problems? It builds your cooking confidence. You will feel so proud. It also makes the flavor amazing. Every bite will be perfect. Which of these problems have you run into before?
Your Quick Questions, Answered
Q: Can I make this gluten-free?
A: Yes! Use your favorite gluten-free bread for the stuffing. Check all your broth labels too.
Q: What can I do ahead of time?
A: You can brine the turkey one day early. Chop your vegetables the night before. This saves big day stress.
Q: I don’t have fresh thyme.
A: That’s fine. Use one teaspoon of dried thyme instead. It will still taste wonderful.
Q: Can I make a smaller turkey?
A: You can. A smaller bird needs less time in the oven. Just use your thermometer to be sure.
Q: Is the brining step optional?
A: You can skip it. But brining adds flavor and keeps the meat juicy. It is worth the time. Which tip will you try first?
A Final Word from My Kitchen
I hope this recipe brings your table joy. The best meals are shared with loved ones. Don’t worry if it isn’t perfect. Cooking is about love, not perfection.
Fun fact: letting the turkey rest after cooking lets the juices settle. This makes carving much easier!
I would love to hear about your cooking adventure. Tell me all about it. Have you tried this recipe? Your stories are my favorite thing to read.
Happy cooking!
—Elowen Thorn.

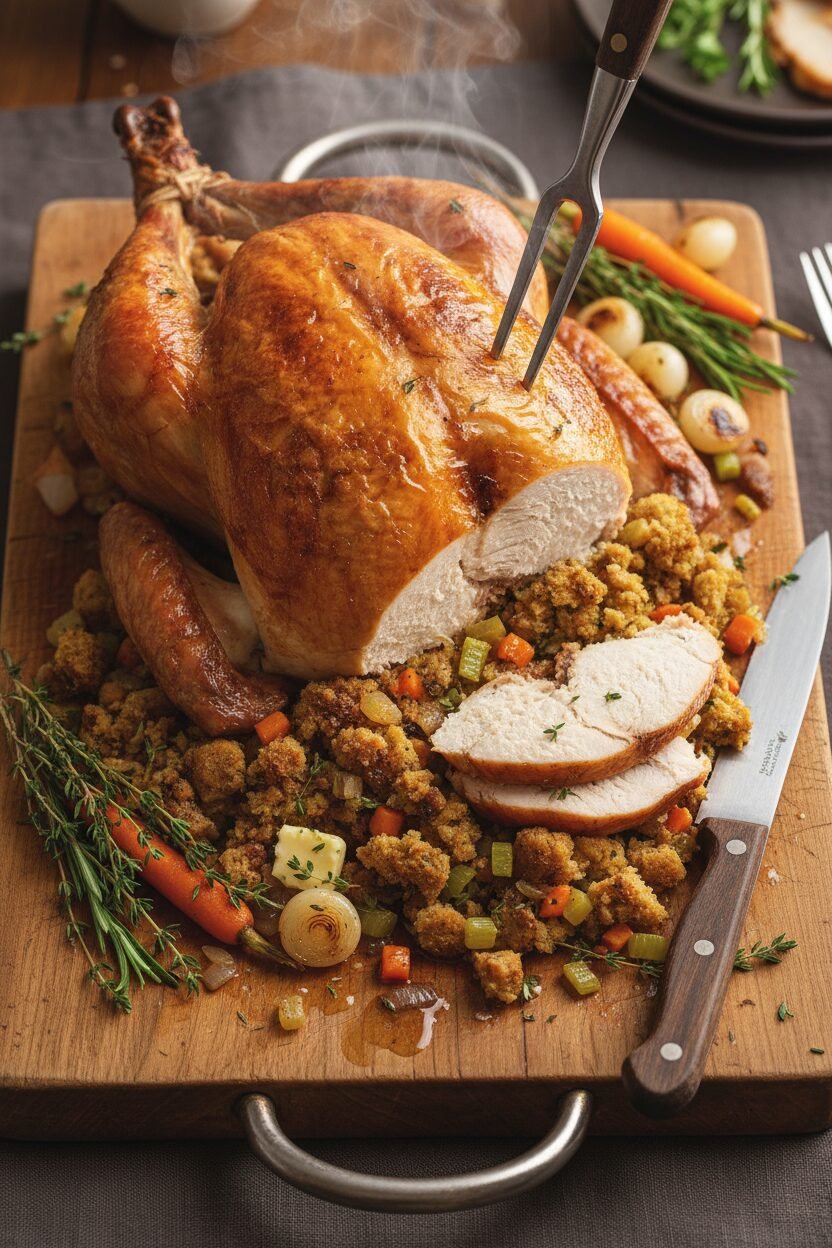
Golden Crisp Roast Turkey with Savory Stuffing
Description
A classic centerpiece featuring a perfectly brined and roasted turkey with a crispy skin, filled with and served alongside savory homemade stuffing.
Ingredients
Instructions
- Dissolve salt in 2 gallons cold water in large stockpot or clean bucket. Add turkey and refrigerate or set in very cool spot (about 40 degrees) for 4 to 6 hours.
- Remove turkey from salt water and rinse well under cool running water. Pat dry inside and out with paper towels. Place turkey breast-side up on flat wire rack set over rimmed baking sheet or roasting pan and refrigerate, uncovered, 8 to 24 hours.
- Adjust oven rack to lowest position and heat oven to 400 degrees. Scatter vegetables and thyme in shallow roasting pan; pour 1 cup water over vegetables. Prepare V-rack according to illustration 4 below.
- Place about 6 cups stuffing in medium microwave-safe bowl and cover with plastic wrap; microwave stuffing on high until stuffing registers 120 to 130 degrees on instant-read thermometer, about 6 minutes. Spoon hot stuffing into cavity of turkey; secure opening with turkey lacers or with skewers and kitchen twine. Tuck wings behind back; following illustrations 1 to 3 below, truss turkey. Brush breast with butter, then set turkey breast-side down on foil-lined V-rack; brush back with butter. Roast 1 hour, then reduce temperature to 250 degrees and roast 2 hours longer, adding more water to roasting pan if necessary. Meanwhile, place remaining stuffing in buttered 11- by 7-inch or 9-inch-square baking dish, cover with plastic wrap, and refrigerate until ready to use.
- Remove roasting pan with turkey from oven; using thick wads of paper towels or potholders, rotate turkey breast-side up and brush with remaining butter. Increase oven temperature to 400 degrees; continue roasting until thickest part of breast registers about 165 degrees, thickest part of thigh registers 170 to 175 degrees, and stuffing registers 165 degrees on instant-read thermometer, 1 to 1 1/2 hours longer. Remove turkey from oven and let rest until ready to carve.
- While turkey is resting, unwrap baking dish with stuffing and bake until golden brown, about 35 minutes.
- Carve turkey; serve with stuffing and gravy, if desired.
Notes
- Ensure the turkey is completely thawed before brining. For food safety, the stuffing inside the turkey must reach 165°F. Letting the turkey rest after roasting allows juices to redistribute for moister meat.