

A Little Story to Start
My grandson calls these “magic scones.” He saw the swirl inside once. His eyes got so wide. I still laugh at that.
They are perfect for a slow weekend morning. The smell fills the whole house. It feels like a hug from the oven. Doesn’t that smell amazing?
Why We Use Cold Butter
Here is a little secret. Cold butter is your best friend. When it melts in the hot oven, it makes steam. That steam makes little pockets in your scone.
Those pockets make the scone light and flaky. If the butter is warm, it just makes a flat dough. This matters because texture is just as important as taste. A good scone should almost melt in your mouth.
The Joy of Getting Your Hands Dirty
You will mix this dough with your hands. Do not be afraid! Feeling the dough come together is the best part. It tells you when it’s ready.
You knead it just a few times. Too much makes the scones tough. This is a gentle lesson. Some things in life get worse if you work them too hard. Good food teaches us patience.
Creating the Swirl
Spreading the Nutella is my favorite step. You make a crisscross pattern. Then you roll it up. It looks like a little log.
When you cut it, you see the beautiful swirl. Every wedge is a surprise. *Fun fact: The hazelnut in Nutella was a smart solution long ago. Cocoa was scarce after a big war, so they used more local hazelnuts to stretch it.*
Sharing the Warmth
I always make a double batch. Why? Because food is for sharing. A warm scone can turn a neighbor’s day around. It says, “I was thinking of you.”
That is why this recipe matters. It makes more than breakfast. It makes a moment of sweet, quiet joy. Do you have a favorite food to share with others?
Your Turn in the Kitchen
Now, it is your turn. Do not worry if they are not perfect. The first time I made them, I forgot the sugar! We laughed and ate them anyway.
What is your favorite thing to bake on a cozy morning? Tell me about it. And when you try these, will you make them with a friend or family member? I would love to hear how they turn out.
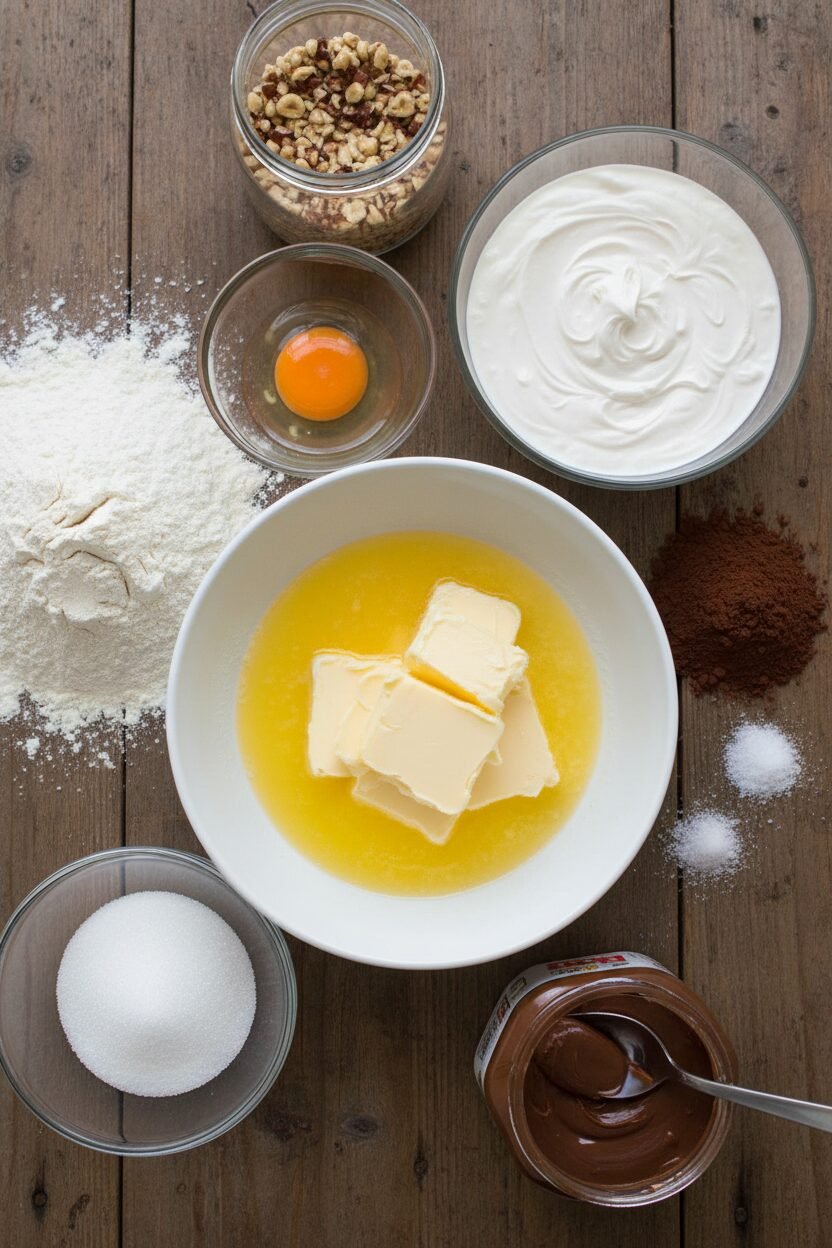
Ingredients:
| Ingredient | Amount | Notes |
|---|---|---|
| Unbleached all-purpose flour | 2 cups | |
| Granulated sugar | 1/4 cup | |
| Dark sweetened cocoa powder | 1/4 cup | |
| Baking powder | 1 tablespoon | |
| Table salt | 1/2 teaspoon | |
| Cold unsalted butter | 6 tablespoons (3/4 stick) | Cut into chunks |
| Large egg | 1 | |
| Heavy cream | 1/2 cup | |
| Toasted hazelnuts | 3/4 cup | Coarsely chopped |
| Nutella | 1/2 cup | Divided (1/4 cup for filling, 1/4 cup for drizzling) |
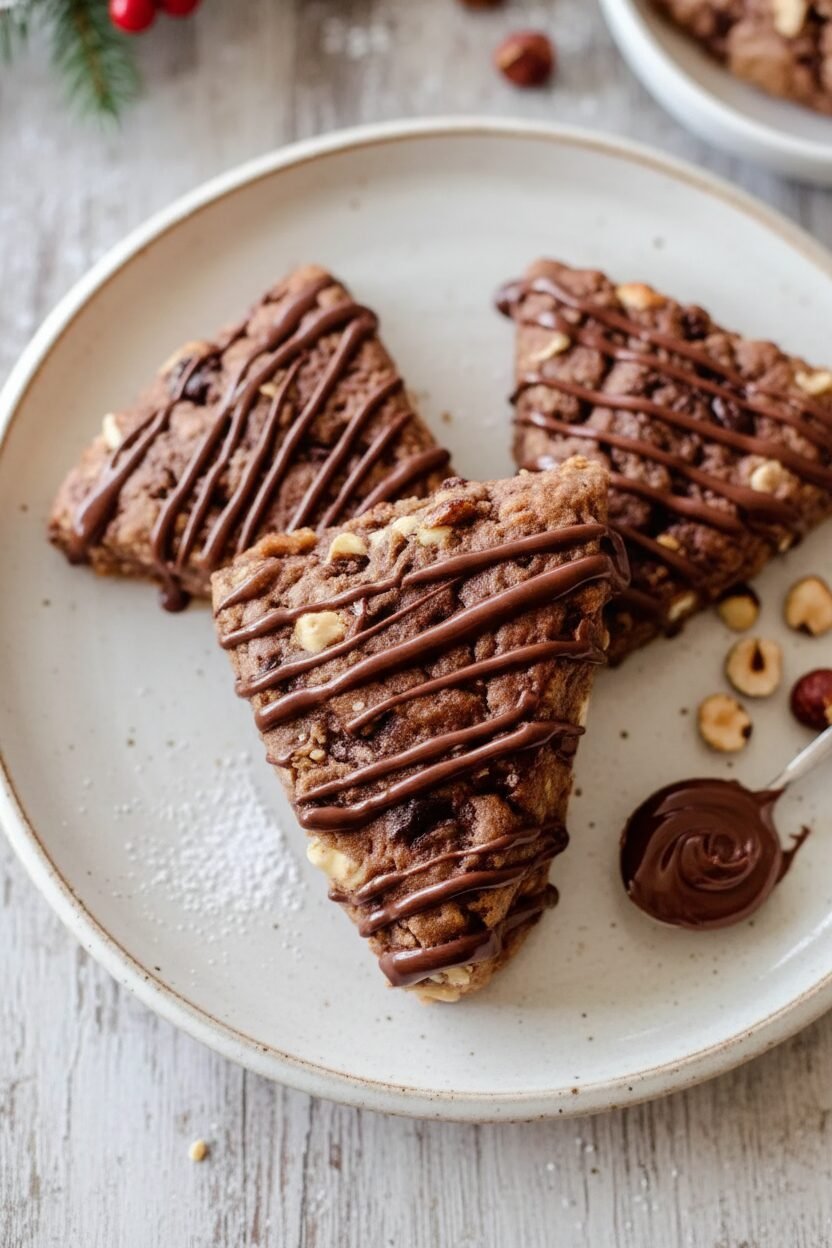
Hazelnut Holiday Scone Delights
Oh, these scones bring back such a happy memory. My grandson Leo once called them “chocolate breakfast cookies.” I still laugh at that. They are perfect for a cozy morning. The toasted hazelnuts make the whole kitchen smell amazing. It feels like a warm hug from the oven.
This recipe is simpler than it looks. I promise. The food processor does most of the work for you. Just remember to keep your butter very cold. That is the secret to a flaky, tender scone. We will swirl Nutella right inside the dough. Doesn’t that sound wonderful?
Instructions
Step 1: First, heat your oven to 375°F. Line a baking sheet with parchment paper. This stops the scones from sticking. I always do this little step. It makes cleanup so much easier.
Step 2: Put the flour, sugar, cocoa, baking powder, and salt in a food processor. Pulse it a few times to mix. Then scatter the cold butter chunks on top. Pulse until it looks like coarse crumbs. (Cold butter makes the scones flaky!). Pour everything into a big bowl.
Step 3: Whisk the egg and cream in another bowl. Pour this into your flour mixture. Stir gently until it’s just combined. Now add the chopped hazelnuts. Gently knead the dough 6 to 8 times. What happens if you knead it too much? Share below!
Step 4: On a floured surface, press the dough into a rectangle. Spread 1/4 cup of Nutella over it in a crisscross. Roll it up into a log. Stand it up and press into a thick disk. Be gentle for tender scones.
Step 5: Cut the disk into 6 or 8 wedges. Place them on your baking sheet. Bake for 18-20 minutes. Rotate the pan halfway through. They are done when a toothpick comes out clean.
Step 6: Let the scones cool on a rack. Warm the last 1/4 cup of Nutella for 10 seconds. Drizzle it over the tops in zigzags. Chill for 5 minutes so the drizzle sets. Then they are ready to enjoy!
Creative Twists
Orange Zest: Add a tablespoon of orange zest to the dough. It sings with the chocolate.
Sea Salt Sparkle: Sprinkle a tiny bit of flaky sea salt on the warm drizzle. It’s magic.
Jam Swirl: Use half Nutella and half raspberry jam for the filling. So pretty and tasty.
Which one would you try first? Comment below!
Serving & Pairing Ideas
These scones are lovely all on their own. For a special treat, add a dollop of whipped cream. A few fresh raspberries on the side look so cheerful. It turns breakfast into a celebration.
For a drink, I love a hot mug of spiced apple cider. The spices are so cozy. For the grown-ups, a small glass of amaretto liqueur is nice. It tastes like almonds and goes perfectly with hazelnuts. Which would you choose tonight?
Keeping Your Scone Delights Fresh
Let’s talk about keeping these treats yummy. First, cool them completely. Then, store them in a tight container at room temperature. They will stay fresh for two days.
For longer storage, freeze them. Wrap each scone in plastic wrap. Then, pop them all into a freezer bag. They keep for a month! To reheat, just warm in a 300°F oven for 10 minutes.
I once froze a batch for my grandson’s surprise visit. He said they tasted just-baked! Batch cooking saves time for busy days. It means you always have a little joy ready. Have you ever tried storing it this way? Share below!
Simple Fixes for Perfect Scones
Sometimes baking has little hiccups. Here are three common ones. First, dry dough. If your mix seems too crumbly, add a splash more cream. This brings it together gently.
Second, flat scones. This often means your butter was too warm. I remember when my kitchen was too hot! Always use very cold butter. It creates steam for a fluffy lift.
Third, tough texture. This happens from over-mixing. Stir just until the dough forms. Gentle handling keeps scones tender. Good technique builds your cooking confidence. It also makes every bite more delicious. Which of these problems have you run into before?
Your Quick Questions, Answered
Q: Can I make these gluten-free?
A: Yes! Use a good gluten-free flour blend. Add 1/2 teaspoon xanthan gum if your blend doesn’t have it.
Q: Can I make the dough ahead?
A: Absolutely. Shape the dough and cut into wedges. Freeze them on a sheet, then bag. Bake straight from frozen, adding a few minutes.
Q: What if I don’t have hazelnuts?
A: Toasted almonds or pecans work beautifully. The recipe is quite friendly to swaps.
Q: Can I double the recipe?
A: You can. Just mix in two separate batches. This prevents overworking the dough.
Q: Any optional tips?
A: A pinch of cinnamon in the dry ingredients is lovely. Fun fact: Hazelnuts and chocolate are a classic pair in Europe! Which tip will you try first?
From My Kitchen to Yours
I hope you love making these scone delights. The kitchen is my favorite place for making memories. I would love to hear about your baking adventure.
Tell me all about it in the comments below. Sharing stories is the best part. Have you tried this recipe? I am so excited to hear from you.
Happy cooking!
—Elowen Thorn.

Hazelnut Holiday Scone Delights
Description
Indulge in rich, chocolatey scones packed with toasted hazelnuts and swirled with Nutella, perfect for a holiday treat or cozy breakfast.
Ingredients
Instructions
- Preheat the oven to 375°F (190°C). Line a baking sheet with parchment paper and set aside.
- In the bowl of a food processor fitted with a metal blade, combine the flour, granulated sugar, cocoa powder, baking powder, and salt. Pulse six times, in one-second bursts, to thoroughly blend the dry ingredients.
- Scatter the chunks of cold butter evenly over the flour mixture. Pulse the processor twelve times, each pulse lasting one second, until the mixture resembles coarse crumbs. Transfer the mixture to a large mixing bowl.
- In a separate medium bowl, whisk together the egg and heavy cream until fully combined. Pour this mixture into the flour-butter mixture. Stir gently with a wooden spoon or spatula just until the dough comes together and is moistened.
- Add the coarsely chopped toasted hazelnuts to the dough. Knead the dough gently by hand 6 to 8 times, being careful not to overwork it, as this can result in tough scones.
- On a lightly floured surface, flatten the dough into a rectangle measuring approximately 6 by 12 inches. Spread 1/4 cup of Nutella over the surface in a crisscross pattern. Roll the dough lengthwise into a cylinder about 6 inches long. Turn the cylinder upright and gently flatten it into a thick disk about 1 3/4 inches high. Avoid excessive handling to maintain a tender texture.
- Using a sharp knife or bench scraper, cut the disk into 6 or 8 equal wedges. Arrange the wedges on the prepared baking sheet, spacing them evenly. Bake for 18 to 20 minutes, rotating the baking sheet halfway through baking, until a toothpick inserted into the center of a scone comes out clean or with only a trace of Nutella.
- Transfer the baked scones to a wire cooling rack, placing the parchment-lined baking sheet underneath to catch any drips. Warm the remaining 1/4 cup Nutella in the microwave for approximately 10 seconds, or until pourable. Using a spoon, drizzle the warm Nutella in a zigzag pattern over the tops of the scones.
- Refrigerate the scones for 5 minutes to allow the Nutella drizzle to set. Serve immediately.
Notes
- For best results, ensure all ingredients (especially butter and cream) are very cold. Toasting the hazelnuts enhances their flavor. You can store cooled, undrizzled scones in an airtight container for up to 2 days; add the Nutella drizzle just before serving.