

My First Pickle Adventure
I made my first batch of pickles years ago. I was so nervous. I thought I would do it all wrong.
But you know what? They turned out great. A little bubbly and very sour. I still laugh at that. It taught me that good food does not need to be perfect. It just needs to be made with care.
Why We Ferment Food
Fermenting is an old, old trick. Our grandparents did it to keep food for winter. They did not have fancy refrigerators back then.
This matters because it connects us to the past. We are doing what people have done for centuries. Fun fact: The bubbles you see are tiny living things having a party. They are the good guys, working to make your pickles tasty and good for your belly.
Let’s Make Some Pickles
First, get your jar and cucumbers very clean. Pack those little cucumbers in tight. Now, cover them with water and add the salt. Shake it all up until the salt disappears.
Does not that look simple? The most important job is to keep the cucumbers under the water. I use a small, clean glass to hold them down. What do you think you could use to keep them submerged?
The Magic of Waiting
Now, we wait. Leave the jar on your counter. Do not put it in a sunny spot. Every day, you get to check on your pickles. Open the lid just a little to hear a gentle pffft sound.
That sound means it is working. This waiting matters. It teaches us patience. Good things take time. After a few days, you will taste one. What flavor are you hoping for, a little sour or a lot?
Your Pickle, Your Rules
This is where you can be the boss. Do you like dill? Add a big bunch. A bay leaf makes it taste a little deeper. You can make them just how you like.
I love adding a clove of garlic to mine. It makes the kitchen smell amazing. What is one special thing you would add to your pickle jar? Tell me about it. I am always looking for new ideas.
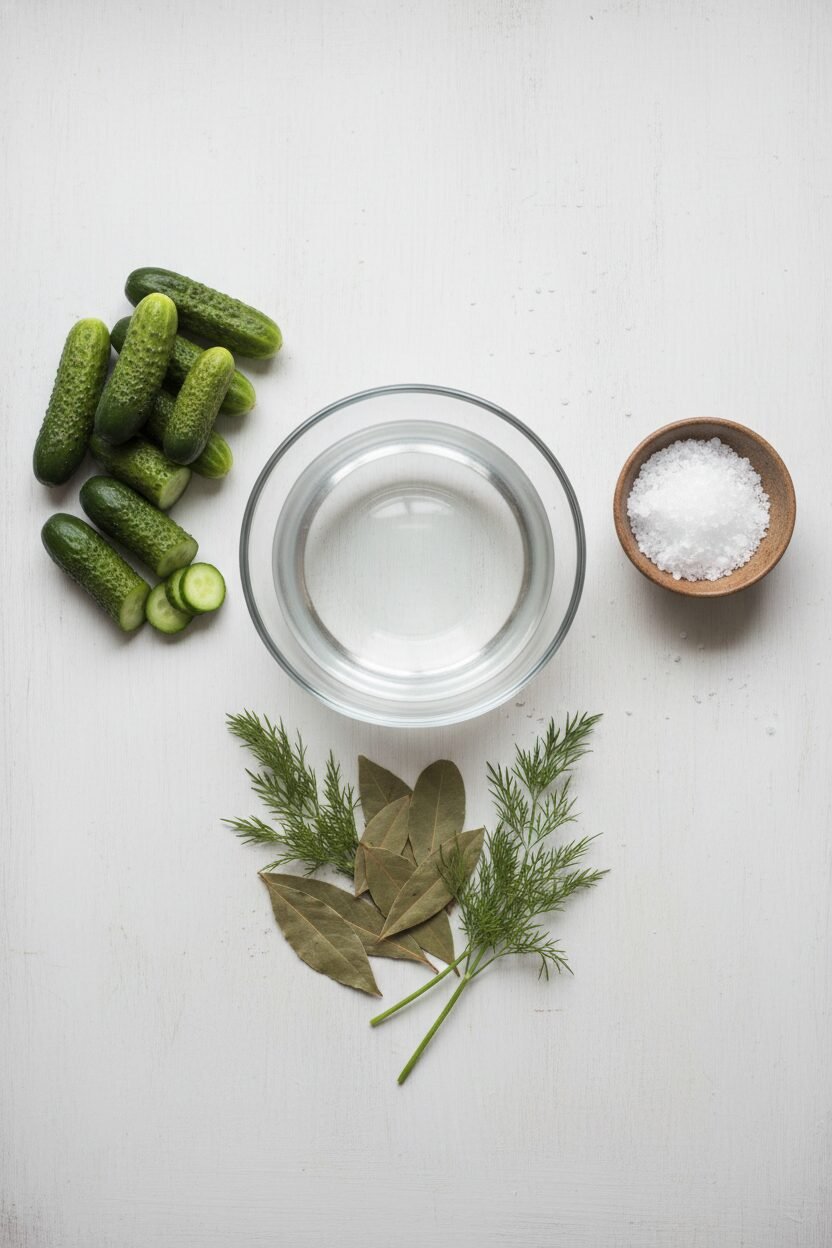
Ingredients:
| Ingredient | Amount | Notes |
|---|---|---|
| Mini cucumbers | 7 (or 2 medium cucumbers, sliced) | |
| Filtered water | 4 cups | Or enough to cover cucumbers |
| Sea salt | 2 tablespoons | Or calculated amount in grams for a 3.5% brine |
| Dried bay leaves and fresh dill | To taste | Optional |
My Favorite Snappy Pickles
Oh, the smell of pickles takes me right back. I remember my own grandma’s kitchen. She had jars of green goodness on every counter. I always tried to sneak one before they were ready. She would swat my hand away with a laugh. Making pickles is like a little bit of kitchen magic. You just need some patience. Let me show you how it’s done.
- Step 1: First, give your cucumbers a good bath. You want them nice and clean. Wash a big mason jar with hot, soapy water too. Rinse it well so no soap is left. A clean start makes the best pickles.
- Step 2: Now, let’s pack those little cukes into the jar. Push them in snugly. You want them to be good friends in there. If you have a kitchen scale, you can use it now. Place your jar on the scale and press “tare”. This makes the scale forget the jar’s weight.
- Step 3: Next, pour in enough filtered water to cover the cucumbers. Tap water can sometimes stop the magic. So filtered is best. If you used your scale, note the total weight now. This helps us get the salt just right.
- Step 4: Time for the salt! This is what makes them crunchy and tasty. If you used cups, add two tablespoons of sea salt. If you used the scale, here’s the fun part. Multiply your total weight by 0.035. Add that many grams of salt. (My hard-learned tip: Don’t use table salt with iodine. It can make your pickles soft!)
- Step 5: Put the lid on tight and shake, shake, shake! You want that salt to disappear into the water. Doesn’t that sound fun? Now you can add flavor if you like. A few sprigs of fresh dill are my favorite. It smells like a summer garden.
- Step 6: This is the most important step. The cucumbers must stay underwater. Any floaters can get moldy. Use a small, clean glass weight to hold them down. I once used a small, clean rock from my garden. It worked perfectly!
- Step 7: Now, the waiting begins. Leave the jar on your counter for a few days. Keep it out of the sun. Each day, open the lid just a tiny bit. This lets the fizzy air out. Then close it right back up. What other foods can you ferment? Share below!
- Step 8: After about three days, taste one. Is it sour enough for you? If not, let them sit another day. When you love the taste, put the whole jar in the fridge. This stops the magic and keeps them perfect. I still laugh at how my first batch was so sour. I let them sit for a whole week!
Cook Time: 15 minutes
Total Time: 3-5 days
Yield: 1 quart jar
Category: Snack, Condiment
Let’s Get Creative!
The basic pickle is a wonderful thing. But sometimes, it’s fun to play with flavors. You can make your jar unique every time. I love experimenting for my grandchildren. They each have a favorite. Here are a few twists to try in your next batch.
- Spicy Garden Add a slice of jalapeño and a clove of garlic. It gives the pickles a little kick. My grandson Leo loves these.
- Dilly Garlic Use extra fresh dill and two crushed garlic cloves. This is the classic way. It makes your whole kitchen smell amazing.
- Tea Leaf Trick Add one black tea bag to the jar. The tannins make the pickles extra crunchy. It’s my secret for the perfect snap. Which one would you try first? Comment below!
Serving Your Masterpiece
A cold, crunchy pickle is a joy all on its own. But they are also wonderful with other foods. I think they make any meal a little more special. They sit so nicely on the side of a plate. Here is how I like to enjoy them.
I always put a few next to a good, hearty sandwich. They are also perfect chopped up in a potato salad. For a pretty plate, serve them on a small dish with some olives. Doesn’t that sound lovely?
For a drink, a tall glass of iced tea is my go-to. It’s so refreshing. If you’re having a grown-up dinner, a crisp lager beer pairs beautifully. Which would you choose tonight?

Keeping Your Pickles Perfect
Let’s talk about keeping your pickles happy. Once they taste just right, pop the whole jar in the fridge. The cold slows the little bugs that do the fermenting. This keeps your pickles from getting too sour. They will last for months in there. I still have a jar from last fall in my fridge. My first batch ever was a surprise. I left it out too long and they got very soft. We learn as we go.
You can easily make a bigger batch. Just use a bigger jar and more cucumbers. This is called batch cooking. It saves you time later. You will always have a tasty, healthy snack ready. A good snack stops you from reaching for less healthy options. Have you ever tried storing it this way? Share below!
Easy Fixes for Happy Fermenting
Sometimes, making pickles can be tricky. But do not worry. Here are some simple fixes. First, if your pickles get soft, your brine might not be salty enough. Always measure your salt carefully. I remember when my grandson used table salt instead of sea salt. The pickles were not the same. Getting the salt right matters for a crisp crunch.
Second, if you see a white film on top, just skim it off. It is usually harmless yeast. Third, if your jar is not bubbling, check the temperature. It might be too cold in your kitchen. Move it to a warmer spot. Solving small problems builds your confidence in the kitchen. It also makes your food taste much better. Which of these problems have you run into before?
Your Pickle Questions Answered
Q: Is this recipe gluten-free? A: Yes, it is naturally gluten-free. All the ingredients are safe.
Q: Can I make these ahead? A: Absolutely. Fermentation is all about making food ahead for future you.
Q: What if I do not have dill? A: You can use mustard seeds or a few garlic cloves instead.
Q: Can I double the recipe? A: Yes, just use a half-gallon jar. Keep the salt percentage the same.
Q: Are the flavorings necessary? A: No, they are optional. Plain fermented pickles are still delicious and good for you. *Fun fact: The sour taste comes from healthy bacteria!* Which tip will you try first?
Share Your Kitchen Adventures
I love hearing about your cooking projects. It makes my day. Your kitchen is a place for fun experiments. Do not be afraid to try new things. I hope you enjoy making these tangy treats.
If you make this recipe, I would be thrilled to see it. You can share a picture of your beautiful jar. Have you tried this recipe? Tag us on Pinterest! Let’s build a community of happy fermenters.
Happy cooking! —Elowen Thorn.
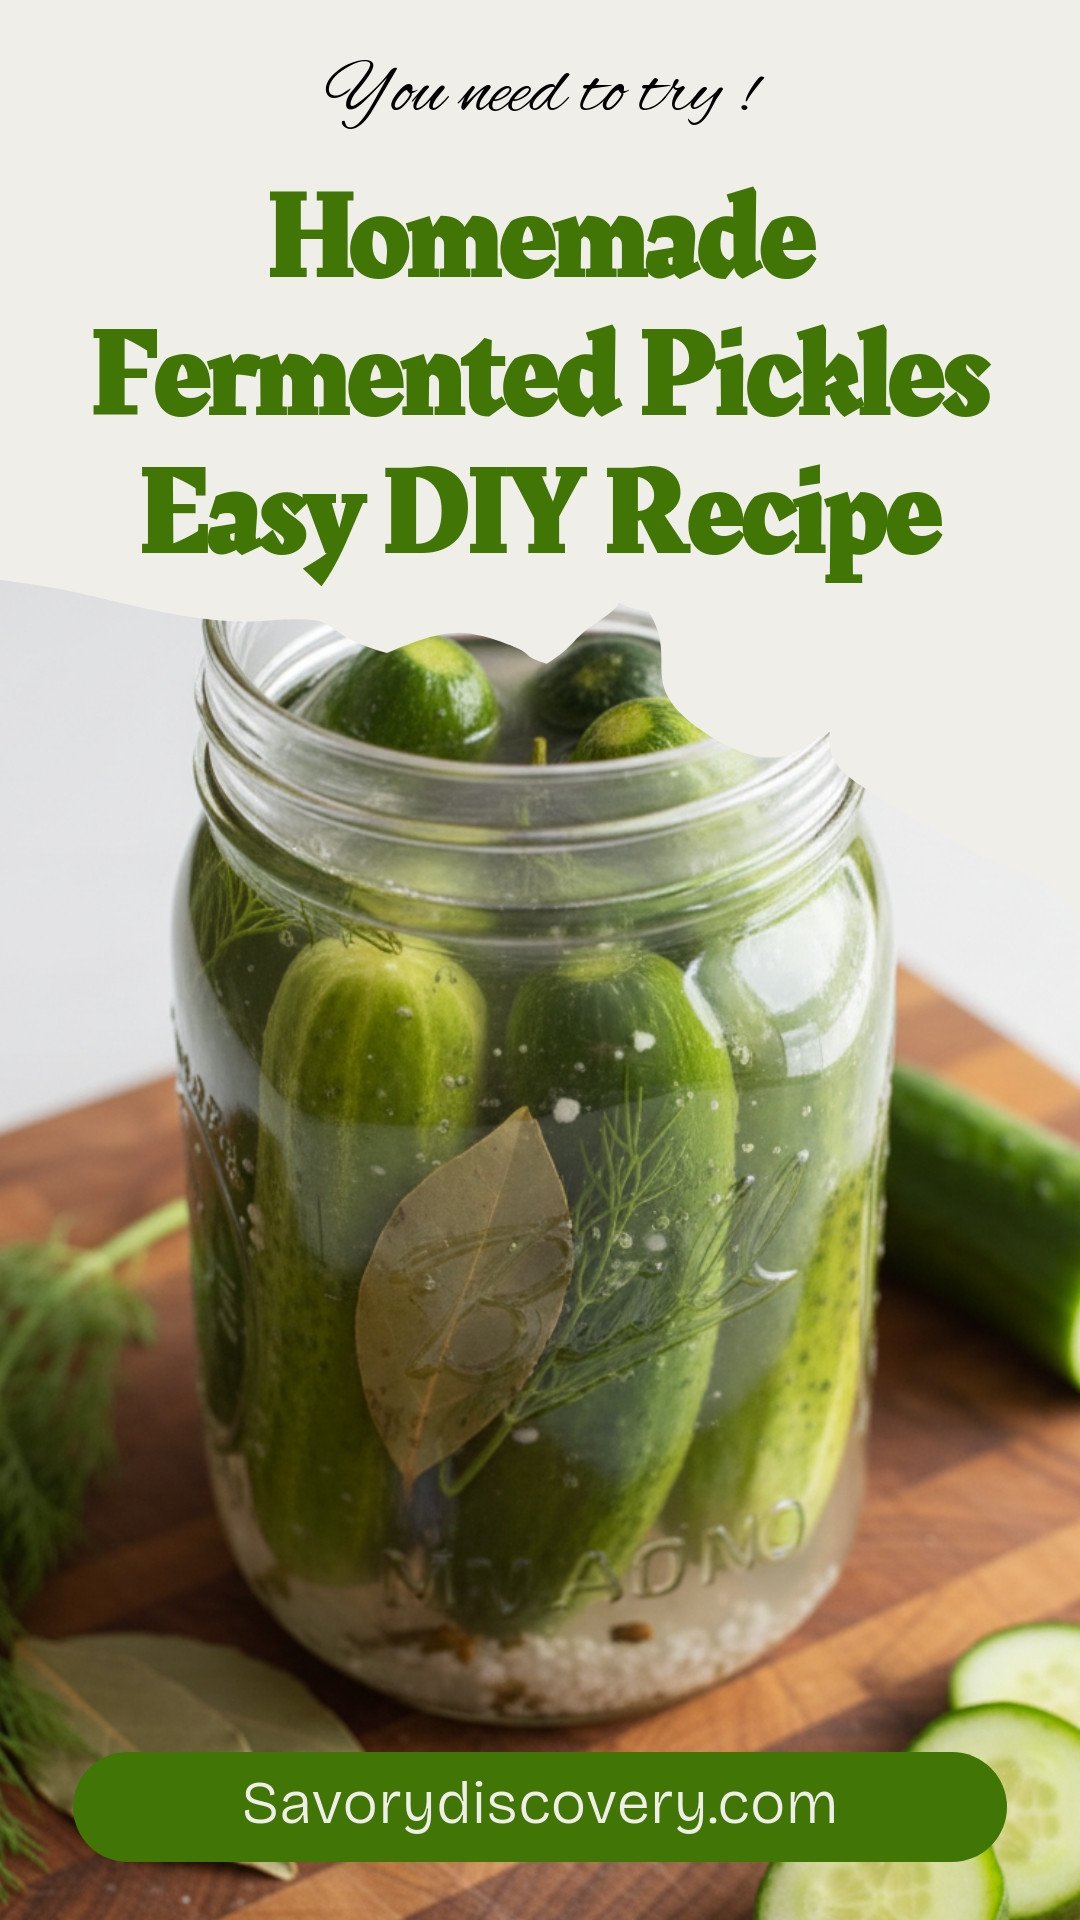

Homemade Fermented Pickles Easy DIY Recipe
Description
Make your own tangy and crunchy fermented pickles at home with this simple DIY recipe.
Ingredients
Instructions
- Wash cucumbers thoroughly. Clean a 32 oz (one-quart) wide-mouth mason jar with hot, soapy water. Rinse well.
- If using a kitchen scale, place the empty jar on the scale and press “tare” to zero out the weight.
- Pack the mini cucumbers into the jar.
- Pour in enough filtered water to fully cover the cucumbers. This is approximately 4 cups of water in a quart jar. If using a scale, note the total weight in grams of the cucumbers and water.
- If using volume measurements: Add 2 tablespoons of salt to the jar. If using a scale: Calculate the salt needed by multiplying the total weight of cucumbers and water (in grams) by 0.035 to achieve a 3.5% brine. Add that calculated amount of salt in grams.
- Secure the lid and shake well to dissolve the salt.
- If desired, add optional flavorings like dried bay leaves and fresh dill.
- Ensure the cucumbers stay fully submerged. Use fermentation weights, a small pinch bowl, or another small mason jar to hold them down.
- Seal the lid.
- Leave the jar at room temperature, away from direct sunlight, for about three to five days.
- Check daily to ensure the cucumbers remain submerged. Slightly open the lid each day to release built-up pressure, then close it again.
- Once the pickles reach your desired flavor, transfer the jar to the refrigerator to slow the fermentation process.
Notes
- Ensure all cucumbers are fully submerged in the brine to prevent mold growth. Use filtered water for best results as chlorine in tap water can inhibit fermentation.