

My First Red Velvet Mistake
I once forgot the vinegar in my red velvet brownies. The color was so dull. I learned my lesson that day. That little bit of tang is the secret. It makes the chocolate taste richer and the red pop. I still laugh at that.
Why does this matter? The vinegar works with the cocoa. It wakes up the flavor. It’s a tiny step with a big job. Have you ever forgotten one ingredient? Did it change your bake? I’d love to hear your story.
The Heart of the Swirl
The cream cheese must be soft. I leave mine on the counter all morning. Room-temperature cheese mixes smooth as silk. A cold lump will never blend right. It makes your swirl grainy.
Gently fold in that egg yolk. Don’t beat it hard. You want a creamy pocket inside your fudgy brownie. Doesn’t that sound amazing? This soft filling is a happy surprise. It’s why these bites feel so special.
A Little Secret in the Batter
*Fun fact*: That espresso powder isn’t for coffee taste. It’s a flavor friend for chocolate. It makes the cocoa taste more like itself. Just a pinch does the trick. You won’t taste coffee, I promise.
Why does this matter? Good baking is about helping flavors shine. Small boosts make big differences. Like using good butter. It gives everything a richer taste. Do you have a tiny ingredient that makes your bakes better? Tell me about it.
The Joy of Swirling
Layering the batter and filling is my favorite part. Spoon, dollop, spoon again. Then take a toothpick. Give it one gentle figure-eight swirl. That’s it. If you swirl too much, the beautiful red and white will turn pink and muddy.
It’s like making marble cake. You want to see both colors. Each bite should be a little different. That’s the fun. Do you like making swirled treats? Or do you prefer clean layers?
Patience for Perfect Bites
The baking time is short. Just 12 minutes. The tops will look set. But the magic happens while they cool. Let them sit in the pan for 5 minutes. This helps them get strong enough to move.
A small knife helps pop them out clean. Then let them finish cooling on a rack. I know it’s hard to wait. But a warm brownie bite can fall apart. Waiting gives you the perfect treat. It’s a lesson in patience that tastes so good.
Instructions
Step 1: First, warm your oven to 350°F. Grease a mini muffin pan very well. This stops the bites from sticking. I still laugh at that time I forgot this step. What a mess! Sift your cocoa powder into a bowl. This makes it smooth. (A hard-learned tip: room-temperature eggs mix in much better.)
Step 2: Melt the butter in a medium bowl. Whisk in the sugar and sifted cocoa. Add the vanilla, red food coloring, and vinegar. Doesn’t that color look amazing? Whisk in the eggs, one at a time. Finally, gently fold in the flour. What’s your favorite part of mixing batter? Share below!
Step 3: Now, make the creamy swirl. Beat the room-temperature cream cheese with sugar and vanilla. Use a whisk to keep it smooth. Then, gently fold in the egg yolk. This filling will stay soft and lovely. I think it’s the best part of any red velvet cake.
Step 4: Spoon brownie batter into each muffin cup. Fill them halfway. Add a teaspoon of cream cheese filling. Top with more brownie batter. Swirl gently with a toothpick. (Don’t over-swirl or you’ll lose the pretty pattern.) For more swirled dessert ideas, see this brownie cheesecake mousse.
Step 5: Bake for 12 minutes. The tops will look just set. Let them cool in the pan for 5 minutes. Then, gently pop them out. Let them cool completely on a rack. The wait is the hardest part! These are perfect for a party, just like these strawberry cheesecake bites.
Creative Twists
Add a sprinkle of sea salt on top before baking.
Mix mini chocolate chips into the brownie batter.
Use a drop of peppermint extract in the cream cheese. Which one would you try first? Comment below!
Serving & Pairing Ideas
Serve these bites on a pretty plate. A dusting of powdered sugar looks like snow. A glass of cold milk is the classic pairing. For a fancy touch, add a dollop of whipped cream. These would also be lovely after a savory meal like this honey mustard chicken. Which would you choose tonight?
Keeping Your Bites Fresh and Fabulous
Let’s talk about storing these lovely bites. First, cool them completely on a wire rack. Then, place them in a single layer in an airtight container. You can keep them in the fridge for up to five days. For longer storage, freeze them on a tray first. Once frozen, pop them into a freezer bag. They will keep for two months.
I remember my first batch of red velvet cheesecake brownies. I left them on the counter overnight. The next day, they were sadly dry. Now I never skip the airtight container! Batch cooking these bites is a wonderful time-saver. It means a sweet treat is always ready for surprise guests or a quick snack.
To reheat, let a frozen bite thaw in the fridge overnight. Or, warm it in the microwave for just 10 seconds. This little care keeps them fudgy and delicious. Storing food well shows love for your future self. It turns cooking from a chore into a gift you give yourself later. Have you ever tried storing it this way? Share below!
Three Little Hiccups and How to Fix Them
Even grandmas face kitchen troubles. Here are three common ones. First, your cream cheese filling is lumpy. This happens if the cheese is too cold. Always let it sit out until it’s soft. I once tried to rush this step. My swirl looked more like cottage cheese dots!
Second, the brownies stick to the pan. Grease every nook of your mini muffin tin very well. A little non-stick spray or butter makes all the difference. Third, the swirl disappears into the batter. You must be gentle. Just a quick figure-eight with a toothpick does the trick. Think of it like drawing in sand, not mixing paint.
Fixing these issues builds your cooking confidence. You learn that small steps have big results. It also ensures every bite has that perfect creamy cheesecake swirl and fudgy base. Good texture makes the flavor truly sing. Which of these problems have you run into before?
Your Quick Questions, Answered
What is the best way to store red velvet cheesecake brownie bites?
Store cooled bites in a single layer in an airtight container. Keep them in the refrigerator for up to five days. For the freezer, freeze them solid on a baking sheet first. Then transfer them to a freezer-safe bag. This prevents them from sticking together. They will stay tasty for about two months. Let them thaw in the fridge before enjoying.
Can I make red velvet cheesecake brownie bites ahead of time?
Absolutely! They are perfect for making ahead. Bake and cool them completely. Then store as directed above. The flavors actually meld and get better after a day. This makes them ideal for parties or busy weeks. You can prepare them up to two days before serving. Just keep them chilled until you are ready.
What makes red velvet brownies different from regular brownies?
Red velvet has cocoa, buttermilk, and vinegar. Our recipe uses vinegar and a touch of espresso. This gives a tangy, rich flavor that is unique. The red color is traditional, of course. It is not just a chocolate brownie. It is a special, slightly tangy treat. The cream cheese swirl is a classic pairing for this flavor.
How do you get a creamy cheesecake swirl in brownies?
The secret is room-temperature cream cheese. Beat it with sugar and vanilla until very smooth. Gently fold in the egg yolk. When layering in the pan, do not mix it in. Just drop it on top of the brownie batter. Then use a toothpick for a light swirl. This creates beautiful layered brownie cheesecake pockets.
Can I use a box mix for the red velvet brownie base?
You can for a shortcut. Pick a red velvet box mix. Prepare it according to the package directions. Then, make the homemade cream cheese swirl from our recipe. Layer and swirl them together as instructed. It will save you some time. The result will still be delightful and impressive for any gathering.
Are there any shortcuts for making cheesecake swirl brownie bites?
Yes, a few! Use the box mix idea mentioned above. You can also use a pre-made cheesecake filling from the store. Another tip is to use a small cookie scoop for the batter. It is faster and keeps the portions even. *Fun fact: The vinegar in the recipe helps keep the red color bright!* Which tip will you try first?
From My Kitchen to Yours
I hope you love making these little bites as much as I do. They are full of sweet memories for me. Baking should be fun, not fussy. So don’t worry if your first swirl isn’t perfect. The taste is what truly matters. I would love to hear about your baking adventure.
Please tell me all about it in the comments. Have you tried this recipe? Share your story or a photo. Maybe you even made them with a friend or your grandma. Every batch tells its own delicious story. Thank you for spending this time with me in my kitchen.
Happy cooking!
—Elowen Thorn

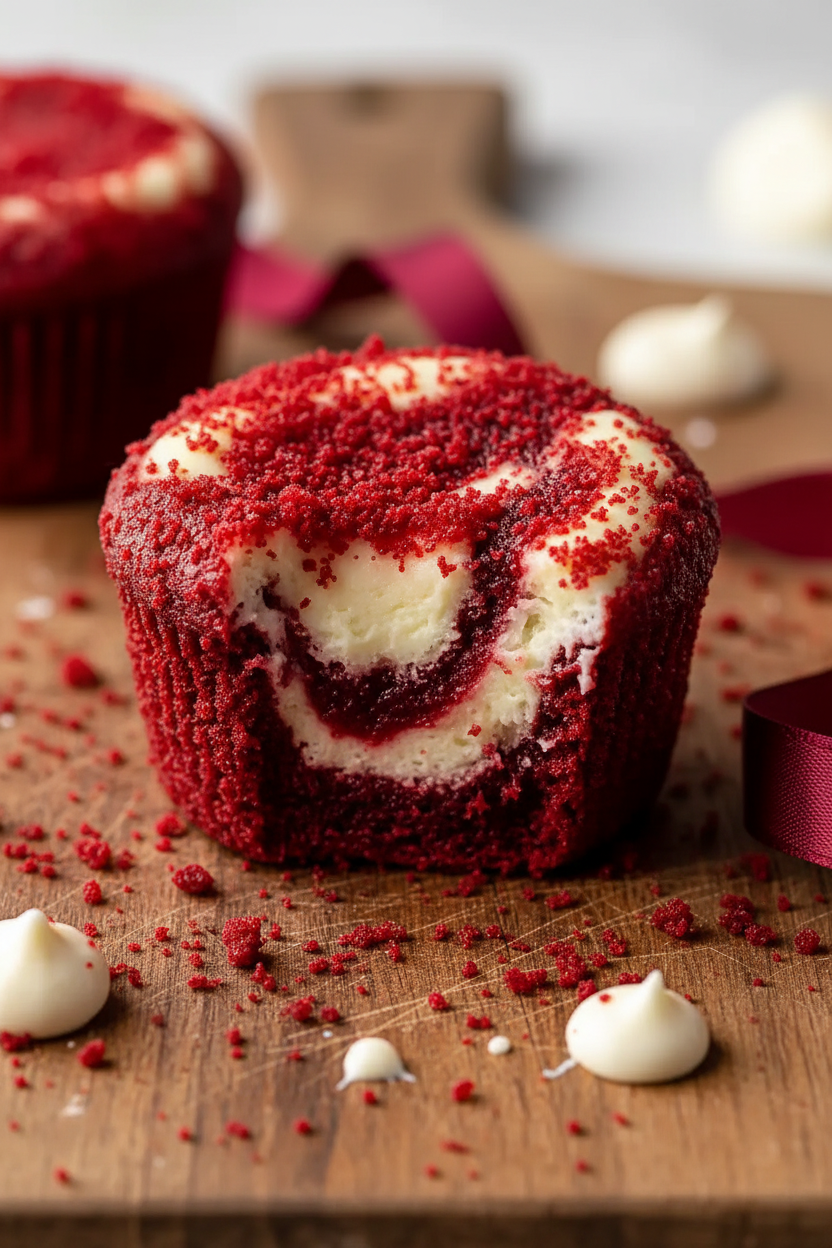
Chef-Tested Red Velvet Cheesecake Brownie Bites
Description
Experience the perfect fusion of fudgy red velvet brownie and creamy cheesecake in these delightful, bite-sized treats.
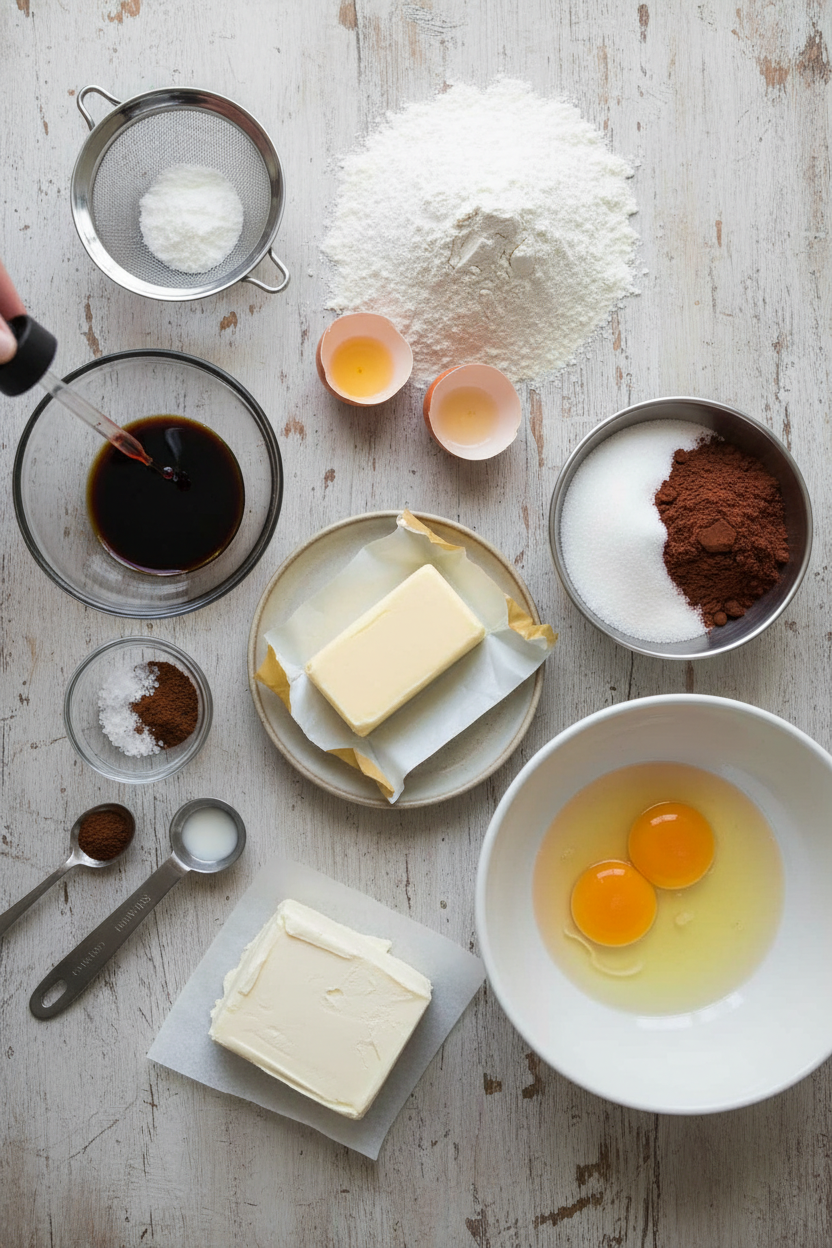
Ingredients
For the brownie mixture:
For the cheesecake swirl:
Instructions
- Preheat your oven to 350°F and generously grease a mini muffin pan with butter or cooking spray, making sure to coat the sides and bottoms of each cup. This prevents sticking and ensures clean release. Sift the cocoa powder into a small bowl to remove any lumps—this prevents streaks in your final brownies. Have all ingredients at room temperature, especially the cream cheese (around 70°F) and eggs, as this helps them blend smoothly and incorporate air for better texture.
- In a medium bowl, melt the 9 tablespoons of butter and whisk together with the 1 1/4 cups sugar, sifted cocoa powder, 1/2 teaspoon vanilla, red food coloring, 1/8 teaspoon salt, espresso powder, and vinegar. The espresso powder enhances the chocolate flavor without making it taste like coffee, while the vinegar adds tang that deepens the red velvet character. Once combined, whisk in the 2 eggs one at a time, ensuring each is fully incorporated. Finally, gently fold in the 3/4 cup flour until just combined—overmixing develops gluten and makes brownies tough, so stop as soon as you see no dry flour streaks.
- In a separate bowl, beat the room-temperature cream cheese with 3 tablespoons sugar and 1/2 teaspoon vanilla until smooth and creamy—about 1 minute of mixing. I like to use a whisk to avoid overbeating, which can make the filling grainy. Gently fold in the egg yolk until just combined. This filling will stay soft during baking and create a luxurious contrast to the fudgy brownie.
- Working with the greased mini muffin pan, spoon about 1 tablespoon of brownie batter from Step 2 into each cup, filling it roughly halfway. Top each with about 1 teaspoon of the cream cheese filling from Step 3, then add another 1 teaspoon of brownie batter on top to seal it. Using a toothpick or thin skewer, drag it through the layers in a figure-eight or circular motion to create a swirled pattern—don’t overmix or you’ll muddy the red velvet effect. The key is gentle swirling just enough to create visual interest without fully blending the layers.
- Bake the pan in your preheated 350°F oven for 12 minutes—the tops should look just set and spring back lightly when touched, but the centers will still be slightly soft and fudgy. Remove from the oven and let the bites cool in the pan for 5 minutes, which helps them set enough to remove cleanly without crumbling. I recommend using a thin knife or small offset spatula to gently pop each bite from the pan once they’ve cooled slightly—this prevents them from breaking apart. Allow them to cool completely on a wire rack before serving.
Notes
- The provided total nutrition is for the entire batch. The per-serving values (for 24 bites) are estimated: ~110 kcal, ~1.5g protein, ~6g fat, ~13g carbs.