

My First Minty Mistake
I first made these cookies years ago. I was in a big hurry. I put the whole mint on top and walked away. I came back to a minty, melty mess. I still laugh at that.
It taught me a good lesson. Good things need a little patience. Letting the mint soften for just a minute is the secret. Then you can spread it like shiny, green frosting.
Why This Recipe Works
The dough is very simple. You melt the butter, sugar, and chocolate together. This makes the cookies extra fudgy and soft. Doesn’t that smell amazing?
Chilling the dough matters. It keeps the cookies from spreading too flat. You get a perfect, round little cookie. That’s the best base for our minty top.
A Little Holiday Magic
These cookies feel like a holiday hug. The dark chocolate is cozy. The bright mint is like a fresh winter breeze. They just belong together.
Fun fact: The mint chocolate combo is older than you think. It was a popular candy flavor over 100 years ago! Some traditions are just too good to change. What’s your favorite holiday flavor pair?
Let’s Get Baking
Roll your dough into small balls. Two teaspoons is just right. Give them room to breathe on the pan. They need their space.
Watch them closely near the end. You want them just set. The magic happens when they come out. Place one mint on each hot cookie. Wait. Watch it get shiny. Then spread it.
Sharing the Wonder
This is why we bake. It’s not just about eating. It’s about making something with your hands. You share it and see someone smile.
These cookies are wonderful gifts. Tuck a few in a little box. It shows you care. Do you have a favorite treat to give during the holidays?
Your Turn in the Kitchen
Now, I’ve shared my story. I want to hear yours. Will you try these minty wonders? Maybe you already have a family cookie champion.
Tell me, what cookie makes your kitchen smell like the holidays? Is it gingerbread? Or maybe sugar cookies? I love learning your traditions.
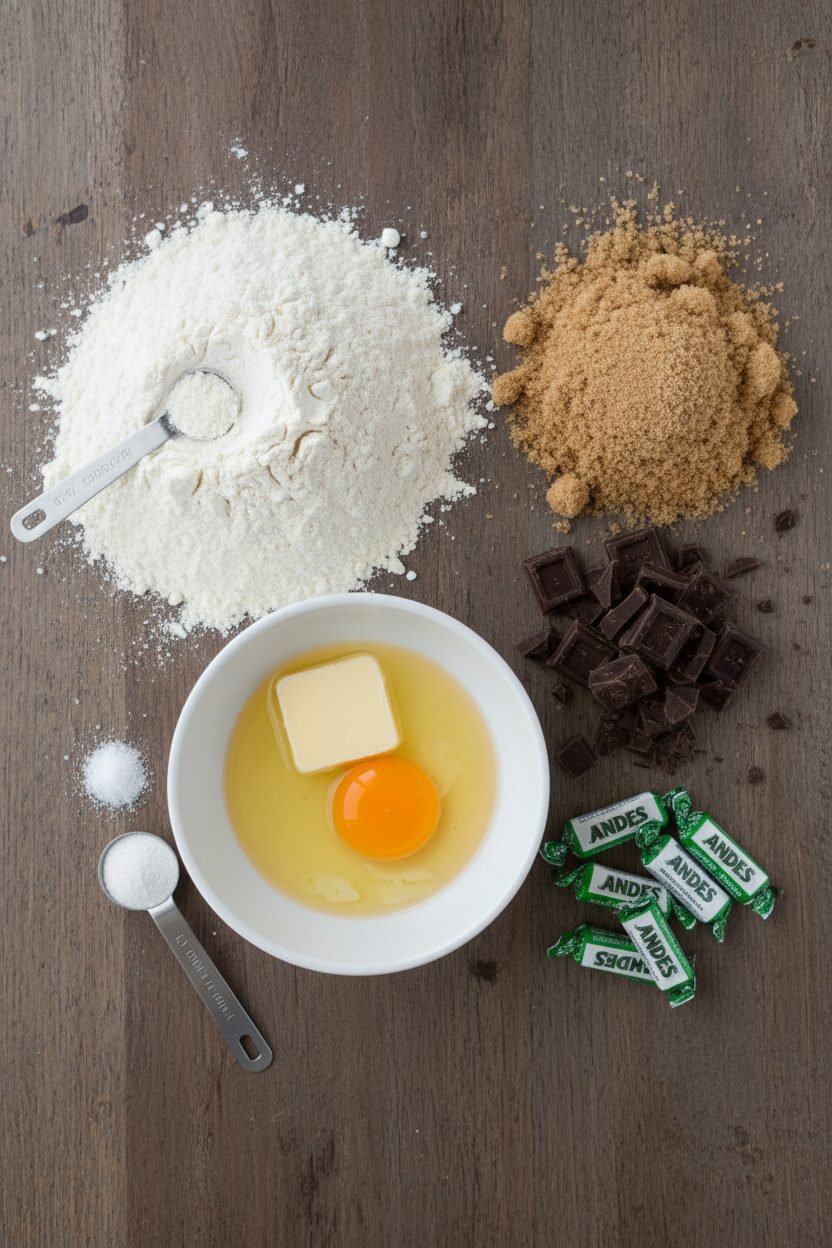
Ingredients:
| Ingredient | Amount | Notes |
|---|---|---|
| All-purpose flour | 1 ¼ cups (6¼ ounces/177 grams) | |
| Baking soda | ½ teaspoon | |
| Table salt | ¼ teaspoon | |
| Unsalted butter | 6 tablespoons | |
| Light brown sugar | ¾ cup packed (5¼ ounces/149 grams) | |
| Bittersweet chocolate | 6 ounces (170 grams) | Chopped |
| Egg | 1 large | |
| Andes chocolate mints | 36 pieces | Unwrapped |
Instructions
Step 1: Grab a medium bowl. Whisk your flour, baking soda, and salt together. Now, find a saucepan. Melt the butter and brown sugar together over low heat. Turn the heat off. Add the chopped chocolate and put the lid on. Let it sit for about 4 minutes. The chocolate will melt all by itself. Stir it until it’s beautifully smooth. (A heavy saucepan holds heat best for this.)
Step 2: Pour that warm chocolate mix into a mixing bowl. Let it cool for 10 minutes. You can touch the bowl. It should be just warm. Now, beat in the egg on medium speed. It will look glossy. Turn the speed to low. Mix in your flour mixture just until it disappears. Cover the bowl with plastic wrap. The dough needs a nap in the fridge for an hour.
Step 3: While the dough chills, get your oven ready. Heat it to 350 degrees. Move your oven racks to the upper and lower middle spots. Line two baking sheets with parchment paper. This little paper saves so much cleaning. I always keep a roll in my drawer.
Step 4: Roll the dough into little 1-inch balls. Use about 2 teaspoons each. Place them 2 inches apart on your sheets. Bake for 10 to 12 minutes. Switch and rotate the sheets halfway. The cookies are done when they look just set. What’s your favorite part of baking cookies? The mixing or the eating? Share below!
Step 5: Take the sheets out. The magic happens now! Place one mint on each hot cookie. Let them sit for 1 minute. The mints will get soft and shiny. Then, use a knife to gently spread the mint like frosting. It’s so satisfying. Let the cookies cool completely on a rack. The wait is the hardest part.
Creative Twists
These cookies love to play dress-up. Try a new look for them. You will have so much fun.
Peppermint Crunch: Crush candy canes. Sprinkle them on top right after you spread the mint.
Cookie Sandwich: Let two cookies cool. Spread a little peppermint frosting between them.
Minty Thumbprint: Press your thumb in the dough ball before baking. Fill the dent with mint after.
Which one would you try first? Comment below!
Serving & Pairing Ideas
These cookies shine all on their own. But I love making a moment special. Place them on a vintage plate. It reminds me of my mother’s holiday table. A little dusting of powdered sugar looks like snow. For a real treat, serve them slightly warm with a scoop of vanilla ice cream. The contrast is wonderful.
For drinks, a cold glass of milk is always perfect. For the grown-ups, a small glass of peppermint schnapps over ice pairs nicely. It brings out the mint in the cookie. Which would you choose tonight?

Keeping Your Cookie Wonders Wonderful
Let’s keep these minty treats tasting fresh. Store cooled cookies in a tin at room temperature. They stay perfect for a week. You can freeze the dough balls for a future surprise. Just bake them straight from the freezer, adding a few minutes.
I once left a batch out overnight. They got a bit stale. My grandson taught me a neat trick. We warmed one in the microwave for just five seconds. It tasted like it was fresh from the oven!
Batch cooking matters for busy days. Having dough ready means fresh cookies anytime. It turns a busy week into a sweet moment. Have you ever tried storing it this way? Share below!
Simple Fixes for Cookie Troubles
First, if your dough is too sticky, just chill it longer. Cold dough is much easier to handle. I remember when my first batch spread too thin. The kitchen was just too warm that day!
Second, your mint might not spread nicely. The cookie must be very hot when you add it. Let the mint sit for a full minute. Then use a small knife to swirl it.
Third, the cookies might bake unevenly. Always rotate your trays halfway through. This gives every cookie its fair share of heat. Getting this right builds your confidence in the kitchen. It also makes sure every bite has the perfect texture. Which of these problems have you run into before?
Your Quick Questions, Answered
Q: Can I make these gluten-free? A: Yes! Use your favorite gluten-free flour blend. I find a 1-to-1 substitute works just fine.
Q: Can I make the dough ahead? A: Absolutely. Wrap it well and refrigerate for up to two days. This actually improves the flavor.
Q: What if I don’t have Andes mints? A: A small peppermint patty works. You could also use a chocolate square and a drop of peppermint extract.
Q: Can I double the recipe? A: You can, but mix it in two separate batches. This ensures everything blends together perfectly.
Q: Any optional tips? A: Try a tiny sprinkle of sea salt on top. It makes the chocolate taste even richer. Which tip will you try first?
From My Kitchen to Yours
I hope you love making these cookie wonders. Baking is about sharing joy and making memories. My kitchen is always full of stories and laughter. I would love to hear about your baking adventure.
Fun fact: The mint-chocolate combo became popular in the 1950s. It was a brand-new, exciting flavor!
Please tell me all about it in the comments. Have you tried this recipe? I read every note you leave. Happy cooking!
—Elowen Thorn.


Mint Chocolate Holiday Cookie Wonders
Description
Marvelous Chocolate Mint Cookies
Ingredients
Instructions
- Combine flour, baking soda, and salt in medium bowl. Melt butter and sugar in medium saucepan over low heat. Add chocolate, cover pan with lid, and let stand off heat until chocolate melts, about 4 minutes. Stir until smooth. Transfer chocolate mixture to bowl of stand mixer fitted with paddle attachment and let cool, about 10 minutes.
- With mixer on medium speed, beat egg into cooled chocolate mixture until thoroughly combined. Reduce speed to low and mix in flour mixture until just combined, about 1 minute. Cover dough with plastic wrap and refrigerate until firm, about 1 hour.
- Meanwhile, adjust oven racks to upper-middle and lower-middle positions and heat oven to 350 degrees. Line 2 baking sheets with parchment paper.
- Roll 2 teaspoons dough into 1-inch balls and place 2 inches apart on prepared sheets. Bake until cookies are just set, 10 to 12 minutes, rotating and switching sheets halfway through baking.
- Remove from oven, top each hot cookie with 1 mint, and let chocolate soften, about 1 minute. Working with one at a time, using knife, spread softened mint over top of cookie and transfer to rack to cool completely, about 30 minutes.
Notes
- (Cookies can be stored in airtight container at room temperature for up to 1 week.)