

My Easter Dessert Mistake
I once brought this dessert to a spring picnic. I forgot to cover it in the fridge. A little dusting of fuzz settled on top. I still laugh at that.
We had to scrape off the top layer. The rest was still perfect underneath. It taught me to always use that cover. Have you ever had a kitchen mistake turn out okay?
Why We Press the Crust
Pressing the crumbs into the dish is important. It gives the dessert a solid base. This matters because it holds everything together. You get a nice bite every time.
Use the bottom of a cup to press. It makes the job easy and even. Doesn’t that smell amazing? The chocolate scent is my favorite part.
The Magic of Folding
You “fold” the whipped topping in. This means gentle mixing. You want to keep the fluffiness. It makes the filling light as a cloud.
If you stir too hard, it goes flat. A gentle hand gives you a treat that melts in your mouth. *Fun fact: The “fold” technique comes from old-fashioned cake making.*
Letting It Set is Key
Waiting two hours is hard. But it matters so much. The flavors become friends. The layers get firm and perfect for slicing.
This patience makes the dessert special. It turns simple ingredients into a celebration. Do you like to make desserts that need to chill?
Make It Your Own
You can change the candies on top. Use sprinkles for a birthday. Use chocolate chips for a simple treat. It’s your canvas.
This is why I love this recipe. It’s a happy, forgiving dessert. What color candies would you use for your next party? Share your idea with me.
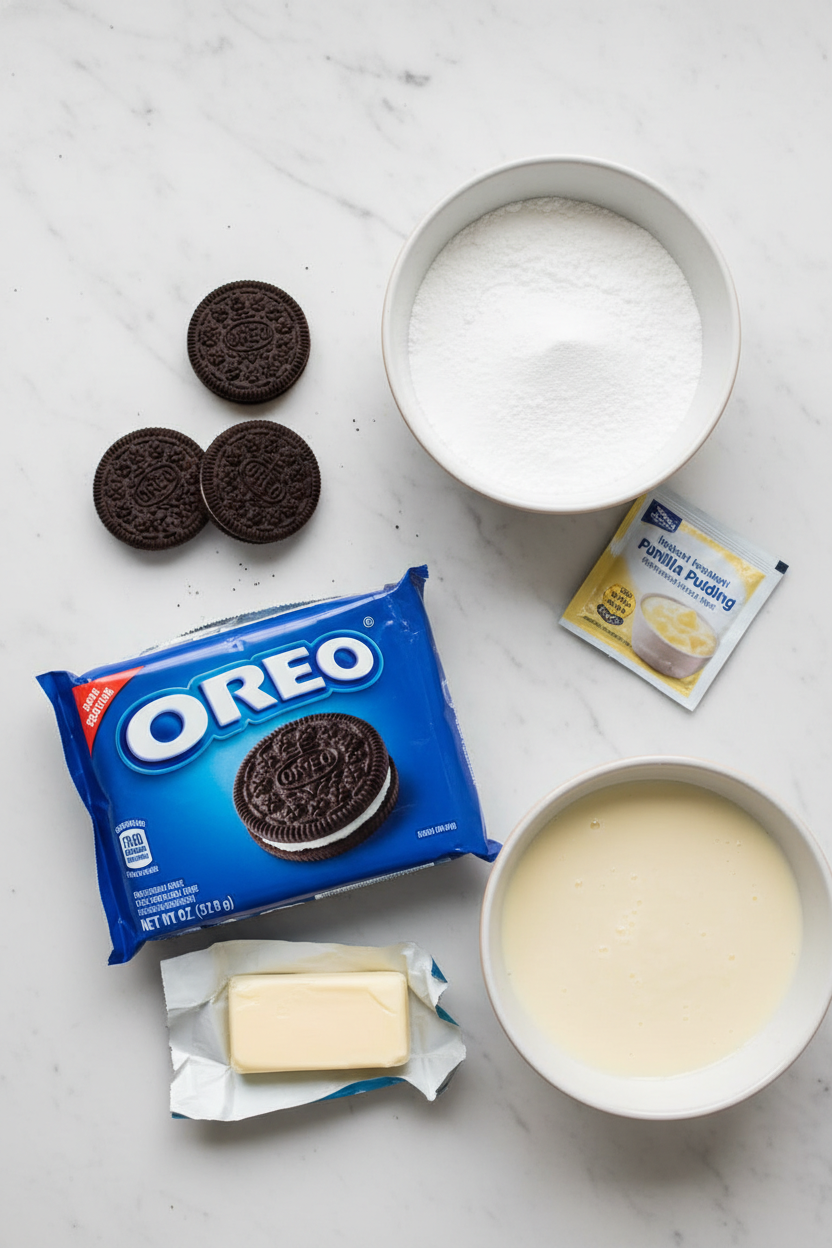
Ingredients:
| Ingredient | Amount | Notes |
|---|---|---|
| Oreo cookies | 14 oz (crushed) | Set aside 1/2 cup for topping |
| Cream cheese | 8 oz | Softened |
| Unsalted butter | 0.25 cup | Softened |
| Powdered sugar | 1 cup | |
| Instant vanilla pudding mix | 3.4 oz | |
| Cold milk | 2 cups | |
| Whipped topping (e.g., Cool Whip) | 8 oz | Thawed |
| Pastel candy coated chocolates | 1 cup | e.g., M&M’s |
| Mini Oreo cookies | 0.5 cup | For topping |
Instructions
Step 1: First, let’s make our crunchy base. Crush those Oreos until they look like dark sand. Save a little bowl of crumbs for later. Press the rest firmly into your dish. A flat-bottomed cup helps press it down evenly. (Trust me, a strong crust means no crumbling later!)
Step 2: Now for the creamy heart. Beat the soft cream cheese, butter, and powdered sugar together. Keep going until it’s perfectly smooth. Then, gently fold in the fluffy whipped topping. Doesn’t that look dreamy already?
Step 3: Let’s make the pudding layer. Whisk the pudding mix with the cold milk. It will thicken up so fast! Let it sit for five minutes to get happy. Then, fold it gently into your cream cheese mixture. What’s your favorite pudding flavor? Share below!
Step 4: Time to bring it all together. Spread your creamy filling over the cookie crust. Be gentle so you don’t pull up the crumbs. Now, the fun part! Sprinkle your saved crumbs, mini Oreos, and those colorful candies on top.
Step 5: Patience is the last ingredient. Cover the dish and let it chill in the fridge. Wait at least two hours for it to set. I know, waiting is the hardest part! The cold makes all the flavors become best friends.
Creative Twists
Peanut Butter Cup: Use peanut butter Oreos and mix peanut butter into the cream cheese.
Cookies & Cream Cheesecake: Add extra crushed Oreos right into the fluffy filling.
Fruit Fiesta: Skip the candies and top with fresh strawberries and blueberries instead.
Which one would you try first? Comment below!
Serving & Pairing Ideas
Serve each square on a pretty plate. A little dollop of extra whipped cream on the side is lovely. For a party, cut them into small bites. A cold glass of milk is the perfect partner. Which would you choose tonight?
Keeping Your Sweet Treat Fresh
Let’s talk about storing this lovely dessert. It must stay in the fridge, covered tight. Use plastic wrap or a lid. It will stay good for about three days this way. The crust stays nice and crisp.
You can freeze it for a month, too. I slice it first and wrap pieces individually. Thaw a slice in the fridge for a few hours. I remember my first time freezing it. I was so pleased it tasted just as good later!
Batch cooking this dessert is a smart idea. It saves you time for a busy week. Making two means one is ready for surprise guests. This matters because good food should bring joy, not stress. Have you ever tried storing it this way? Share below!
Simple Fixes for Common Hiccups
Sometimes the crust can be too crumbly. Just press it into the dish more firmly. Use the bottom of a cup to help you. I once had a crust fall apart. A little more patience fixed it perfectly.
If your filling seems too runny, do not worry. Make sure your milk is very cold. Also, let the pudding thicken fully before mixing. Your cream cheese and butter must be soft, too. This matters for a slice that holds its shape.
The topping candies might bleed color if added too soon. Always sprinkle them on right before serving. This keeps your colors bright and pretty. Getting these small things right builds your kitchen confidence. Which of these problems have you run into before?
Your Quick Questions, Answered
How to make Oreo pastel dessert?
First, make a crust from crushed Oreos. Then, mix a creamy filling with cream cheese and pudding. Finally, top it with more crumbs and pastel candies. The key is layering each part carefully. Chill it well so every slice is perfect. It is a simple, no-bake treat the whole family will love.
What are the ingredients for no-bake Oreo dessert?
You need Oreos, cream cheese, butter, and powdered sugar. Also, grab instant vanilla pudding mix and cold milk. Do not forget the whipped topping. For decoration, use mini Oreos and pastel candies. That is everything! It is a simple list of easy-to-find items. You probably have some in your kitchen right now.
Can I use different cookies for this dessert?
Yes, you certainly can. Golden Oreos or mint cookies work wonderfully. Any crunchy cookie you enjoy will be fine. Just crush them the same way. The flavor will change, but it will still be delicious. Experimenting is part of the fun in cooking. Find your family’s favorite combination.
How to achieve pastel colors in the dessert?
The colors come from your toppings. Use pastel candy-coated chocolates for the best look. Spring M&M’s are perfect for this. You could also use pastel sprinkles. The white filling makes those colors pop. *A fun fact: pastel candies were my granddaughter’s idea!* It makes the dessert look like a cheerful spring garden.
How long does it need to set in the fridge?
It needs at least two hours to set properly. I like to leave it for three or four. This gives the pudding time to firm up. Overnight is even better. A well-set dessert cuts into clean, beautiful slices. Patience here makes your treat look and taste its very best.
Can I make this dessert ahead of time?
Absolutely, and I recommend it. Make it the day before your event. This lets all the flavors blend together nicely. Just add the candy topping right before you serve. This matters because it makes your day so much easier. You get to enjoy your own party! Which tip will you try first?
A Note From My Kitchen to Yours
I hope you love making this sweet treat. It holds so many happy memories for me. I think of my grandkids smiling whenever I make it. Sharing food is sharing love. Now I would love to hear from you in the comments.
Have you tried this recipe? Tell me all about it. Did your family enjoy it? What fun changes did you make? Your stories are my favorite thing to read. Thank you for cooking along with me today.
Happy cooking!
—Grace Ellington.

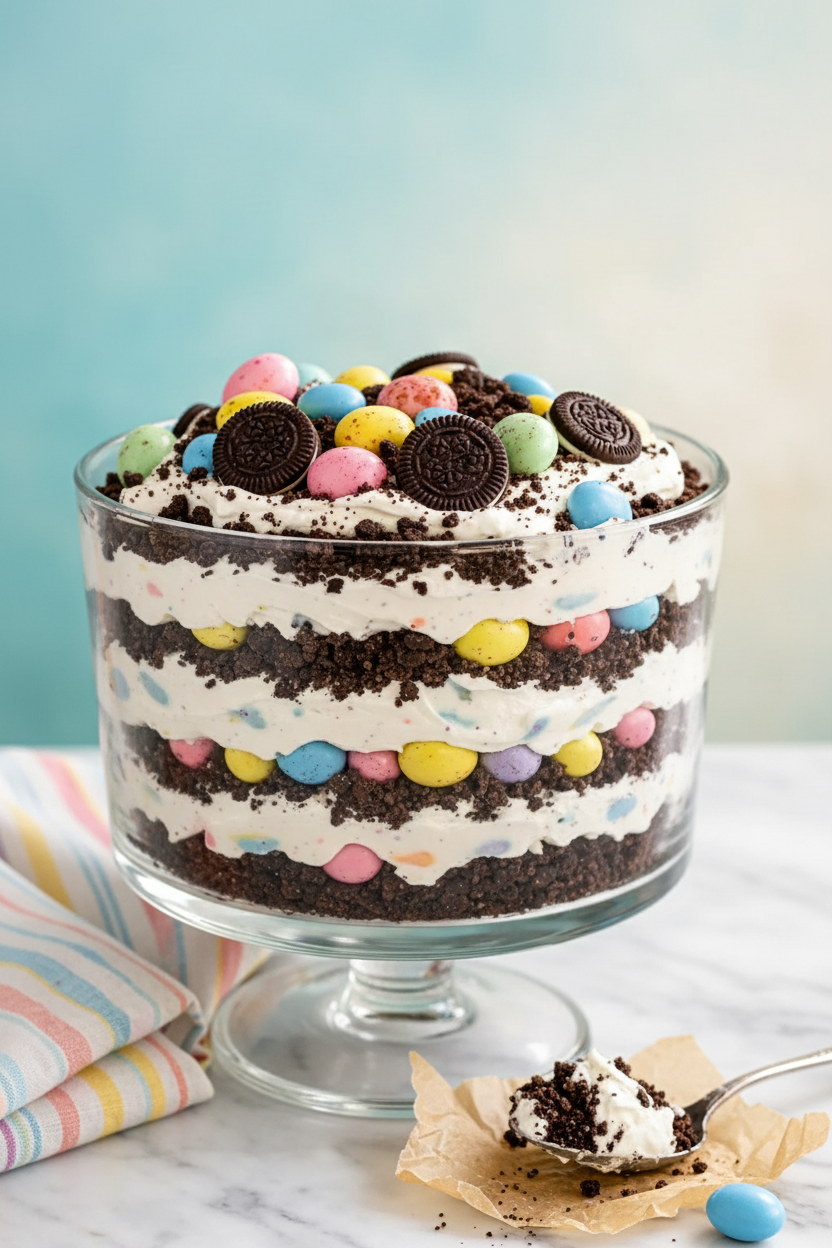
My Favorite No-Bake Oreo Pastel Dessert
Description
A creamy, no-bake dessert with an Oreo crust, a fluffy cream cheese and vanilla pudding filling, topped with pastel candies and mini Oreos.
Ingredients
Instructions
- Crush all Oreo cookies and set aside 1/2 cup of crumbs for topping. Press the remaining crumbs into a 9×13 inch dish to form the crust.
- Beat softened cream cheese, butter, and powdered sugar until smooth. Fold in the whipped topping until light and fluffy.
- Whisk the pudding mix with cold milk until thickened. Let rest five minutes, then fold into the cream cheese mixture.
- Spread the filling over the crust. Sprinkle with reserved crumbs, mini Oreos, and pastel candies.
- Cover and refrigerate at least two hours to set.
Notes
- For best results, ensure the cream cheese and butter are fully softened before mixing. You can use different pudding flavors or candy colors to match holidays.