

The Cake That Floats
This cake is a cloud. It is light and soft. We bake it in a water bath. That means the pan sits in hot water in the oven. It keeps the cake gentle and moist. I still laugh at that. We are giving the cake a warm bath while it bakes.
This method matters. It keeps the texture perfect. No dry, crumbly cake here. Just a tender bite that melts. My grandson calls it his “pillow cake.” Have you ever tried baking with a water bath? It is easier than it sounds. I think you will love the result.
A Sweet Berry Trick
We must treat the strawberries right. We slice them and toss them with sugar. Then we let them sit. This is called macerating. The sugar pulls out the sweet, shiny juice. Doesn’t that smell amazing? We use that juice in our cake syrup for extra flavor.
This step matters. It turns good berries into great ones. It prevents a soggy cake, too. The berries hold their shape. *Fun fact: This trick works for almost any fruit!* You can try it on peaches or blueberries. What is your favorite fruit to sweeten this way?
The Gentle Fold
Making the batter is a dance. We beat egg whites until they are fluffy. Then we fold them into the yolk mixture. Folding is gentle. We use a spatula and turn the bowl. We do not stir hard. We want to keep all that lovely air inside.
I once rushed this step. My cake was flat as a pancake. I learned my lesson. Patience makes a tall, proud cake. This is the secret to many lovely classic desserts. Do you enjoy the quiet, careful part of baking? I find it very peaceful.
Cloud Cream
The frosting is just sweet cream. We whip it until it is soft and billowy. You can add a bit of gelatin. This helps the cream stay firm if you are not serving right away. It is called stabilized cream. But simple whipped cream is wonderful, too.
This simple topping matters. It lets the strawberry flavor shine. It is not too sweet or heavy. It is like the fluffy angel food dessert topping your grandma might make. Do you prefer your cream plain or stabilized? I choose based on how long my cake needs to wait.
Putting It All Together
Assembly is my favorite part. We slice the cooled cake into two thin layers. We brush each with a sweet syrup. Then we add cream and those glossy berries. We stack it all up. Finally, we cover it in a smooth blanket of more cream.
Every bite has cake, cream, and berry. It is a perfect balance. This cake is a celebration of simple things done with care. It reminds me of other beautiful strawberry cakes. Will you decorate the top with a pretty strawberry pattern? I sometimes make a little flower shape in the center.
Instructions
Step 1: First, get your pan ready. Line a round pan with parchment paper. This little trick is my secret for a perfect release every time. Now, warm your milk and butter together until they’re friendly. Gently stir in the sifted flour. Doesn’t that smell amazing? Finally, mix in the egg yolks until smooth.
Step 2: Next, beat the egg whites. They should look glossy and form soft peaks. (A clean, dry bowl is the key to success here). Carefully fold a scoop into your yolk mixture. Then, fold everything together gently. Pour the batter into the pan. Give it a little tap on the counter to settle it.
Step 3: Bake your cake in a water bath. This keeps it wonderfully moist. It needs about an hour and a half. Let it cool completely before you move it. I know, waiting is the hardest part! What’s the most important tool for beating egg whites? Share below!
Step 4: Slice your strawberries and toss them with sugar. Let them sit and get all syrupy. While they rest, whip your cream with a bit of sugar. For a firmer cake, add a touch of gelatin. I still laugh at the time I over-whipped it!
Step 5: Now, the fun part! Slice the cooled cake into two thin layers. Brush each with a simple syrup. Spread cream and arrange those sweet strawberries. Top with the second layer and cover it all in fluffy cream. A strawberry sheet cake is lovely, but this one feels so special.
Creative Twists
Lemon Zest: Add a little lemon zest to the cake batter. It makes the strawberry flavor pop!
Earl Grey Syrup: Steep an Earl Grey tea bag in your cake syrup. It adds a lovely, subtle fragrance.
Mixed Berries: Use a mix of raspberries and blueberries with the strawberries. So pretty and tasty!
Which one would you try first? Comment below!
Serving & Pairing Ideas
Serve each slice with a few fresh berries on the side. A cup of green tea is a perfect, light partner. For a real treat, a scoop of vanilla ice cream turns it into a celebration. This cake reminds me of a strawberry dream cake, but so much lighter. Which would you choose tonight?

Keeping Your Strawberry Cake Fresh
This lovely cake is best the day it’s made. But life happens. You can store it in the fridge for a day. Just cover it loosely with a dome or plastic wrap. This keeps the cream from drying out. For a classic dessert like this, freshness is key.
I do not recommend freezing the assembled cake. The cream and berries do not freeze well. You can freeze the plain cake layers alone. Wrap them tightly in plastic wrap first. Then place them in a freezer bag. Thaw them in the fridge overnight when needed.
I remember my first time making this cake. I left it out too long. The cream started to weep. I learned to chill it right away. Storing food well shows care for your efforts. It means your hard work can be enjoyed later. Have you ever tried storing it this way? Share below!
Simple Fixes for Common Cake Troubles
Is your cake layer stuck in the pan? Let it cool completely first. Then run a thin knife around the edge. I once flipped a warm cake. It broke right in half. Patience is your best kitchen tool here.
Is your whipped cream too runny? Your bowl and cream must be very cold. Chill them for 20 minutes before starting. This helps the cream hold its shape. A stable cream makes your dessert reimagined look beautiful.
Are your cake layers uneven? Use toothpicks as guides before cutting. Mark the middle all around the cake. Slice slowly with a serrated knife. This matters for a pretty, professional look. It builds your cooking confidence too. Which of these problems have you run into before?
Your Quick Questions, Answered
What are the key steps to making a perfect strawberry shortcake?
The key is gentle handling. Do not overmix the cake batter. Fold the egg whites in carefully. Bake the cake in a water bath for a tender crumb. Let the cake cool fully before you cut it. Macerate your strawberries to make them sweet and juicy. Finally, whip your cream until it is just firm. Each step builds a light and lovely crowd-pleasing dessert.
How do you make homemade whipped cream for strawberry shortcake?
Start with very cold heavy cream and a cold bowl. Sift in some confectioners’ sugar for sweetness and stability. Whip at medium speed until soft peaks form. Stop just when the cream holds its shape. Over-whipping makes butter. This simple, fresh topping is far better than any store-bought can. It makes your special cake taste truly homemade.
What’s the best way to macerate strawberries for shortcake?
Slice your strawberries evenly. Toss them with a little sugar in a bowl. Let them sit for at least one hour. The sugar pulls out the berries’ natural juices. This creates a sweet syrup. That syrup flavors both the berries and your cake. It is a simple trick for maximum strawberry taste.
What type of cake is best for strawberry shortcake: biscuit, sponge, or pound cake?
This Japanese-style cake uses a sponge. A light sponge cake is best here. It soaks up the strawberry syrup beautifully. It is sturdy enough to hold the cream but still tender. A pound cake or biscuit can be too dense. The delicate sponge lets the strawberries and cream shine.
How can you prevent the shortcake from getting soggy?
Assemble the cake just before serving if you can. If not, use stabilized whipped cream. Brush the cake layers with syrup, but do not drown them. Let the macerated strawberries drain a little before adding. These steps keep the texture perfect. A soggy cake can ruin your beautiful heavenly bites.
Is there a simple syrup recipe to enhance strawberry shortcake?
Yes, and it is very easy. Mix two tablespoons of sugar with three of hot water. Stir until the sugar dissolves. Let it cool. You can add the juice from your macerated strawberries for extra flavor. This syrup keeps the cake moist. It adds a little extra sweetness to every bite.
*Fun fact: The water bath for baking is called a “bain-marie.” It creates a gentle, even heat.
Which tip will you try first?
A Final Word from My Kitchen
I hope you feel ready to make this special cake. It looks fancy but is made with simple steps. The most important ingredient is your own joy. Cooking for others is a gift of love. Every easy no-bake treat or layered cake shares a piece of your heart.
I would love to hear about your baking adventures. Tell me how it went in your kitchen. Have you tried this recipe? Your stories are my favorite thing to read. Thank you for spending this time with me.
Happy cooking!
—Elowen Thorn

Perfect Strawberry Shortcake with Cream and Syrup
Description
A classic dessert featuring a light, fluffy sponge cake soaked with syrup, layered with sweet macerated strawberries and fresh whipped cream.
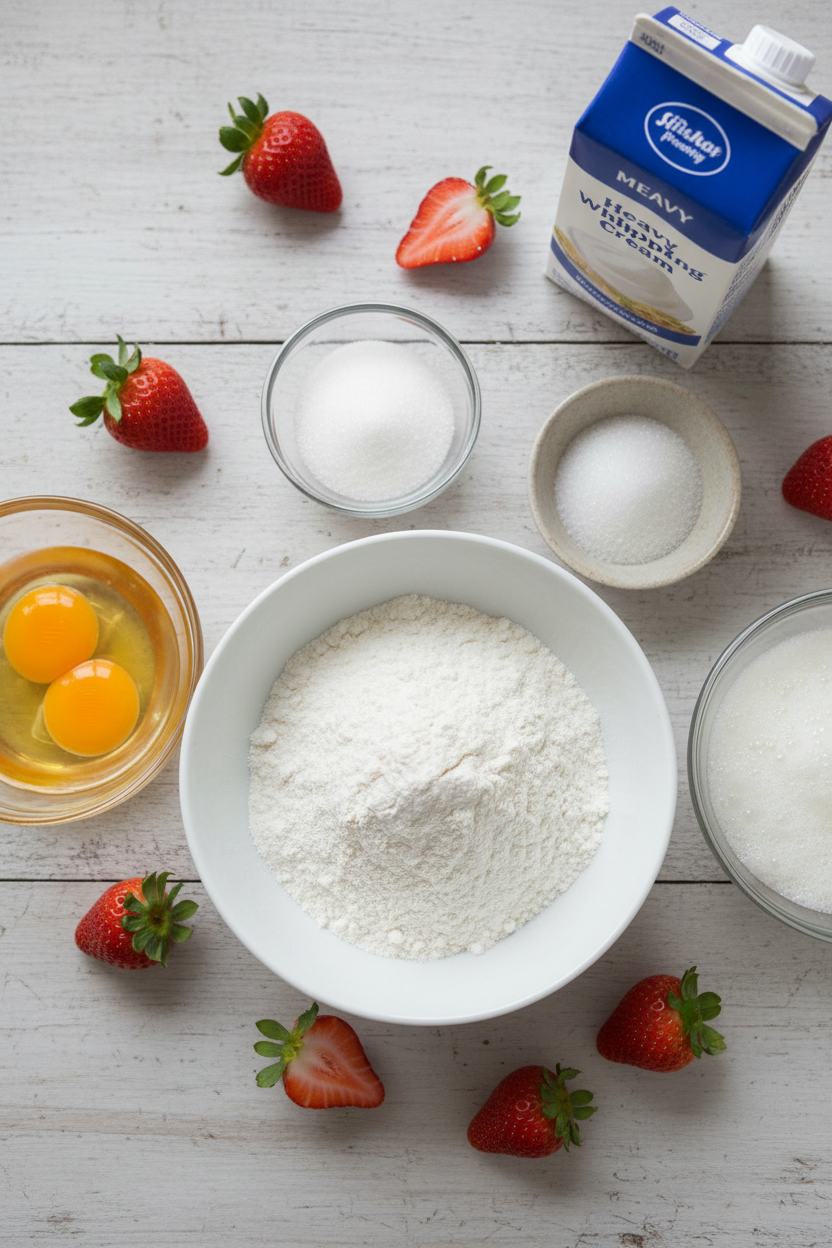
Ingredients
Instructions
- Prepare the cake: Cut a piece of parchment paper to fit the bottom of an 8” round cake pan and line the pan with it. Preheat the oven to 325°F (160°C). Prepare a high-walled pan or baking dish that fits your cake pan to use as a water bath. Boil a small pot of water to use later. The water should be enough to cover 1 inch (2.5 cm of the pan). If using a springform or removable-bottom cake pan, line the outside with a few layers of foil to make sure no water leaks into the cake.
- Combine the milk and butter in a medium-sized heatproof bowl. Microwave until melted. Stir to mix well. Sift the cake flour into the mixture. Mix gently with a spatula until smooth. Add the egg yolks. Mix again until evenly combined.
- Add the egg whites into the clean mixing bowl of a stand mixer, or a clean bowl using a hand mixer. Beat at medium high speed until the egg whites are frothy. Slowly add the sugar while continuing to beat, until glossy and medium peaks form.
- Scoop 1/4 of the beaten whites out and add it to the yolk mixture, Fold using a spatula until smooth. Pour the mixture back into the egg whites. Continue to fold everything together until just smooth. Don’t overmix but also avoid leaving large pieces of egg white.
- Pour the batter into the lined cake pan. Drop the pan from 5” (12 cm) onto the table twice to release any extra large bubbles. Place the cake pan in the water bath pan and add an inch of hot water. Bake for 1 hour 30 minutes, or until a skewer inserted to the center of the cake comes out clean and the cake has pulled away from the sides of the pan. Do not open the oven to check until 1 hour has gone by.
- Run a knife along the edge of the pan to release the cake. Flip it on to a cooling rack. Let it cool completely before cutting and decorating.
- Prepare the macerated strawberries: While the cake cools, slice 8 oz (225 g) of strawberries into 1/4” (1/2 cm) slices and place them into a bowl. Sprinkle with the sugar and toss to coat well. Let them sit for at least an hour, up to 2 hours. Once the strawberries are glossy and sweet, remove them from the bowl and lay them out on a plate. Reserve the liquid left in the bowl.
- Combine the cake syrup ingredients in a small bowl and stir until the sugar is dissolved. (OPTIONAL) Add the reserved strawberry soaking liquid to the syrup; this adds extra strawberry flavor but will color the cake slices slightly pink.
- Prepare the cream: (Optional) IF MAKING STABILIZED CREAM (do not make ahead of time, it will set before decorating): Combine the gelatin and cold water in a small bowl. Let sit for 5 minutes. Once the gelatin is fully expanded, briefly heat in the microwave or a hot water bath, until fully melted.
- Add the heavy cream into the mixing bowl of a stand mixer, or a bowl and use a hand mixer. Sift the confectioners sugar into the cream. Whip at medium speed until very soft peaks begin to form, then stop immediately. Add a large scoop of the whipped cream into the melted gelatin. Stir with a spoon until fully mixed and consistent. Drizzle the gelatin mixture into the mixing bowl with the cream. Continue to whip at medium speed briefly, until soft peaks are formed. DO NOT over-whip, it will begin to separate out the gelatin (which is still usable, but will be a bit blobby and unattractive). IF MAKING REGULAR CREAM: Add the heavy cream into the mixing bowl of a stand mixer, or a bowl and use a hand mixer. Sift the confectioners sugar into the cream. Whip at medium speed until firm peaks begin to form.
- Assemble the cake: Once the cake has fully cooled, place it on a cutting board. Measure the height on 4 sides. Use toothpicks to mark evenly where the top should be cut off, and where the cake should be cut in half. Use a serrated knife to slice off the top along the top of the toothpicks, and discard the browned top. Slice the cake into two thin, even layers along the toothpicks.
- Move the top layer of cake onto a spinning cake stand (*Footnote), cut side down. Brush the syrup evenly onto the top of the cake. Flip the other layer of the cake upside down. Brush the syrup evenly over the top.
- Add a large dollop of the whipped cream onto the cake layer on the cake stand. Spread the cream with an offset spatula into an even thin layer across the top until the cream is just spilling over the edge. Arrange as many strawberries as possible evenly on the cream. Put another large dollop of cream on top of the strawberries. Spread evenly and thinly until just spilling over.
- Place the top layer of the cake on top and line it up with the bottom cake. Add another dollop of cream to the cake and spread again. Smooth out the sides of the cake using the cream that spilled over earlier. Add a little extra cream if needed. Once the cake is covered with a thin, even layer of cream, add another larger dollop to the cake. Spread a thicker layer of cream on top and then smooth out the sides.
- (Optional) If you have any cream left, add it to a piping bag or ziplock bag with the corner cut off for decorating the top and/or sides if desired. Decorate the cake with the remaining strawberries on top.
- If using stabilized cream, place the cake uncovered in the refrigerator for at least 30 minutes to let the cream set. If using unstabilized cream, serve immediately or refrigerate and serve within a few hours. To serve, you can slice the cake using a serrated knife once you transfer the cake from the fridge, if using unstabilized cream. If using stabilized cream, you can let the cake come back to room temperature, 1 hour or so, to achieve the best texture.
Notes
- The cake can be baked a day ahead. Wrap tightly in plastic wrap once completely cool and store at room temperature. Macerate the strawberries and prepare the syrup and cream on the day of serving for best results.