

My First Taste of Karpatka
My friend Anna brought this cake to a spring picnic. I took one bite and my eyes got wide. It was clouds and cream, all at once. I begged her for the Karpatka recipe right there on the blanket.
She laughed and wrote it on a napkin. I still have that napkin in my recipe box. It reminds me that the best food finds you when you least expect it. That’s why this matters. Good treats connect us to people and happy days.
What is This Cake Anyway?
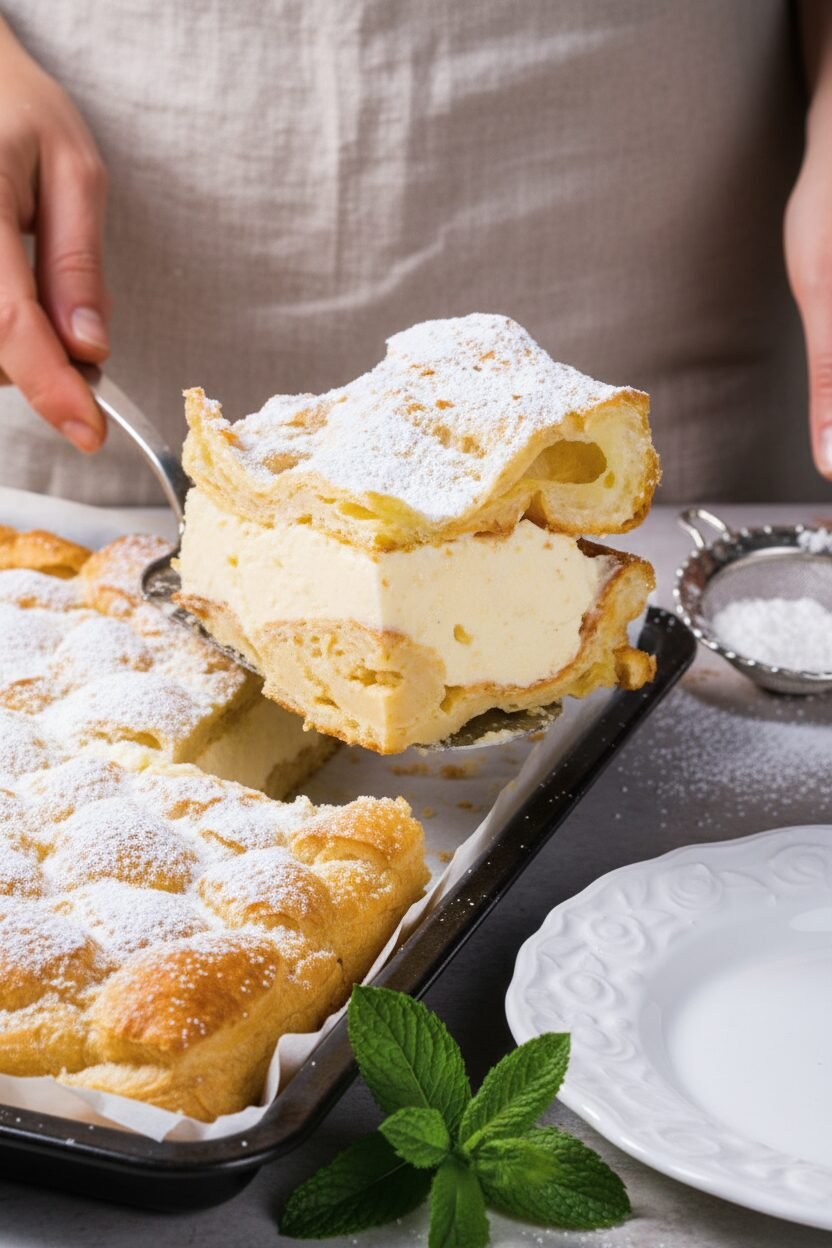
Karpatka is a traditional Polish dessert. It is named for the Carpathian Mountains. The baked choux pastry layers look like snowy mountain peaks. That’s how it got the name Polish Carpathian cake.
It is a choux pastry dessert, but easier than little cream puffs. You just spread the dough in a pan. The magic is the rich vanilla custard cream cake in the middle. It is a dreamy, creamy sandwich.
A Little Story About the Dough
The first time I made the dough, I was nervous. You cook it in a pot first. It gets very thick and smooth. I thought I had ruined it. But I kept going.
When I beat the eggs in, it turned silky. *Fun fact: The steam from the eggs and butter is what makes choux pastry puff up so high in the oven!* Isn’t that clever? So don’t worry if your dough is sticky. That’s a good thing.
The Heart of the Cake: The Cream
This custard cream filling is the star. You cook it slowly, whisking all the time. Doesn’t that smell amazing? Like sweet vanilla and warm milk. Then you mix it with soft, fluffy butter.
The result is not too sweet and perfectly smooth. This is the soul of any traditional Polish dessert. Making it teaches patience. That’s why this matters. The best things in life, and baking, often take a little time.
What’s your favorite cake filling? Is it chocolate, fruit, or something else? I’d love to know.
Putting Your Polish Carpathian Cake Together
Assembly is the fun part. Place one baked layer down. Pile all that lovely cream on top. Gently place the second layer over it. It will look like a delicious snowy mountain range.
Then, you must wait. Chill the cake for a few hours. This lets the cream settle and the flavors become friends. Before serving, a snowstorm of powdered sugar goes on top. This easy Karpatka recipe is simpler than it looks.
Have you ever tried a cake from a different country? What was it?
Your Turn to Bake
I hope you try this how to make Karpatka guide. Polish baking recipes are full of such comforting treats. This one is perfect for a spring celebration or a Sunday treat.
Share a picture if you make it! What does your Carpathian Mountains cake look like? I bet it will be wonderful.
Ingredients:
| Ingredient | Amount | Notes |
|---|---|---|
| Milk (for dough) | 1 cup (250 ml) | |
| Butter (for dough) | 1 stick (113 g) | |
| All-purpose flour (for dough) | 1 cup (150 g) | |
| Eggs (for dough) | 5 (medium) | |
| Milk (for custard) | 3 cups (750 ml) | Divided for recipe steps |
| Fine/Caster sugar (for custard) | 10 tbsp (130 g) | |
| Vanilla sugar | 1 tbsp (1 sachet, 16 g) | Can substitute 1 vanilla bean or 3 tsp vanilla extract |
| Egg (for custard) | 1 | |
| Egg yolks (for custard) | 4 | |
| Potato starch / flour | 4 tbsp (40 g) | |
| All-purpose flour (for custard) | 2-2.5 tbsp (20 g) | |
| Butter (for custard) | 3 sticks (340-350 g) | At room temperature |
| Caster sugar (for butter) | 2 tbsp (25 g) | |
| Icing / powdered sugar | For sprinkling | Used for assembly |

Instructions
Step 1: Let’s make the choux pastry for our Karpatka recipe. Heat the milk and butter in a pan. When it boils, dump in all the flour. Stir fast until it forms a ball. This is the start of your Polish Carpathian cake. (Tip: Stir until the dough leaves the pan sides clean.)
Step 2: Let that dough cool completely. Then, beat in the eggs one by one. This makes a smooth, sticky choux pastry dessert. My arm used to get so tired mixing! Divide the dough in two. Why do we add eggs one at a time? Share below!
Step 3: Spread half the dough in a greased pan. Bake until golden and puffy. Do not peek! This creates the lovely hills of our Carpathian Mountains cake. Repeat with the second half. Let both layers cool on a rack. Their rough tops are perfect for holding cream.
Step 4: Now for the vanilla custard cream cake. Boil most of the milk with the sugars. Whisk the rest with egg yolks and starches. Slowly mix the hot milk into the cold milk mixture. Cook until thick for your traditional Polish dessert. (Tip: Press plastic wrap right on the surface so no skin forms.)
Step 5: Whip the soft butter with sugar until fluffy. Beat in the cool custard, spoon by spoon. This is the magic of how to make Karpatka cream. It becomes light as a cloud. This custard cream filling is the heart of the cake. Doesn’t that smell amazing?
Step 6: Time to assemble your Polish baking recipes masterpiece. Place one choux layer on a plate. Pile all that dreamy cream on top. Gently set the second layer over it. Chill for hours so the flavors marry. This easy Karpatka recipe just needs patience now.
Step 7: Right before serving, dust the top with snowy icing sugar. Use a very sharp knife to cut clean slices. Each piece is a little mountain of joy. I still laugh at how fast it disappears. Your vanilla custard cream cake is ready to share!
Creative Twists
Add a layer of fresh strawberries or raspberries in the cream. Drizzle the top with a little melted dark chocolate. Mix a spoonful of instant coffee into the custard for a mocha twist. Which one would you try first? Comment below!Serving & Pairing Ideas
Serve each slice with a few fresh berries on the side. A cup of cold milk or a hot herbal tea pairs beautifully. For a fancy touch, add a mint leaf on the plate. Which would you choose tonight?
Keeping Your Karpatka Cake Happy
This cake is best enjoyed the day it’s made. But leftovers need love too. Store slices in the fridge, covered tightly. The cream stays fresh and safe this way. You can also freeze the whole cake for later. Wrap it well in plastic wrap first. Then add a layer of foil for extra safety.
I remember my first Karpatka. I made two! I froze one for my grandson’s visit. Thawing it slowly in the fridge worked perfectly. It tasted just as wonderful. Batch cooking like this saves future-you time. It turns a special treat into a ready-made joy. Have you ever tried storing it this way? Share below!
Three Little Hiccups and How to Fix Them
First, a runny custard is a common worry. The key is constant whisking while it cooks. Let it boil for a full three minutes. This thickens the starch properly. I once rushed this step. My cream was too soft. Patience here makes a stable, dreamy filling.
Second, flat choux pastry can happen. Do not open the oven door early. The steam inside makes the layers puff up. Peeking lets the steam escape. Third, lumpy dough is no fun. Add the eggs one at a time. Mix each one in fully before adding the next. This makes a smooth, perfect batter.
Fixing these small issues builds your confidence. It also makes the flavor and texture just right. Which of these problems have you run into before?
Your Quick Questions, Answered
What is the traditional way to make Karpatka?
The traditional Karpatka recipe uses a simple choux pastry. You bake it into two thin, bumpy layers. They look like the Carpathian Mountains. The middle is filled with a rich vanilla custard cream. The cake is chilled, then dusted with powdered sugar. This Polish Carpathian cake is a beloved, classic treat.
Can I use a different type of flour for the choux pastry?
For this choux pastry dessert, use all-purpose flour. It has the right protein level. This helps the pastry puff up in the oven. Other flours, like cake flour, are too soft. They might not create the strong structure you need. Stick with all-purpose for the best results in your Polish baking recipes.
What is the difference between Karpatka and Kremówka?
Both are delicious traditional Polish desserts. Karpatka has rough, puffy choux pastry layers. Kremówka uses flaky puff pastry sheets. The cream fillings are also different. Karpatka uses a butter-enriched vanilla custard cream. Kremówka often uses a lighter pastry cream. Think of Karpatka as the mountain cousin of the smoother Kremówka.
How do I prevent the cream from becoming runny?
Cook the custard base until it truly boils. Whisk non-stop for 3-5 minutes. This activates the starch. Then, let it cool completely before adding the butter. The butter must be at room temperature. Adding cool custard to soft butter is the secret. This keeps your vanilla custard cream cake firm and sliceable.
Can Karpatka be made a day ahead?
Yes! Making it ahead is a great idea. Assemble the whole cake. Then chill it in the fridge overnight. This resting time lets the flavors meld. The cream also sets perfectly. Add the powdered sugar just before serving. This easy Karpatka recipe plan makes serving guests stress-free.
Are there any common variations or twists on the classic recipe?
Some cooks add a layer of fruit jam. Others flavor the custard cream with lemon zest. A fun twist is a chocolate glaze on top. You can even make mini individual portions. The classic custard cream filling is always the star. But feel free to add your own family’s favorite touch. Which tip will you try first?
From My Kitchen to Yours
I hope you love making this taste of Poland. It is a cake full of history and heart. *Fun fact: The bumpy top is meant to look like snowy mountain peaks!* That always makes me smile. I would love to hear about your baking adventure. Did it remind you of a family story?
Please tell me all about it in the comments. Sharing recipes connects us all. Have you tried this recipe? Let me know how it turned out for you. Happy cooking!
—Elena Rutherford
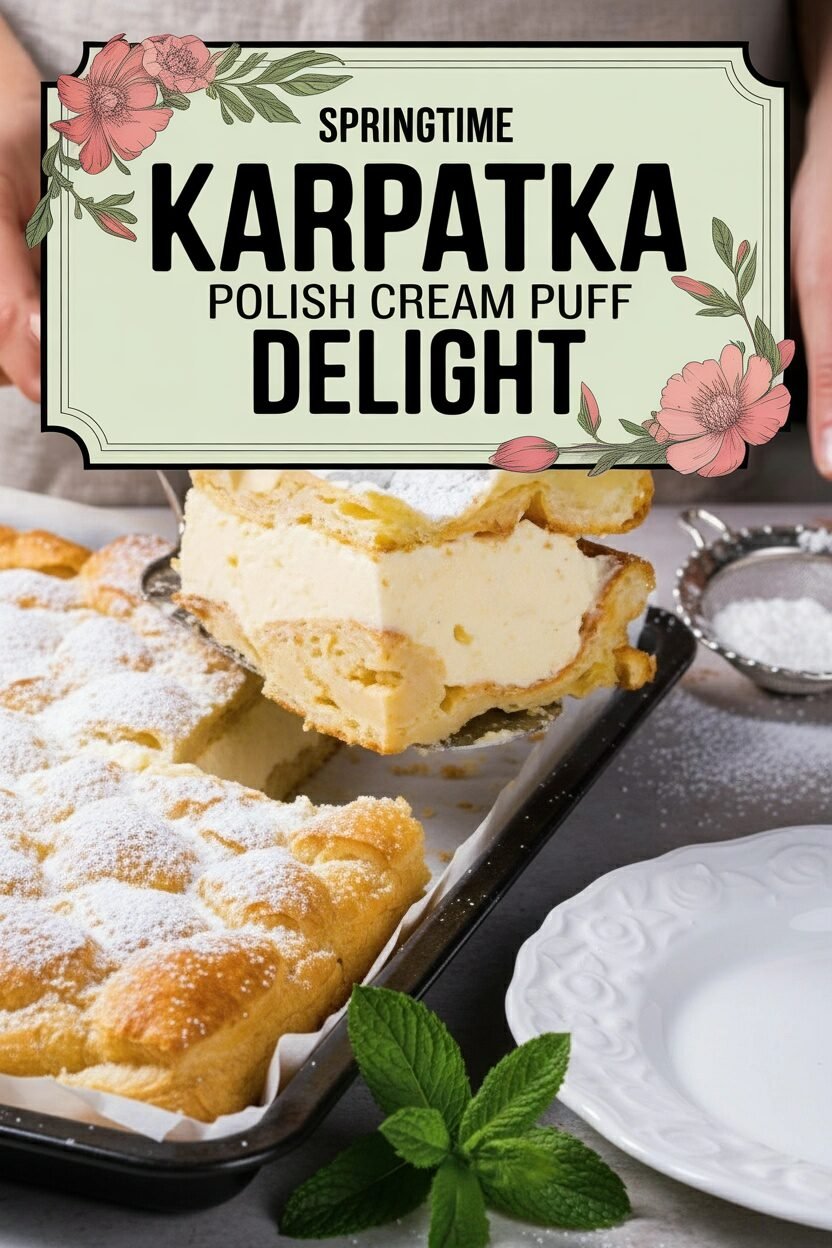

Springtime Karpatka Polish Cream Puff Delight
Description
Karpatka: Carpathian Cake with Custard Cream
Ingredients
For Choux Dough (Enough for 2 layers):
For Vanilla Custard Cream:
For sprinkling:
Instructions
- For Choux Dough: Place milk and butter in a saucepan. Heat on a ‘medium-low’, letting the butter melt into the milk. Bring the mixture to a boil. Add in 1 cup of flour and reduce the heat. Whisk together for a while until a thick, lump-free mass forms. It should come off the sides of the pot relatively easily. Remove from the stove and leave to cool down.
- Once completely cooled, beat in the eggs – one by one, mixing as you go. The dough should become smooth, a bit sticky and lump-free. Divide the dough into two.
- Grab a large rectangular cake tin (ideally 9 by 13 in / 23 by 33 cm). Grease it generously with butter and sprinkle with flour. Spread one part of the dough on a cake tin and even out the surface with a butter knife or spatula. If the dough is sticky – don’t worry, that’s a good thing.
- Bake at 390°F (200ºC) for 25-30 minutes, until the cake turns lightly golden. Do not open the oven while it bakes! Remove to cool and repeat with another portion of the dough. Leave to cool.
- For Vanilla Custard Cream: Boil two cups of milk (0.5 litre) together with fine sugar and a packet of vanilla sugar.
- Grab the remaining cup of cold milk (250 ml) and add an egg, 4 yolks, potato starch and regular all-purpose flour.
- Bring to boil and continue cooking for 3 to 5 minutes – whisking continuously, until a lump-free custard forms. Once you’re happy with the texture, take it off the heat. Cover with cling film and leave to cool completely.
- Place 3 sticks (340-350 g) of butter and two tablespoons of caster sugar in the bowl of your mixer. Blend together to form a light & fluffy butter mass. Gradually start adding custard, a few spoonfuls at a time, blending continuously.
- Assembly: Place one layer of baked choux pastry onto a serving plate. Alternatively, keep it in the cake tin that we have used for baking.
- Spread the custard cream on top, even out the surface with a spatula or a butter knife. Cover with another layer of baked choux pastry.
- Chill in the fridge for a few hours before serving, giving the cream some time to settle. Before serving, sprinkle generously with icing sugar. Cut into portions with a super-sharp knife.
Notes
- Ensure the choux dough layers are completely cool before adding the custard. For best results, chill the assembled cake overnight.