

My First Cheese Ball Fumble
I made my first cheese ball thirty years ago. I was so nervous. I forgot to chill it first.
I tried to roll it in nuts right away. What a mess! It looked like a fuzzy, lumpy potato. I still laugh at that. Chilling it first is the secret. It lets everything come together nicely.
Why We Make This Every Year
This cheese ball is more than a snack. It is a tradition. It sits in the middle of the table with crackers.
Everyone gathers around it to talk and laugh. That is why this matters. Food brings people together. It makes a space for sharing stories. What is one food that means “party” to your family?
The Magic of Just Three Ingredients
Let’s talk about the flavor. Sharp cheddar gives it a big bite. Cream cheese makes it smooth and spreadable.
The Worcestershire sauce is the quiet hero. It adds a deep, savory taste. Fun fact: Worcestershire sauce is often made from anchovies! Don’t worry, you won’t taste fish. It just makes everything taste richer. Doesn’t that smell amazing when you mix it?
A Little Kick and a Nice Crunch
The cayenne pepper is my favorite part. It is just a tiny bit. It gives a warm feeling at the back of your throat.
Then you get the toasted almonds. They add the perfect crunch. Toasting them is important. It makes them taste nutty and warm. Do you like a little spice in your food, or do you prefer things mild?
Your Turn to Make Memories
This recipe is very forgiving. If you don’t have a food processor, a strong spoon and some arm power will work! Just mix it all very well in a bowl.
Shaping it with plastic wrap is fun. It is like playing with edible clay. Letting it get firm is the last step of kindness you give it. That patience makes it perfect for your guests. This matters because cooking is a gift of your time and care. Will you use almonds, or try a different nut like pecans?
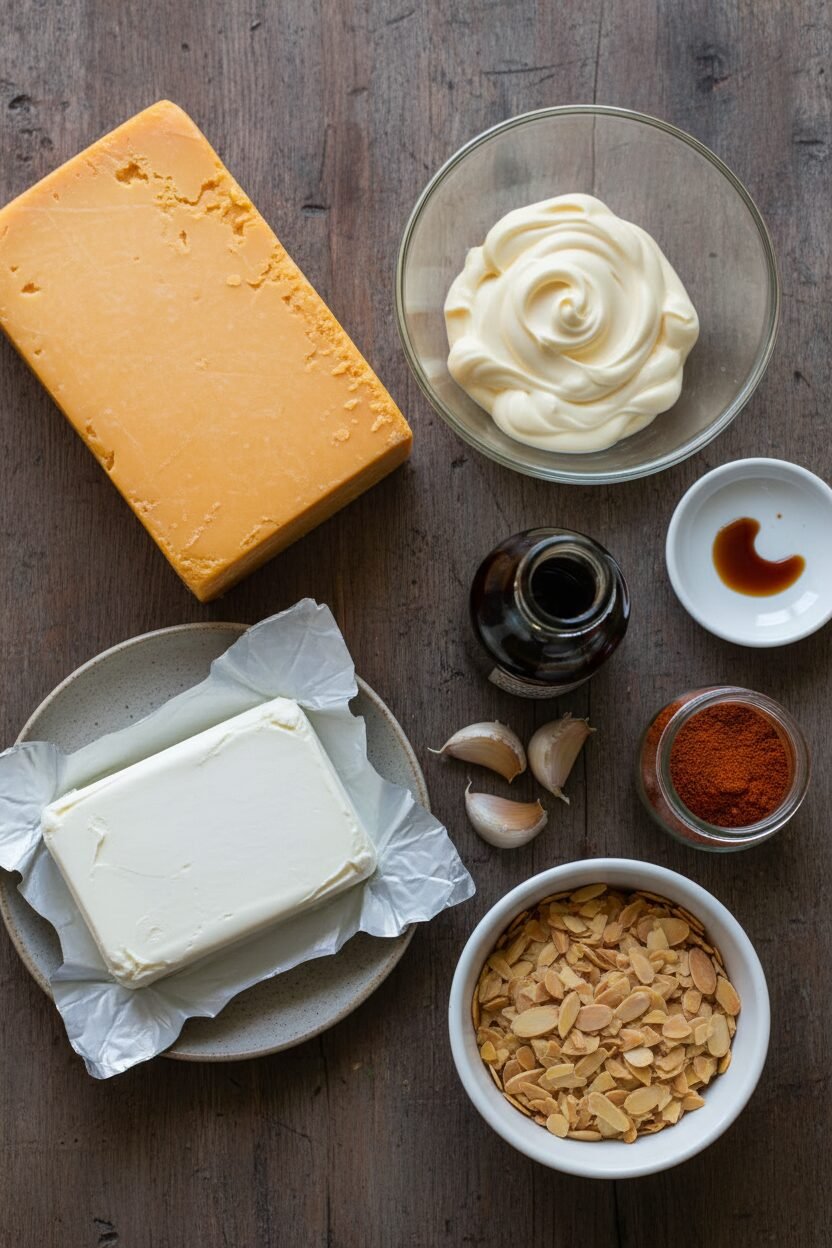
Ingredients:
| Ingredient | Amount | Notes |
|---|---|---|
| shredded extra-sharp cheddar cheese | 2 cups | |
| cream cheese | 8 ounces | softened |
| mayonnaise | 2 tablespoons | |
| Worcestershire sauce | 1 tablespoon | |
| garlic | 1 clove | minced |
| cayenne pepper | ¼ teaspoon | |
| sliced almonds | ½ cup | toasted |
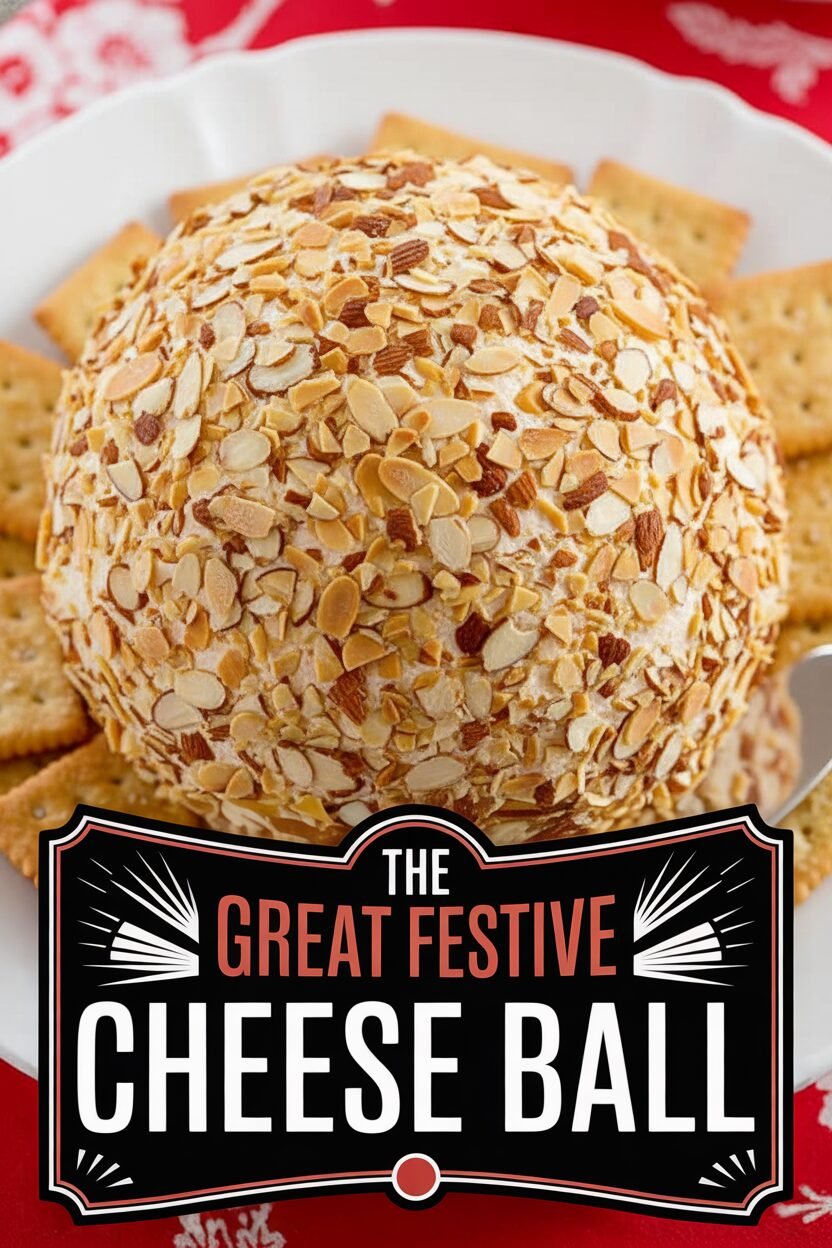
The Great Festive Cheese Ball
Hello, my dear. Come sit at the counter. Let’s make a holiday tradition. This cheese ball is pure joy. It reminds me of my own grandma’s table. She always had one waiting for guests. The smell of toasted almonds fills the whole house. Doesn’t that smell amazing?
Instructions
Step 1: Get your food processor ready. Put all the ingredients inside. But leave out the toasted almonds for now. Blend everything until it’s nice and smooth. You might need to stop and scrape the sides. (A rubber spatula is your best friend here.) This creamy mix is the secret.
Step 2: Now, dump the cheese onto plastic wrap. Gather the wrap’s corners in one hand. Use your other hand to twist and shape it. You’ll make a loose, messy ball. That’s perfect! Pop it in the fridge to firm up. I always plan ahead for this three-hour chill.
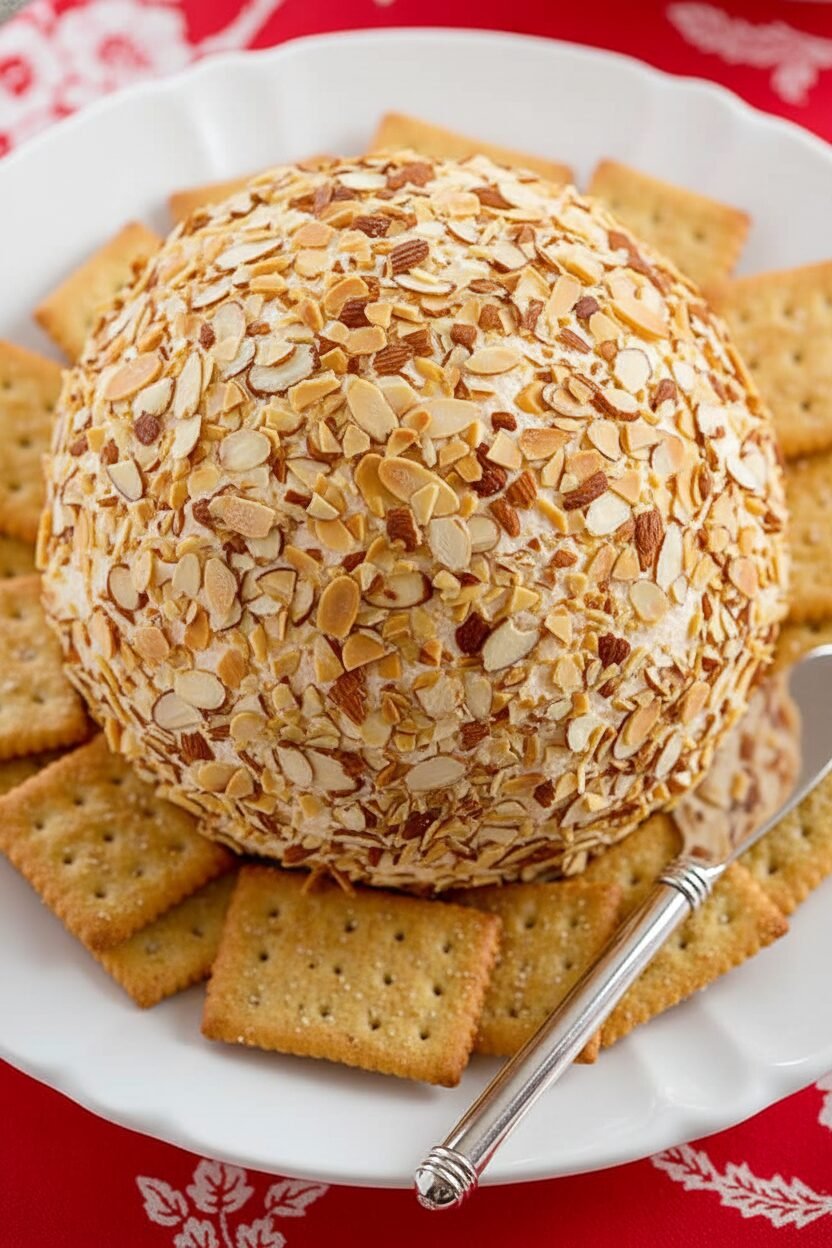
Step 3: Time to decorate! Unwrap your now-firm cheese ball. Roll it gently in the toasted almonds. Press lightly so they stick. Let it sit out for fifteen minutes before serving. This softens it just right for spreading. What’s your favorite cracker for a cheese ball? Share below!
Creative Twists
Herb Garden: Skip the almonds. Roll your ball in fresh, chopped parsley and dill.
Everything Bagel: Use everything bagel seasoning for a savory, crunchy coat.
Sweet & Savory: Add a handful of dried cranberries right into the cheese mix.
Which one would you try first? Comment below!
Serving & Pairing Ideas
Place your cheese ball on a pretty plate. Surround it with simple water crackers. Add some crisp apple slices and grapes too. The sweet fruit is a lovely contrast. For a drink, a dry cider pairs beautifully. For the little ones, sparkling apple juice feels so festive. Which would you choose tonight?
Keeping Your Cheese Ball Happy
This cheese ball loves the cold. Wrap it tightly in plastic after shaping. It will keep in the fridge for two days. You can also freeze it for one month. Thaw it overnight in your refrigerator.
I once made three balls for a big family party. It saved me so much time. Batch cooking like this is a gift to your future self. It means more time with guests, less time in the kitchen. That matters more than anything during the busy holidays.
To serve, let it sit out for 15 minutes first. This softens it just right for spreading. Never try to reheat it, just let it come to room temperature. Have you ever tried storing it this way? Share below!
Cheese Ball Troubles? Easy Fixes!
Is your mixture too soft? Do not worry. Just chill it longer. I remember when mine was like soup. An extra hour in the fridge fixed it perfectly. This matters because patience makes the best texture.
Are the nuts not sticking? Pat the cheese ball dry with a paper towel first. A damp surface will send nuts sliding everywhere. This simple step makes your creation look beautiful. A pretty dish builds your cooking confidence.
Is the flavor too mild? Add a pinch more cayenne or Worcestershire sauce. Taste as you go. Which of these problems have you run into before?
Your Quick Questions, Answered
Q: Is this gluten-free? A: Yes, all the listed ingredients are naturally gluten-free.
Q: Can I make it ahead? A: Absolutely! Make it up to two days before your party.
Q: No almonds? A: Use chopped pecans or walnuts instead. They are just as tasty.
Q: Can I make a smaller one? A: Yes, simply cut all the ingredients in half. It works perfectly.
Q: Any fun twists? A: Roll it in crispy bacon bits or dried cranberries. *Fun fact: The first cheese ball recipe was printed in a 1940s cookbook!* Which tip will you try first?
From My Kitchen to Yours
I hope this recipe brings joy to your table. It has been at mine for many years. Food is about sharing stories and making memories. I would love to see your creation.
Have you tried this recipe? Tag us on Pinterest! You can find me at @ElowensKitchen. I always look for your photos. Thank you for cooking with me today.
Happy cooking!
—Elowen Thorn.

The Great Festive Cheese Ball
Description
Holiday Cheddar Cheese Ball
Ingredients
Instructions
- Process all of the ingredients (except the nuts) in a food processor until smooth, scraping down the sides as necessary, about 1 minute. Transfer the cheese mixture to the center of a large sheet of plastic wrap.
- Holding the corners of the wrap in one hand, twist the cheese with your other hand to seal the wrap and shape the cheese into a rough ball (mixture will be somewhat loose). Refrigerate until firm, about 3 hours. (The cheese ball can be refrigerated for up to 2 days.)
- Once the cheese ball is firm, reshape it as necessary into a smooth sphere. Unwrap the cheese ball and roll it in nuts. Let it sit at room temperature for 15 minutes before serving.
Notes
- For a different coating, try using chopped pecans, walnuts, or fresh herbs. Serve with crackers, bread slices, or vegetable sticks.