

The Magic of No-Bake Treats
Some of the best things happen without turning on the oven. I learned this from my own grandma. She made the best summer desserts on the hottest days. Her kitchen stayed cool. I still laugh at that.
These little pies are her kind of magic. You mix, you chill, you eat. It’s that simple. This matters because cooking should be fun, not hard. It’s about joy, not heat. What’s your favorite no-bake treat? Tell me about it.
A Crumbly, Buttery Start
Let’s talk about the crust. It’s just crumbs, sugar, and melted butter. Press it into your pans with your fingers. Feel it come together. Doesn’t that smell amazing? Like a sweet, toasty cookie.
Pressing it in firmly is the secret. A good crust holds your filling like a hug. *Fun fact*: Graham crackers were first made to stop naughty thoughts! I think they just make happy thoughts about pie.
The Zingy Heart of the Pie
Now for the filling. Sweet milk meets tart lime juice. They are opposites. But they become best friends. Whisk them and watch the magic. The mixture gets thick and sunny yellow.
That tart zing is important. It wakes up the sweet. It makes your mouth happy. Life needs a little zing, don’t you think? Do you prefer your desserts tart or very sweet?
The Cloud on Top
Whipped cream is a fluffy cloud. Beat the cream until it forms soft peaks. It’s like a pillow for your pie. Be patient. It will happen. The reward is so light and dreamy.
This topping matters. It adds a cool, gentle finish. It balances the zing below. A good meal, or pie, should have different feels. It makes each bite interesting.
Your Turn to Make Memories
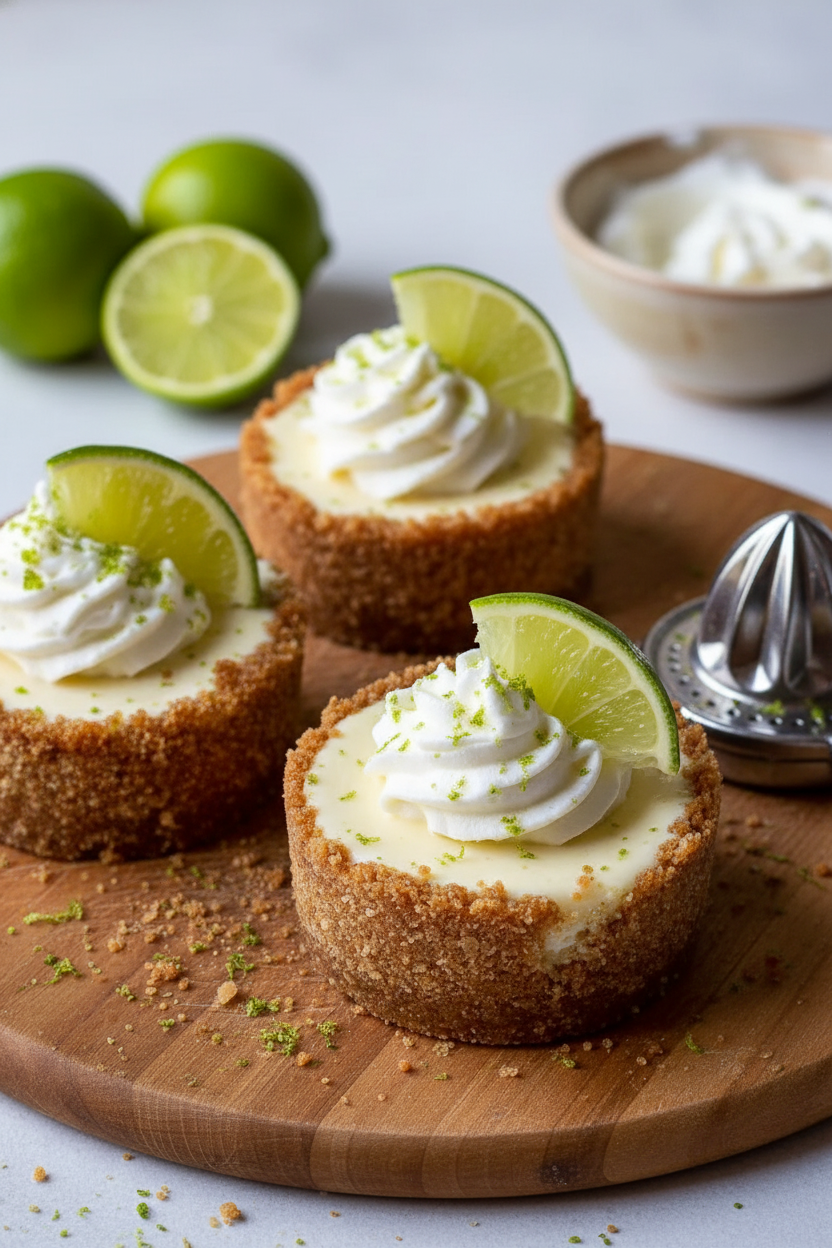
Now you put it all together. A dollop of cream, a sprinkle of zest. It looks so pretty. These mini pies are perfect for sharing. Or not sharing! That’s okay too.
The real recipe is the time you spend. Making something with your hands is a gift. Who will you make these for first? I’d love to hear your stories.
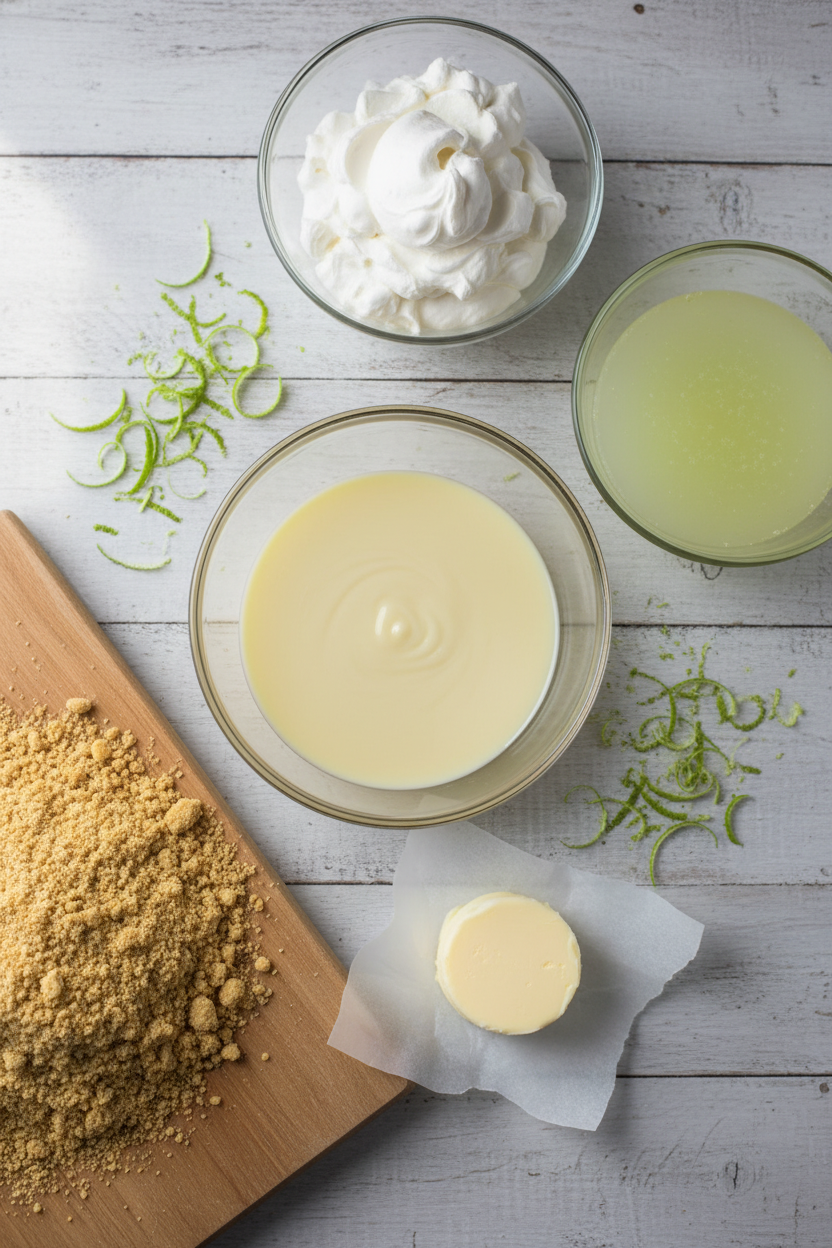
Ingredients:
| Ingredient | Amount | Notes |
|---|---|---|
| Graham cracker crumbs | 1 1/2 cups | For the crust |
| Granulated sugar | 1/3 cup | For the crust |
| Unsalted butter, melted | 6 tablespoons | For the crust |
| Sweetened condensed milk | 1 can (14 ounces) | For the filling |
| Key lime juice | 1/2 cup | Freshly squeezed, for the filling |
| Lime zest | 1 teaspoon | For the filling |
| Heavy cream | 1 cup | For the whipped cream topping |
| Powdered sugar | 2 tablespoons | For the whipped cream topping |
| Lime zest | For garnish | For garnish |
Instructions
Step 1: Let’s make the crust. Mix crumbs, sugar, and melted butter in a bowl. Stir until it looks like wet sand. Press it firmly into your little pans. (Tip: Use a small glass to press it flat.)
Step 2: Now, pop those crusts in the fridge. They need to get firm and cold. This takes about fifteen minutes. I always use this time to squeeze my limes. Doesn’t that smell amazing?
Step 3: Time for the magic filling. Whisk the condensed milk, lime juice, and zest together. It will thicken up right before your eyes. Pour it into your chilled crusts. What’s your favorite no-bake dessert? Share below!
Step 4: Patience is key now. Let the pies chill for two hours. They need to set perfectly. Meanwhile, make the whipped cream. Beat the heavy cream and sugar until it’s fluffy. (A cold bowl helps it whip faster!)
Step 5: The best part is decorating. Add a fluffy cloud of cream to each pie. Finish with a tiny sprinkle of green lime zest. I still laugh at how my grandson always licks the spoon first. They’re ready to enjoy!
Creative Twists
Swap the crust for crushed vanilla wafers. Add a few fresh blueberries into the filling. Freeze them for a tangy, frozen treat. Which one would you try first? Comment below!Serving & Pairing Ideas
Serve these on a pretty plate. A few fresh raspberries on the side look lovely. For a fun party, line them up on a cake stand. They also pair wonderfully with a glass of cold lemonade. Which would you choose tonight?
Keeping Your Little Pies Perfect
Let’s talk about keeping your pies fresh. Fridge storage is best for two days. Cover them with plastic wrap. This stops other food smells from sneaking in.
You can freeze them for a month too. Just skip the whipped cream topping first. Add it fresh when you serve. I once froze a whole pie for my grandson’s visit. His smile was worth the wait.
Batch cooking these crusts saves so much time. Make a big batch of crumbs. Press them into many pans at once. This matters because it makes a special treat easy any day. Have you ever tried storing it this way? Share below!
Little Kitchen Hiccups and How to Fix Them
First, a soggy crust is no fun. Your butter must be melted, not soft. I remember when I used soft butter. The crust just fell apart. Press the mixture very firmly into the pan.
Second, the filling might not thicken. Your lime juice must be fresh. Bottled juice sometimes does not work as well. This matters because fresh juice gives you that perfect, creamy set.
Third, whipped cream can go flat. Make sure your bowl and cream are very cold. This matters for confidence. A fluffy topping makes your pie look like a pro made it. Which of these problems have you run into before?
Your Quick Questions, Answered
What is the easiest way to make key lime pie filling?
The easiest way is with three ingredients. Use one can of sweetened condensed milk. Add half a cup of key lime juice. Finish with a teaspoon of lime zest. Just whisk them together in a bowl. No cooking is needed. The mixture will thicken beautifully on its own in the fridge.
Can I use regular limes instead of key limes?
Yes, you can use regular limes. They are called Persian limes. You will need the same amount of juice. The flavor will be slightly different but still delicious. Key limes are a bit more tart and aromatic. Your pie will be wonderful with either kind.
What can I use if I don’t have a muffin tin for mini pies?
You can use a few things. Small glass jars or ramekins work perfectly. You can also use a regular pie dish. Just press the crust into the bottom. You will make one big pie instead. *Fun fact: The first key lime pie was likely made in a regular dish!
How do you keep no-bake pies from getting soggy?
Chilling the crust first is the secret. After you press it in, put the pan in the fridge. Let it get firm for fifteen minutes. This creates a barrier before you add the wet filling. It keeps your crust crisp and delightful with every single bite.
Can I make these mini pies ahead of time?
You absolutely can make them ahead. They are perfect for planning. Assemble the pies with the filling up to two days early. Keep them covered in your refrigerator. Only add the whipped cream topping right before you are ready to serve. This keeps everything fresh and pretty.
How long do no-bake mini key lime pies need to set in the fridge?
They need at least two hours to set properly. This gives the filling time to firm up. I like to leave them for three or four hours if I can. For the very best texture, you can even let them chill overnight. Patience makes a perfect pie. Which tip will you try first?
From My Kitchen to Yours
I hope you love making these little bites of sunshine. They always remind me of summer afternoons. Cooking is about sharing joy and making memories.
I would love to hear about your baking adventure. Did your family enjoy them? What little twist did you add? Tell me all about it in the comments. Have you tried this recipe?
Thank you for spending time with me in my kitchen today. Happy cooking!
—Elena Rutherford
