

The Day I Learned to Stop Worrying and Love the Boil
I remember my first batch of apricot jam. I was so nervous I could barely hold the ladle. I kept peeking into the pot, sure I had ruined it. The house filled with the sweetest, sunniest smell you could imagine. Doesn’t that smell amazing? It made me feel like summer had moved right into my kitchen.
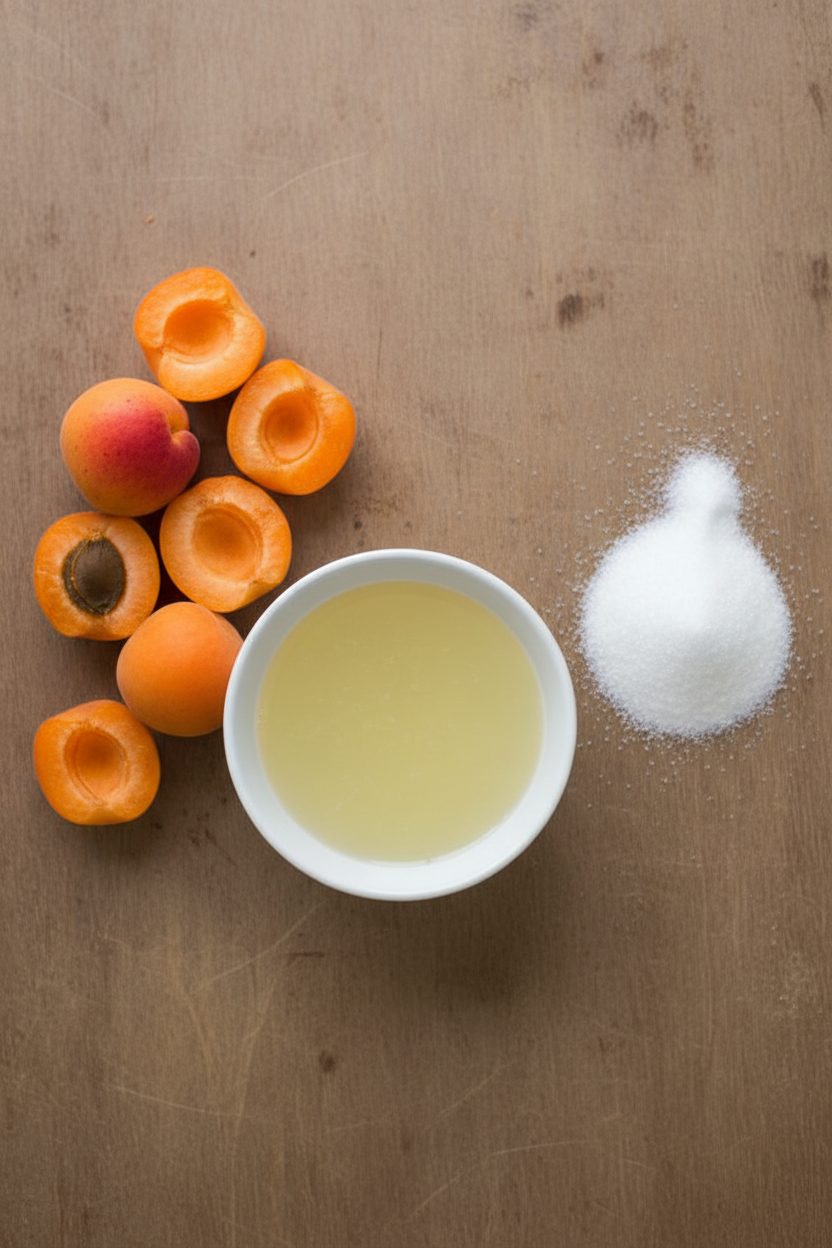
That first batch turned out perfect anyway. I still laugh at how scared I was of a simple pot of fruit. The recipe is just three things: apricots, lemon juice, and sugar. That’s it. No magic tricks or fancy tools. Just plain, honest ingredients doing their thing.
Why Your Apricots Need a Little Help
Have you ever eaten an apricot that was a little too soft? That’s the kind you want for jam. Firm fruit is nice for eating out of hand, but soft, ripe apricots break down faster and give you more flavor. This is why we add lemon juice too. It helps the jam set and keeps the color bright.
The sugar isn’t just for sweetness. It works with the fruit to create that thick, spreadable texture we all love. If you skip it, you’ll end up with thin, runny apricot soup. And nobody wants soup on their toast, right? What is your favorite thing to spread jam on besides toast?
A Little History in a Jar
People have been making fruit jam for hundreds of years. Before refrigerators, this was the smartest way to keep summer fruit for winter. My own grandma would put up dozens of jars every August. She said it was like capturing a sunbeam in glass. I think she was right.
That tradition matters because it connects us to our past. When you make this jam, you are doing something people have done for generations. It’s a small act of love that outlasts any fancy store-bought spread. And once you taste it, you will never go back.
The Magic of the Rolling Boil
Here is where most folks get nervous. The recipe says to boil the mixture for 30 minutes. You have to let it come to a full, rolling boil that you cannot stir down. That means bubbles covering the whole surface, like a hot, happy volcano. Stir it often so the bottom doesn’t burn.
Why does this matter? That long boil is what evaporates the extra water. It concentrates the apricot flavor and makes the jam thick enough to spread. If you stop too early, your jam will be runny. Stick with it, and you will be rewarded with the best jam of your life. Have you ever burned a pot of jam? I sure have, more than once.
Jars, Lids, and the Big Water Bath
Washing the jars in hot soapy water is not just for show. It removes any dust or leftover food that could spoil your jam. The boiling water bath at the end seals the jars tight. That seal keeps air out and your jam good for a whole year. *Fun fact: that popping sound you hear as jars cool is a tiny vacuum forming inside. It means you did it right.*
When you lift the jars out of the canner, set them on a towel and do not touch them for 12 hours. I know it is hard to wait. But moving them while they’re hot can break the seal. Let them sit and cool completely. Then check every lid with your finger. If the center does not spring back, you can pat yourself on the back.
What to Do with All That Jam
Once you have eight or ten jars of this stuff, you’ll start looking for excuses to use it. It is wonderful on buttered biscuits, stirred into yogurt, or spooned over vanilla ice cream. I even use a little in salad dressings sometimes. The sweet-tart flavor goes with almost anything.
This jam also makes a great gift. Tie a ribbon around a jar and hand it to a neighbor. They will think you are some kind of kitchen wizard. And honestly, you will be. Making your own jam is a big deal, and you should be proud. How many jars do you think you’ll give away this year?
The Quiet Joy of a Full Pantry
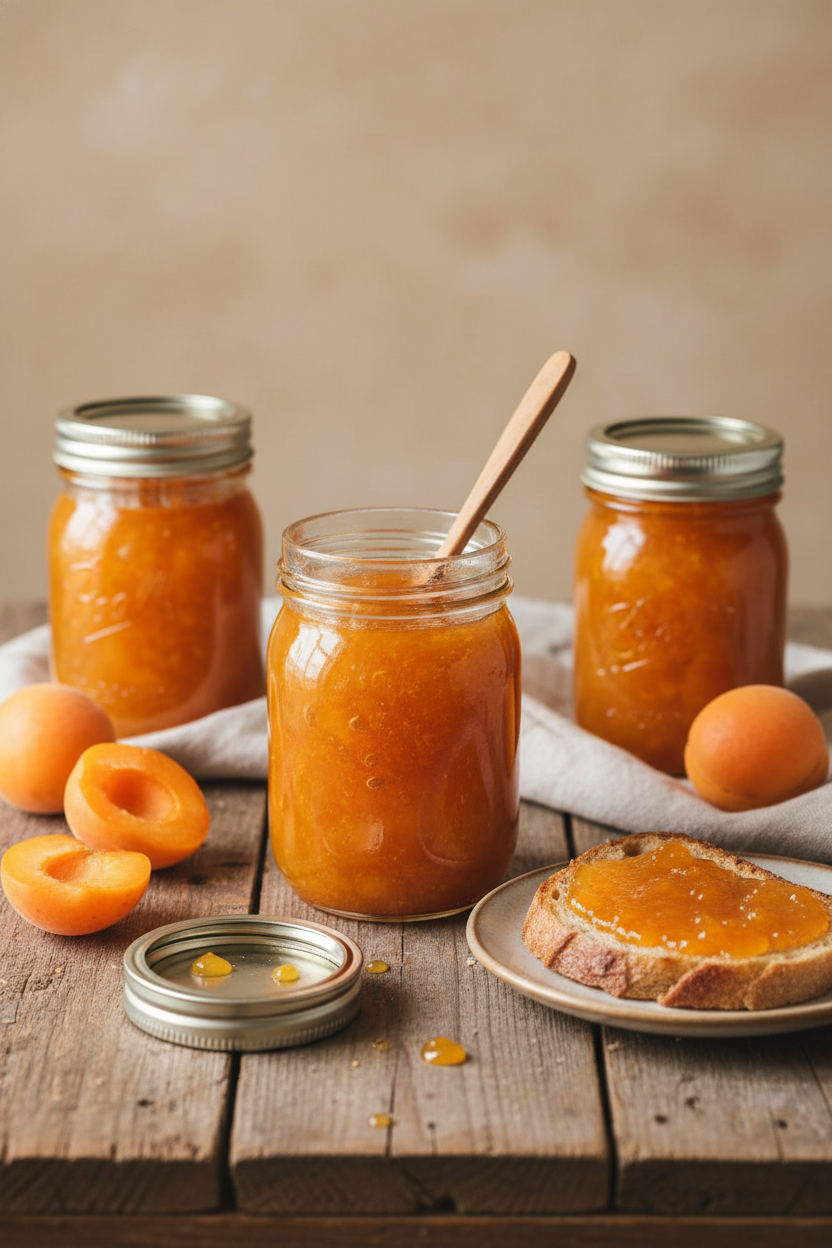
There is something deeply satisfying about seeing those jars lined up on a shelf. They look like little gold ingots of summertime. Every time you open one in January, you get a tiny burst of sunshine. That feeling never gets old, no matter how many times you do it.
This matters because making food with your own hands changes how you see the world. You start to notice the seasons more. You appreciate the work that goes into every bite. It is a small, sweet rebellion against the chaos of modern life. And it all starts with three simple ingredients and a little patience. What season of fruit do you look forward to the most every year?
Ingredients:
| Ingredient | Amount | Notes |
|---|---|---|
| Diced apricots | 8 cups | Fresh or frozen, peeled if desired |
| Lemon juice | 1/4 cup | Freshly squeezed preferred |
| Sugar | 6 cups | Granulated white sugar |
Instructions
Step 1: Wash your jars and screw bands in hot, soapy water. Rinse them well with warm water. Pour boiling water over the flat lids in a bowl. Let them sit until you are ready to use them.
Step 2: Combine 8 cups of diced apricots, 1/4 cup lemon juice, and 6 cups of sugar in a big pot. Stir it all together. I still remember the first time I made this with my grandmother. The smell in her kitchen was pure sunshine.
Step 3: Bring the pot to a boil over medium-high heat. Stir it gently as the sugar dissolves. (Here is a hard-learned tip: do not walk away. Burnt sugar is a sad thing.) Let it come to a full rolling boil that you cannot stir down.
Step 4: Let the jam gently boil for 30 minutes, stirring often. Ladle it quickly into the prepared jars, leaving 1/4 inch of space at the top. Wipe the jar rims clean with a damp towel. Put the lids and bands on tight. Does your kitchen smell as wonderful as mine right now? Share below!
Step 5: Place the jars on a rack in your canner. Lower the rack in, cover, and bring the water to a gentle boil. Process for 10 minutes. Then lift them out and set them on a towel to cool. Wait until they are completely cool before checking the seals.
Creative Twists
… Stir in a pinch of cinnamon and a splash of vanilla extract just before ladling.
… Replace half the sugar with honey for a deeper, flower-like sweetness.
… Add a handful of chopped fresh ginger for a tiny, warm kick.
Which one would you try first? Comment below!
Serving & Pairing Ideas
Spoon this jam over a block of soft cream cheese and serve with buttery crackers. It makes a lovely little appetizer for company. You can also swirl a spoonful into yogurt or oatmeal for a sweet start. My grandson loves it on a warm, buttered biscuit. Which would you choose tonight?
Storing Your Homemade Apricot Jam
This apricot jam is a treasure. You worked hard to make it, so let’s keep it safe. Once your jars are sealed, store them in a cool, dark cupboard.
I remember my first batch of jam. I was so proud, but I left a jar in the sunny window. Within a week, the color faded and the flavor turned flat. Now I know better.
Why storing matters: Proper storage keeps your jam bright and tasty for up to a year. If a jar doesn’t seal, just pop it in the fridge and use it within three weeks. You can even freeze jam in freezer-safe containers for up to six months. Batch cooking saves time and money, so you can enjoy summer flavor all winter. Have you ever tried storing it this way? Share below!
Three Common Jam Problems and Easy Fixes
Sometimes jam doesn’t turn out perfect. That is okay. Here are three common issues and how to fix them.
Problem one: Runny jam. I once made a batch that was like syrup. The fix is simple—cook it a little longer. Boil for five extra minutes and it will thicken right up.
Problem two: Hard, sugary crystals. I remember my grandmother’s jam looked like sand. She told me to stir gently and only until the sugar dissolves. Over-stirring causes crystals. Problem three: Burnt bottom. Always stir frequently, especially near the end. A wooden spoon works best.
Why fixing these matters: Getting the texture right makes your jam perfect for toast or spooning over ice cream. Learning these tips builds your cooking confidence, so you can experiment with new recipes. Which of these problems have you run into before?
Your Quick Questions, Answered
How long does homemade apricot jam last?
Sealed properly, homemade apricot jam lasts up to one year in a cool, dark cupboard. The key is a good seal. Press the center of each lid after cooling. If it doesn’t pop back, it’s sealed. Once opened, store it in the fridge and use within three weeks. Always check for mold or off smells before eating. If stored in the freezer, it can last six to eight months. This gives you plenty of time to enjoy your summer apricots all year long.
Can I use frozen apricots for jam?
Yes, you can use frozen apricots for jam. Thaw them completely first, then drain off any extra liquid. Frozen fruit often releases more water, so you may need to cook the jam a little longer to thicken it. I like using frozen apricots in winter when fresh ones are not in season. The flavor is still wonderful. Just chop them while still slightly frozen for easier handling. The lemon juice and sugar work the same way.
Do I need to peel apricots for jam?
No, you do not need to peel apricots for jam. The skins are thin and tender. They break down as the jam cooks. Leaving the skins on adds a nice texture and extra color. My grandmother always left the skins on. She said it gave the jam a rustic, homemade look. If you prefer a smoother jam, you can peel them, but it takes extra work. For the best flavor, just wash the apricots well and chop them up.
What is the best ratio of sugar to apricots for jam?
For this recipe, the best ratio is about three parts apricot to two parts sugar by volume. That means for every three cups of diced apricots, use two cups of sugar. This ratio gives a sweet, bright jam without being too sugary. Using less sugar may make the jam runny or spoil faster. Cooking the apricots down helps concentrate the flavor. This balance is what makes a jam that sets perfectly and tastes like summer.
How do I thicken apricot jam?
To thicken apricot jam, cook it longer. Bring it to a full rolling boil and let it go for 30 minutes, stirring often. The water evaporates and the fruit’s natural pectin helps it set. You can also add a tablespoon of lemon juice for extra pectin. If it is still runny, boil five more minutes. I do the frozen plate test: put a spoonful on a cold plate. If it wrinkles when pushed, it is ready. Patience is key.
Can I reduce the sugar in apricot jam without affecting preservation?
You can reduce sugar, but it changes how the jam keeps. Sugar is a natural preservative. It stops mold and bacteria from growing. If you cut the sugar too much, the jam may spoil faster. It could also turn out runny because sugar helps the jam set. For a safe, long-lasting jam, follow the recipe. If you want less sugar, make smaller batches and store them in the fridge. A fun fact: sugar also helps the apricots keep their bright color.
Which tip will you try first?
A Warm Send-Off from Elowen Thorn
I hope you feel ready to make this apricot jam. It is one of my favorite ways to save summer in a jar. Have you tried this recipe? I would love to hear how it turned out for you. Drop a comment below and tell me your story. Maybe you added a hint of vanilla or a pinch of cinnamon. Every batch is a little different, and that is the joy of homemade. Happy cooking!
—Grace Ellington.

Homemade Apricot Jam Recipe from My Kitchen
Description
Bring a boiling-water canner, 3/4 full with water, to simmer. Wash jars and screw bands in hot soapy water; rinse with warm water. Pour boiling water over flat lids in saucepan off the heat. Let stand in hot water until ready to use. Drain well before filling. Combine all 3 ingredients in a large pot. Bring to a boil over medium high heat, stirring occasionally as sugar dissolves. Allow mixture to come to a full rolling boil. Gently boil for 30 minutes, stirring frequently. Ladle immediately into prepared jars, filling to within 1/4 inch of tops. Wipe jar rims and threads. Cover with two-piece lids. Screw bands on. Place jars on elevated rack in a canner. Lower rack into canner. Cover; bring water to gentle boil. Process 10 min. Remove jars and place upright on towel to cool completely. After the jars have cooled, check the seals by pressing middles of lids with finger. If lids spring back, lids are not sealed and refrigeration is necessary. Yields 5 pints or 10 1/2 pints.
Ingredients
Instructions
- Bring a boiling-water canner, 3/4 full with water, to simmer. Wash jars and screw bands in hot soapy water; rinse with warm water. Pour boiling water over flat lids in saucepan off the heat. Let stand in hot water until ready to use. Drain well before filling.
- Combine all 3 ingredients in a large pot. Bring to a boil over medium high heat, stirring occasionally as sugar dissolves. Allow mixture to come to a full rolling boil. Gently boil for 30 minutes, stirring frequently.
- Ladle immediately into prepared jars, filling to within 1/4 inch of tops. Wipe jar rims and threads. Cover with two-piece lids. Screw bands on. Place jars on elevated rack in a canner. Lower rack into canner. Cover; bring water to gentle boil. Process 10 min. Remove jars and place upright on towel to cool completely.
- After the jars have cooled, check the seals by pressing middles of lids with finger. If lids spring back, lids are not sealed and refrigeration is necessary. Yields 5 pints or 10 1/2 pints.
Notes
- Store sealed jars in a cool, dark place for up to 1 year. Refrigerate after opening.