

The Sweetest Little Secret in My Pantry
I have a jar of dried apricot jam in my cupboard right now. It makes me smile every time I see it. That golden color looks like a jar full of sunshine. Doesn’t that smell amazing just thinking about it?
This jam is special because it starts with dried fruit. Most people use fresh apricots, but dried ones give you a stronger, sweeter taste. Why does that matter? Well, you can make this jam any time of year, not just in summer. That is the first reason this recipe is a keeper.
Have you ever tried making jam with dried fruit before? I would love to hear your stories in the comments.
My Kitchen Disaster That Taught Me Everything
I still laugh at the first time I tried to make jam. I was a brand new cook, maybe twenty years old. I forgot to stir the pot and the sugar burned on the bottom. The whole house smelled like a campfire gone wrong.
My grandmother walked in and just shook her head. She handed me a spoon and said, “Stir with love, not with worry.” That was fifty years ago, and I still hear her voice when I cook. This dried apricot jam is her recipe, and I have never burned it since.
Here is a little question for you: what is the funniest thing that ever happened to you in the kitchen? Share it with us.
Why Simple Ingredients Make the Best Jam
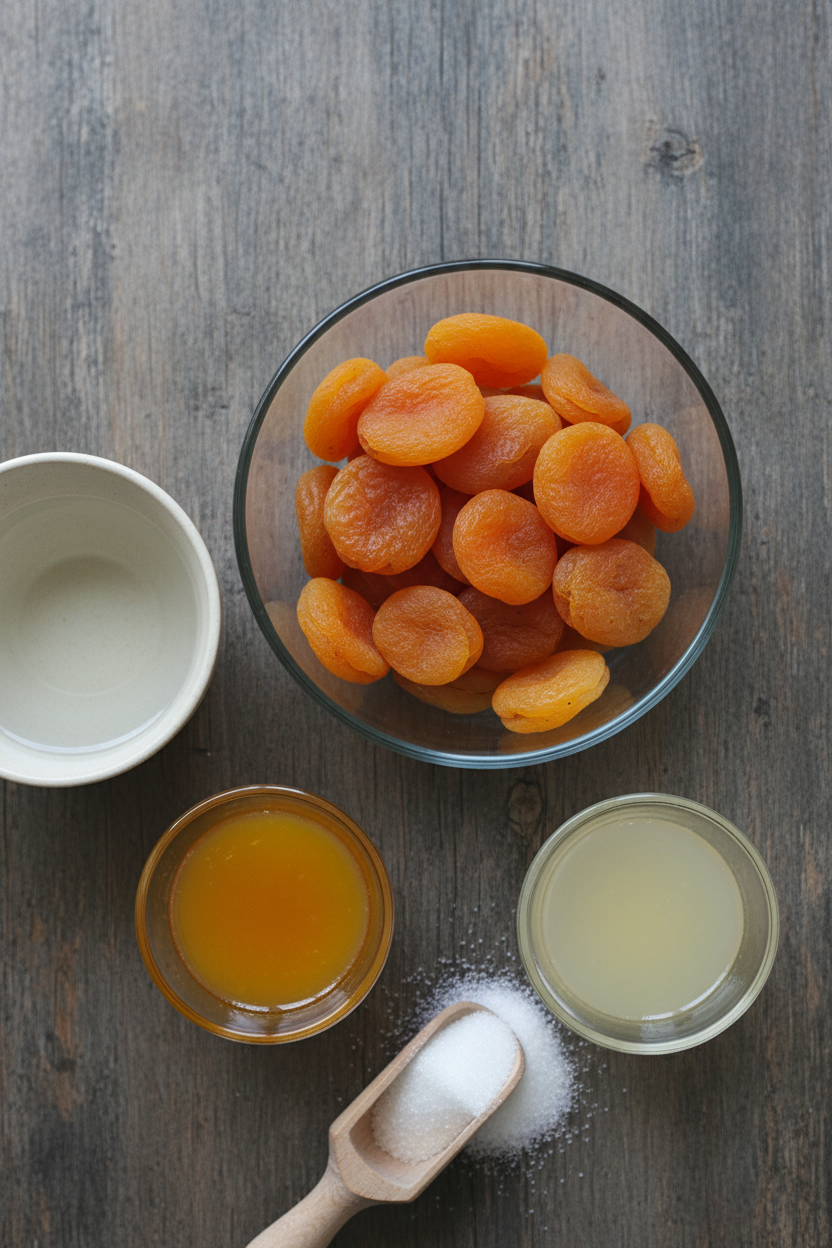
Look at this short list: dried apricots, water, orange juice, lemon juice, and sugar. That is all you need. Five simple things from your pantry. No weird chemicals or hard-to-find spices.
The orange juice is the secret star here. It wakes up the apricot flavor and makes it taste bright and fresh. The lemon juice keeps the color pretty and helps the jam set right. Why does this matter? Because you do not need fancy tricks to make something wonderful. Just good fruit and a little patience.
Fun fact: Apricots are relatives of roses. That is right, your jam comes from the same family as a flower. Sweet, huh?
The Part Nobody Tells You About Canning
Washing jars and boiling lids sounds boring. I know. But I promise, this is the part where you become a real jam maker. When you hear that “pop” sound as the jars seal, it is better than fireworks.
You need to keep your jars hot in the oven and your lids in hot water. That step is not just fussy cooking. It makes sure no bad germs get in your jam. That is the second reason this matters: safe jam means happy eating all year long.
Do you remember the first time you heard a jar “pop” and seal? Tell me about it. I love that sound.
How to Know When Your Jam Is Done
You boil everything together, then you pulse it in the food processor. That part is fast and easy. Then you boil it again with the sugar for one full minute. Just one minute. Set a timer so you do not guess.
After that, you fill your jars and boil them in the water bath for twenty minutes. Do not rush this step. The boiling water locks in the flavor and keeps the jam fresh for up to a whole year. I have jars from last fall that taste just as good as the day I made them.
Here is a poll for you: do you like your jam smooth or with little chunks of fruit? I am a chunky jam person myself.
A Quiet Moment of Waiting
Once the jars come out of the water, you set them on a towel and leave them alone for at least twelve hours. No shaking, no checking, no peeking. That is the hardest part of making jam.
I like to set my jars on the counter and watch the light shine through them. They look like little stained glass windows. The waiting teaches you something. Good things take time, and you cannot rush sweetness.
What is your favorite thing to put jam on? Toast, biscuits, or maybe a spoon right out of the jar? No judgment here.
Saving a Little Sunshine for Winter
When you open a jar of this jam in January, you will taste summer again. That is the real magic of canning. You capture a moment and save it for later. The bright apricot flavor reminds you of warm days.
This jam also makes a wonderful gift. Put a pretty label on it and tie a ribbon around the lid. People feel loved when you give them something you made with your own hands. I gave a jar to my mailman last year, and he said it was the best present he got all season.
One last question before you go: who would you give a jar of homemade jam to? I bet you already know the answer.
Ingredients:
| Ingredient | Amount | Notes |
|---|---|---|
| Dried apricots | 3 1/2 cups | |
| Water | 1 1/2 cups | |
| Orange juice | 1 cup | |
| Lemon juice | 1 tablespoon | |
| Sugar | 2 cups |
Dried Apricot Jam
Step 1: Wash your mason jars and lids in hot soapy water. Rinse well and place jars on a baking sheet. Pop them in a 200-degree oven to keep warm. (I learned the hard way: cold jars can crack when you add hot jam.)
Step 2: Add the dried apricots, water, orange juice, and lemon juice to a big saucepan. Stir it all together and bring it to a boil over medium heat. Cover the pot and let it boil for 20 minutes. Doesn’t that smell amazing already?
Step 3: Pour the cooked mixture into a food processor and pulse until it’s as smooth or chunky as you like. I like a few little bits left in mine for texture. Pour it back into the saucepan and stir in the sugar.
Step 4: Bring the jam to a full rolling boil over high heat, stirring all the time. Let it boil for exactly one minute, then take it off the heat. What is your favorite fruit to turn into jam? Share below! (Here’s a tip: use a non-metallic bubble remover to get air bubbles out of the jars.)
Step 5: Ladle the hot jam into the warm jars using a funnel. Wipe the rims clean with a damp paper towel. Place the sealing discs on the jars and screw on the bands just until firm using your fingertips.
Step 6: Use jar tongs to lower the jars into a boiling water bath canner. Boil for 20 minutes, then lift them out carefully. Let them cool on a towel-covered rack for at least 12 hours.
Creative Twists
Add a pinch of cinnamon or cardamom for warmth. Stir in a handful of chopped almonds before canning. Swap the orange juice for apple cider for a fall flavor. Which one would you try first? Comment below!
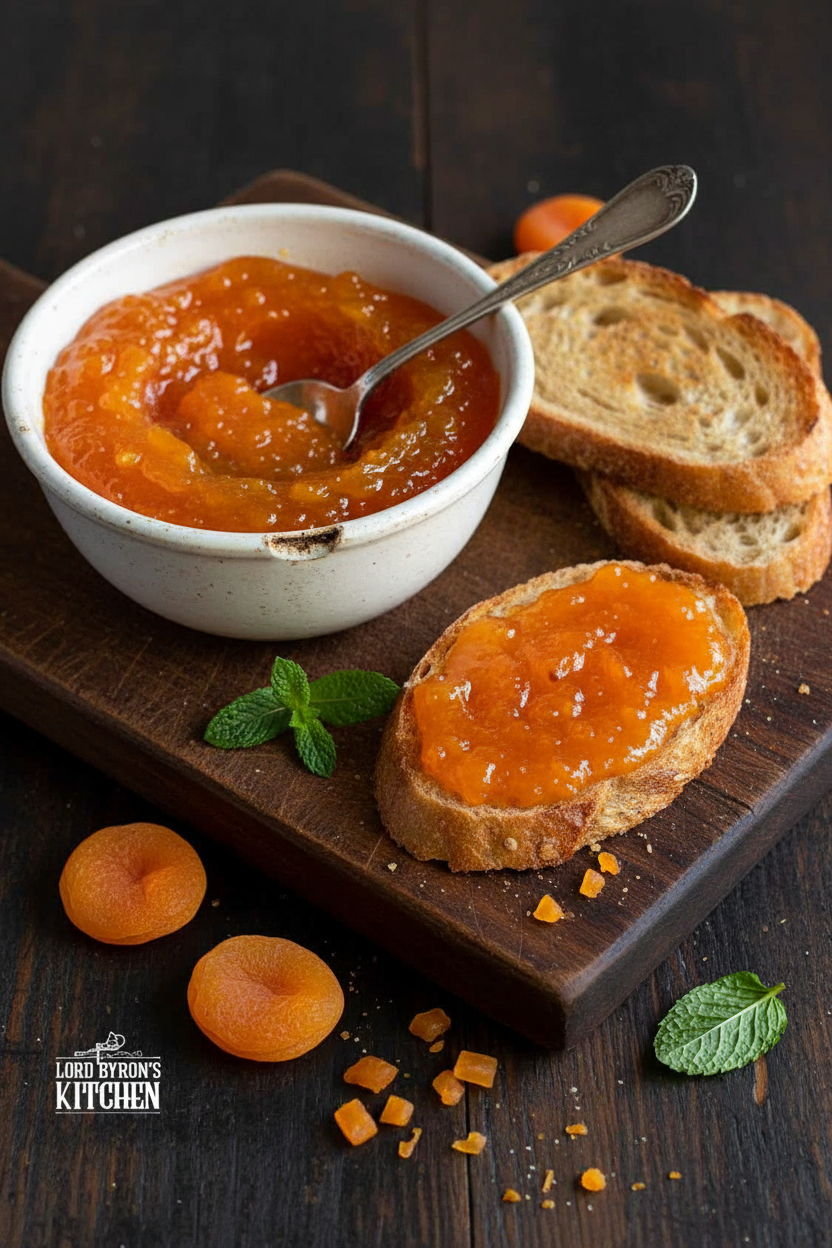
Serving & Pairing Ideas
Spread this golden jam on warm buttermilk biscuits for breakfast. Swirl a spoonful into plain yogurt for a quick treat. Use it as a glaze for baked chicken or pork chops. Which would you choose tonight?
My Favorite Way to Store Apricot Jam
I remember the first batch of apricot jam I ever made. I was so proud, but I stored the jars wrong. They went bad in just a few weeks. Now I know better.
Always let your jars cool completely. That takes about twelve hours on the counter. Then wipe them clean and store them in a dark, cool cabinet. A pantry works great.
For the freezer, this jam does well. Just leave an inch of space at the top of the jar. The jam expands as it freezes. To reheat, just scoop some into a bowl and warm it gently on the stove or in the microwave.
Batch cooking matters because it saves time. When you make a big batch, you have jam ready for months. It is a little gift to your future self. Have you ever tried storing it this way? Share below!
Three Common Jam Problems and Easy Fixes
I once made a batch that came out too runny. I was so disappointed. The fix was simple: I just boiled it a little longer the next time.
Problem one is runny jam. This happens when you do not boil it long enough. Just cook it on high heat for a few more minutes. Stir constantly.
Problem two is fruit that floats to the top. I remember my grandma telling me to stir the jam gently after it sits for five minutes. That helps the fruit stay mixed in.
Problem three is sugar crystals forming. This happens when you stir too much while it boils. Just let it boil without stirring once the sugar is dissolved.
Why does this matter? Fixing these problems makes your jam taste perfect. It also gives you confidence in the kitchen. You learn to trust your eyes and nose. Which of these problems have you run into before?
Your Quick Questions, Answered
How long does homemade apricot jam last?
When you use the water bath canner method, your jam lasts up to one year in a dark, cool cabinet. This seal keeps the jam safe from spoilage. I always label my jars with the date. That way, I know which batch to use first. If a seal breaks, keep the jar in the fridge and use it within three weeks.
Can I use frozen apricots for jam?
Yes, you can use frozen apricots. Thaw them completely before cooking. Drain off any extra water, or your jam will be too runny. I often freeze fresh apricots when they are in season. Then I make jam in the winter. The taste is still bright and sunny, just like summer.
How do you thicken apricot jam?
If your jam is runny, just boil it longer. Cook it on high heat for two to three extra minutes. Stir it the whole time so it does not burn. You can also add a tablespoon of lemon juice. The acid helps the jam set. Dried apricots already have less water, so this recipe often thickens easily.
What is the best apricot variety for jam making?
For this recipe, any dried apricot works well. But if you use fresh apricots, choose Blenheim or Royal varieties. They have a deep, sweet flavor. Riper apricots make the best jam. They are softer and more fragrant. If the fruit is underripe, your jam may be tart and firm.
Do you need to peel apricots for jam?
No, you do not need to peel apricots for this recipe. The skins soften during cooking. Then you pulse everything in a food processor. That breaks the skins into tiny pieces. You will not even notice them. Plus, the skins add natural pectin, which helps thicken the jam.
Why did my apricot jam turn brown?
Browning usually means the jam cooked too long or at too high a heat. The natural sugars caramelize, which turns the color dark. It is still safe to eat, but it tastes different. Next time, watch the boiling time closely. Also, stir constantly once you add the sugar. That keeps the heat even.
Which tip will you try first?
My Warm Send-Off to You
I hope you feel ready to make this jam. It is such a cozy thing to do on a quiet afternoon. The smell fills your kitchen like a hug. I would love to hear how your batch turns out. Have you tried this recipe? Tell me about it in the comments below. Happy cooking!
—Grace Ellington.

My Homemade Apricot Jam Recipe With Expert Tips
Description
Expert tips and full instructions for making homemade apricot jam with dried apricots, orange juice, and lemon juice.
Ingredients
Instructions
- Wash mason jars and screw lids in soapy water and rinse soap off well under running hot water. Place clean jars on a baking sheet and place in oven preheated to 200 degrees. Set screw bands aside. Next, boil a kettle of water and pour into a clean glass bowl. Carefully submerge the sealing discs in the bowl of hot water. Set aside.
- Add the apricots, water, orange juice, and lemon juice to a large saucepan. Stir and bring to a boil of medium heat. Once the mixture begins to boil, cover and continue to boil for 20 minutes. In the meantime, fill your water bath canner to the halfway mark with water and add the jar rack. Bring to a full boil.
- Transfer the entire contents of the saucepan to a food processor and pulse until the mixture is broken down to a consistency you prefer. Pour the mixture back into the saucepan, add the sugar, and over high heat, bring the mixture to a full boil while stirring constantly. Once the mixture has been at a full bubbling boil for 1 minute, remove from heat.
- Ladle the jam into prepared mason jars using a funnel to prevent the sauce from touching the rim of the jars. Use the non-metallic bubble remover to remove any air bubbles. Wipe down the rim of each jar with a damp paper towel to ensure no sauce has come in contact with the rim. Carefully remove the sealing discs from the hot water with a magnetic lid lifter. Position the sealing disc directly onto the lid of the jars. Do not touch the underside of the lid. Screw on the screw bands until firm – do not apply pressure! Just use your fingertips to tighten the screw bands.
- Using the jar lifter, place the jars into the water bath canner with the boiling water. Do not place the lid on the canner. Boil for 20 minutes. Carefully remove each jar from the canner using the jar lifter. Try not to tilt the jars. Place jars onto a wire cooling rack that has been covered with a clean kitchen towel. Leave the jars to cool for a minimum of 12 hours. Once cooled, wipe the jars of any residue that might have been transferred to the outside of the jar during the boiling process. Label the jars and store in a dark, cool cabinet for up to one year.
Notes
- Store in a dark, cool cabinet for up to one year.