

A Pickle Story from My Kitchen
Let me tell you about the first time I made pickles. I was maybe your age, standing on a stool. My grandmother handed me a jar and said, “Don’t spill the brine.” I still laugh at that. I spilled it all over the counter. But the pickles? They were perfect. Doesn’t that smell amazing when you open the jar? That vinegary, dill-y smell is like summer in a jar.
This recipe is called Refrigerator Dill Pickles because you don’t need a hot water bath or any fancy canning gear. You just mix, wait, and eat. That is what I love most. It is simple food that makes you feel clever. Have you ever made something that felt like magic when it worked?
Why These Pickles Matter
These pickles teach us something important. When you make food yourself, you know exactly what is inside. No weird chemicals or long lists of things you can’t pronounce. Just cucumbers, salt, vinegar, and spices. That is a good feeling.
Another reason this matters is patience. You have to wait 24 hours before eating them. That is a whole day! But waiting makes the reward sweeter. Or in this case, more sour and crunchy. My grandson once said, “Grandma, these are better than store-bought.” I think he was right. What do you think makes homemade food taste better?
The Secret to Crunchy Pickles
Here is a little trick I learned. The recipe calls for bay leaves or grape leaves. Those leaves have something in them that keeps pickles crunchy. Without them, your pickles might get a little soft. Nobody likes a floppy pickle, right?
I also slice off the blossom end of the cucumber. That little tip has enzymes that can make pickles mushy. So off it goes. My daughter always forgets this step. Then she wonders why her pickles are sad. I just smile and hand her a fresh batch. Do you have a kitchen tip that your family passes down?
A Fun Fact About Dill
Did you know that the word “dill” comes from an old Norse word meaning “to soothe”? People used dill to calm upset stomachs. That is why pickles feel so good to eat when you are hot or tired. They are like a tiny nap in a jar.
*Fun fact: Dill pickles were a favorite snack of Cleopatra. She thought they made her skin glow and her hair shiny. I don’t know if that is true, but I do know they make my kitchen smell wonderful. A little bit of history in every bite.
How to Make Them Your Own
This recipe is a starting place. You can change it however you like. Add a slice of hot pepper if you want spicy pickles. Throw in some garlic cloves for extra flavor. My neighbor adds a pinch of sugar, and her pickles are a little sweet and sour. They disappear fast at potlucks.
I always say, cooking is like painting. You get to choose the colors. So if you love dill, add more. If you want less salt, use less. The jar is yours. What would you add to these pickles to make them your favorite?
A Final Thought on Waiting
When you put that jar in the fridge, something special happens. The cucumbers soak up the brine. The garlic whispers its flavor to the dill. It is a quiet party in there. After 24 hours, take a bite. Listen to that crunch. That is the sound of success.
I hope you make these. I hope you share them with someone you love. And I hope you remember that the best food comes from a little patience and a lot of heart. Now tell me, will you eat these straight from the jar or put them on a sandwich?
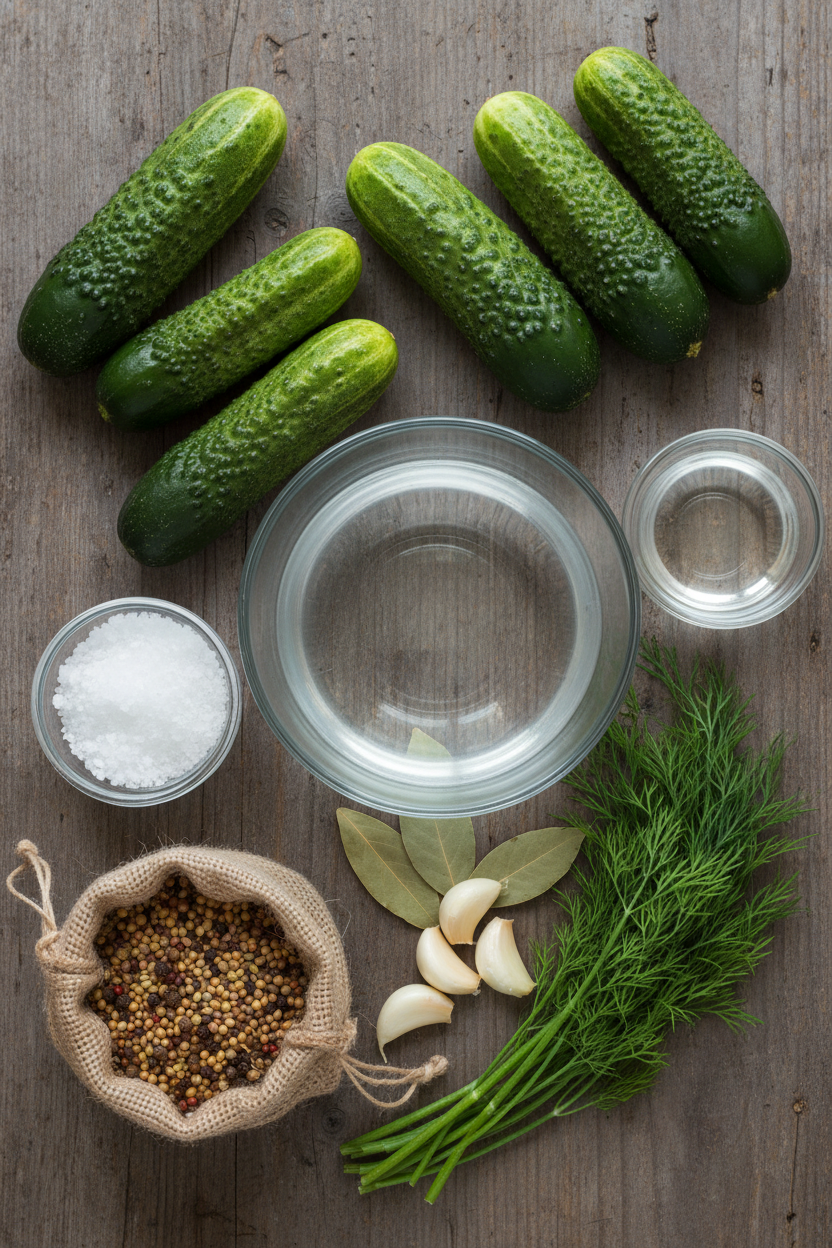
Ingredients:
| Ingredient | Amount | Notes |
|---|---|---|
| Water | 3/4 cup | For brine |
| Sea salt | 3-4 teaspoons | Dissolve in water first |
| Pickling (Kirby) cucumbers | 14 oz | Sliced or cut into spears |
| Pickling spice | 2-3 teaspoons | Add to jar |
| Dried dill (or fresh dill) | 1 teaspoon (or 1 tablespoon) | Fresh preferred if available |
| Bay leaves (or grape leaves) | 2 leaves | Adds flavor |
| Garlic | 1 clove | Peeled |
| White vinegar | 3/4 cup | Combine with brine |
Instructions
Step 1: Stir together the water and salt in a bowl. Let it sit until the salt dissolves completely. This is your brine; it’s the heart of the pickle. (Don’t rush this step; cloudy brine means the salt didn’t melt.)
Step 2: Wash and dry your cucumbers nicely. Slice off the blossom end; it can make pickles mushy. Then cut them into slices or spears, whatever you like best.
Step 3: Place the cucumbers in a quart jar. Add the pickling spices, dill, bay leaves, and garlic. I still remember my grandma stuffing garlic cloves into every crack.
Step 4: Pour the salt water and vinegar over the cucumbers until they are fully covered. If they are not quite covered, add a splash more water. What is your favorite type of cucumber to use? Share below!
Step 5: Put a fermentation weight or a small bowl on top to keep the cucumbers submerged. Close the lid tight. Let them sit in the fridge for 24 whole hours. Doesn’t that smell amazing when you open the jar?
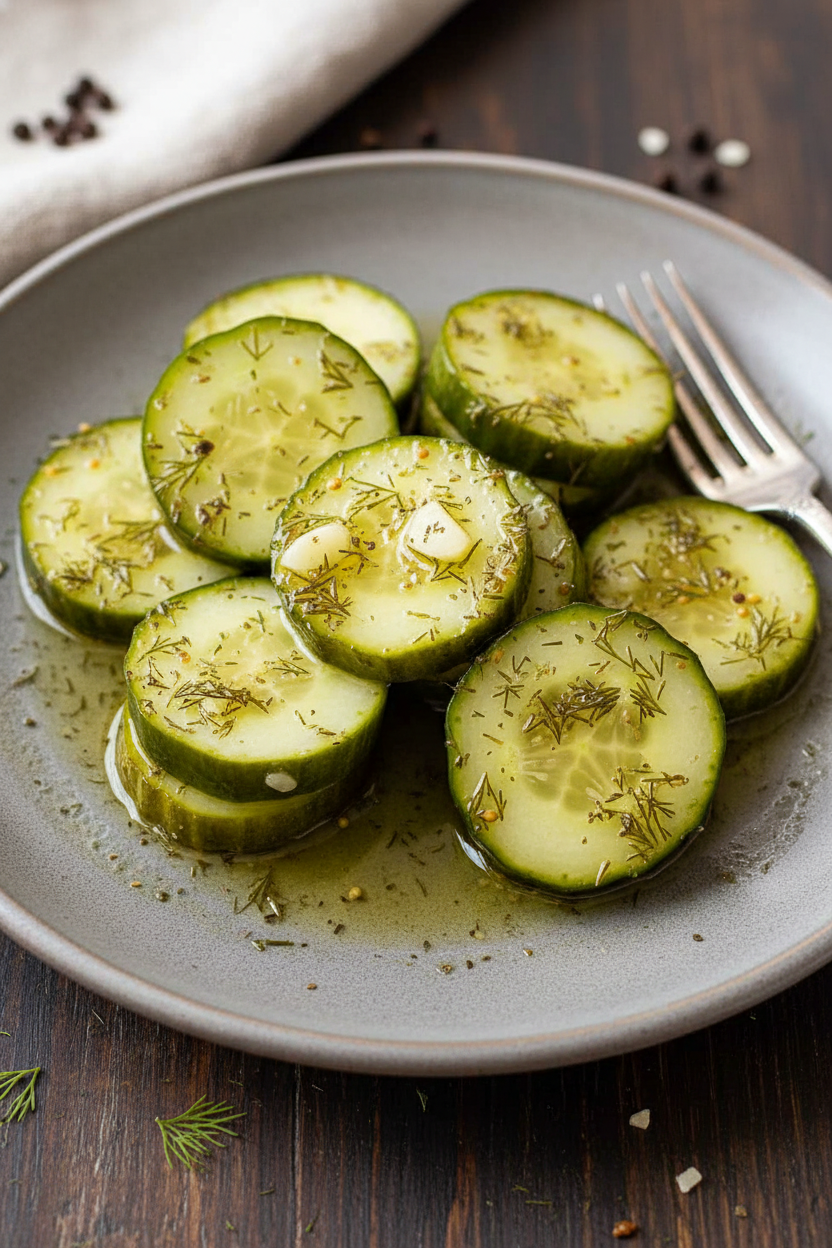
Step 6: After a full day, your pickles are ready to eat! They will stay crisp and tasty in the fridge for 3 to 4 weeks. That is, if you don’t eat them all first.
Creative Twists
… Add a sliced jalapeno for a little spicy kick. It wakes up the whole jar.
… Throw in a few slices of red onion. They get pickled too and are amazing on sandwiches.
… Swap the dill for fresh tarragon. It gives the pickles a sweet, licorice-like taste. Which one would you try first? Comment below!
Serving & Pairing Ideas
These pickles are perfect on a big, juicy burger. The crunch is just right. I love serving them with a simple grilled cheese and tomato soup. They also make a great snack right out of the jar on a hot day. Which would you choose tonight?
My First Batch of Fridge Pickles
I remember my very first batch of these pickles. I was so nervous they would not turn out crunchy. I put the jar in the fridge and checked it every few hours like a worried hen. The next day, I took a bite and my whole kitchen felt like sunshine. That snap, that tang—it was pure magic.
Now, I always make a double batch. Storing them properly is key. Keep that jar in the coldest part of your fridge, not the door. The door gets too warm from opening and closing. This helps the pickles stay crisp for a full three to four weeks. Batch cooking matters because you have a ready snack for weeks. No last-minute scrambling for a side dish.
Reheating is not needed here. These are cold pickles, meant for crunching straight from the jar. But if you want them a little warmer for a hot dog, just let them sit out for ten minutes. One more thing: always use a clean fork to grab them out. Dirty hands can spoil the whole jar.
Have you ever tried storing it this way? Share below!
Three Common Pickle Problems and Easy Fixes
We all hit a snag now and then. I once made a batch that turned out mushy. It broke my heart. But I learned the fix: remove the blossom end of the cucumber first. That little bit contains enzymes that soften pickles.
Another issue is bland flavor. Your brine needs enough salt to wake up the cucumbers. Do not skimp on the 3 to 4 teaspoons. Salt is not just for taste; it draws out water and keeps things firm. This matters because a bland pickle is a sad pickle. You deserve bold flavor in every bite.
The third problem is pickles floating above the brine. They can turn soft or moldy. I remember when I forgot to weigh them down and lost half a batch. Now I always use a small bowl or a weight on top. Making sure they are fully submerged is a simple step that saves the whole batch. This boosts your cooking confidence because you know you can fix problems before they happen.
Which of these problems have you run into before?
Your Quick Questions, Answered
How long do these quick pickles need to sit before they are ready?
You need to let them sit in the fridge for a full 24 hours before tasting. This gives the salt water and vinegar time to work their magic. The cucumbers soak up all the dill, garlic, and pickling spice flavors during that time. I know it is hard to wait, but that first bite will be worth it. The crunch and tang develop best after a full day. If you taste them too early, they will just taste like salty cucumbers. Patience gives you that perfect pickle snap.
Can I use other types of vinegar besides distilled white vinegar?
Yes, you can use apple cider vinegar or white wine vinegar for a different taste. Distilled white vinegar gives the classic tangy flavor you expect from dill pickles. Apple cider vinegar adds a softer, fruitier note that some people love. White wine vinegar is milder and more delicate. Just keep the amounts the same—3/4 cup vinegar. Avoid dark vinegars like balsamic because they change the color and flavor too much. Stick with light, clear vinegars for the best results and that pretty pickle look.
What is the shelf life of refrigerator pickles compared to canned ones?
Refrigerator pickles last 3 to 4 weeks in the fridge, no more than that. Canned pickles use a hot water bath to seal the jars, so they last a year or more on a shelf. The trade-off is texture. Canned pickles are often softer because of the heat. Fridge pickles stay crunchy and fresh-tasting. I prefer fridge pickles for that reason. You get a bright, crisp bite every time. Just remember to eat them within a month. They are a treat, not a pantry staple.
Do I need to boil the brine for no-cook fridge pickles?
No, that is the beauty of this recipe. You simply stir together the water and the salt until the salt dissolves. No heat, no stove, no fuss. The vinegar goes in cold, too. This keeps the cucumbers super crunchy because they never get warm. I love this method on a hot summer day. The brine comes together in two minutes. Just give the salt a good stir to make sure it is fully dissolved. Then pour it right over your cucumbers and garlic.
Can I reuse the brine for another batch of pickles?
You can reuse the brine once for a second batch, but the flavor will be weaker. The first batch soaked up all the good dill and garlic notes. The second batch will still taste fine, just more mild. Make sure to add a fresh clove of garlic and a pinch of fresh dill to boost it. Do not reuse the brine more than once. The salt and vinegar lose their power after two rounds. Old brine can also grow bacteria if you wait too long. One reuse is safe and thrifty.
What vegetables besides cucumbers work best for this quick pickle method?
You can pickle almost any crunchy vegetable with this same brine and method. Carrots are wonderful—slice them into thin sticks or rounds. Red onions turn a pretty pink and taste sweet and tangy. Cauliflower florets soak up the flavor beautifully. Green beans, radishes, and bell peppers also work great. Slice everything to about the same thickness so they pickle evenly. I once did a mix of carrots and cauliflower for a party platter. Everyone asked for the recipe. Just keep the same 24-hour waiting rule.
Which tip will you try first?
A Warm Send-Off from My Kitchen to Yours
I hope these tips help you make the crunchiest, tangiest pickles at home. This recipe is a gift you give to your future self. Picture a busy weeknight when you pull out a jar of homemade pickles. That little moment of crunch makes everything better. Have you tried this recipe? Tell me how it turned out for you. I love hearing your stories as much as I love sharing mine.
*Fun fact: Pickling is one of the oldest ways to preserve food, dating back over 4,000 years!*
Happy cooking!
—Grace Ellington.

My Simple Quick Fridge Pickles Recipe Guide
Ingredients
Instructions
- Stir together the water and the salt; allow to sit until the salt has dissolved. Wash and dry the cucumbers. Slice off the blossom ends, then cut into slices or spears.
- Place the cucumber slices or spears in a quart/liter jar along with the pickling spices, dill, bay leaves, and garlic. Add the salt water and vinegar into the jar so it covers the cucumbers. If they are not quite covered, add more water.
- Add a fermentation weight or small bowl on top of the cucumbers so they are submerged. Close the lid and allow the cucumbers to sit in the fridge for 24 hours before enjoying. The pickles will keep for 3 to 4 weeks in the fridge.