By Elowen Thorn · Fall Activities · Six no-carve ideas, plus the setup that makes them work
Every October I watch a parent hand a five-year-old a carving knife and then spend the next twenty minutes hovering. There is a better way to do this. The six projects below need no blade at all, they take between ten minutes and an afternoon, and the youngest child in the room can do almost all of the work. What follows is not just the ideas — it is the setup, the paint that survives a rainy porch, the age guide, and the cleanup plan that means you will actually do this again next year.
Carving a pumpkin is a lovely thing to do with a nine-year-old who has steady hands and a parent beside them. It is a miserable thing to do with a three-year-old who wants to help. The knife is the problem, and it is the only part of the tradition that cannot be handed over. Take the knife out and the whole activity changes: the child does the work, the adult supervises rather than hovers, and the pumpkin survives the afternoon.
There is a second reason no-carve projects are worth your October. A carved pumpkin is a countdown. Once the face is cut, the clock starts and you have somewhere between three days and a week before it slumps into the porch. A painted, glued or wrapped pumpkin has no open wound, so it can sit on the step from the first week of the month until Halloween and still look like it did on day one. If you want the season to feel long rather than frantic, that difference matters more than any design.
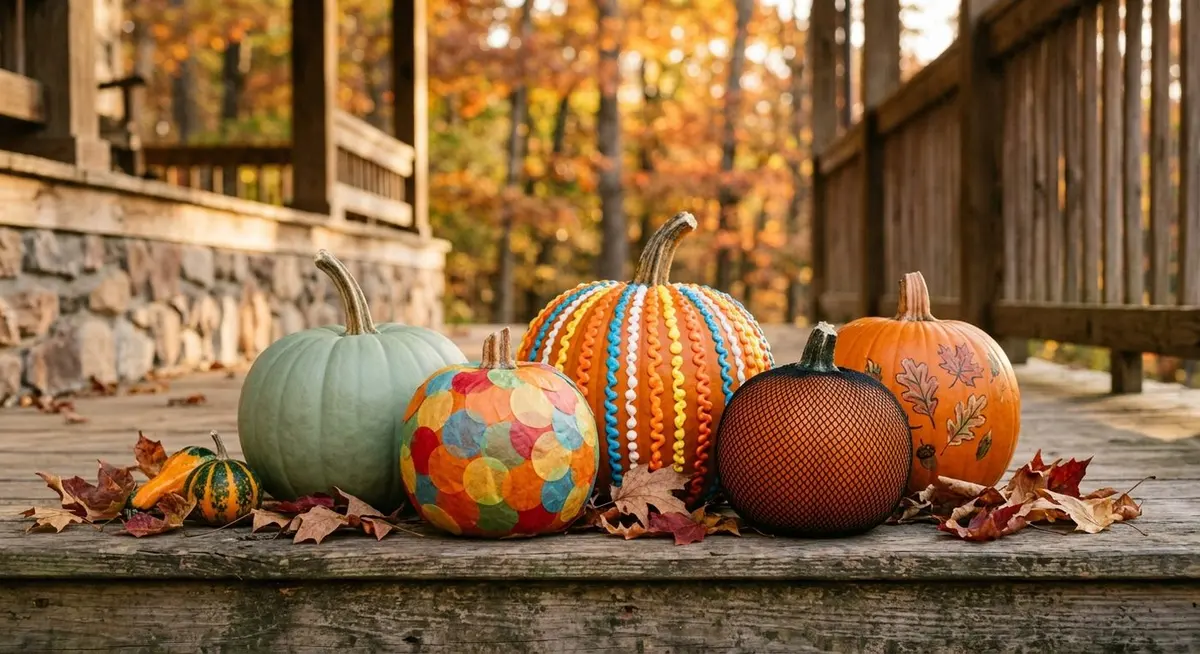
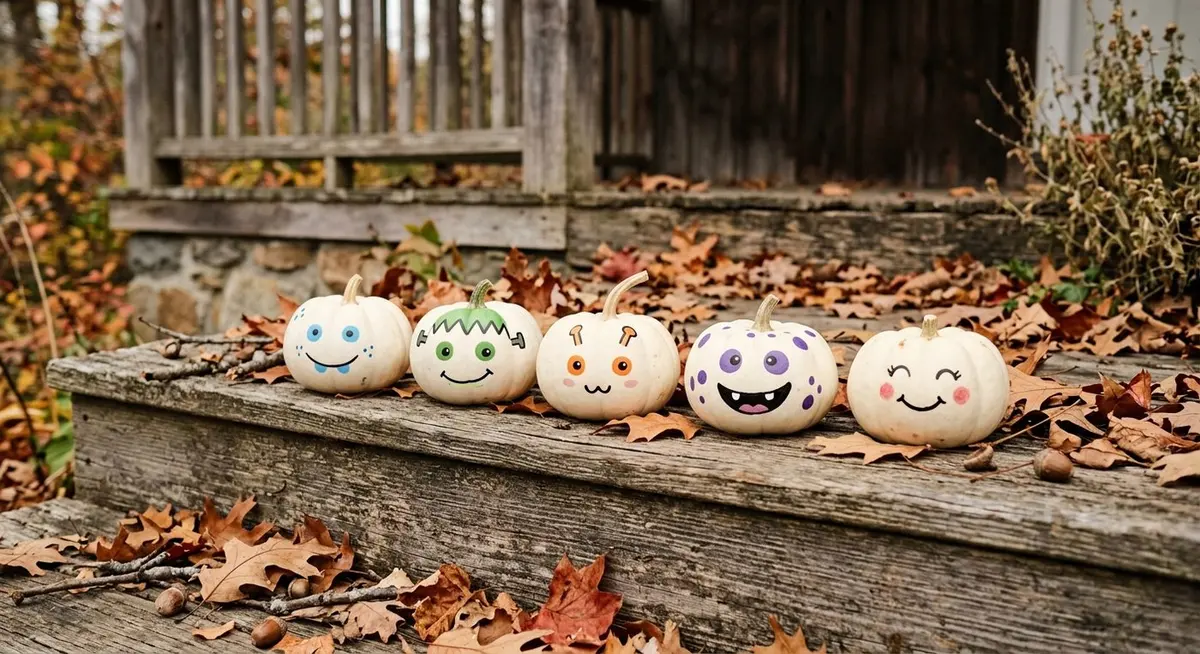
Five pumpkins, five different techniques, and not a single cut in any of them — which is why they were still on the step three weeks later.
The one rule that matters: pick the project that matches the child, not the one that looks best on a screen. A four-year-old with a paintbrush and a plain pumpkin will produce something better than a four-year-old handed a stencil they cannot follow.
How to Choose a Project for the Age You Have
The projects below fall into four families, and each family asks something different of a child. Painting asks for a brush grip and a willingness to be messy. Gluing asks for patience, because the paper has to be placed and then left alone. Wrapping asks for almost nothing except a willingness to watch an adult stretch something over a surface. Drawing asks for a marker grip and a steady enough hand to follow a line. Match the family to the child and the afternoon runs itself.
The four families of no-carve pumpkin projects
Family
Best age
Mess level
Time
Adult help needed
Painting
2+
High
20 – 40 min
Set up the surface, then hand over the brush
Gluing and collage
3+
Medium
30 – 45 min
Coat the pumpkin; the child places the pieces
Wrapping and covering
4+
Low
10 – 15 min
Stretch the material; the child chooses the pattern
Drawing and stencilling
5+
Low
20 – 30 min
Make the stencil; the child traces and colours
If you are doing this with more than one child, give each of them their own pumpkin rather than one shared one. A shared pumpkin turns a craft into a negotiation, and the negotiation is always longer than the craft.
What Actually Works at Each Age
Age is a rough guide, not a rule, but it is a useful one, because the failure mode of a pumpkin project is almost always a mismatch between what the child can do and what the project asks. Here is what tends to work, and what tends to end in tears.
Pumpkin projects by age
Age
What they can do
Best project
Skip this
Under 2
Hold, pat, smear, taste-test everything
Finger painting with edible paint, or simply carrying a small pumpkin around
Anything with glue, small pieces or a marker
2 to 3
Scribble, dab, place large pieces with help
Finger painting, large tissue-paper circles, sponge stamping
Fine stencils, anything with a blade, small beads
3 to 4
Place pieces deliberately, follow one simple instruction
Anything on this list, plus the science experiment
Being given a task designed for a four-year-old
12+
Design and execute a whole look
The mesh wrap, the monogram stencil, the puffy-paint pattern
Being told the project is for little kids
The older-child problem, solved: give a twelve-year-old a real job rather than a harder version of the same task. Put them in charge of the camera, the paint mixing or the design for the whole family’s set of pumpkins. Being needed keeps an older child in the room far longer than being challenged does.
Six No-Carve Pumpkin Ideas, Step by Step
These are the six that have survived in our house across a decade of Octobers, in roughly the order a family tends to meet them. Each one lists what you need and what to actually do, and none of them requires a knife.
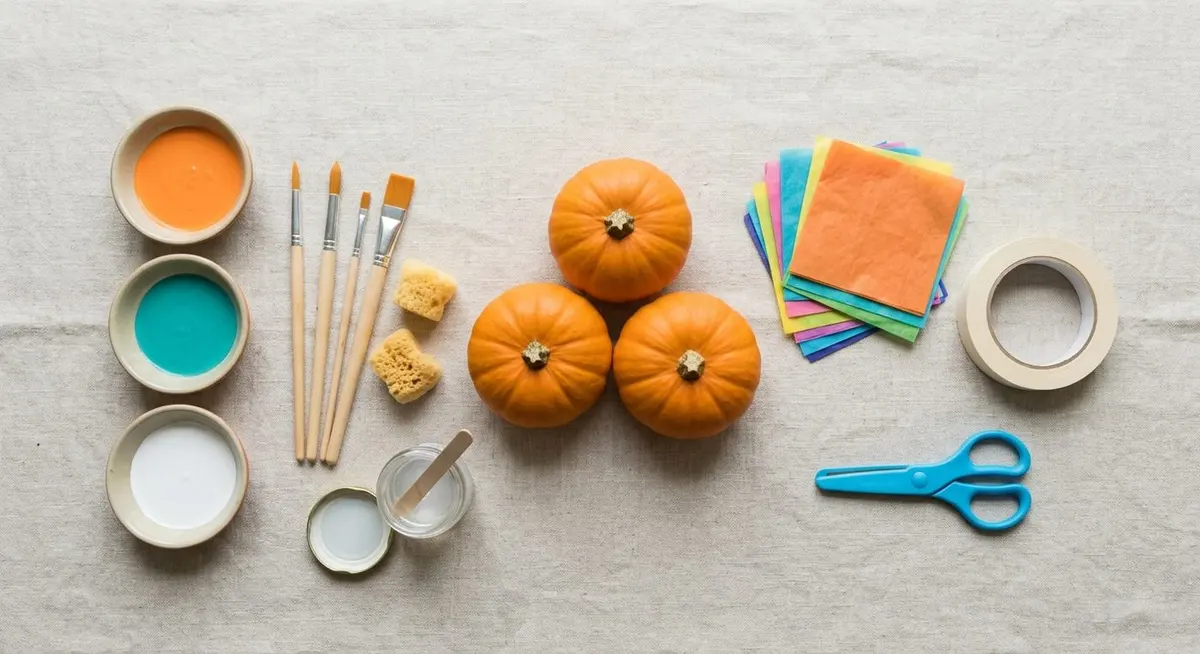
The whole supply list for all six projects fits on one tray — paint, glue, tissue paper, tape, sponges and a few small pumpkins.
1. The Finger-Painted Pumpkin
This is the first project to try with a toddler, because it asks for nothing except a hand and a willingness to get paint everywhere. Tape a simple shape onto the pumpkin with painter’s tape before the child starts — a stripe, a chevron, a big letter — then let them cover the whole surface in finger paint. When the paint is dry, peel the tape away and the shape is revealed underneath in the pumpkin’s own colour. The tape does the design work; the child does the painting.
2. The Tissue-Paper Collage
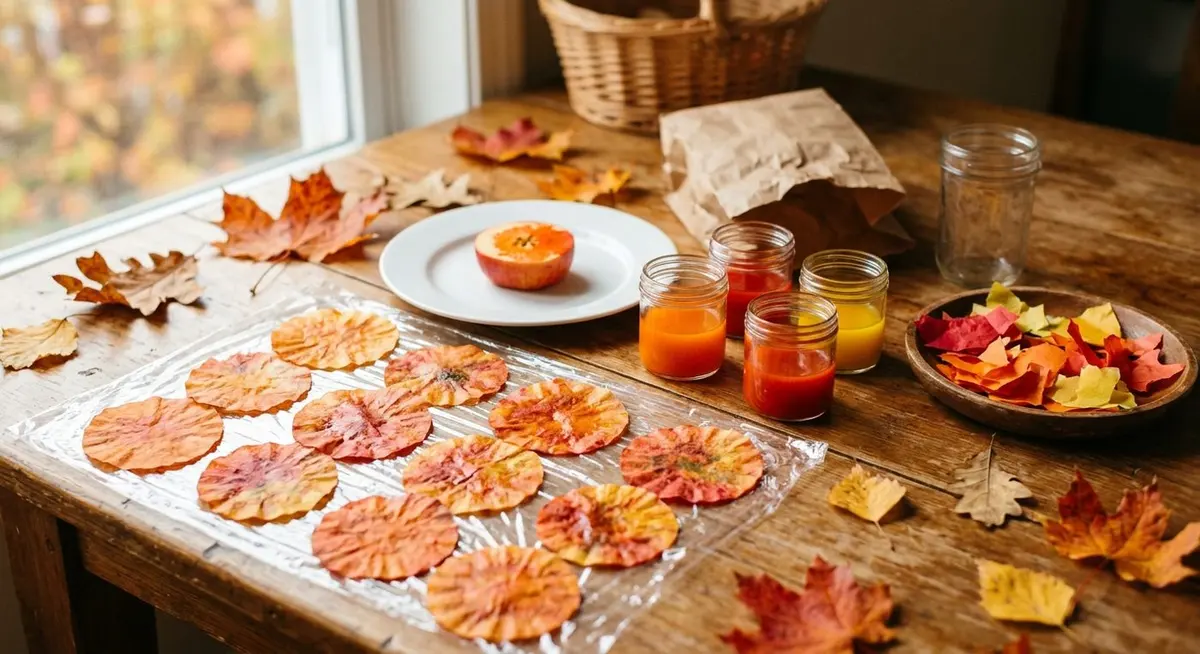
Cut tissue paper into circles, some large and some small, in three or four colours. Brush a thin layer of clear craft glue over the pumpkin, hand the child the circles, and let them place them wherever they like, overlapping and all. When they are finished, brush a second coat of glue over the top to seal the paper down. The result looks like stained glass and it is genuinely hard to get wrong, which is exactly what you want from a project for a three-year-old.
3. The Puffy-Paint Pattern
Puffy paint is the one material that makes a pumpkin look deliberate rather than improvised. Draw rows of dots, stripes or chevrons straight onto the surface and let them dry raised. If you want a more grown-up finish, paint the whole pumpkin a single solid colour first, let it dry, then add the puffy-paint pattern on top — the raised texture against the flat colour is what makes it look bought rather than made.
4. The Mesh Wrap
This is the fastest project on the list and the one that gets the most comments. Take a length of black fishnet or a patterned mesh, stretch it over the pumpkin, and let it shrink back around the top and bottom. Trim the excess. The pattern transfers to the surface in about two minutes, and a white or pale pumpkin takes it best because the contrast does the work. It is also the project a teenager will actually agree to do.
5. The Stencil Transfer
For a design more complicated than a child can draw freehand, make a stencil at home. Print or draw the shape, turn the paper over and scribble over the back of the lines with a soft pencil, then press the paper face-up onto the pumpkin and trace over the design with pressure. The pencil transfers a faint outline onto the surface, which the child can then paint or colour in. It is the same trick used for transferring embroidery patterns, and it works on a pumpkin exactly as well.
6. The Handprint Keepsake
Trace a small hand onto card, cut it out, and use it as a stencil on the pumpkin — the fingers can become the eyes of a face, the wings of a bat, or simply a row of handprints around the middle. This is the one to do with a baby, who cannot participate in any other way, and it is the one you will still have on a shelf in ten years. Use a washable marker for the tracing and a permanent one only for the final outline.
Do them in this order if you are doing several: start with the wrap, because it takes two minutes and gives everyone an immediate win, then move to the painting projects, which need drying time, and finish with the collage, which is the messiest and the best last thing of the day.
Painting Techniques That Survive the Weather
A painted pumpkin that lives on a porch has to cope with rain, wind and a temperature that drops ten degrees overnight. Most craft paint does not. These are the choices that make the difference between a pumpkin that still looks good on the thirty-first and one that has run into a sad puddle by the twelfth.
Choose the right paint
Acrylic craft paint is the default and it is fine for indoor pumpkins. For anything going outside, look for outdoor acrylic or add a coat of clear matte sealer once the paint is fully dry. Washable children’s paint is the right choice for a toddler’s project and the wrong choice for a porch, so decide which one you are making before you open the bottle.
Acrylic craft paint — the all-rounder. Dries fast, covers well, needs a sealer outdoors.
Outdoor acrylic — formulated to flex with temperature changes. Worth it for a front-step pumpkin.
Washable children’s paint — the only sensible choice for under-fives. It will not survive rain.
Spray paint — the fastest route to a solid base colour. Do it outdoors, in light coats, and let it cure a full day.
Puffy paint — for raised detail only. It is not a base coat and it does not seal.
Make the paint last
Two things kill a painted pumpkin: a wet surface and a thick coat. Wipe the pumpkin down and let it dry completely before you start, because paint will not bond to the waxy skin if there is any moisture on it. Then build the colour in two or three thin coats rather than one heavy one — a thick coat skins over on top while staying wet underneath, and that is what peels off in a sheet a week later.
Wipe and dry first. A dry surface is the whole secret.
Two thin coats beat one thick one. Always.
Seal it. One coat of clear matte sealer after 24 hours of drying.
Keep the stem dry. Water collects at the base of the stem and rots the pumpkin from the top down.
Bring it in for heavy rain. No sealer survives a storm.
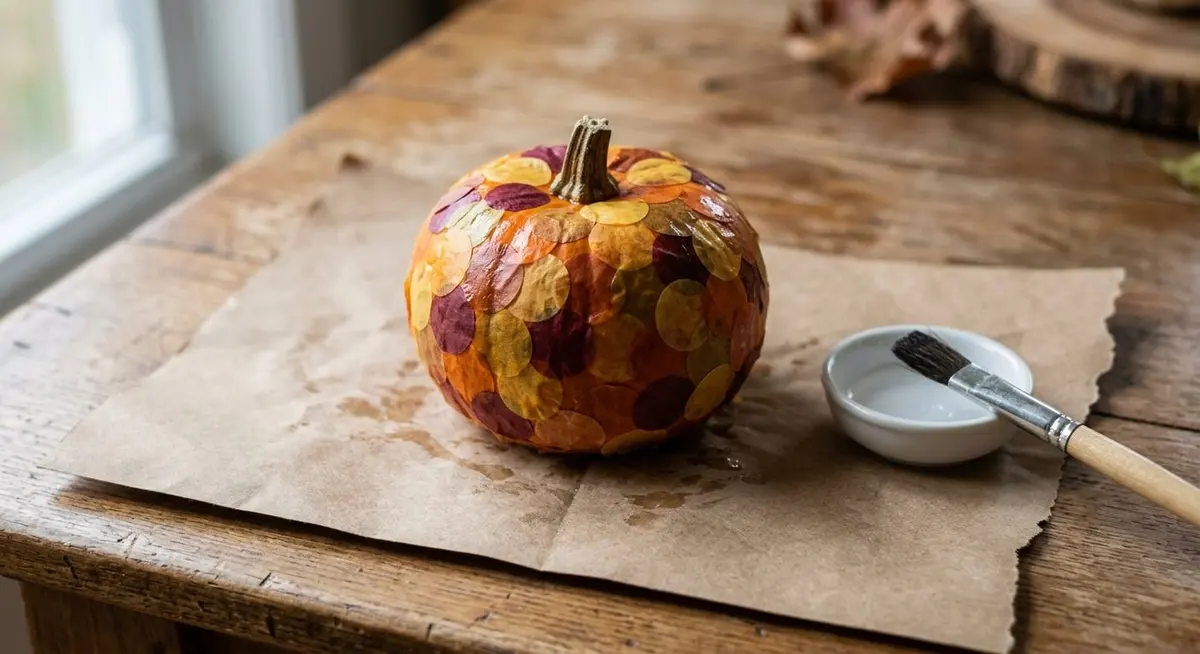
The collage needs a full hour to dry before it goes outside — kraft paper underneath catches the drips and makes the whole thing a two-minute cleanup.
The stem is the weak point. A pumpkin rots from the stem down, not from the base up. If you are painting, mask the stem or leave it unpainted, and never let water sit in the dip around it.
The Pumpkin Science Experiment, Done Properly
If you want the decorating afternoon to double as something a child remembers for a different reason, run one real experiment alongside it. The classic is the erupting pumpkin, and it is worth doing properly rather than as a party trick — because the interesting part is not the foam, it is the question of why the foam happens at all.
Hollow out a small pumpkin through the top, or use a wide-mouthed jar if you would rather not waste one. Set it on a tray with a lip — this will overflow, and the tray is what saves the table.
Spoon two tablespoons of baking soda into the bottom, then add a good squeeze of dish soap and a few drops of food colouring. The soap is what turns a fizz into a foam; without it you get bubbles that pop immediately.
Ask the child to predict what will happen before anything is poured. Write the prediction down. This is the step that turns a trick into an experiment.
Pour in about half a cup of white vinegar and stand back. The reaction is immediate and it will keep going for a few seconds after the first rush.
When it settles, ask what changed. Then repeat it with warm vinegar, or with double the baking soda, and see whether the result is bigger, faster or the same.
Change one thing at a time. That single habit — one variable, one repeat — is the whole of the scientific method, and a six-year-old can learn it in an afternoon.
Why it works, in one sentence: the baking soda is a base and the vinegar is an acid, and when they meet they produce carbon dioxide gas — the bubbles. The dish soap traps that gas in films, which is why you get foam instead of a quiet fizz. Warm vinegar speeds the reaction up because heat makes molecules move faster.
The Setup and Safety Checklist Nobody Prints
Almost every pumpkin-project disaster is a setup problem rather than a child problem. Ten minutes of preparation before anyone picks up a brush prevents nearly all of it, and it means you can let the children work without standing over them.
Cover the whole table, not just the middle. A shower curtain, a plastic tablecloth or a sheet of kraft paper taped down at the edges. Paint travels further than you think.
Put a tray under every pumpkin. A rimmed baking tray catches the drips and lets you move a wet project without touching it.
Decant paint into shallow dishes. A wide, shallow dish is far harder to tip than a tall bottle, and it lets a small brush reach the bottom.
Use washable paint for under-fives. Not because they will eat it, but because they will touch their face, their clothes and the wall.
Keep the glue out of reach between uses. Craft glue is not dangerous, but a two-year-old with an open bottle is a twenty-minute cleanup.
Set up a hand-washing station before you start. A bowl of warm water and a towel on the floor beside the table. Do not make washing hands a trip to another room.
Never leave a child alone with a craft knife, even for the stencil. The adult cuts the stencil; the child does everything after that.
Check the pumpkin for soft spots first. A pumpkin that is already going soft will not hold paint or glue, and it will smell by the end of the week.
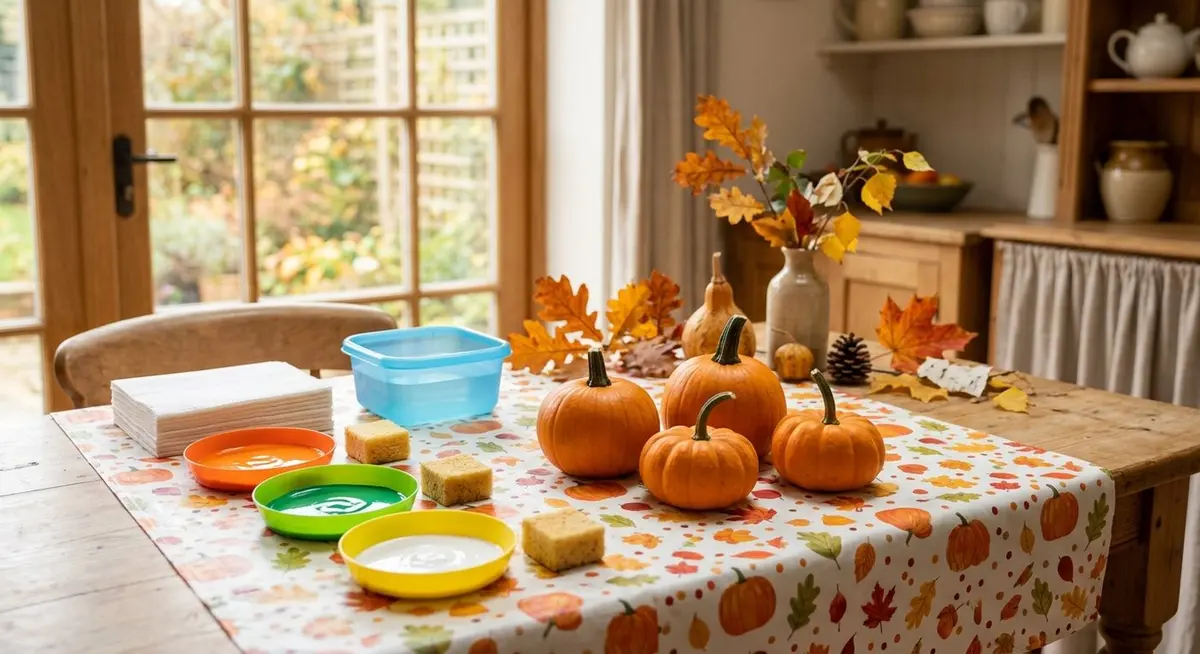
Everything within arm’s reach, nothing within tipping distance, and a water tub already on the table — the setup is what lets you sit down and join in.
The five-minute version: cover the table, tray under each pumpkin, paint in shallow dishes, washable paint for the little ones, water and a towel on the floor. That is the whole checklist, and it is the difference between a lovely afternoon and an hour of scrubbing.
Displaying Them So They Last
Where a pumpkin sits decides how long it lasts, and the difference between a good spot and a bad one is measured in weeks. The two enemies are standing water and direct sun; the two friends are airflow and shade.
Where to put a decorated pumpkin
Spot
How long it lasts
Watch out for
Indoors, on a shelf
4 – 6 weeks
Heat from a radiator dries it out and shrinks it
Covered porch, on a step
3 – 5 weeks
Water pooling in the dip around the stem
Open porch, in shade
2 – 4 weeks
Wind knocking it over; put it against a wall
Direct sun all day
1 – 2 weeks
Sun scorches the paint and splits the skin
On bare soil or grass
1 – 2 weeks
Ground moisture rots the base first
On a metal or stone step
2 – 3 weeks
Cold surfaces draw condensation underneath
Raise it off the ground. A small tile, a wooden block or an upturned saucer under the pumpkin keeps the base out of standing water and adds a week or more to its life. It is the single cheapest thing you can do for a porch display.
Cleanup, Storage and Next Year
The reason families stop doing pumpkin crafts is not the craft. It is the cleanup, and the memory of the cleanup the following October. Twenty minutes of tidying at the end of the afternoon is what buys you the willingness to do it again.
Cleanup and storage, by material
Material
Clean up with
Store for next year?
Washable children’s paint
Warm water and a cloth, while still wet
No — the pumpkin will not keep
Acrylic craft paint
Soap and water on hands; peel dried drips off the tablecloth
No — the pumpkin will not keep
Craft glue
Warm water; it softens and lifts off
No — the pumpkin will not keep
Tissue paper
Lift the dry pieces first, then wipe
Yes — the leftover sheets keep flat in a folder
Puffy paint
Peel dried blobs off the surface
Yes — the pens keep for years if the caps go back on
Faux pumpkins
Damp cloth only, never soak them
Yes — this is the whole point of using them
The one upgrade worth making: use faux pumpkins for any project you want to keep. They cost a little more, they take paint and glue exactly like the real thing, and they come out of a box next October looking identical. Real pumpkins are for the projects you are happy to compost.
A Four-Week Pumpkin Rhythm
October is long enough to spread this out, and spreading it out is what stops the whole thing becoming one exhausting Saturday. Here is a rhythm that gives you a decorated porch by the middle of the month without ever spending more than an hour on it.
Week one — gather and choose. Buy the pumpkins, wash and dry them, and let each child pick which project they want. No paint yet. Choosing is half the fun and it costs nothing.
Week two — the big project. Do the messiest, most involved project now, while everyone still has energy for it. This is the collage or the finger painting.
Week three — the quick wins. The mesh wrap and the puffy-paint patterns. Two minutes each, and they fill the porch out.
Week four — the keepsake and the display. Do the handprint pumpkin, then arrange everything on the step and take the photograph you will want next year.
Buffer — the last few days. Nothing planned. If something got rained off, this is when it happens. If nothing did, you have a quiet evening.
Do not plan all six. Two or three projects across the month is a better October than six in one weekend, and it is the version your children will ask to repeat. The buffer week is not slack — it is the part that makes the plan survive contact with real life.
When It Goes Wrong
Almost every problem with a decorated pumpkin traces back to one of four things: a wet surface, a thick coat, a soft pumpkin, or a project that was too hard for the child. Here is what to do about each.
Common problems and fixes
Problem
Why it happened
What to do
The paint peeled off in a sheet
One thick coat, or paint applied to a damp surface
Wipe and dry first, then two thin coats with a day between
The glue dried cloudy
Too much glue, or a humid room
Use a thinner coat and press the paper down as you go
The tissue paper lifted at the edges
The sealing coat was too thin
Brush a second coat over the edges and press them flat
The pumpkin went soft in a week
It was already bruised, or it sat in standing water
Raise it off the ground and check for soft spots before you start
The child lost interest after ten minutes
The project was pitched above their age
Switch to the wrap or the finger painting — both give a fast result
The paint cracked as it dried
The coat was too thick, or the room was too warm
Thin coats, and let each one dry fully before the next
The design smudged
The marker was water-based and the pumpkin was damp
Use a permanent marker on a dry surface, and let it cure overnight
Nothing here is unfixable. A smudged pumpkin can be painted over, a peeled one can be repainted, and a project that failed is still an afternoon the child spent making something. The only real mistake is handing a small child a project they cannot finish.
Questions Parents Actually Ask
These are the ones that come up every October, usually the night before. Most of them come down to age, paint or weather, and most of them have a simpler answer than expected.
What is the best no-carve pumpkin idea for a toddler?
Finger painting, and it is not close. A toddler can do the whole thing themselves, the mess is contained by a covered table, and the result is genuinely charming. Tape a shape onto the pumpkin first so there is a design underneath when the paint dries. If you want more ideas pitched at that age, the toddler fall activities guide has twenty-five that all take about twenty minutes.
How long do decorated pumpkins last?
A no-carve pumpkin lasts three to five weeks on a covered porch and four to six weeks indoors, which is far longer than a carved one. The two things that shorten its life are standing water and direct sun. Raise it off the ground on a tile or a block and keep it in shade and it will comfortably make it to Halloween.
What paint should I use on a pumpkin?
Acrylic craft paint for anything indoors, and outdoor acrylic or a clear matte sealer for anything on a porch. Washable children’s paint is the right choice for under-fives and the wrong choice for outside, because it will not survive a single rain shower. Whatever you use, apply two thin coats rather than one thick one.
Do I need to seal a painted pumpkin?
If it is going outside, yes. One coat of clear matte sealer after the paint has dried for a full day makes the difference between a pumpkin that still looks good at the end of the month and one that has run in the rain. Indoors, a sealer is optional but it does make the finish more durable.
Can I use a fake pumpkin instead of a real one?
Yes, and for any project you want to keep you should. Faux pumpkins take paint, glue and marker exactly like the real thing, and they come out of storage next October looking identical. Use real pumpkins for the projects you are happy to compost and faux ones for the keepsakes.
How do I stop the paint from peeling off?
Two things: start with a completely dry surface, and build the colour in thin coats. Paint will not bond to a waxy pumpkin skin if there is any moisture on it, and a thick coat skins over on top while staying wet underneath, which is exactly what peels off in a sheet a week later.
What do I do with a pumpkin that has gone soft?
Compost it. A soft pumpkin will not hold paint or glue, and it will start to smell within days. Check for soft spots before you start a project rather than after, and press the base with a thumb — if it gives, it is already on its way out.
Is the erupting pumpkin experiment safe for young children?
Yes, with supervision. Baking soda, vinegar, dish soap and food colouring are all safe to handle, but the mixture is not for drinking and the food colouring will stain clothes. Do it on a rimmed tray, keep the vinegar bottle out of reach, and wash hands afterwards. If you want more autumn activities to fill the rest of the month, the fall activities for kids guide sorts forty of them by the kind of day each one needs.
Free Printable: The Pumpkin Decorating Planner
A printable companion to this guide — the six projects as step cards, the age-and-skills chart, the supply checklist, the paint and sealer guide, the display and storage table, a four-week rhythm planner and a design sheet for each child.
PDF · 6 pages · prints on letter or A4 · subscribe to unlock the download
Savory Discovery · By Elowen Thorn · Last updated September 2026. Always supervise children with craft materials, and check pumpkins for soft spots before you start.
Elowen Thorn I cook, photograph and re-test every recipe in an ordinary home kitchen before it goes up, so what you make matches what you see. Savory Discovery is where simple weeknight cooking, seasonal ideas and the odd bit of kitchen craft sit side by side — written plainly, and worth cooking twice.