By Elowen Thorn · Fall Decor · One wreath, six pieces
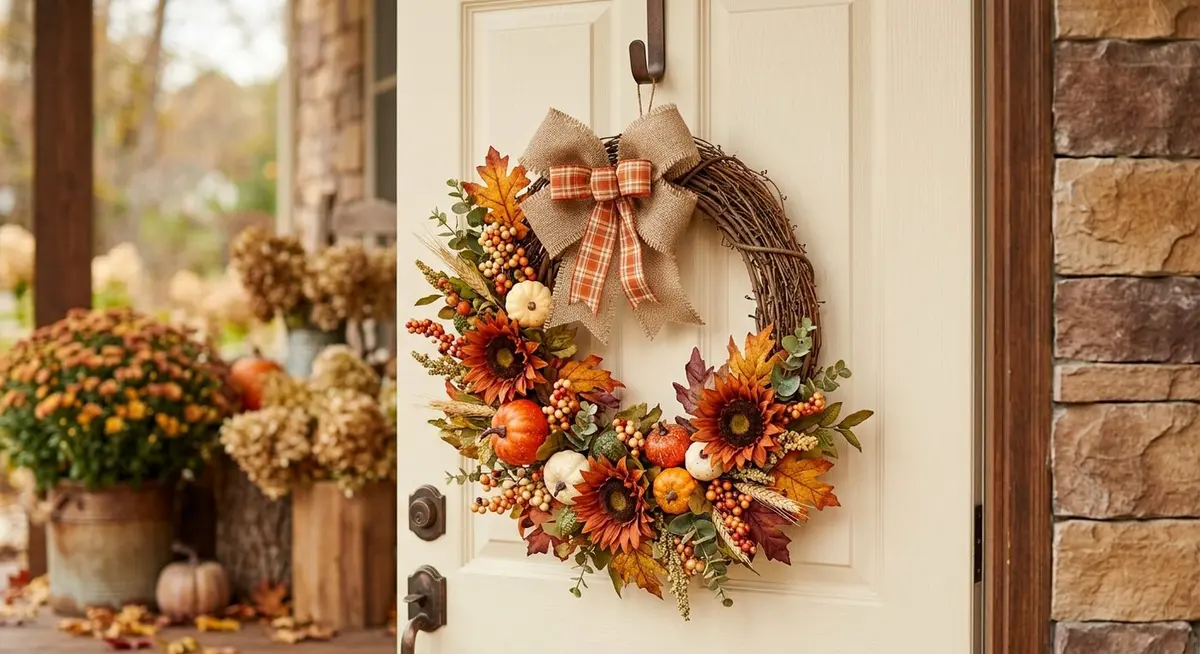
A designer fall wreath looks like it came from a boutique, and it costs about the same as a takeaway dinner. The version I make every September uses six pieces, a pair of wire cutters and no glue at all, and it is finished before the kettle boils. Here is the whole method, plus the parts nobody tells you — how to keep the stems from scratching your door, how to build a bow that holds its shape, and how to reuse the same base for Christmas.
Walk into a craft store in September and the wreath aisle is overwhelming. There are hundreds of stems, and the instinct is to buy a basketful. That instinct is what makes a wreath look cluttered and cost forty pounds. A designer wreath is not a collection of everything autumn has to offer — it is a small number of pieces placed with intent.
The formula that works is simple: one base, two foliage picks, two decorated stems and one ribbon. That is six pieces. Two picks give you the leafy structure, two decorated stems give you the pumpkins, sunflowers and berries that read as autumn from the pavement, and the ribbon ties the whole thing together. Everything else is optional, and most of it is a distraction.
Six pieces, one base, no glue. The whole thing takes less time than finding the box of autumn decorations in the loft.
The same principle runs through everything I make for the house. A nature walk with the children works because you go out with one purpose rather than five, and a scavenger hunt works because the list is short enough to finish. Constraint is what makes a thing feel designed.
The six-minute claim is real, with one condition. The clock starts when the supplies are on the table in front of you. Gathering them is the slow part — the assembly genuinely takes about five minutes once everything is within reach.
The Supply List, and What Each Piece Does
Buy the base first and take it with you. A wreath is a composition, and the only way to know whether a stem is the right scale is to hold it against the base you are actually going to use. Everything below is sized for an 18-inch oval grapevine wreath, which is the size that suits a standard front door.
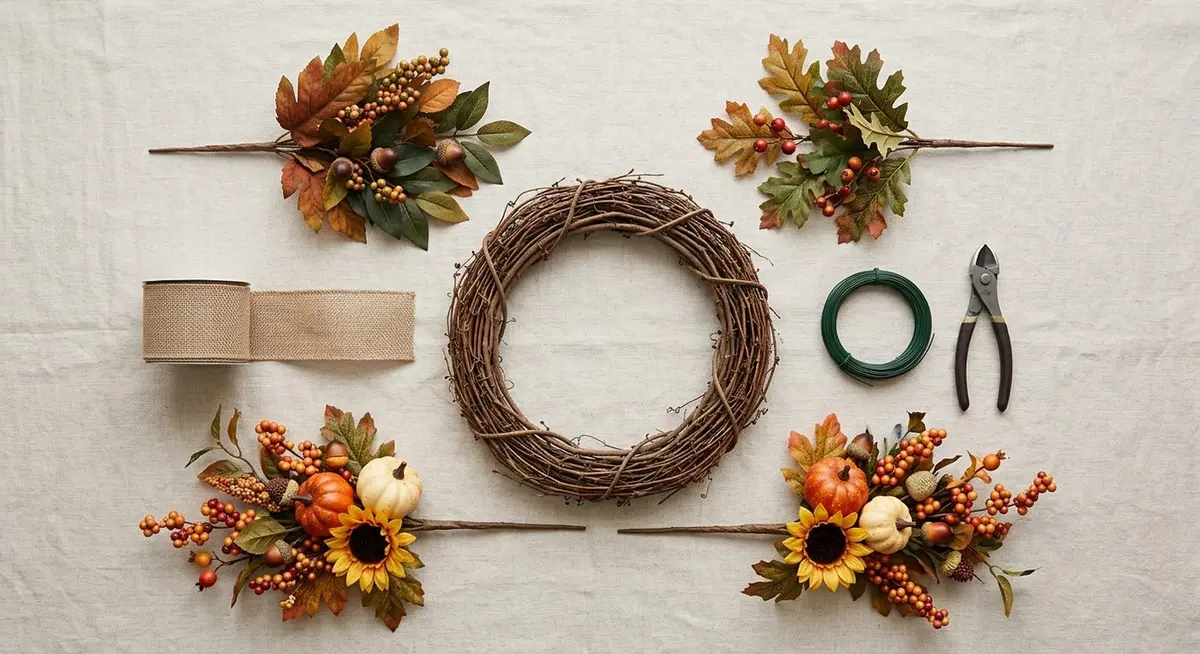
Everything you need, laid out before you start. If a piece is not on this table, you do not need it.
The six pieces, and the job each one does
Piece
What to look for
Its job
18-inch oval grapevine wreath
Tightly woven, no loose loops, flat on the back
The base — everything else is tucked into it
2 fall foliage picks
Rust, ochre and deep green leaves, flexible wire stems
The leafy structure that fills the top and bottom
2 decorated stems
Small pumpkins, sunflowers and berries on one stem
The colour and the focal points
1.5-inch burlap wired ribbon
Wired edges, so the bow holds its shape
The bow, and the thing that makes it look finished
Floral wire
24-gauge, on a spool
Secures the bow to the base
Wire cutters
Sharp, and used only for stems
Trims the stems flush at the back
Skip the glue gun for a personal wreath. Glue is for wreaths you intend to sell, where the stems must never shift in transit. On your own door, unglued stems mean you can pull them out in December and rebuild the same base for Christmas. That is the single best money-saving decision in this whole project.
The Six-Minute Method, Step by Step
Work in this order and the wreath builds itself. The logic is that you always place the largest, softest elements first and the smallest, brightest ones last — so the eye lands on the berries and pumpkins rather than on a tangle of leaves.
Lay the grapevine base flat on the table, front side up. Find the natural top by holding it up and looking for the side that sits flattest against a door.
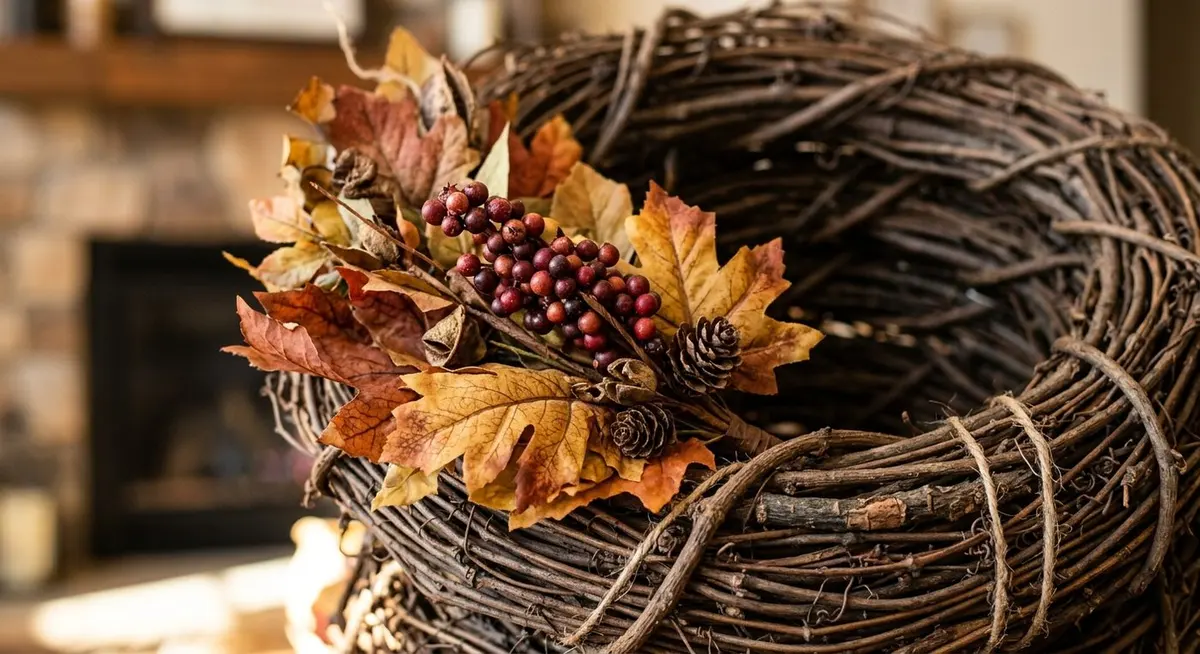
Take the first foliage pick and push its stem into the bottom of the base, angling it so the leaves follow the curve of the wreath. Push at an angle, not straight in — a straight push sends the stem out of the back where it will scratch the door.
Add the second foliage pick at the top, facing the opposite direction. Now the wreath has fullness at the top and the bottom, which is what makes it read as balanced from a distance.
Layer the first decorated stem on top of the bottom foliage pick. Tuck it into the same area rather than a new one — layering is what creates depth, and depth is what separates a designer wreath from a flat one.
Layer the second decorated stem over the top foliage pick, again facing the other way.
Turn the wreath over and trim every stem flush with the wire cutters. Run your hand across the back; if you can feel a stem, it will scratch the paint on your door.
Make the bow (see the next section), wire it to the base between the top and bottom clusters, then fluff the leaves and berries outward so nothing looks squashed.
Tuck the stem at an angle so the leaves follow the curve of the base. Straight stems poke out of the back and scratch the door.
The layering rule. Every new piece goes on top of the last one, in the same two zones — top and bottom. Resist the urge to spread pieces evenly around the ring. Two strong clusters with open vine between them looks deliberate; evenly spaced pieces look like a craft kit.
Making a Bow That Holds Its Shape
The bow is where most homemade wreaths give themselves away. A limp, uneven bow undoes an otherwise good wreath, and a good bow rescues a plain one. The fix is the wire in the ribbon and a consistent loop size — not a special tool.
The no-tool method
Cut a 14-inch tail of ribbon and let it hang. This is the tail that will dangle below the bow.
Pinch the ribbon between your thumb and finger and make a loop about six inches long, twisting the ribbon at the pinch point so the right side always faces out.
Make a matching loop on the other side, then repeat, making each new pair of loops slightly smaller than the last. Three pairs is the classic full bow.
Cut a second 14-inch tail and let it hang on the opposite side.
Wrap floral wire tightly around the centre pinch three or four times and twist it closed at the back. Do not tie it — wire is what stops the bow sagging.
Fluff each loop outward and pull the tails into a soft V. Wire the bow to the base between the two foliage clusters.
If your bow looks flat, it is the ribbon. Unwired ribbon cannot hold a loop, no matter how carefully you tie it. Check the selvedge for a thin wire running through both edges before you buy. Burlap and linen-look ribbons are almost always wired; satin usually is not.
Choosing the Right Base
The base decides how the finished wreath hangs and how long it lasts. Grapevine is the standard for autumn because it is already the colour of the season, it is stiff enough to hold heavy stems without sagging, and it can be stripped and rebuilt indefinitely.
Base types compared
Base
Best for
Watch out for
Grapevine, oval
Front doors, autumn and winter
Loose loops on cheap versions — check the weave
Grapevine, round
Walls and interior doors
Can look heavy on a narrow door
Wire frame
Very full, dense designs
Needs far more stems to look finished
Straw or foam
Indoor table wreaths
Not weatherproof; sheds if it gets damp
Twig or birch
Rustic, natural looks
Brittle — handle gently or it snaps
Oval or round? An oval suits a tall front door and reads as more formal. A round base is easier to balance and better on a wall.
Size: 18 inches is the sweet spot for a standard door. Go to 24 inches only if your door is wide, or the wreath will look like it is wearing a hat.
Check the back: a good grapevine base is flat on the reverse. A domed back will rock against the door and mark the paint.
Buy the base in September, not November. Grapevine bases sell out first, and the ones left late in the season are the loose, badly woven ones. It is the one supply worth buying early.
Building the Colour Story
Autumn has a huge palette and that is exactly the problem. A wreath that uses every autumn colour at once looks noisy. Pick one of the three schemes below and hold every stem against it before you buy.
Three colour schemes that always work
Scheme
Colours
Feels like
Classic harvest
Rust, ochre, deep green, natural burlap
Traditional, warm, works on any door
Muted neutral
Cream, sage, soft brown, oatmeal ribbon
Quiet and modern; suits a pale door
Deep and rich
Burgundy, plum, bronze, dark green
Dramatic; best on a dark or black door
Match the door, not the season. A wreath is judged against the surface behind it. Muted neutrals disappear on a cream door; deep burgundy disappears on a black one.
Repeat one colour three times. Pick a single accent — the berry red, say — and make sure it appears in the foliage, the decorated stems and the ribbon. Repetition is what makes a wreath look designed.
Keep the ribbon neutral. Burlap, oatmeal or a soft brown ribbon lets the foliage carry the colour. A patterned ribbon fights everything else on the wreath.
Photograph your stems before you leave the shop. Lay the picks and stems together on the floor and take one picture. Colours that look harmonious under shop lighting can clash badly in daylight on your door, and the photo is the cheapest way to catch it.
Hanging It Without Wrecking the Door
This is the part that costs people their deposit. A wreath is heavier than it looks, and the wrong hanger leaves a mark that outlasts the wreath by years.
Over-the-door hook: the safest option for a rented home. Choose one with a padded back so the metal does not press into the paint.
Adhesive hook: fine for a light wreath on a clean, dry, painted surface. Clean the spot with rubbing alcohol first and let it cure for an hour before hanging anything.
Nail or screw: the most secure, and the one that leaves a hole. Only for a door you own and do not mind repairing.
Ribbon over the top: loop a wide ribbon over the top of the door and hang the wreath from that. No hardware at all, and it looks intentional.
Trim the back before you hang it. Run your fingers across the reverse of the wreath. Any stem you can feel will press into the door under the wreath’s own weight and leave a scratch. Two minutes with the wire cutters now saves a repaint in January.
Reusing the Base All Year
Because nothing is glued, the same grapevine base can carry you from September to January and beyond. Pull the stems out, store them flat, and rebuild. One base, four seasons, one purchase.
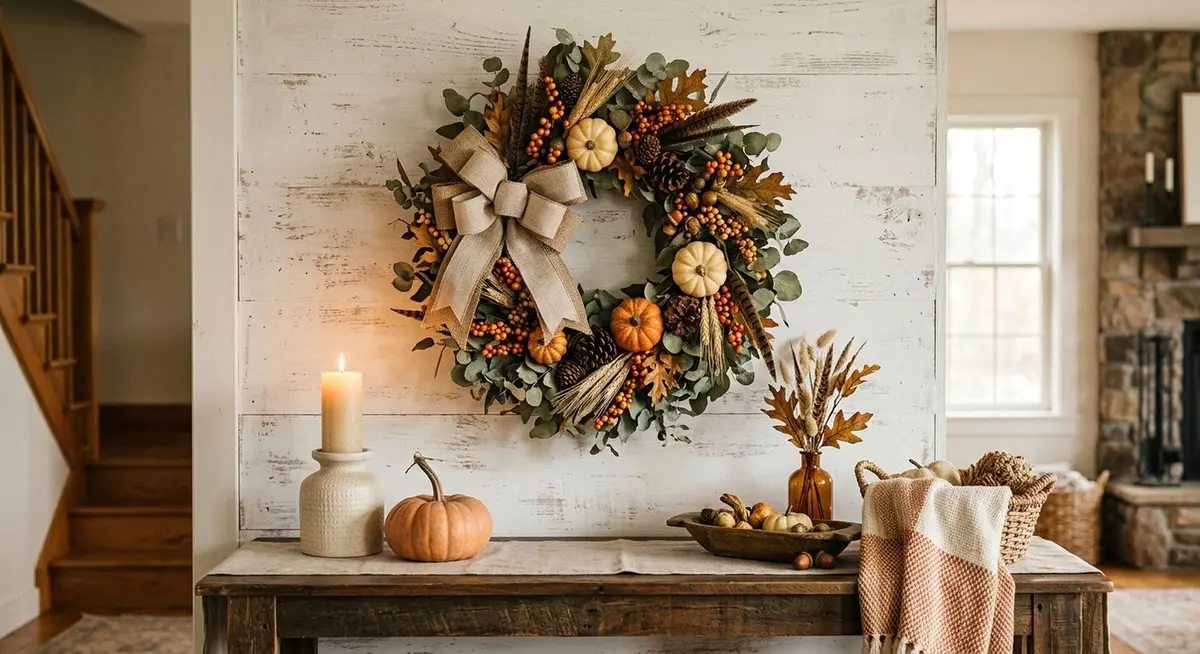
The same wreath works indoors between seasons — on a wall above a console, it reads as decor rather than as a door decoration.
If you enjoy building things for the house rather than buying them, this is the same logic that makes a fall bucket list worth writing out and a no-carve pumpkin project worth doing with the children — a small number of pieces, chosen deliberately, beats a house full of things you did not really want.
Store stems flat, not upright. A box lined with tissue keeps the leaves from crushing. Standing them in a vase bends the wire stems.
Label the box by season. Next September you will not remember which stems were the autumn ones.
Retire a stem when it fades. Faux foliage fades in direct sun. If a stem has gone grey, it will drag the whole wreath down.
Keep it out of direct sun. A wreath on a south-facing door in full afternoon sun will fade in a single season, however good the stems are. If your door faces the sun, plan to rebuild the wreath each year rather than expecting two.
Five Mistakes That Make a Wreath Look Homemade
These are the five things that separate a wreath people ask about from one that looks like a kit. All five are easy to avoid once you know to look for them.
The five tells, and the fix
Mistake
Why it shows
The fix
Too many pieces
Looks cluttered and cheap
Stick to six; layer rather than add
Evenly spaced stems
Reads as a craft kit
Two clusters, top and bottom, open vine between
A limp bow
Undoes an otherwise good wreath
Use wired ribbon and secure with floral wire
Stems poking out the back
Scratches the door
Trim flush and feel the back before hanging
Mixing every autumn colour
Looks noisy from a distance
Pick one scheme and repeat one accent three times
Once the wreath is on the door, the rest of the season tends to follow. If you are planning the weeks around it, a short list of fall crafts and a one-bowl pumpkin loaf for the afternoon are the two things that make an autumn weekend feel finished rather than rushed.
The distance test. Stand back six feet and look at the wreath. If your eye does not know where to land, there is too much going on. Remove a piece rather than adding one — the fix is almost always subtraction.
Troubleshooting and Questions
These are the questions that come up most often, and almost every wreath problem traces back to one of three things: a loose base, unwired ribbon, or stems left long at the back.
Can I really make this in six minutes?
Yes, once the supplies are laid out in front of you. The assembly is genuinely about five minutes: two foliage picks, two decorated stems, a bow and a trim. The time goes on shopping and on making the bow, so if you are new to bow-making, budget ten minutes for your first attempt and five for every one after that.
Do I need a glue gun?
No, and for a wreath on your own door you are better off without one. Glue is for wreaths you intend to sell, where the stems must not shift in transit. Leaving the stems unglued means you can pull them out and rebuild the same base for Christmas, spring and summer.
How do I stop the wreath scratching my door?
Turn the wreath over when you have finished and trim every stem flush with wire cutters. Then run your hand across the back — if you can feel a stem, it will press into the paint under the wreath’s weight. Two minutes of trimming now saves a repaint later.
What size wreath should I buy?
Eighteen inches is the sweet spot for a standard front door. Go to 24 inches only if your door is unusually wide, or the wreath will look undersized against the frame. For a wall or an interior door, a round base works better than an oval.
Why does my bow look flat?
Almost always the ribbon. Unwired ribbon cannot hold a loop, however carefully you tie it. Check the selvedge for a thin wire running through both edges before you buy — burlap and linen-look ribbons are usually wired, satin usually is not. Secure the finished bow with floral wire rather than tying it, so it cannot sag.
Can I use real foliage instead of faux?
You can, and it looks beautiful for about a week. Real leaves dry out, curl and drop, and they will not survive a rainy fortnight on a front door. If you want real foliage, use it on an interior door or a table wreath and plan to remake it often. Faux stems are the practical choice for a front door.
How do I store the wreath between seasons?
Pull the stems out, lay them flat in a box lined with tissue, and label the box by season. Storing stems upright in a vase bends the wire and crushes the leaves. Keep the base itself somewhere dry — grapevine is fine in a garage or loft, but damp will make it brittle.
Will the wreath survive rain?
A grapevine base and faux stems will, and they are the reason this design works outdoors. The one thing to watch is the ribbon: burlap can go limp when it is soaked. If your door is very exposed, either accept that the bow will need re-fluffing after a storm or bring the wreath in during the worst of the weather.
Free Printable: The Fall Wreath Planner
A printable companion to this wreath — the six-piece shopping list, the three colour schemes, the bow loop guide, the six-minute step checklist, a door-hanging safety check and a four-season rebuild plan.
Elowen Thorn I cook, photograph and re-test every recipe in an ordinary home kitchen before it goes up, so what you make matches what you see. Savory Discovery is where simple weeknight cooking, seasonal ideas and the odd bit of kitchen craft sit side by side — written plainly, and worth cooking twice.