By Elowen Thorn · Halloween Play · 10 sensory setups
Most Halloween activities for kids fail in the same quiet way: the prep takes longer than the play. You mix, you freeze, you arrange it beautifully — and four minutes later someone is bored and the table is a swamp. The fix is not more elaborate ideas. It is choosing a setup that matches what your child can actually do with their hands right now, and knowing before you start which ones are worth the mess.
How to Choose a Setup That Actually Gets Played With
Sensory play works because the material does the entertaining, not you. A tray of foam, a lump of dough, a bowl of something that fizzes — each one gives a child something to push, scoop, squash and watch, and that is what holds attention far longer than a finished craft. The trick is matching the material to the hands in front of you.
Ask three questions before you open a single cupboard. Can my child get their hands into it without help? A two-year-old cannot manage tweezers, and giving them tweezers guarantees frustration. Does the setup survive being done wrong? Foam and dough do; anything with a specific end result does not. Can I clean it up in under five minutes? If the answer is no, the activity will wear you out faster than it delights them.
Then think about texture, because that is what you are really offering. Foam is airy and collapses. Dough is firm and holds a shape. Slime stretches and resists. Cornstarch-and-water is solid until you grab it and then it drips. Fizzing is the loudest of all because it moves on its own. Rotate the texture rather than the theme and the same ten ideas stay interesting for weeks.
The rule that saves every afternoon: set the boundary before the material comes out, not after. Say the rule once, out loud, while their hands are still clean — “the foam stays in the tray” — then put the tray down. Children follow a rule they heard before the fun started far better than one shouted over it. And when you have a pumpkin to paint instead of a tray to fill, the same principle is what makes painted monster pumpkins work with a toddler in the room.
The Ten Setups at a Glance
Here is the whole set in one table. Use it to pick by age, by how much notice you have, and by how much mess you are willing to meet at the end. Every setup below is then written out in full further down the page.
Pick by age, prep time and mess
Setup
Best age
Prep ahead?
Mess level
Shaving cream ghosts
2 – 5
No
High
Monster handprints
2 – 8
No
Medium
Fall leaf tree
3 – 9
No
Low
Foaming spiders
3 – 8
Yes — freeze 2 hours
Medium
Candy corn bin
18 months – 5
No
Low
Witch’s stew
3 – 9
Yes — boil the pasta
High
Fizzing ice ghosts
2 – 7
Yes — freeze 1–2 hours
Low
Spider slime
5 – 11
No
Medium
Play dough pumpkins
2 – 7
No
Low
Wiggly monster eyes
3 – 10
Yes — chill 2 hours
Low
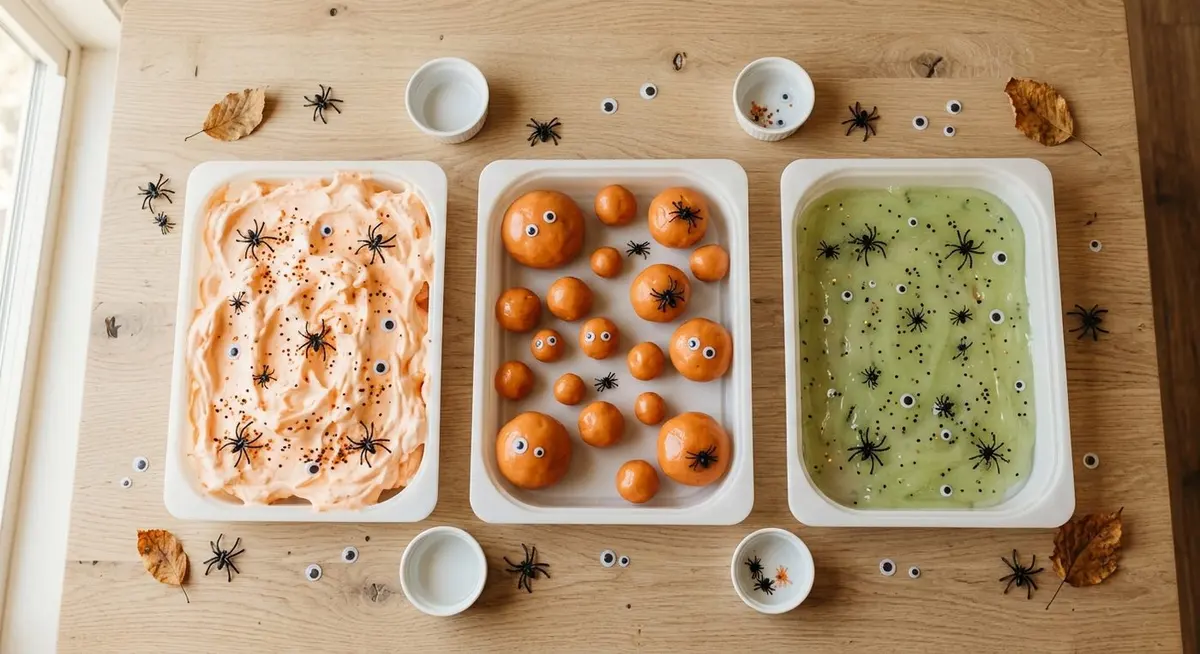
Three textures, one afternoon: collapsing foam, firm dough and stretchy slime cover almost every stage between two and eight.
Two things are worth noticing in that table. First, the setup with the highest mess score is also the one for the youngest children — that is not a coincidence, it is the whole point. Second, the four that need prep all need it in a freezer or a fridge, which means they are the ones you build during nap time and play with after school.
Shaving Cream Ghosts
If you only do one thing on this list, do this one. A shallow tray of shaving cream is the cheapest, fastest, most reliably absorbing sensory material there is, and it collapses back into itself so it never overflows on its own. One can serves two children for a full sitting.
Squirt a generous mound of plain shaving cream into a shallow tray — not a deep tub, so nothing can be scooped over the edge.
Scatter a handful of googly eyes of different sizes across the foam, plus a few small plastic spiders if you have them.
Show them once: drag two fingers through the foam to leave a trail, then press an eye into the top of a mound.
Then step back and let them lead. Most children will bury the eyes, dig them out, and rebuild the mound four or five times.
When interest fades, hand them a dry cloth and let them wipe the tray themselves — the clearing up is part of the play for a toddler.
Rinse hands at the sink with warm water. Shaving cream is soap, so hands come out cleaner than they went in.
Two easy upgrades. Add a few drops of orange food colouring or liquid watercolour and stir it in to turn the foam into pumpkins; a drop of green makes a Frankenstein instead. For older children, add a spoonful of school glue and the foam dries into a puffy paint — have them paint a paper plate or a paper pumpkin and leave it to set overnight. Keep the coloured version away from pale grout and unsealed wood, because the colour does stain.
Monster Handprints
This is the bridge between a sensory setup and something you can hang on the wall. The play is in the pressing and the smearing; the product is a wonky, wonderful monster that looks like nothing else your child will make this month.
Lay a large sheet of paper on a wipeable mat. Slightly heavier paper — card stock or sugar paper — takes wet paint without buckling.
Paint one palm and four fingers in a single colour. Orange, green and purple read best, and a foam brush is easier than a bristle one for a small hand.
Press the hand down flat, fingers spread, and hold for a slow count of three before lifting straight up. Lifting sideways is what smears the print.
While it dries, cut a few triangles from scrap paper for claws and horns.
Once dry, glue on googly eyes — one, three or seven, the odder the better — and add the paper triangles as fingernails.
Finish with a thin line of school glue drawn into a mouth and a sprinkle of glitter over it. Shake the excess off over the bin, not the table.
The print you keep is the fourth one. The first handprint is always too faint because the paint is still thick on the palm. The second is usually the best. By the third or fourth the paint is thin and the print goes patchy — so re-paint between every press rather than trying to stretch one coat. If you have more than one child, do them on one sheet and let the prints overlap; a crowd of monster hands is better than a neat row of them.
Fall Leaf Tree
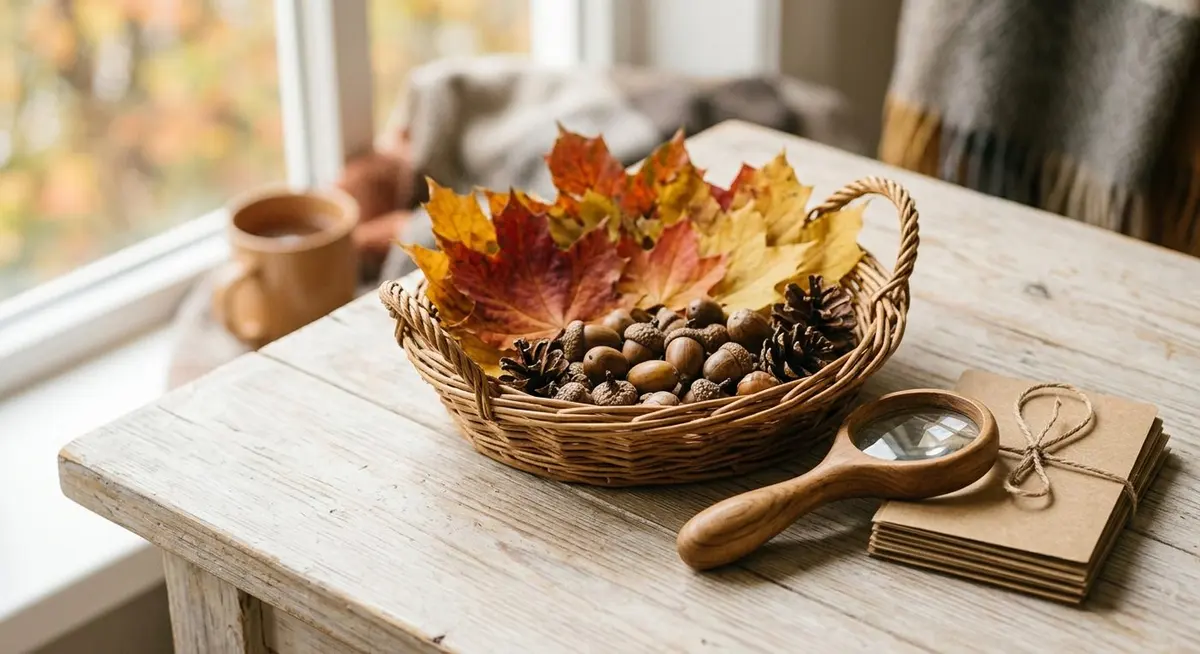
This one starts outside, which is half its charm. Collecting the leaves is an activity in itself, and it costs nothing. If you want to make the walk into a proper outing with a list to tick off, our fall nature walk guide builds the whole route around it.
Take a bag outside and collect leaves of as many different colours and shapes as you can find. Ten minutes is plenty; aim for variety over quantity.
Draw a simple bare trunk and a few branches on a large sheet of paper. Three lines is enough — the leaves do the rest.
Let your child paint the trunk, or colour it in, and leave it to dry while they sort the leaves by colour.
Run a line of school glue along one branch at a time and press leaves on, overlapping them like scales.
Work up and outwards, leaving the lowest branches bare so the tree still reads as a tree.
Once it is dry, press the whole sheet under a heavy book for an hour so the leaves lie flat. Hang it somewhere you will still see it in November.
Use the leaves twice. Fresh leaves are soft and glue down easily but curl as they dry. Leaves pressed flat for a day first hold their shape far better and keep their colour longer. If you want a second version without the glue, lay leaves under a sheet of paper and let your child crayon over them to take rubbings — a completely different, much quieter activity from the same handful of leaves.
Foaming Spiders
This is the one that makes children gasp. You build a small spider out of baking soda, freeze it, and then drop it into vinegar — and it foams, fizzes and slowly falls apart to reveal the plastic spiders hidden inside. The reveal is why it beats every other activity on this list for a second and third round.
Make the spiders — and yes, they need the freezer
Mix about half a cup of baking soda with a quarter cup of water in a bowl until you have a damp, mouldable paste. Add a few drops of food colouring if you want coloured spiders.
Take a handful and press a couple of small plastic spiders into the middle of it.
Add more of the paste over the top and roll it between your palms to make the abdomen, then use the rest to shape a smaller head at one end.
Cut four pipe cleaners in half and push four pieces into each side for the eight legs.
Set the finished spiders on wax paper and freeze for at least two hours. Overnight is better — just let them sit out for ten minutes before play so they are not rock hard.
At playtime, mix vinegar with a good squirt of washing-up liquid in a shallow dish and drop the spiders in. The foam starts almost immediately.
Hand them a spoon so they can lift the dissolving spiders out, find the plastic ones and drop them back in for another round.
Why it fizzes: the baking soda is a base and the vinegar is an acid, and the two together release carbon dioxide — that is the entire trick. The washing-up liquid is not decoration: it traps those gas bubbles in a film and turns a mild fizz into a proper climbing foam. Skip it and the reaction still works, but the drama drops by half. The same reaction powers the witches’ cauldron effect you can use at a party.
Candy Corn Sensory Bin
The least work and the longest engagement on the whole list, which is exactly why it is the one to reach for on a bad afternoon. A tray of candy corn and a handful of scoops is genuinely enough for a toddler to occupy themselves for twenty minutes.
Tip two or three bags of candy corn into a shallow tray. A rimmed baking sheet or a plastic serving tray both work.
Add small plastic spiders, and any other Halloween smalls you have — rubber eyeballs, gummy worms, squishy shapes.
Set out a row of small dishes, a couple of spoons and a scoop or two alongside the tray.
Let them scoop, pour, sort and bury. Resist the urge to direct it; the value is in the choosing.
Add a pair of tweezers or kitchen tongs for an older child, and ask them to move one piece at a time between bowls.
When they are done, tip the corn back into a bag or jar and the plastic into a smaller box. Both keep for next year.
A word about the sweets. Candy corn is an easy choking shape for children under three, so this bin is one to supervise closely and to swap for dried pasta shells or pom-poms if you have a child who still mouths everything. If the bin is going to be handled a lot, use it as a counting and sorting tray rather than an eating one, and keep a separate bowl of corn for actual snacking. For a no-sweets Halloween snack that still feels like a treat, Halloween trail mix does the same job with a spoon.
Witch’s Stew
The messiest activity here, and the one children ask for again. The premise is simple: give them a cauldron of ingredients and let them brew. The fizz at the end is the finish line, so the whole thing has a shape — which is what keeps it going for half an hour rather than five minutes.
Boil a pan of spaghetti, drain it, and let it cool completely. Add a little green or orange food colouring to the cooking water if you want it properly witchy.
Set up a wide tray or a big bowl with the cold spaghetti, a scatter of candy corn, plastic spiders and gooey eyeballs, plus spoons, scoops and small bowls.
Add a small pot of baking soda and a jug of vinegar — but keep both at arm’s length until the end.
Let them mix, ladle and serve their stew for as long as they want. This is the long middle part of the activity and it needs no input from you.
When they announce the stew is ready, sprinkle baking soda over the top and pour the vinegar in. It fizzes and climbs.
Tip the whole tray straight into the bin afterwards. Spaghetti does not survive a second round, so do not try to save it.
Keep it in one tray. The mess here is real, so contain it deliberately: put the whole setup inside a boot tray, a roasting tin or a storage tub, and put that on a washable tablecloth. Give each child a towel beside them before they start. The single biggest reason parents avoid this activity is the clean-up, and the tray solves most of it before it happens.
Fizzing Ice Ghosts
Quieter and cleaner than the foaming spiders, with a long, slow version of the same magic. The ghosts melt as they fizz, so the activity drifts from fizzing to water play without any transition you have to manage.
Mix one part water to two parts baking soda to make a damp, crumbly paste.
Spoon it into the holes of an ice cube tray and press a pair of googly eyes into the top of each one.
Freeze for one to two hours until solid.
At playtime, tip the ghosts into a shallow dish and give your child a small bowl of vinegar with a dropper or a pipette.
Let them drip vinegar onto the ghosts and watch the fizz start. Dropping a whole ghost into the bowl makes a tiny volcano.
As the ghosts melt, hand over a spoon and let them scoop the slush. The ice-cold sensory play at the end is often the part they remember.
Two small fixes. If the mixture will not hold together in the tray, it needs slightly more water; if it slumps, add a spoonful more baking soda. And if your freezer runs very cold, leave the ghosts out for ten minutes before play — a fully frozen ghost has almost no surface to fizz on, and a slightly softened one reacts immediately.
Spider Slime That Does Not Fail
Slime goes wrong for one reason nine times out of ten, and it has nothing to do with the recipe: people add the activator too fast. Pour the liquid starch in slowly, stir, and stop as soon as the mixture pulls away from the bowl. Everything else on this page is forgiving. This is the one that is not.
Pour two 5-ounce bottles of school glue into a large bowl. Clear glue makes translucent slime, white glue makes opaque slime, and either works.
Add about ten ounces of water and stir until the glue and water are completely combined.
Pour in roughly half of the liquid starch and stir slowly.
Keep adding starch a little at a time, stirring, until the mixture gathers into a single mass and stops sticking to the sides of the bowl. You may not need all of it.
Lift it out and knead with your hands until it stops feeling sticky. Thirty seconds of kneading fixes what another splash of starch would ruin.
Add a handful of plastic spiders and play. Store in a lidded jar in the fridge and it will last a week or more.
If it has already gone wrong. Too sticky means it needs more activator — add a teaspoon of starch and knead again. Too rubbery and snapped means it has too much, and no amount of stirring will undo it: add a tablespoon of warm water and knead, and if it still snaps, add a little more glue instead. Slime that has been left out and gone stiff usually comes back with a few drops of water and a minute of kneading.
Play Dough Pumpkins
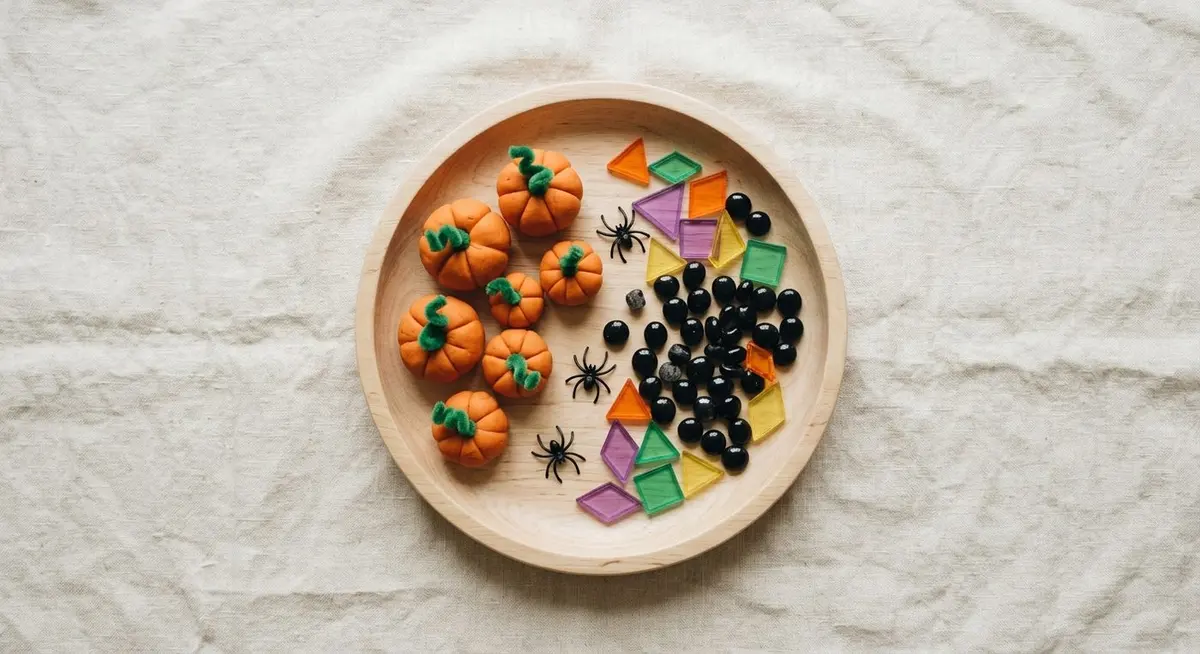
The setup with the best ratio of engagement to clean-up on this entire list. A ball of orange dough, a few green stems and a scatter of small beads will keep a two-year-old busy, and the same tray quietly becomes a shape-and-pattern exercise for a five-year-old.
Set out orange play dough, a few green pipe cleaners cut into short stems, and small black beads or pattern blocks.
Show them how to roll a ball, then press the green stem into the top.
Hand over the beads and let them press in faces. Black beads make eyes and mouths; pattern blocks make geometric faces that look surprisingly good.
For a flat pumpkin, flatten the ball into a disc and decorate the surface instead — easier for very small hands.
Older children can use the side of a plastic fork to press ridges into the dough and make it look properly ribbed.
Swap the dough for green and the same setup makes Frankenstein monsters. Blue makes ghosts, purple makes bats.
One colour of dough, one colour of stem and a handful of small beads is a complete invitation to play.
Keep store-bought dough in its own box. Homemade dough and shop dough behave differently and both dry out fast when left in the open air. Press the pumpkins back into a ball at the end of the session and seal it in a bag or a lidded tub. If you would rather paint a real pumpkin than shape a dough one, the no-carve pumpkin decorating ideas pick up exactly where this leaves off.
Wiggly Monster Eyes
The only activity on this list that is also a snack. Jelly set in half a plastic egg with a raisin in the middle comes out looking unnervingly like an eyeball, and children find this hilarious. It is also the lowest-mess setup of the ten.
Make up a packet of jelly as the box directs and let it cool to lukewarm.
Sit the two halves of a few plastic Easter eggs in a muffin tin so they stay upright.
Pour the jelly into one half of each egg, filling it about two-thirds.
Drop a single raisin into each half and push it down so it sits in the middle. This becomes the pupil.
Chill for at least two hours, until fully firm.
Pop them out of the shells and tip them into a shallow dish. They wobble, they slide, and they are genuinely fun to chase around a plate.
For a bigger eyeball, set one half, then sit a second half on top with a little more jelly and chill again to make a full sphere.
Two practical notes. Use red or green jelly for the most convincing eyes, and make sure the jelly is only lukewarm when it goes into the eggs — hot jelly warps thin plastic. Because this is a food activity, keep it away from the other play trays, wash hands before anyone handles it, and check the ingredients if anyone at the table has a gelatine or food-dye sensitivity.
The Master Supply List
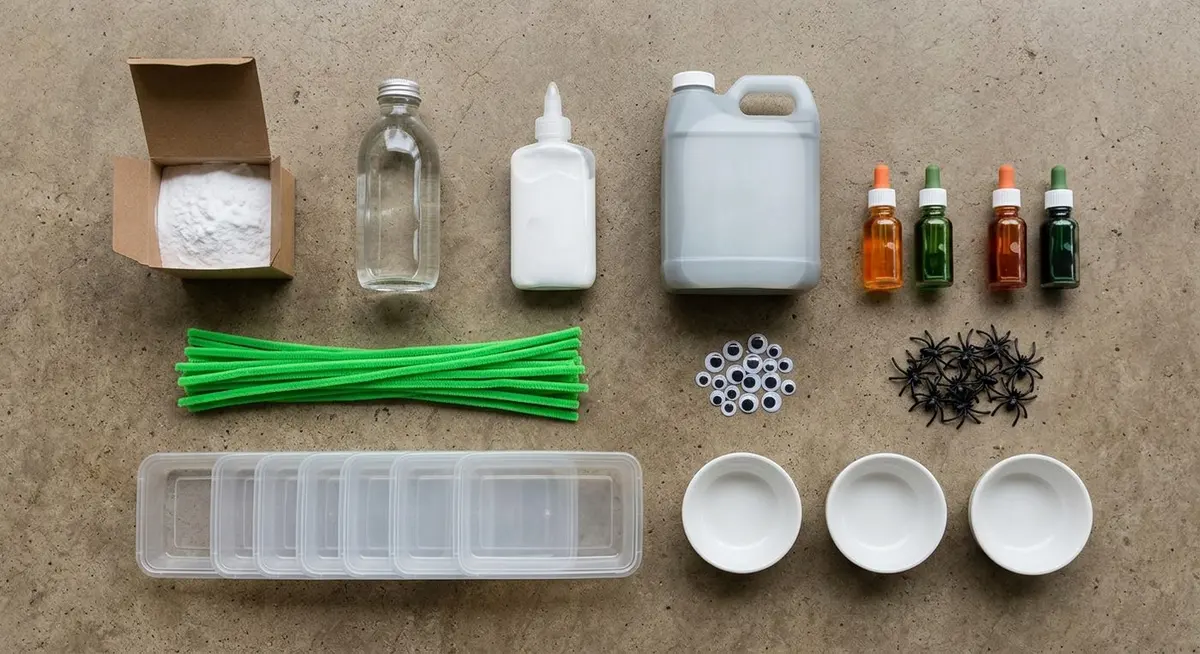
Almost everything across the ten setups comes from three aisles: the baking shelf, the craft box and the discount shop’s Halloween section. Buy once in autumn and you have next October covered, because most of these materials keep for a year in a labelled box.
Nearly all ten setups come out of this one box of supplies.
What to buy and what it is for
Supply
Which setups
Note
Baking soda
Foaming spiders, ice ghosts, witch’s stew
Buy the large box; you will use it all
White vinegar
Foaming spiders, ice ghosts, witch’s stew
The cheap kind works perfectly
Washing-up liquid
Foaming spiders
Makes the fizz into a real foam
School glue
Spider slime, monster handprints
Two 5 oz bottles per batch of slime
Liquid starch
Spider slime
The only reliable activator for glue slime
Shaving cream
Shaving cream ghosts
Plain, unscented if you can find it
Food colouring or liquid watercolour
Almost all of them
Liquid colour mixes far more evenly
Plastic spiders and googly eyes
Six of the ten
Buy a big mixed bag in October
Pipe cleaners
Foaming spiders, play dough pumpkins
Green for stems, black for legs
Play dough
Play dough pumpkins
Orange first, then whatever else you like
Candy corn or dried pasta
Candy corn bin, witch’s stew
Pasta if you have a child under three
Jelly, raisins, plastic eggs
Wiggly monster eyes
One packet makes about eight eyes
Shallow trays and small bowls
Every single one
The single most important purchase
A wipeable tablecloth or a boot tray under every setup
A towel within reach of each child, laid out before the material
Small bowls, scoops and one pair of tongs for the older children
A lidded box for the plastic spiders, eyes and beads so they survive to next year
A spare set of clothes, or an apron, next to the shaving cream and the stew
Mess, Safety and Ages
Sensory play is only relaxing if you have decided in advance how far you are willing to let it go. Set the level before you start and the whole thing stops being a negotiation. The table below is the version that works in a normal house with a normal amount of patience.
The realistic age bands
Age
What they can do
What to watch for
Under 18 months
Squash, smear, mouth everything
Everything goes in the mouth — use only edible materials
18 months – 3
Scoop, pour, bury, sort by colour
Choking shapes; keep small parts out or supervise closely
3 – 5
Follow two or three steps, name textures
Frustration with tools; skip the tweezers and tongs
5 – 8
Build to a plan, do the prep with you
Wanting the result to be perfect; praise the mess
8 – 11
Run the setup themselves, measure ingredients
Boredom — hand them the recipe and let them own it
Three safety rules that are not negotiable. Anything small enough to fit inside a toilet roll tube is a choking risk for a child under three, so the spiders, beads, googly eyes and candy corn all stay out of reach at that age. Baking soda and vinegar are safe to handle but should not be eaten in quantity, and the fizzing setups are not a food activity. And keep every setup away from anyone with a food dye or gelatine sensitivity — the jelly eyes and the coloured foam are the two to check before you start.
Storing and Reusing a Setup
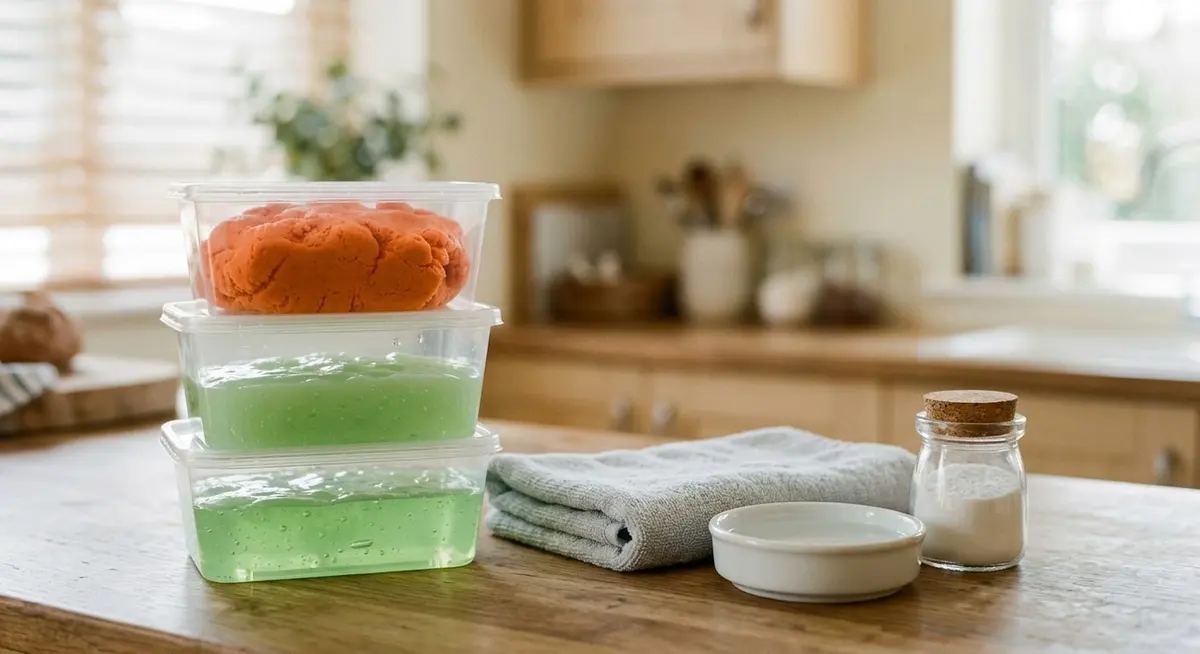
The difference between an activity you do once and an activity you do all month is storage. Most of these keep far better than you would expect, provided you separate the wet from the dry and label the box so next October is easy.
Lidded containers, kept low enough that the children can reach them themselves, get used twice as often.
What keeps and what does not
Setup
How to store it
Keeps
Spider slime
Lidded jar in the fridge
1 week or more
Play dough
Rolled into a ball, sealed bag, cool cupboard
1 – 2 months
Shaving cream ghosts
Tray wiped out and reused; the foam is single-use
One sitting
Monster handprints
Flat, under a heavy book for an hour, then on the wall
Years
Fall leaf tree
Pressed flat under a book; leaves keep their colour
Months
Foaming spiders
Frozen, unbaked, in a bag — make a double batch
1 month in the freezer
Candy corn bin
Corn back in a jar, plastics in a small box
Next October
Witch’s stew
Nothing survives; tip it all out
One sitting
Fizzing ice ghosts
Keep the tray of frozen ghosts in the freezer
1 month
Wiggly monster eyes
Fridge, covered, in the dish
2 days
One habit makes the biggest difference: label the box with what is inside it and the date you put it away, and keep the whole thing on a shelf a child can reach without asking. Setups that are visible get chosen. Setups in a cupboard behind the Christmas decorations get forgotten until they are dusty. If you want a wider rotation to pull from, a fall bucket list is a good place to keep the next few ideas written down.
Troubleshooting and Questions
These are the ones that come up most often. Almost every problem below traces back to one of three things: a material that is too cold, a mixture that was over- or under-activated, or a setup that was offered to a child who was not quite ready for it.
My child lost interest in two minutes. What went wrong?
Almost always the setup asked for a skill they do not have yet, or the material was too cold to handle. Go back to the age table and drop one band — a two-year-old who is offered tweezers will quit immediately. Very cold dough, frozen spiders and chilled slime are all much harder to play with than they look, so let them stand at room temperature for ten minutes first.
Can I use baking soda and vinegar indoors?
Yes, and it is the safest of the reactions here. Use shallow dishes rather than deep ones so nothing climbs over the rim, put a tray or cloth underneath, and keep the quantities small — a quarter cup of vinegar at a time. The fizz is carbon dioxide, which is harmless in a normal room, so just open a window if you are doing several rounds.
My slime turned rubbery and snapped. Can I save it?
Probably, by working backwards. Snap means too much activator, so add a tablespoon of warm water and knead it in. If it is still snapping rather than stretching, add a small squeeze of fresh glue instead. If it has set hard after being left out, a few drops of water and a minute of kneading usually brings it back.
Is candy corn safe for a toddler?
Not as a play material, and not as a snack. Its shape and firmness make it an easy choke for a child under three, and a sensory bin is exactly the setting where a child is most likely to put it in their mouth. Use dried pasta shells or pom-poms in the bin at that age, and save the candy corn for older children or for a supervised snack bowl.
How do I stop the mess getting out of hand before it starts?
Decide the level before the materials come out — get the kitchen roll and a bin within arm’s reach, lay a wipeable cloth or a boot tray under everything, and say the boundary out loud while hands are still clean. Then accept the mess inside that boundary and do not keep correcting it. The children who get told off for splashing tend to stop playing altogether.
What is the best one to do with a mixed-age group?
Play dough pumpkins or the shaving cream ghosts. Both scale down to a toddler and up to an eight-year-old without changing a single supply, and neither has a correct answer, so nobody can be behind. Avoid the slime and the foaming spiders with mixed ages — those need hands that can follow a sequence.
Free Printable: The Halloween Sensory Play Kit
A printable companion to this guide — a supply checklist, an age-and-mess reference card, all ten setups as individual step cards you can cut out, a prep-ahead timeline and a storage label sheet.
PDF · 5 pages · prints on letter or A4 · subscribe to unlock the download
Savory Discovery · By Elowen Thorn · Last updated September 2026. Age bands are a general guide; follow the materials on the packet and your own child’s stage.
Elowen Thorn I cook, photograph and re-test every recipe in an ordinary home kitchen before it goes up, so what you make matches what you see. Savory Discovery is where simple weeknight cooking, seasonal ideas and the odd bit of kitchen craft sit side by side — written plainly, and worth cooking twice.