By Elowen Thorn · Halloween at Home · 10 Setups · Ages 2–12
Ten Halloween activities you can run at home this week, built on one cheap reaction and a box of baking soda. Some fizz, some glow, some you eat. Every one of them is written out with the exact amounts, the age it actually suits, and the mess it will make — so you can pick the right one for the afternoon you have.
Most Halloween activity lists fail for the same reason: they are really craft projects wearing a costume. A craft has a right answer, and once a child has glued the googly eye in the wrong place, the fun is over. A reaction does not have a right answer. It has a result, and the result changes when you change something. That is why a jar of baking soda and vinegar will hold a four-year-old for twenty minutes while a paper plate ghost holds them for four.
The ten setups below all run on the same cheap chemistry, with three exceptions that are baking rather than science. Baking soda and an acid make carbon dioxide, and carbon dioxide is the whole show: it foams, it lifts, it makes bubbles travel through oil, and it makes a carved pumpkin look like it is being sick. You can buy a year’s worth of the stuff for the price of one plastic toy.
What makes this list different from the version you have probably already scrolled past is that each setup is written out with the amounts that actually work, the age it genuinely suits, and an honest note about the mess. A puking pumpkin is a wonderful twenty minutes and a terrible idea on a carpet. Knowing that before you start is the difference between a good afternoon and a long one.
Three jars, one box of baking soda and a bottle of vinegar. That is the entire kit for the fizzing half of this list.
The one rule that saves the afternoon: put the tray down before the first pour. Every fizzing setup here overflows at least a little, and a metal baking tray or a lasagna dish under the jar turns a disaster into a wipe-up.
Before You Start: The Ten-Minute Setup
The difference between a setup that runs and a setup that stalls is almost always preparation. Children lose interest during the searching-for-things phase, not during the reaction. Ten minutes of laying out before they arrive buys you an hour of attention.
Cover the surface first. A plastic sheet, a bin bag split open, or a cheap shower curtain. This is the single highest-value step in the whole list.
Lay out every supply in the order you will use it. Left to right, like a recipe. Interrupted setups are the ones that end in tears.
Buy baking soda by the bag, not the box. A single afternoon of these setups can use two cups, and running out mid-reaction is the one thing that ends the fun early.
Decide who handles the vinegar. Vinegar is harmless but it stings in a cut and it is miserable in an eye. For anyone under five, you pour and they watch, or you hold the cup together.
Have a towel and a bowl of warm water within arm’s reach before anything comes out of the cupboard.
Pick two setups, not ten. One fizzing and one making is the combination that holds attention. Ten is a list, not an afternoon.
Say the boundary out loud before the first pour. “The soda stays in the tray and the vinegar stays in the cup.” It sounds fussy and it works. Children follow a rule they heard before the fun started far better than one delivered in the middle of it.
All Ten at a Glance
Use this table to pick. Time is hands-on time, not including cooling or baking. Mess is an honest estimate, not a hopeful one.
The ten setups, sorted by what they cost you
#
Setup
Time
Mess
Best age
1
Spooky lava lamp
10 min
Low
4+
2
Glow-in-the-dark slime
15 min
Medium
5+
3
Skeleton brittle candy
1 hr 20 min
Medium
8+ with an adult
4
Spider cookies
45 min
Medium
4+
5
Bubbling witch’s cauldron
10 min
Low
3+
6
Puking pumpkin
20 min
High — do it outside
3+
7
Fizzy sensory bin
15 min
High
2+
8
Potion class
10 min
Low
4+
9
Caramel corn
30 min
Medium
8+ with an adult
10
Pumpkin pancakes
30 min
Medium
3+ helping
If you only have twenty minutes and one child: the lava lamp. It is the best return on effort on this entire list — three tablespoons of soda, a bottle of oil and a cup of coloured vinegar, and it looks like something you bought.
The Fizzing Setups: Lava Lamp and Cauldron
These two are the fastest wins on the list and they use the same two ingredients. Start here if you have never run a science setup with your children before, because the reaction is immediate and impossible to get wrong.
1. The spooky lava lamp
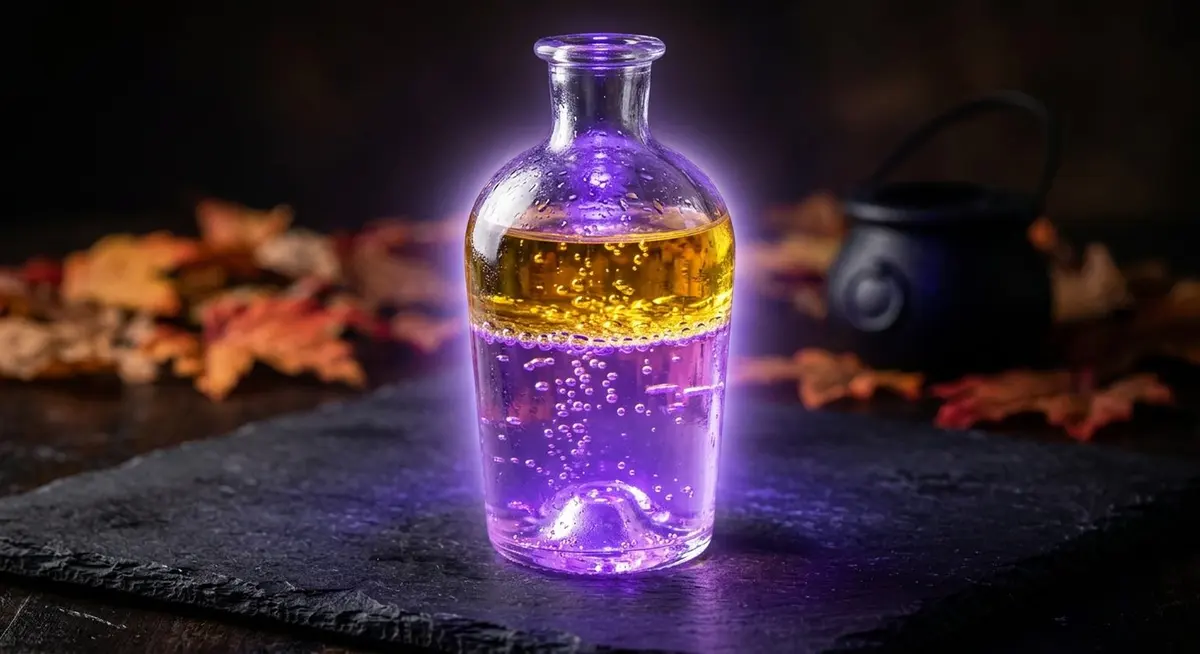
A lava lamp works because oil and vinegar do not mix, and the carbon dioxide bubbles have to carry the coloured vinegar up through the oil to escape. The bubbles rise, the colour sinks back, and it keeps going for several minutes. Red food colouring makes it look like something out of a laboratory; glow-in-the-dark colouring under a black light bulb makes it look like something out of a film.
Add 3 large tablespoons of baking soda to a tall clear bottle or jar. The taller the container, the easier it is to watch the bubbles travel.
Fill the bottle two-thirds of the way with vegetable oil. Do not stir it into the soda — let it sit on top.
In a separate cup, mix enough vinegar to fill the last third of the bottle with three drops of food colouring.
Pour the coloured vinegar in slowly and watch the bubbles start to climb through the oil.
Set it on the table with a black light nearby and let them watch. It will keep fizzing for several minutes, and you can run it again straight away.
If you want a second low-mess setup to run alongside it, the printable fall scavenger hunt keeps everyone busy while the lamp settles, and it costs nothing but a printer.
The bubbles have to travel up through the oil to escape, which is what makes the colour rise and fall instead of just fizzing once.
5. The bubbling witch’s cauldron
This is the same reaction in a smaller, more theatrical container, and it is the one to run if you have several children at once because you can give each of them their own cauldron and their own colour. Small plastic cauldrons sold for Halloween sweets are exactly the right size.
Put about a teaspoon of baking soda into each small cauldron or container.
Pour half a cup of vinegar into a small cup for each colour you want, and add a few drops of food colouring to each.
Let each child pour their own coloured vinegar over their own cauldron.
Stir lightly for a bigger eruption. Warn them not to touch their eyes with coloured hands.
More soda and more vinegar means a bigger eruption, not a longer one. If you want the fizz to last, add the vinegar in small pours rather than all at once. That single change turns a ten-second reaction into a two-minute one.
The Puking Pumpkin
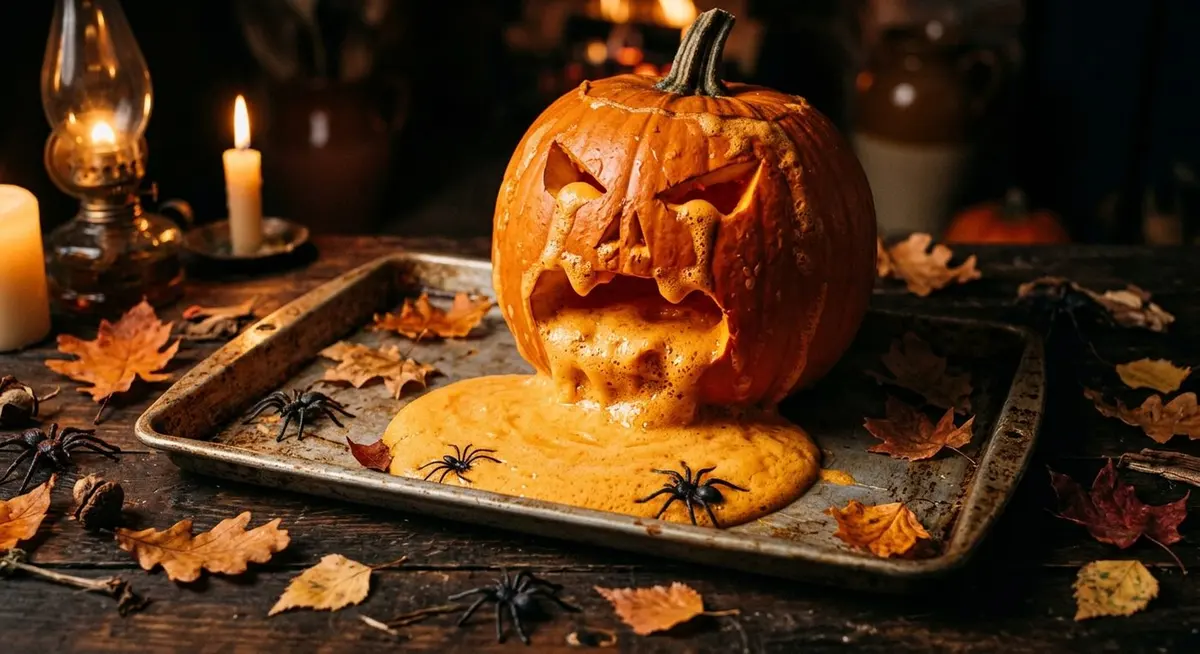
This is the one they will ask for again next year. You carve a jack-o’-lantern, then make it vomit foam. It is the same baking soda and vinegar reaction, but the carved mouth gives the foam somewhere to go, and a squirt of dish soap makes it far foamier and slower to collapse than the reaction on its own.
Carve your pumpkin as usual and clear out the inside properly. An adult should handle the knife.
Set the pumpkin on a metal baking tray, a lasagna dish or a large plate — something with a lip to catch the overflow.
Spoon a quarter cup of baking soda into the bottom of the carved pumpkin. For a very large pumpkin, use up to a cup.
Add a squirt of dish soap on top of the soda. This is what makes the foam thick and slow rather than thin and quick.
Mix several drops of food colouring into half a cup of vinegar. Green and orange both look convincingly awful.
Pour the vinegar in and stand back. Add plastic spiders or chopped apple pieces to the tray for extra effect.
Once the pumpkin has finished puking, the tray is usually the start of a bigger spread. Our spider web taco dip and mummy hot dogs are the two savoury things that go with it, and the Halloween punch is the drink.
The dish soap is what turns a quick fizz into thick foam that keeps oozing for a minute or more.
Do this one outside, or on a hard floor. Food colouring stains grout, carpet and grout-adjacent things permanently. A driveway or a patio is the right venue, and the clean-up is a hose.
Slime and the Fizzy Sensory Bin
These two are the toddler and preschool picks. Both are about hands rather than steps, which means they suit children who are too young to follow a sequence but old enough to want to be doing something.
2. Glow-in-the-dark slime
Slime is glue, baking soda and saline contact solution. The baking soda makes the mixture alkaline, and the saline solution supplies the ions that make the glue molecules link up into a stretchy solid. Glow-in-the-dark glue or glitter paint is what makes it a Halloween project rather than a Tuesday one.
Pour a 12-ounce bottle of school glue into a storage container.
Add one and a half tablespoons of baking soda and stir until it is fully mixed in.
Add a few drops of washable glitter paint until it reaches the colour you want.
Add two tablespoons of saline contact solution and stir. Keep adding a little at a time until it pulls away from the sides of the container.
Knead it with your hands for a minute. Add beads, plastic gems or glitter now.
Charge it under a lamp or in indirect sunlight, then turn the lights off.
7. The fizzy sensory bin
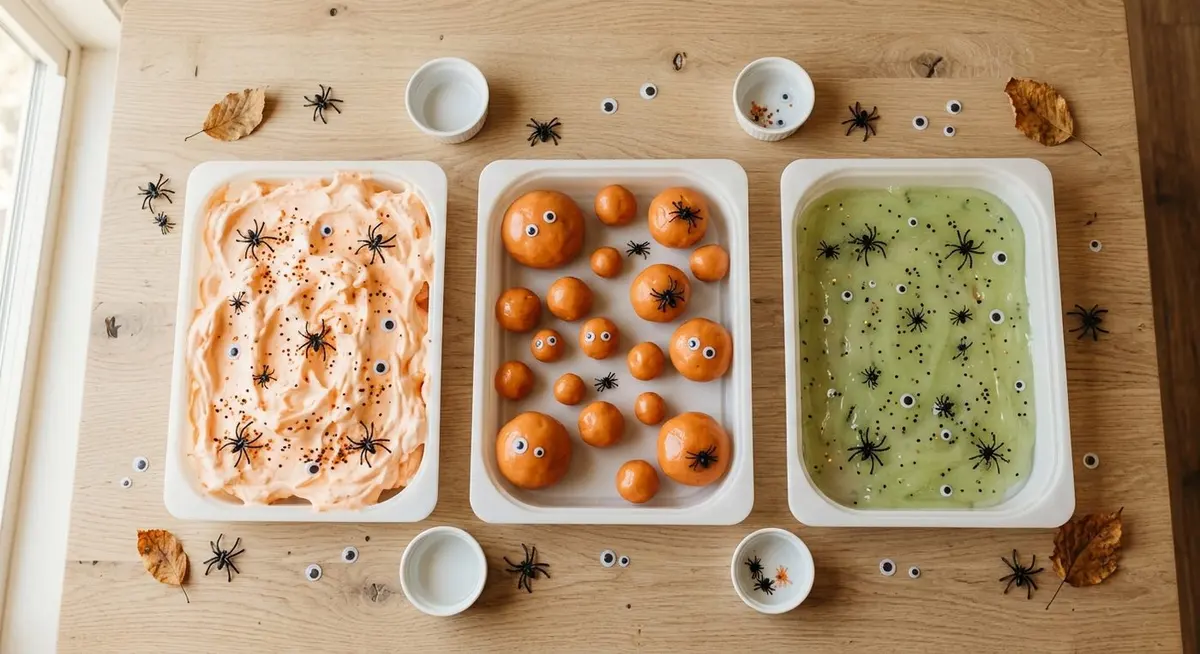
This is the best setup on the list for a two-year-old, and it takes about three minutes to build. You bury plastic Halloween figures under a cup of baking soda, pour vinegar over the top, and the toys rise to the surface on a bed of bubbles. The fizzing tickles their fingers, which is the part they remember.
Put the plastic spiders, pumpkins and figures in the bottom of a shallow plastic tub.
Pour a cup of baking soda over them and spread it so the toys are completely buried.
Add a few drops of food colouring in two or three separate spots.
Pour a cup of vinegar in slowly and watch the toys bubble up to the surface.
Let them dig. Add more soda and vinegar when the fizzing stops.
Use one colour, not several. Multiple colours turn muddy brown within a minute, which is fine for the reaction and disappointing for the photograph. One colour keeps it looking like a potion.
The Kitchen Setups: Cookies, Caramel Corn, Brittle
Three of the ten are baking rather than chemistry, and all three use baking soda for a real reason rather than as a gimmick. These are the ones to run when the weather has cancelled the outdoor plan, and they have the advantage of producing something you can eat.
4. Spider cookies
These are peanut butter blossom cookies wearing a costume. You press an indent into each warm cookie, then fill it with melted chocolate and add a malted ball for the body and two candy eyes. Piping chocolate legs on afterwards is the step that turns them from biscuits into spiders, and it is the step children enjoy most. If you want a second tray to bake alongside them, the monster cookies and the ghost brownies both use the same oven temperature.
Heat the oven to 375 F and line a baking sheet.
Beat half a cup each of granulated sugar, brown sugar, peanut butter, softened butter and one egg until smooth.
Stir in one and a half cups of flour, three-quarters of a teaspoon of baking soda and half a teaspoon of baking powder until a dough forms.
Roll the dough into one-inch balls, roll each in extra sugar, and space them two inches apart on the sheet.
Bake 8 to 10 minutes until the edges are golden, then press an indent into the centre of each cookie while they are still warm.
Once cool, pipe melted chocolate into each indent, press on a malted ball, add two candy eyes and pipe on eight legs.
9. Caramel corn
The baking soda here is doing something specific: it reacts with the acid in the molasses and sugar syrup and foams the caramel full of tiny bubbles. That is what makes the coating soft and buttery rather than hard and tooth-cracking. It is the difference between carnival caramel corn and a jawbreaker.
Put three-quarters of a cup of molasses, two cups of white sugar, a teaspoon of butter and half a teaspoon of vinegar in a large heavy pan.
Bring it to a boil, stirring constantly so crystals do not form on the sides of the pan.
Clip a candy thermometer to the pan and keep stirring until the mixture reaches 234 F.
Take it off the heat and stir in a quarter teaspoon of baking soda. It will foam up immediately.
Pour in five to six quarts of popped popcorn and stir to coat everything.
Let it cool, then break it into pieces or press it into balls while it is still slightly warm.
3. Skeleton brittle candy
This is the most impressive-looking thing on the list and the one that needs the most adult involvement, because it involves sugar at 300 F. The baking soda goes in at the very end and foams the hot sugar into a pale, brittle, honeycomb sheet that snaps into shards. Piled in a bowl, the shards genuinely look like bones. It sits well next to the candy corn fudge and the homemade caramel apples on a Halloween table.
Line an 8 by 8 inch metal or glass pan with parchment paper.
Put one cup of sugar, two tablespoons of honey, a quarter cup of corn syrup and half a cup of water in a medium saucepan, in that order.
Cook over medium-high heat for 5 to 10 minutes, stirring, until the mixture reaches 300 F on a candy thermometer.
Take it off the heat and add two teaspoons of baking soda, whisking for about five seconds. It will foam dramatically.
Pour it into the lined pan and leave it for an hour to harden.
Break it into shards with your hands and pile them in a bowl.
300 F sugar is the one genuine burn risk on this list. Keep children at arm’s length from the pan for the whole cook, and do not let them near the brittle until it is fully cool. An adult does every step involving the hob.
Pumpkin Pancakes for Halloween Morning
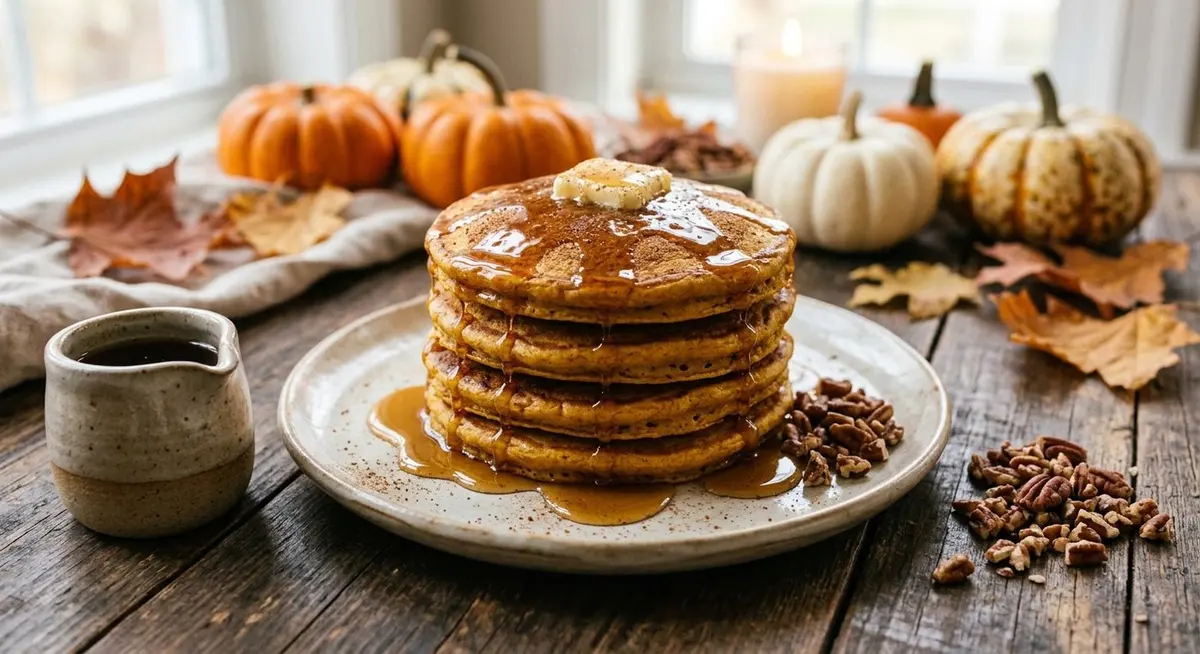
The tenth setup is breakfast. Pumpkin pancakes are the easiest way to make Halloween morning feel like an occasion without any of the mess of the other nine, and the batter is forgiving enough that a three-year-old can genuinely help with the stirring. The baking soda and the buttermilk do the lifting, and the pumpkin keeps the crumb soft.
Whisk one and a quarter cups of flour, a quarter cup of sugar, two tablespoons of brown sugar, half a teaspoon of baking soda, one and a half teaspoons of pumpkin pie spice and a quarter teaspoon of salt in a large bowl.
In a jug, whisk one cup of buttermilk, two eggs, a quarter cup of melted butter and a tablespoon of maple syrup.
Pour the wet into the dry and stir until just combined. Lumps are fine — overmixing makes them tough.
Mix the remaining quarter cup of buttermilk with three-quarters of a cup of canned pumpkin, then fold that into the batter.
Let the batter rest for five minutes while the pan heats.
Cook in a buttered pan over medium heat, about two minutes a side, until golden and cooked through.
Serve with butter, maple syrup and toasted pecans.
Pour the batter into a squeeze bottle and you can draw jack-o’-lantern faces straight onto the pan.
The shape trick: pour the batter into a clean squeeze bottle and draw a simple face or a cat head onto the hot pan. It takes a steady hand and about thirty seconds, and it is the thing they will talk about at school. If you want the rest of the morning covered, our pumpkin spice cinnamon rolls and the one-bowl pumpkin bread both bake while the pancakes are on the griddle.
Which Setup Suits Which Age
The most common way an activity afternoon goes wrong is a mismatch between the setup and the child. A five-year-old given a two-year-old’s sensory bin is bored in three minutes; a two-year-old given a five-year-old’s slime is eating it. Match the setup to the hands in front of you.
Matching the setup to the child
Age
What they can do
What you do
Good picks
Under 2
Watch, splash, grab
Everything — keep it in a tub on the floor
Sensory bin, cauldron
2 – 3
Pour with help, bury toys, stir
Measure the soda, hold the cup
Sensory bin, cauldron, potions
4 – 5
Pour, choose colours, press toppings
Set up, handle the tray
Lava lamp, slime, spider cookies
6 – 8
Measure, mix, follow steps, predict
Supervise the heat and the tray
All the fizzing setups, pancakes
9 – 12
Run the whole thing, then change a variable
Stay nearby for heat and knives
Brittle, caramel corn, pancakes
The choking rule, stated plainly: malted balls, candy eyes and plastic spiders are all small enough to block a small airway. If there is anyone under three in the room, those three things stay in a sealed tub until the older children are at a different table.
Mess, Safety and the Rules That Matter
None of these setups is dangerous, but two of them involve real hazards and the rest involve real mess. Knowing which is which lets you say yes to the fun ones without worrying about the others.
Vinegar and food colouring stay away from eyes — no touching faces with coloured hands.
An adult handles all heat: the 300 F sugar syrup, the griddle, the oven.
The tray or lasagna dish is under every fizzing setup before the first pour.
The puking pumpkin is set up outside or on a hard floor, never on carpet.
Small parts — malted balls, candy eyes, plastic spiders — are out of reach of anyone under three.
Glow-in-the-dark slime is kept away from hair, upholstery and pets.
Everyone washes hands after handling slime or raw egg dough.
A towel and a bowl of warm water are within arm’s reach before you start.
The mess ranking, honestly: low mess is the lava lamp, the cauldron and potion class. Medium is slime, the cookies, the caramel corn and the pancakes. High is the sensory bin and the puking pumpkin. If you are doing this on a school night, stay in the low column.
Clean-Up, Storage and What to Keep
Clean-up is part of the activity, not a chore after it. Children who rinse their own jars and wipe their own tray learn that the fun includes the tidying, and it takes four minutes instead of twenty if you do it while the fizzing is still fresh in their minds.
What to do with everything afterwards
What
How to clean it
Keep it?
Fizzing jars and cauldrons
Rinse with warm water, then air dry upside down
Yes — reuse all season
Sensory bin
Tip the liquid outside, rinse the toys in a sieve, dry on a towel
Yes — toys and bin
Slime
Store in an airtight container in the fridge
Up to 2 weeks
Brittle and caramel corn
Break into pieces, store in an airtight tin with parchment between layers
Up to 1 week
Spider cookies
Cool completely, then a tin with parchment between layers
Up to 4 days
Pancakes
Cool, then freeze flat with parchment between them
Up to 2 months
Pumpkin after the puking
Rinse the inside, dry it, then compost it
No — compost it
Keep the jars. The single most useful thing you can do this October is wash and keep every clear jar and bottle that comes through the kitchen. Next year’s lava lamp and cauldron setups cost you nothing but the soda.
Questions and Troubleshooting
These are the questions that come up most often, and almost every problem traces back to one of three things: not enough baking soda, vinegar that has been sitting open for a year, or a reaction run on a surface nobody covered.
My reaction barely fizzed. What went wrong?
Almost always the ratio or the vinegar. You need roughly one part baking soda to two parts vinegar by volume for a strong reaction, and old vinegar that has been open for months loses its acidity. Start with fresh vinegar and measure the soda rather than eyeballing it. Cold vinegar also reacts more slowly than room-temperature vinegar.
Does the lava lamp actually keep going?
It fizzes for several minutes and then settles. You can restart it by adding another spoonful of baking soda and a splash more vinegar. The reason it lasts longer than a plain eruption is that the oil slows the bubbles down as they travel up, so the reaction is spread over more time.
Is the slime safe for a four-year-old?
The slime itself is made from school glue, baking soda and saline solution, so it is not toxic. The risk is the small parts — beads, gems and glitter — and the fact that a four-year-old will put it in their mouth. Supervise closely, and skip the beads entirely for anyone under five.
Can I use lemon juice instead of vinegar?
Yes, and it works, but it is weaker. Lemon juice is a less concentrated acid, so you will need noticeably more of it for the same reaction. It is a good option if you are out of vinegar and a bad option if you want a big eruption.
How do I stop the food colouring staining everything?
Cover the surface before you start, keep the colouring in the vinegar rather than the soda, and rinse anything coloured within a few minutes. Food colouring on grout, carpet or painted walls is close to permanent. Outside or on a hard floor is always the safer venue.
What is the best setup for a two-year-old?
The fizzy sensory bin, without question. It is the only one on the list that a two-year-old can lead entirely on their own — they dig, they splash, and the bubbles tickle their hands. Keep the vinegar in a cup you hold, and use one colour rather than several.
Can we do these in the spring?
All of them, yes. The chemistry does not care what month it is. The only seasonal ones are the pumpkin setups, and a butternut squash works just as well as a jack-o’-lantern if you want the puking effect out of season.
How much baking soda will we get through?
More than you expect. A single afternoon running the lava lamp, the cauldron and the sensory bin can use two cups. Buy the large resealable bag rather than the small box, and you will not run out halfway through the best part.
Free Printable: The Halloween Science Activity Kit
A printable companion to this list — the shopping list, the reaction ratios for every setup, a one-page reference for all ten, the age guide, a session run-sheet, a safety check and a clean-up table.
PDF · 5 pages · prints on letter or A4 · subscribe to unlock the download
Savory Discovery · By Elowen Thorn · Last updated September 2026. Adult supervision is required for every setup in this guide, particularly anything involving heat.
Elowen Thorn I cook, photograph and re-test every recipe in an ordinary home kitchen before it goes up, so what you make matches what you see. Savory Discovery is where simple weeknight cooking, seasonal ideas and the odd bit of kitchen craft sit side by side — written plainly, and worth cooking twice.